所有的Hibernate应用中都会访问Hibernate的5个核心接口。
  Configuration接口:配置Hibernate,根启动Hibernate,创建SessionFactory对象。
  SessionFactory接口:初始化Hibernate,充当数据存储源的代理,创建Session对象。
  Session接口:负责保存、更新、删除、加载和查询对象。
  Transaction接口:管理事务。
  Query和Criteria接口:执行数据库查询。
  1.Configuration接口
  Configuration对象用于配置并且启动Hibernate。Hibernate应用通过Configuration实例来指定对象-关系映射文件的位置或者动态配置Hibernate的属性,然后创建SessionFactory实例。
  2.SessionFactory接口
  一个SessionFactory实例对应一个数据存储源,应用从SessionFactory中获得Session实例。SessionFactory有以下特点:
  它是线程安全的,这意味着它的同一个实例可以被应用的多个线程共享。
  它是重量级的,这意味着不能随意创建或销毁它的实例。如果应用只访问一个数据库,只需要创建一个SessionFactory实例,在应用初始化的时候创建该实例。如果应用同时访问多个数据库,则需要为每个数据库创建一个单独的SessionFactory实例。
  之所以称SessionFactory是重量级的,是因为它需要一个很大的缓存,用来存放预定义的SQL语句以能映射元数据等。用户还可以为SesionFactory配置一个缓存插件,这个缓存插件被称为Hibernate的第二级缓存。,该缓存用来存放被工作单元读过的数据,将来其他工作单元可能会重用这些数据,因此这个缓存中的数据能够被所有工作单元共享。一个工作单元通常对应一个数据库事务。
3.Session接口
  Session接口是Hibernate应用使用最广泛的接口。Session也被称为持久化管理器,它提供了和持久化相关的操作,如添加、更新、删除、加载和查询对象。
  Session有以下特点:
  不是线程安全的,因此在设计软件架构时,应该避免多个线程共享同一个Session实例。
  Session实例是轻量级的,所谓轻量级,是指它的创建和销毁不需要消耗太多的资源。这意味着在程序中可以经常创建和销毁Session对象,例如为每个客户请示分配单独的Session实例,或者为每个工作单元分配单独的Session实例。
  Session有一个缓存,被称为Hibernate的第一级缓存,它存放被当前工作单元加载的对象。每个Session实例都有自己的缓存,这个Sesion实例的缓存只能被当前工作单元访问。
  4.Transaction接口
  Transaction接口是Hibernate的数据库事务接口,它对底层的事务接口做了封装,底层事务接口包括:
  JDBC API、JTA(Java Transaction API)、CORBA(Common Object Requet Broker Architecture)API
  Hibernate应用可通过一致的Transaction接口来声明事务边界,这有助于应用在不同的环境容器中移植。尽管应用也可以绕过Transaction接口,直接访问底层的事务接口,这种方法不值得推荐,因为它不利于应用在不同的环境移植。
  5.Query和Criteria接口
  Query和Criteria接口是Hibernate的查询接口,用于向数据库查询对象,以及控制执行查询的过程。Query实例包装了一个HQL查询语句,HQL查询语句和SQL查询语句有些相似,但HQL查询语句是面向对象的,它引用类句及类的属性句,而不是表句及表的字段句。Criteria接口完全封装了基于字符串的查询语句,比Query接口更加面向对象,Criteria接口擅长执行动态查询。
  Session接口的find()方法也具有数据查询功能,但它只是执行一些简单的HQL查询语句的快捷方法,它的功能远没有Query接口强大。
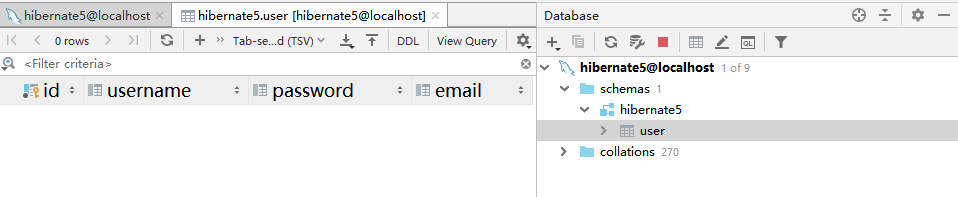
新建表
create  table user(
  id int(10) unsigned not null auto_increment,
  username varchar(50) default null ,
  password varchar(50) default  null,
  email varchar(50) default  null,
  primary key (id),
  unique key(id),
  key id_2(id)
)engine=InnoDB auto_increment=1 DEFAULT  charset =utf8
选择Hibernate 5.2-5,2。确定即可。IDEA会自动下载相关的Jar包,并自动生成一个hibernate.cfg.xml配置文件
3)调整一个项目的结构,将lib文件夹移动到web/WEB-INF路径下,在web/WEB-INF路径下生成一个文件夹classes。快捷键:Ctrl + Alt + Shift + S ,弹出Project Module。配置Paths和Dependencies。
选择左边的Persistence,选择对应的Module的hibernate.cfg.xml,注意选择的是图标是数据库样式的,右键 -> Generate Persistence Mapping -> By Database Schema

选择数据库源,就是刚刚测试连接的数据库;输入包名,它会自动创建包的;由于这里只是简单的演示如何利用Hibernate操作数据库,所以只是简单的选择其中一个表来做实验,比如选择hibernate5.user。并且将右下方的“Generate Column Properties”勾上。如果选择的是第一种操作方式,则将右下方的“Generate Separate XML per Entity”勾选上,即为每一个表所对应的实体类生成一个配置文件。确定即可。

6)自动生成的实体类UserEntity。


package com.tanlei.pojo;

import javax.persistence.*;
import java.util.Objects;

/**
 * @author <a href="mailto:lei.tan@vtradex.net">谭磊</a>
 * @since 2018-12-28 10:47
 */
@Entity
@Table(name = "user", schema = "hibernate5", catalog = "")
public class UserEntity {
    private int id;
    private String username;
    private String password;
    private String email;

    @Id
    @Column(name = "id", nullable = false)
    public int getId() {
        return id;
    }

    public void setId(int id) {
        this.id = id;
    }

    @Basic
    @Column(name = "username", nullable = true, length = 50)
    public String getUsername() {
        return username;
    }

    public void setUsername(String username) {
        this.username = username;
    }

    @Basic
    @Column(name = "password", nullable = true, length = 50)
    public String getPassword() {
        return password;
    }

    public void setPassword(String password) {
        this.password = password;
    }

    @Basic
    @Column(name = "email", nullable = true, length = 50)
    public String getEmail() {
        return email;
    }

    public void setEmail(String email) {
        this.email = email;
    }

    @Override
    public boolean equals(Object o) {
        if (this == o) return true;
        if (o == null || getClass() != o.getClass()) return false;
        UserEntity that = (UserEntity) o;
        return id == that.id &&
                Objects.equals(username, that.username) &&
                Objects.equals(password, that.password) &&
                Objects.equals(email, that.email);
    }

    @Override
    public int hashCode() {
        return Objects.hash(id, username, password, email);
    }
}
7)配置hibernate.cfg.xml 如下。
<?xml version='1.0' encoding='utf-8'?>
<!DOCTYPE hibernate-configuration PUBLIC
        "-//Hibernate/Hibernate Configuration DTD//EN"
        "http://www.hibernate.org/dtd/hibernate-configuration-3.0.dtd">
<hibernate-configuration>
    <session-factory>
        <property name="connection.url">jdbc:mysql://localhost:3306/hibernate5</property>
        <property name="connection.driver_class">com.mysql.jdbc.Driver</property>
        <property name="connection.username">root</property>
        <property name="connection.password">password</property>
        <property name="current_session_context_class">thread</property>
        <property name="show_sql">true</property>
        <property name="hbm2ddl.auto">update</property>
        <property name="dialect">org.hibernate.dialect.MySQL5Dialect</property>
        <mapping class="com.tanlei.pojo.UserEntity"/>
        <!-- DB schema will be updated if needed -->
        <!-- <property name="hbm2ddl.auto">update</property> -->
    </session-factory>
</hibernate-configuration>
8)生成测试路径。在Module路径下生成一个文件夹,与src同级,名为test,点击文件夹test,右键,选择Mark Directory As - > Test Sources Root。
9)生成测试类。
import com.tanlei.pojo.UserEntity;
import org.hibernate.Session;
import org.hibernate.SessionFactory;
import org.hibernate.Transaction;
import org.hibernate.cfg.Configuration;
import org.junit.Before;
import org.junit.Test;

/**
 * @author <a href="mailto:lei.tan@vtradex.net">谭磊</a>
 * @since 2018-12-28 10:58
 */
public class DaoTest {

    Configuration configuration=null;
    SessionFactory sessionFactory=null;
    Session session=null;
    Transaction transaction=null;
    @Before
    public void init(){
        configuration=new Configuration().configure("/hibernate.cfg.xml");
        sessionFactory=configuration.buildSessionFactory();
        session=sessionFactory.openSession();
        transaction=session.beginTransaction();
    }

    /**
     *
     * 增加一个用户
     */
    @Test
    public void insert(){
        UserEntity userEntity=new UserEntity();
        userEntity.setUsername("admin");
        userEntity.setPassword("admin");
        userEntity.setEmail("273008379@qq.com");
        session.save(userEntity);
        transaction.commit();
    }

    /**
     *修改一个用户
     */
    @Test
    public void update(){
        UserEntity userEntity=session.load(UserEntity.class, new Integer(2));
        userEntity.setUsername("tt");
        session.update(userEntity);
        transaction.commit();
        session.close();
    }

    /**
     * 查找一个用户
     */
    @Test
    public void select(){
        UserEntity userEntity=session.load(UserEntity.class,new Integer(2));
        transaction.commit();
        System.out.println(userEntity.getId()+userEntity.getUsername()+userEntity.getEmail()+userEntity.getPassword());
        session.close();
    }

    /**
     * 删除一个用户
     */
    @Test
    public void delete(){
        UserEntity userEntity=session.load(UserEntity.class, new Integer(2));
        session.delete(userEntity);
        transaction.commit();
        session.close();
    }
}
10)运行测试类,可以一个一个方法的进行运行,也可以在类名处将所有的测试方法都一起运行。全部运行成功!