git clone https://github.com/pirobot/rbx1.git
1.打开一个终端
cd ~/catkin_ws/
catkin_make
source ./devel/setup.bash
cd src
roslaunch rbx1_bringup fake_turtlebot.launch
2.新打开一个终端
cd ~/catkin_ws/
catkin_make
source ./devel/setup.bash
cd src
roslaunch rbx1_nav fake_move_base_blank_map.launch
要是避障的话,运行
cd ~/catkin_ws/
catkin_make
source ./devel/setup.bash
cd src
roslaunch rbx1_nav fake_move_base_map_with_obstacles.launch3.新打开一个终端
cd ~/catkin_ws/
catkin_make
source ./devel/setup.bash
cd src
rosrun rviz rviz -d `rospack find rbx1_nav`/nav_fuerte.rviz
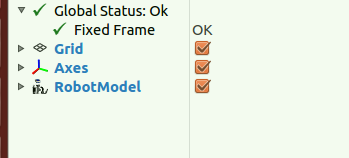
ADD这三个play就可以了,还要再ADDcostmap
4.新打开一个终端
cd ~/catkin_ws/
catkin_make
source ./devel/setup.bash
cd src
rostopic pub /move_base_simple/goal geometry_msgs/PoseStamped
'{ header: { frame_id: "map" }, pose: { position: { x: 0, y: 0, z: 0 }, orientation: { x: 0, y: 0, z: 0, w: 1 } } }'
rostopic pub /move_base_simple/goal geometry_msgs/PoseStamped
'{ header: { frame_id: "base_link" }, pose: { position: { x: 1.0, y: 0, z: 0 }, orientation: { x: 0, y: 0, z: 0, w: 1 } } }'
不能带<这个符号,不然不成功
ctrl+shift +t 测试
rostopic pub /move_base_simple/goal geometry_msgs/PoseStamped
'{ header: { frame_id: "base_link" }, pose: { position: { x: 1.0, y: 0, z: 0 }, orientation: { x: 0, y: 0, z: 0, w: 1 } } }'
rostopic pub /move_base_simple/goal geometry_msgs/PoseStamped
'{ header: { frame_id: "map" }, pose: { position: { x: 2, y: 0, z: 0 }, orientation: { x: 0, y: 0, z: 0, w: 1 } } }'
的确x轴向前移动了2米
rostopic pub /move_base_simple/goal geometry_msgs/PoseStamped
'{ header: { frame_id: "map" }, pose: { position: { x: 0, y: 0, z: 0 }, orientation: { x: 0, y: 0, z: 0, w: 1 } } }'
rostopic pub /move_base_simple/goal geometry_msgs/PoseStamped
'{ header: { frame_id: "map" }, pose: { position: { x: 2, y:1, z: 0 }, orientation: { x: 0, y: 0, z: 0, w: 1 } } }'
不行,出错rostopic pub /move_base_simple/goal geometry_msgs/PoseStamped
'{ header: { frame_id: "map" }, pose: { position: { x: 0, y:1, z: 0 }, orientation: { x: 0, y: 0, z: 0, w: 1 } } }'
点击一下2d_Nav Goal,点击鼠标左键,可以选定一个目标位置,接着机器人就可以移动到目标位置
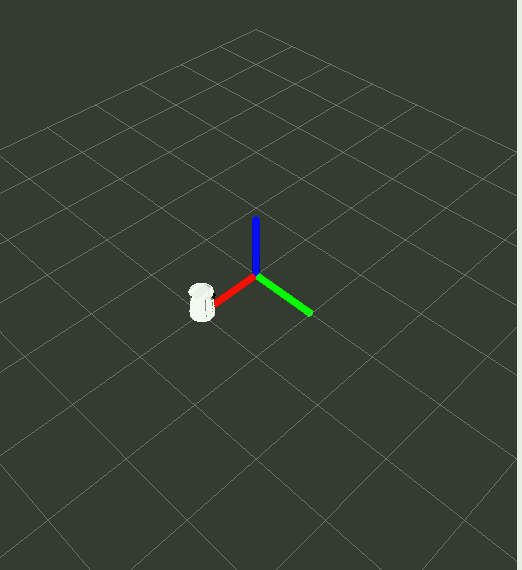
5.让机器人回到原点
![]()
rostopic pub /move_base_simple/goal geometry_msgs/PoseStamped
'{ header: { frame_id: "map" }, pose: { position: { x: 0, y: 0, z: 0 }, orientation: { x: 0, y: 0, z: 0, w: 1 } } }'
点击rviz上的reset
6,打开一个新终端,
cd ~/catkin_ws/
catkin_make
source ./devel/setup.bash
cd src
rosrun rbx1_nav move_base_square.py
可以看到机器人沿一个正方形在走(这个代码解释已经完成)
7.第二步是运行了一个空白地图,现在把它换成带有障碍物的地图,找到这个终端,ctrl+c退出这个地图,然后运行
roslaunch rbx1_nav fake_move_base_map_with_obstacles.launch
8.再运行rosrun rbx1_nav move_base_square.py
可以看到机器人在正方形区域避障行走
三、amcl定位
先运行仿真机器人
cd ~/catkin_ws/
catkin_make
source ./devel/setup.bash
cd src
roslaunch rbx1_bringup fake_turtlebot.launch
新打开一个终端,运行amcl节点,使用的已经准备好的测试地图,这个地图不是我们自己建的地图,我们自己要建地图的话,需要使用深度数据,然后用gmapping生成地图,amcl是二维环境下的概率定位系统,之所以说是概率定位系统,是因为它用的是自适应的蒙特卡洛的定位方法,就是之前的粒子滤波,用这个粒子滤波去跟踪机器人当前的状态。
cd ~/catkin_ws/
catkin_make
source ./devel/setup.bash
cd src
roslaunch rbx1_nav fake_amcl.launch map:=test_map.yaml
先来看一下这个launch文件是怎么写的。
<launch>
<!-- Set the name of the map yaml file: can be overridden on the command line. -->
<arg name="map" default="test_map.yaml" />
<!-- Run the map server with the desired map -->
<node name="map_server" pkg="map_server" type="map_server" args="$(find rbx1_nav)/maps/$(arg map)"/>
<!-- The move_base node -->
<include file="$(find rbx1_nav)/launch/fake_move_base.launch" />
<!-- Run fake localization compatible with AMCL output -->
<node pkg="fake_localization" type="fake_localization" name="fake_localization" output="screen" />
<!-- For fake localization we need static transforms between /odom and /map and /map and /world -->
<node pkg="tf" type="static_transform_publisher" name="odom_map_broadcaster"
args="0 0 0 0 0 0 /odom /map 100" />
</launch>
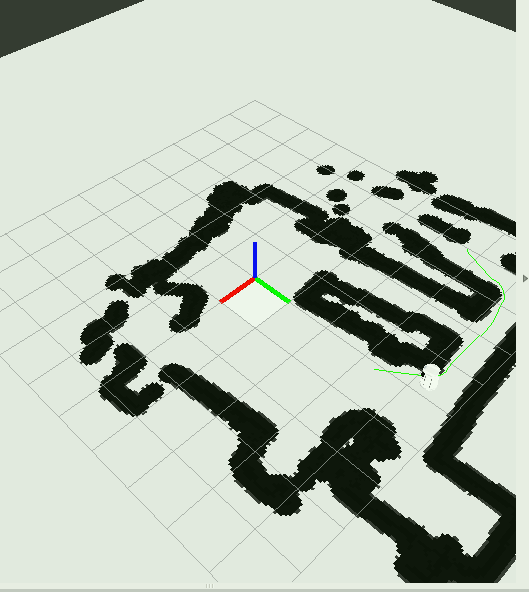
可以看到它调用了map_server包用来加载地图,fake_localization,tf包里的static_transform_publisher的工具,还调用了fake_move_base_launch文件打开move_base节点并加载配置文件,然后运行amcl节点。主要作用是加载了一个地图(如下所示)

cd ~/catkin_ws/
catkin_make
source ./devel/setup.bash
cd src
rosrun rviz rviz -d `rospack find rbx1_nav`/nav_fuerte.rviz
我是在rviz里加载了这几个display,其中global plan下的costmap,RobotModel,global plan下的Path,Axes是必须的。
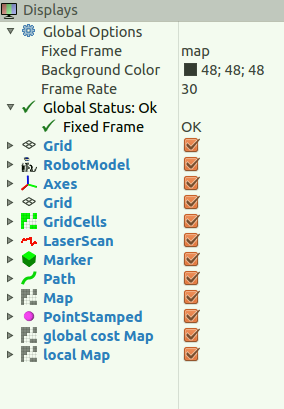
然后就可以在rviz中看到实际效果了。左键选定目标位置,机器人就可以自主规划绕开障碍物到达目的地了。
程序:
1.
cd ~/catkin_ws/
catkin_make
source ./devel/setup.bash
cd src
roslaunch rbx1_bringup fake_turtlebot.launch
2.
cd ~/catkin_ws/
catkin_make
source ./devel/setup.bash
cd src
3.
cd ~/catkin_ws/
catkin_make
source ./devel/setup.bash
cd src
四、自主导航
但我们总是希望机器人能够自主进行导航,这样才更智能化。下面它做的是让目标点在地图中随机生成,然后让机器人自动导航到达其目标。
首先来看一下它的launch文件fake_nav_test.launch
<launch>
<param name="use_sim_time" value="false" />
<!-- Start the ArbotiX controller -->
<include file="$(find rbx1_bringup)/launch/fake_turtlebot.launch" />
<!-- Run the map server with the desired map -->
<node name="map_server" pkg="map_server" type="map_server" args="$(find rbx1_nav)/maps/test_map.yaml"/>
<!-- The move_base node -->
<node pkg="move_base" type="move_base" respawn="false" name="move_base" output="screen">
<rosparam file="$(find rbx1_nav)/config/fake/costmap_common_params.yaml" command="load" ns="global_costmap" />
<rosparam file="$(find rbx1_nav)/config/fake/costmap_common_params.yaml" command="load" ns="local_costmap" />
<rosparam file="$(find rbx1_nav)/config/fake/local_costmap_params.yaml" command="load" />
<rosparam file="$(find rbx1_nav)/config/fake/global_costmap_params.yaml" command="load" />
<rosparam file="$(find rbx1_nav)/config/fake/base_local_planner_params.yaml" command="load" />
<rosparam file="$(find rbx1_nav)/config/nav_test_params.yaml" command="load" />
</node>
<!-- Run fake localization compatible with AMCL output -->
<node pkg="fake_localization" type="fake_localization" name="fake_localization" output="screen" />
<!-- For fake localization we need static transform between /odom and /map -->
<node pkg="tf" type="static_transform_publisher" name="map_odom_broadcaster" args="0 0 0 0 0 0 /map /odom 100" />
<!-- Start the navigation test -->
<node pkg="rbx1_nav" type="nav_test.py" name="nav_test" output="screen">
<param name="rest_time" value="1" />
<param name="fake_test" value="true" />
</node>
</launch>
这个launch文件的功能比较多
(1)加载机器人驱动( <include file="$(find rbx1_bringup)/launch/fake_turtlebot.launch" />这样我们就不用在终端中再去加载机器人驱动了)
(2)加载地图
<node name="map_server" pkg="map_server" type="map_server" args="$(find rbx1_nav)/maps/test_map.yaml"/>
这里的地图就是map_server,有时候可不需要
(3)调用move_base节点
<node pkg="move_base" type="move_base" respawn="false" name="move_base" output="screen">
并且加载了它的几个配置文件,分别是:
costmap_common_params.yaml,local_costmap_params.yaml,global_costmap_params.yaml,base_local_planner_params.yaml,nav_test_params.yaml
(4)调用之前的amcl节点
<node pkg="fake_localization" type="fake_localization" name="fake_localization" output="screen" />
(5)当然还有tf
<node pkg="tf" type="static_transform_publisher" name="map_odom_broadcaster" args="0 0 0 0 0 0 /map /odom 100" />
(6)加载nav_test.py程序,进行随机导航(这里的随机是指目标点位置随机)
其实这个launch文件好像是把之前运行的几个launch文件进行整合了。
运行
roscore
运行
rqt_console(这个程序如果运行不了的话,运行sudo apt-get install ros-indigo-rqt ros-indigo-rqt-common-plugins ros-indigo-turtlesim,参考:http://blog.exbot.net/archives/1413)
打开一个新终端,运行
cd ~/catkin_ws/
catkin_make
source ./devel/setup.bash
cd src
roslaunch rbx1_nav fake_nav_test.launch
打开一个新终端,运行
cd ~/catkin_ws/
catkin_make
source ./devel/setup.bash
cd src
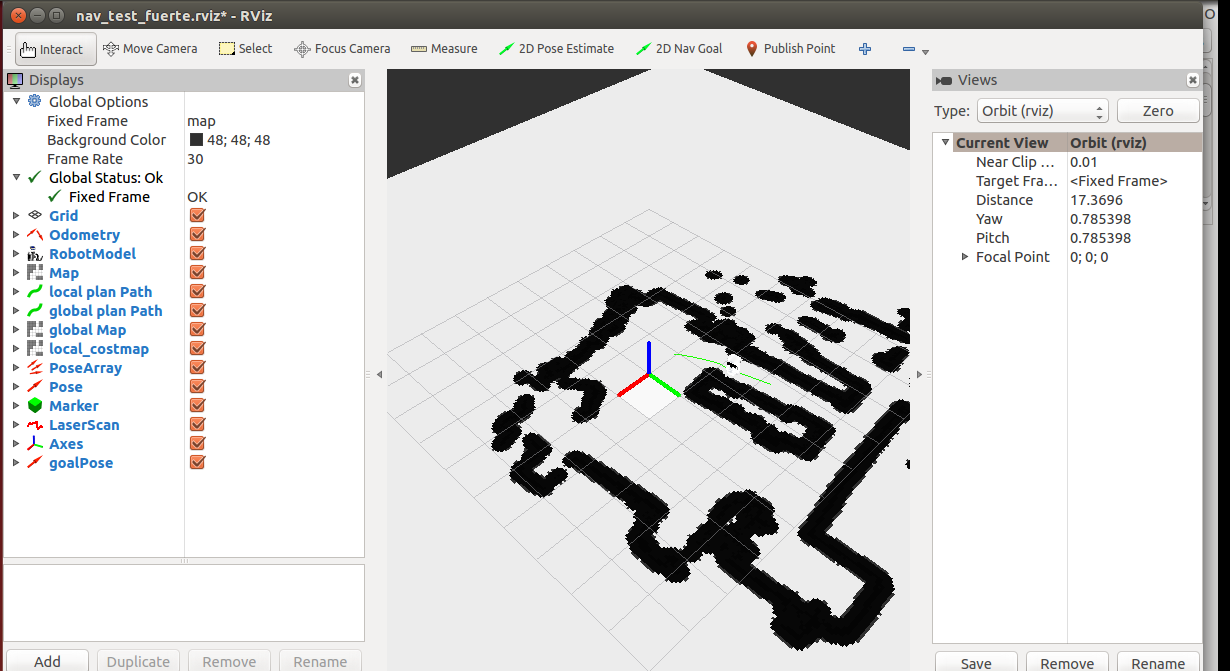
rosrun rviz rviz -d `rospack find rbx1_nav`/nav_test_fuerte.rviz
运行结果如下
之前运行的rqt_console是用来做调试的,可以看到机器人发送的状态信息。
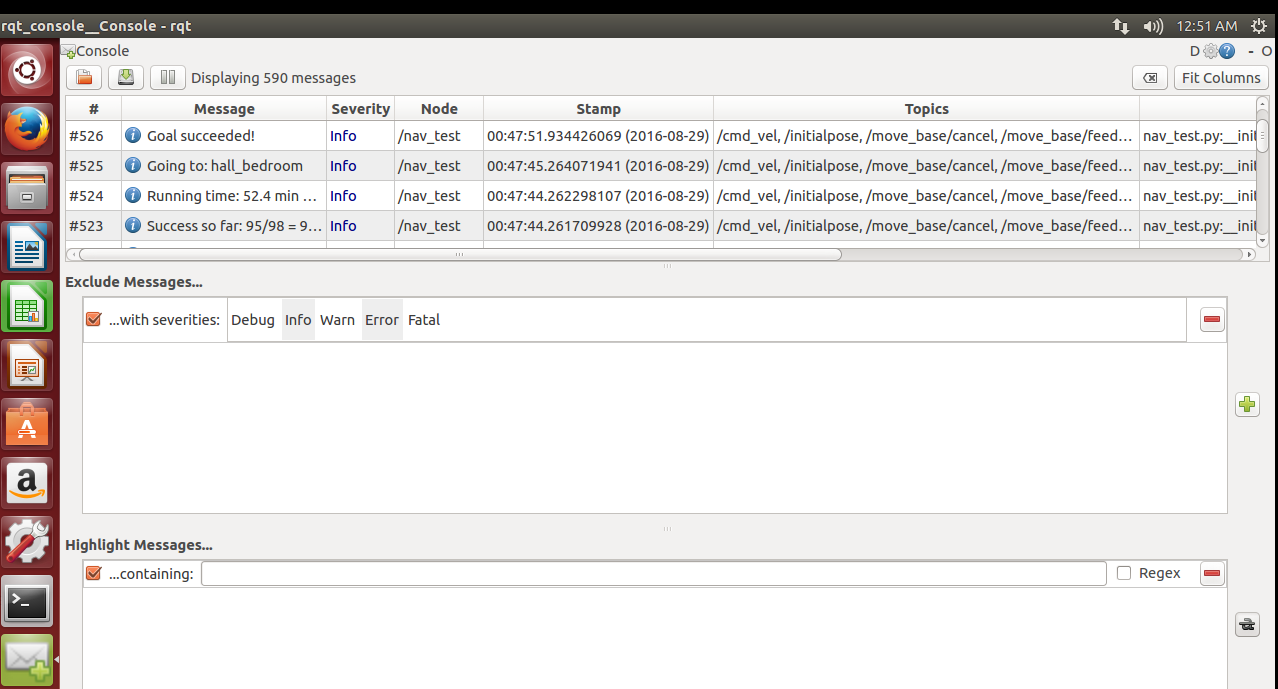
比如
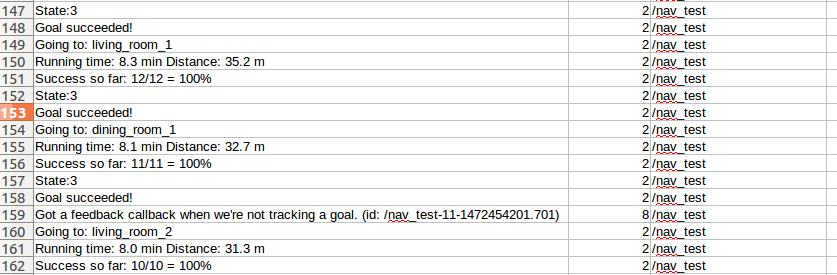
可以看到目标点信息(going to ),状态信息(state),距离信息(Distance),成功率,速度等
程序:
1.
roscore
2.
rqt_console
3.
cd ~/catkin_ws/
catkin_make
source ./devel/setup.bash
cd src
roslaunch rbx1_nav fake_nav_test.launch
4.
cd ~/catkin_ws/
catkin_make
source ./devel/setup.bash
cd src
rosrun rviz rviz -d `rospack find rbx1_nav`/nav_test_fuerte.rviz
