Java Session 介绍
一、添加、获取session
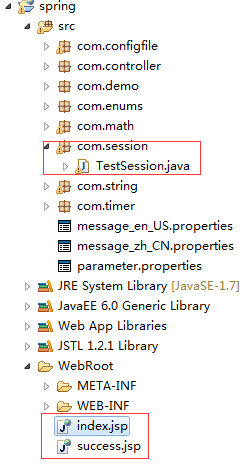
1、项目结构
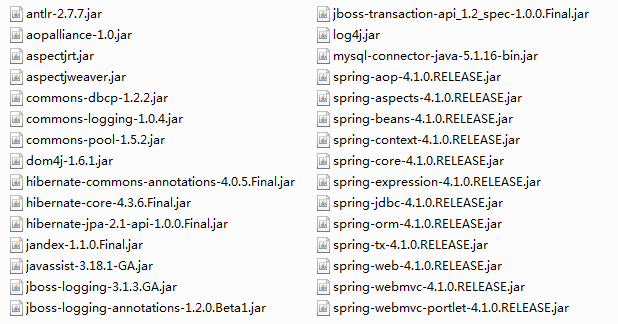
2、jar包
3、web.xml文件
<?xml version="1.0" encoding="UTF-8"?>
<web-app xmlns:xsi="http://www.w3.org/2001/XMLSchema-instance"
    xmlns="http://java.sun.com/xml/ns/javaee"
    xmlns:web="http://java.sun.com/xml/ns/javaee/web-app_2_5.xsd"
    xsi:schemaLocation="http://java.sun.com/xml/ns/javaee
    http://java.sun.com/xml/ns/javaee/web-app_3_0.xsd" id="WebApp_ID" version="3.0">
      <display-name>spring</display-name>

      <context-param>
        <param-name>contextConfigLocation</param-name>
        <param-value>/WEB-INF/spring-context.xml,/WEB-INF/applicationContext.xml</param-value>
    </context-param>
    <listener>
        <listener-class>org.springframework.web.context.ContextLoaderListener</listener-class>
    </listener>

      <!-- log4j配置文件路径 -->
    <context-param>
        <param-name>log4jConfigLocation</param-name>
        <param-value>/WEB-INF/log4j.properties</param-value>
    </context-param>

    <context-param>
        <param-name>log4jRefreshInterval</param-name>
        <param-value>6000</param-value>
    </context-param>

    <!-- 加载log4j配置文件 -->
    <listener>
        <listener-class>org.springframework.web.util.Log4jConfigListener</listener-class>
    </listener>

    <!-- springmvc配置 -->
      <servlet>
        <servlet-name>springMVC</servlet-name>
        <servlet-class>org.springframework.web.servlet.DispatcherServlet</servlet-class>
        <init-param>
            <param-name>contextConfigLocation</param-name>
            <param-value>/WEB-INF/spring-config.xml</param-value>
        </init-param>
        <load-on-startup>1</load-on-startup>
    </servlet>
    <servlet-mapping>
        <servlet-name>springMVC</servlet-name>
        <url-pattern>/</url-pattern>
    </servlet-mapping>

  <welcome-file-list>
    <welcome-file>index.html</welcome-file>
    <welcome-file>index.htm</welcome-file>
    <welcome-file>index.jsp</welcome-file>
    <welcome-file>default.html</welcome-file>
    <welcome-file>default.htm</welcome-file>
    <welcome-file>default.jsp</welcome-file>
  </welcome-file-list>
</web-app>
4、spring-config.xml文件
<?xml version="1.0" encoding="UTF-8"?>
<beans xmlns="http://www.springframework.org/schema/beans"
    xmlns:xsi="http://www.w3.org/2001/XMLSchema-instance"
    xmlns:oxm="http://www.springframework.org/schema/oxm"
    xmlns:context="http://www.springframework.org/schema/context"
    xmlns:aop="http://www.springframework.org/schema/aop"
    xmlns:tx="http://www.springframework.org/schema/tx"
    xmlns:task="http://www.springframework.org/schema/task"
    xsi:schemaLocation="http://www.springframework.org/schema/beans
       http://www.springframework.org/schema/beans/spring-beans-3.0.xsd
       http://www.springframework.org/schema/oxm
       http://www.springframework.org/schema/oxm/spring-oxm-3.0.xsd
       http://www.springframework.org/schema/context
       http://www.springframework.org/schema/context/spring-context-3.0.xsd
       http://www.springframework.org/schema/tx
        http://www.springframework.org/schema/tx/spring-tx-3.0.xsd
         http://www.springframework.org/schema/aop
         http://www.springframework.org/schema/aop/spring-aop-3.0.xsd
         http://www.springframework.org/schema/task
       http://www.springframework.org/schema/task/spring-task-3.2.xsd">

    <!--  通知spring容器通过注解的方式装配bean -->
      <context:annotation-config />
    <!--  通知spring容器采用自动扫描机制查找注解的bean -->
      <context:component-scan base-package="com.*" />

      <task:annotation-driven /> <!-- 定时器开关-->

      <bean id="agentExcelTask" class="com.timer.TimerController1"/>
    <task:scheduled-tasks>
        <task:scheduled ref="agentExcelTask" method="printstr" cron="* * 0/1000 * * ?"/>
    </task:scheduled-tasks>

    <!--  配置返回页面过滤 -->
    <bean id="viewResolver" class="org.springframework.web.servlet.view.UrlBasedViewResolver">
        <property name="viewClass"
            value="org.springframework.web.servlet.view.JstlView" />
        <property name="prefix" value="/" />
        <property name="suffix" value=".jsp" />
    </bean>
</beans>
5、TestSession.java
package com.session;

import javax.servlet.http.HttpServletRequest;
import javax.servlet.http.HttpSession;

import org.springframework.stereotype.Controller;
import org.springframework.ui.Model;
import org.springframework.web.bind.annotation.RequestMapping;
import org.springframework.web.bind.annotation.SessionAttributes;

import com.demo.User;
@Controller
@SessionAttributes("user")
public class TestSession {

    /**
     * 用servlet的HttpServletRequest添加信息到session
     */
    @RequestMapping("addSession")
    public String addSession(User user, HttpServletRequest request, Model model){
        request.getSession().setAttribute("user", user);
        //request.getSession().removeAttribute("user");//删除 session 指定属性健
        //request.getSession().invalidate();//清除所有的session,使当前 session 完全失效
        User u = (User) request.getSession().getAttribute("user");
        model.addAttribute("name", u.getName());
        model.addAttribute("password", u.getPassword());
        return "success";
    }

    /**
     * 用servlet的HttpSession添加信息到session
     */
    @RequestMapping("addSession1")
    public String addSession1(User user, HttpSession request, Model model){
        request.setAttribute("user", user);
        //request.removeAttribute("user");//移除session
        //request.invalidate();//清除所有的session,使当前 session 完全失效
        User u = (User) request.getAttribute("user");
        model.addAttribute("name", u.getName());
        model.addAttribute("password", u.getPassword());
        return "success";
    }

}
6、index.jsp
<%@ page language="java" import="java.util.*" pageEncoding="UTF-8"%>
<%@ taglib prefix="spring" uri="http://www.springframework.org/tags" %>
<%
String path = request.getContextPath();
String basePath = request.getScheme()+"://"+request.getServerName()+":"+request.getServerPort()+path+"/";
%>

<!DOCTYPE HTML PUBLIC "-//W3C//DTD HTML 4.01 Transitional//EN">
<html>
  <head>
    <base href="<%=basePath%>">
    <title>index</title>
  </head>

  <body>
    <form action="addSession1" method="post">
          用户:<input type="text" name="name"><br><br>
          密码:<input type="text" name="password"><br><br>
        <input type="submit" value="确定">
    </form>

    <!-- 使用message 标签配置需要显示的国际化文本,
           code  对应国际化文件中对应的键的名称  -->
    <span style="color: #2D2D2D;">
        <spring:message code="main.title"/>
    </span>
    <br>
    <input type="text" value="<spring:message code="main.target"/>">
  </body>
</html>
7、success.jsp
<%@ page language="java" import="java.util.*" pageEncoding="UTF-8"%>
<%
String path = request.getContextPath();
String basePath = request.getScheme()+"://"+request.getServerName()+":"+request.getServerPort()+path+"/";
%>

<!DOCTYPE HTML PUBLIC "-//W3C//DTD HTML 4.01 Transitional//EN">
<html>
  <head>
    <base href="<%=basePath%>">
    <title>success</title>
  </head>

  <body>
    ${name},success. <br>
    用户名:${name},密码:${password}
  </body>
</html>
二、设置session超时的3中方式
1. 在web容器中设置(此处以tomcat为例)
在tomcat-5.0.28confweb.xml中设置,以下是tomcat 5.0中的默认配置:
<session-config>

  <session-timeout>30</session-timeout>

</session-config>
Tomcat默认session超时时间为30分钟,可以根据需要修改,负数或0为不限制session失效时间。
2. 在工程的web.xml中设置
<!-- 时间单位为分钟   -->

<session-config>

      <session-timeout>15</session-timeout>

</session-config>
3. 通过java代码设置
session.setMaxInactiveInterval(30*60);//以秒为单位
三种方式优先级:1 < 2 <3