1、maven目录结构
src
    -main
            -java
                -package
    -test
            -java
                -package
    -resources
2、新建目录
在任意指定盘下建文件夹(我的是D盘,目录结构如下)
D:codemaven
按maven的目录机构建文件夹,如下图
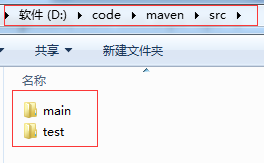
3、D:codemavensrcmainjavacommaven下建HelloWorld.java
package com.maven;

public class HelloWorld{
    public String sayHello(){
        return "hello world!";
    }
}
4、D:codemavensrc estjavacommaven下建HelloWorldTest.java
package com.maven;

import org.junit.*;
import org.junit.Assert.*;

public class HelloWorldTest{
    @Test
    public void testHello(){
        Assert.assertEquals("hello world!",new HelloWorld().sayHello());
    }
}
5、D:codemaven下建pom.xml文件,同src根目录同级
<?xml version="1.0" encoding="UTF-8"?>
<project xmlns="http://maven.apache.org/POM/4.0.0"
xmlns:xsi="http://www.w3.org/2001/XMLSchema-instance"
xsi:schemaLocation="http://maven.apache.org/POM/4.0.0 http://maven.apache.org/maven-v4_0_0.xsd">
    <modelVersion>4.0.0</modelVersion>

    <groupId>com.maven</groupId>
    <artifactId>maven-model</artifactId>
    <version>0.0.1</version>


    <dependencies>
    <dependency>
        <groupId>junit</groupId>
        <artifactId>junit</artifactId>
        <version>4.10</version>
        <scope>test</scope>
    </dependency>
    </dependencies>
</project>
注:
<groupId>com.maven</groupId>为我的工程目录(D:codemaven)
<dependency>
        <groupId>junit</groupId>
        <artifactId>junit</artifactId>
        <version>4.10</version>
        <scope>test</scope>
    </dependency>为单元测试依赖
6、进入命令行,进入D:codemaven目录
执行mvn compile(第一次执行会下载各种插件、依赖包会慢点)

执行mvn test
