81、项目初始化和目录介绍
创建项目:
`vue init webpack luffy_project`
------------------初始化参数-----------------
Project name luffy_project
Project description A Vue.js project
Author
Vue build (Use arrow keys)
Vue build standalone
Install vue-router? Yes
Use ESLint to lint your code? No
Set up unit tests No
Setup e2e tests with Nightwatch? No
---------------------------------------------------
启动:
`cd luffy_project`
`npm run dev`
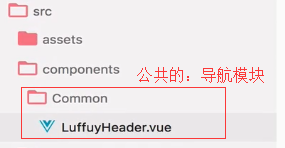
82、ElementUI框架使用和导航栏实现
mitui是基于vue的移动端的框架,elementui是基于vue的pc的
安装ElementUI:
cd luffy_project
npm i element-ui -S
引入ElementUI: 在main.js中
import Vue from 'vue'
import App from './App'
import router from './router'

import ElementUI from 'element-ui';
import 'element-ui/lib/theme-chalk/index.css';
Vue.use(ElementUI);  //调用插件

Vue.config.productionTip = false

/* eslint-disable no-new */
new Vue({
  el: '#app',
  router,
  components: { App },
  template: '<App/>'
})
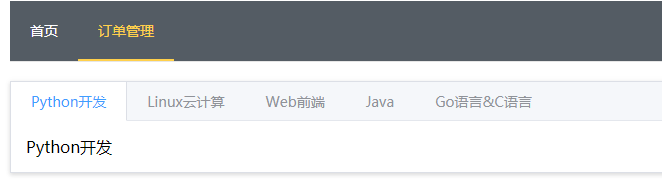
使用ElementUI实现导航页面,效果:

83、导航栏路由跳转(略)

84、linkActiveClass和history模式介绍
linkActiveClass的作用是,点击了某router-link后,即时刷新了页面,也能保持之前router-link的样式
当使用了<router-link > 标签 ,在这个标签选中时可以设置a标签添加的样式名称,比如,路由选中之后,给a标签添加“is-active”样式

在router/index.js中加上“linkActiveClass”,修改a标签选中后样式名称为“is-active”
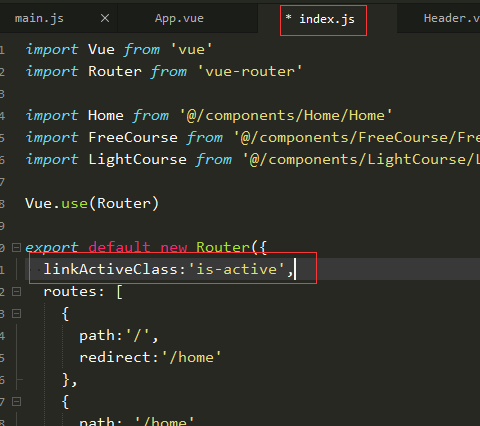
修改后,

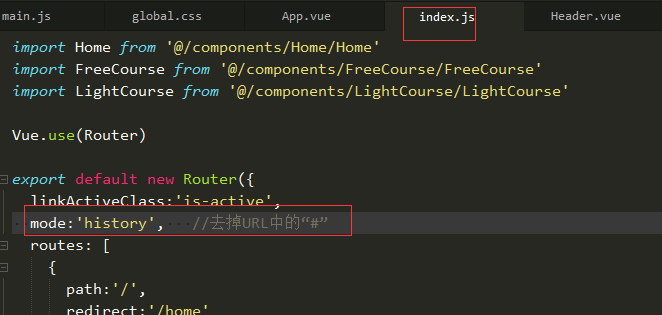
history模式的作用是去掉URL链接中的“#”号,在router/index.js中配置:
使用elementUI后如何实现同样的效果:刷新后被选中的标签样式还在?
<template>
  <div id="app">
    <el-container>
      <el-header>
        <el-menu :default-active="onRoutes" mode="horizontal" @select="handleSelect" background-color="#545c64"
          text-color="#fff" active-text-color="#ffd04b" :router="true">
          <el-menu-item index="/home">首页</el-menu-item>
          <el-menu-item index="/freeCourse">免费课程</el-menu-item>
        </el-menu>
      </el-header>
      <el-main>
        <router-view />
      </el-main>
    </el-container>
  </div>
</template>

<script>
  export default {
    name: 'App',
    data() {
      return {

      }
    },
    methods: {
      //打印el-menu-item的index,path
      handleSelect(index, path) {
        console.log(index, path);
      }
    },
    computed: {
      onRoutes() {
        //刷新后保存默认激活样式
        let path = this.$route.path;
        return path;
      }
    }
  }
</script>

<style>
</style>
85、首页轮播图实现

<template>
  <div>
    <el-carousel
    :initial-index="1"
    :autoplay="true"
    :interval="1500"
    indicator-position="outside">
      <el-carousel-item v-for="item in imgArr" :key="item.id">
        <h3><img style=" 100%;" :src="item.src"></h3>
      </el-carousel-item>
    </el-carousel>
  </div>
</template>

<script>
  export default {
    name: 'Home',
    data(){
      return{
        imgArr:[
          {
            id:1,
            src:"http://hcdn1.luffycity.com/static/frontend/index/banner3_1567492242.652474.png"
          },
          {
            id:2,
            src:"http://hcdn1.luffycity.com/static/frontend/activity/banner@2x_1572512380.614902.png"
          },
          {
            id:3,
            src:"http://hcdn1.luffycity.com/static/frontend/index/banner2@2x_1567507260.133423.png"
          },
          {
            id:4,
            src:"http://hcdn1.luffycity.com/static/frontend/index/banner1_1567492241.7829425.png"
          }
        ]
      }
    }
  }
</script>

<style>
</style>
86、免费课程-课程分类列表实现

安装axios:`cd project` `npm install axios --save`
在main.js中,引入axios:
// The Vue build version to load with the `import` command
// (runtime-only or standalone) has been set in webpack.base.conf with an alias.
import Vue from 'vue'
import App from './App'
import router from './router'

//引入ElementUI
import ElementUI from 'element-ui';
import 'element-ui/lib/theme-chalk/index.css';
Vue.use(ElementUI);

//引入axios
import Axios from 'axios';
Vue.prototype.$axios = Axios;
Axios.defaults.baseURL='https://www.luffycity.com/api/v1/';

Vue.config.productionTip = false

/* eslint-disable no-new */
new Vue({
  el: '#app',
  router,
  components: { App },
  template: '<App/>'
})
使用:
<template>
  <div>
    <el-tabs type="border-card">
        <el-tab-pane v-for="category in categoryList" :key="category.id" :label="category.name">
        {{category.name}}
        </el-tab-pane>
      </el-tabs>
  </div>
</template>

<script>
  export default {
    name: 'FreeCourse',
    data(){
      return {
        categoryList:[],  //分类列表
      }
    },
    //生命周期 created中发起ajax请求
    created(){
      this.$axios.get("free/category/")
      .then(res=>{
        this.categoryList = res.data.data;
      })
      .catch(err=>{
        console.log(err);
      })
    }
  }
</script>

<style>
</style>
效果-->
87、API封装axios
不用axios直接发get或POST请求,而是使用封装的方法:
<template>
  <div>
    <el-tabs type="border-card">
      <el-tab-pane v-for="category in categoryList" :key="category.id" :label="category.name">
        {{category.courses}}
      </el-tab-pane>
    </el-tabs>
  </div>
</template>

<script>
  export default {
    name: 'FreeCourse',
    data() {
      return {
        categoryList: [], //分类列表
      }
    },
    methods: {
      getCategoryList() {
        this.$http.categoryList()
          .then(res => {
            this.categoryList = res.data;
            let category = {
              id: 0,
              category: 0,
              name: '全部'
            }
            this.categoryList.unshift(category);
          })
          .catch(err => {
            console.log(err);
          })
      }
    },
    //生命周期 created中发起ajax请求
    created() {
      this.getCategoryList();
    }
  }
</script>

<style>
</style>
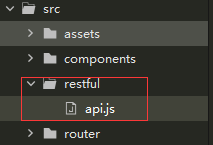
在src下新建restful/api.js文件
api.js:
import Axios from 'axios';
Axios.defaults.baseURL='https://www.luffycity.com/api/v1/';

export const categoryList = ()=>{
  return Axios.get("free/category/").then(res=>{
    return res.data
  })
}
main.js
// The Vue build version to load with the `import` command
// (runtime-only or standalone) has been set in webpack.base.conf with an alias.
import Vue from 'vue'
import App from './App'
import router from './router'

//引入ElementUI
import ElementUI from 'element-ui';
import 'element-ui/lib/theme-chalk/index.css';
Vue.use(ElementUI);

//引入axios
// import Axios from 'axios';
// Vue.prototype.$axios = Axios;
// Axios.defaults.baseURL='https://www.luffycity.com/api/v1/';

// 封装axios
import * as api from '@/restful/api'
Vue.prototype.$http = api;

Vue.config.productionTip = false

/* eslint-disable no-new */
new Vue({
  el: '#app',
  router,
  components: { App },
  template: '<App/>'
})
88-89、课程列表数据渲染
90、课程背景色变化
思路:在循环之前,给每个课程添加颜色bgColor,颜色可以随机也可以在固定列表中取
91、分类列表点击切换不同课程
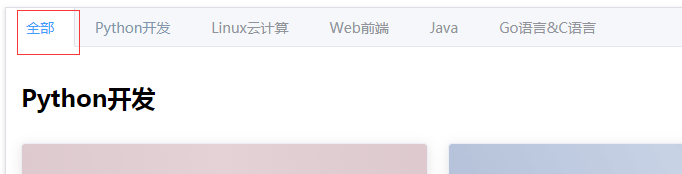
“全部” 的数据在接口中没有提供,我在这里使用的是elementUI中的tab,所以把“全部”的数据拼到列表中。因为elementUI的tab标签已经实现了切换功能,但是需要所有tab的数据,有几个tab,HTML中就有几个div,tab只是实现对他们的显示和隐藏。
如果不使用elementUI的tab,不论有多少个tab,HTML只有一个div,在tab切换时,可以发送ajax请求,在事件中改变数据,数据驱动div显示发生变化,地址栏URL不变
使用tab标签
<template>
  <div>
    <el-tabs type="border-card">
      <el-tab-pane v-for="(item,index) in categoryList" :key="index" :label="item.name">
        <div v-for="category in item.data" :key="category.id">
          <h1>{{category.name}}</h1>
          <el-row :gutter="20">
            <el-col :span="8" v-for="course in category.courses" :key="course.id">
              <el-card :body-style="{ padding: '0px' }">
                <img :src="course.course_img" class="image">
                <div style="padding: 14px;">
                  <span>{{course.course_slogan}}</span>
                  <div class="bottom clearfix">
                    <span>{{course.learn_number}}人在学</span>
                    <span v-if="course.level===0">入门</span>
                    <span v-if="course.level===1">进阶</span>
                    <el-button type="text" class="button">免费</el-button>
                  </div>
                </div>
              </el-card>
            </el-col>
          </el-row>
        </div>
      </el-tab-pane>
    </el-tabs>
  </div>
</template>

<script>
  export default {
    name: 'FreeCourse',
    data() {
      return {
        categoryList: new Array() //分类列表
      }
    },
    methods: {
      getCategoryList() {
        this.$http.categoryList()
          .then(res => {
            //开始组装数据,把res.data格式化,加入"全部"标签的数据
            let total_list = new Array();
            res.data.forEach((item, index) => {
              let v = new Array();
              v.push(item);
              let d = {
                'name': item.name,
                'data': v
              };
              total_list.push(item);
              this.categoryList.push(d);
            })
            let total = {
              'name': '全部',
              'data': total_list
            }
            this.categoryList.unshift(total);
          })
          .catch(err => {
            console.log(err);
          });
      }
    },
    //生命周期 created中发起ajax请求
    created() {
      this.getCategoryList();
    }
  }
</script>

<style>
  .el-col {
    margin: 10px 0;
  }

  .time {
    font-size: 13px;
    color: #999;
  }

  .bottom {
    margin-top: 13px;
    line-height: 12px;
  }

  .button {
    padding: 0;
    float: right;
  }

  .image {
    width: 100%;
    display: block;
  }

  .clearfix:before,
  .clearfix:after {
    display: table;
    content: "";
  }

  .clearfix:after {
    clear: both
  }
</style>