1. apollo入门demo实战(二)
1.1. 下载demo
- 从下列地址下载官方脚本和官方代码
1.2. 运行前准备
- 脚本中sql目录中两个sql,在自己的mysql中运行创建两个数据库
- 修改demo.sh中mysql数据库的账号密码
- 执行
./demo.sh start会启动三个服务,config service配置服务,admin service管理服务,portal service前端服务,正常启动日志如下 - 注意:我使用git bash模拟liunx在window里启动,此时需要注意JAVA_HOME环境变量需要配好,路径中不能有空格,否则启动不成功
$ ./demo.sh start
Windows new JAVA_HOME is: /d/Java/jdk1.8.0_161
==== starting service ====
Service logging file is ./service/apollo-service.log
Started [2156]
Waiting for config service startup.......
Config service started. You may visit http://localhost:8080 for service status now!
Waiting for admin service startup..
Admin service started
==== starting portal ====
Portal logging file is ./portal/apollo-portal.log
Started [3252]
Waiting for portal startup.......
Portal started. You can visit http://localhost:8070 now!
1.3. 进入后台页面
-
启动成功后访问
localhost:8070显示如下,默认账号密码apollo/admin

-
登录后显示,默认有一个SampleApp项目,点击
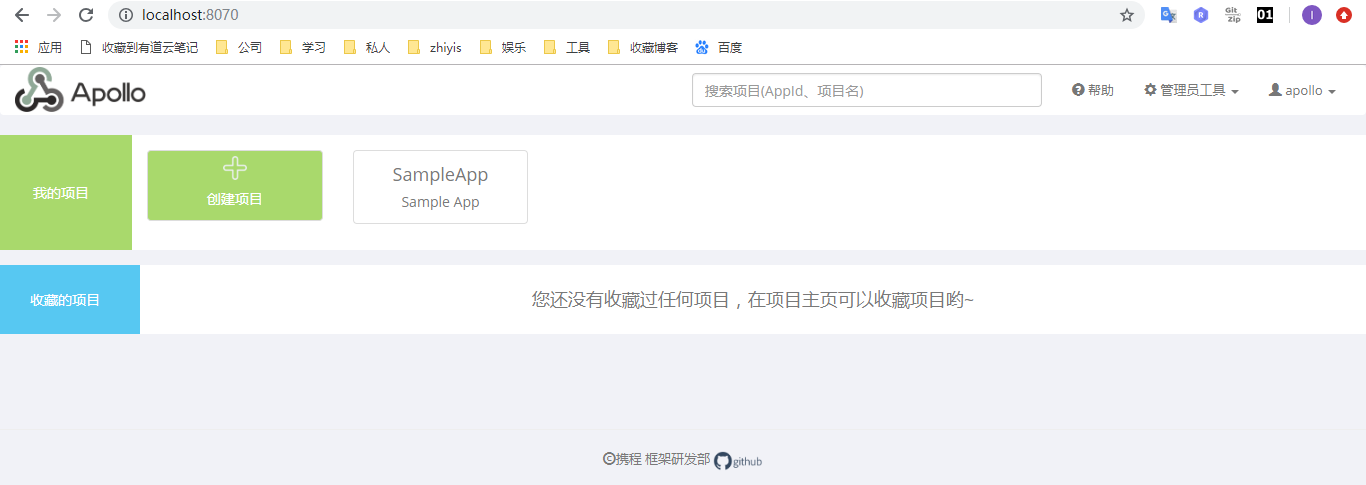
- 进入后整体显示如下

1.4. 启动客户端
- 在上述下载的脚本文件里已经存在了客户端,可以直接使用
./demo.sh client启动 - 启动日志如下
$ ./demo.sh client
Windows new JAVA_HOME is: /d/Java/jdk1.8.0_161
[apollo-demo][main]2019-03-15 16:17:56,913 INFO  [com.ctrip.framework.foundation.internals.provider.DefaultApplicationProvider] App ID is set to SampleApp by app.id property from /META-INF/app.properties
[apollo-demo][main]2019-03-15 16:17:56,916 INFO  [com.ctrip.framework.foundation.internals.provider.DefaultServerProvider] Environment is set to [dev] by JVM system property 'env'.
[apollo-demo][main]2019-03-15 16:17:57,023 INFO  [com.ctrip.framework.apollo.internals.DefaultMetaServerProvider] Located meta services from apollo.meta configuration: http://localhost:8080!
[apollo-demo][main]2019-03-15 16:17:57,024 INFO  [com.ctrip.framework.apollo.core.MetaDomainConsts] Located meta server address http://localhost:8080 for env DEV from com.ctrip.framework.apollo.internals.DefaultMetaServerProvider
Apollo Config Demo. Please input key to get the value. Input quit to exit.
- 输入属性回车,取的值就是页面上配的属性值,没有的值则undefined
> timeout
Loading key : timeout with value: 100
> poolsize
Loading key : poolsize with value: undefined
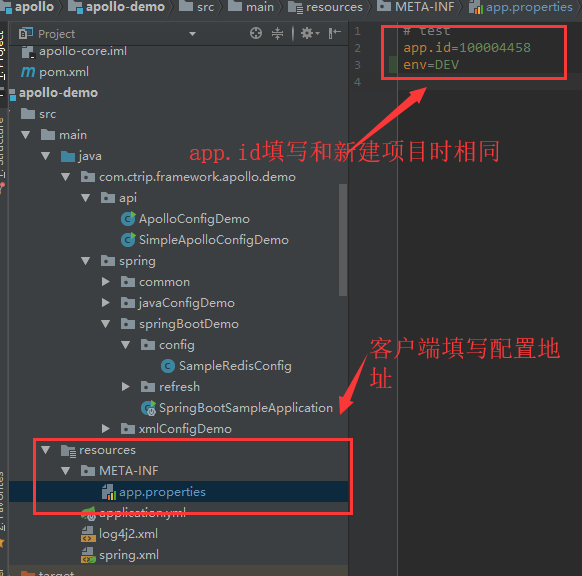
- 除了上述启动方式,如果你下载了apollo源码,你可以直接运行源码中的demo,SimpleApolloConfigDemo这个类,但运行前需要进行两个配置,官方推荐如果是windows在
C:/opt/settings/server.properties该目录创建这个文件,内容写上
env=DEV
apollo.meta=http://localhost:8080
表示启动环境DEV开发环境和config service服务地址

1.5. 创建新项目
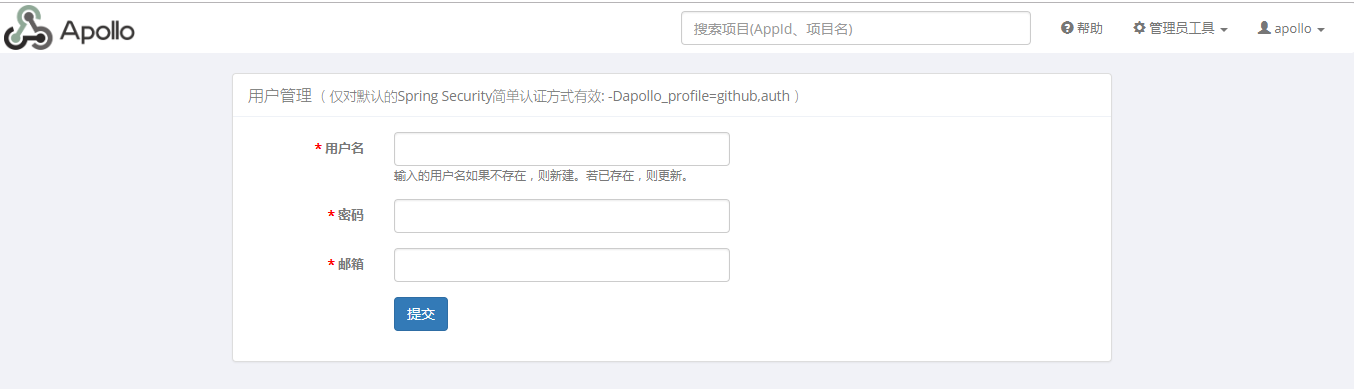
1.5.1. 创建账户
- 访问
http://{portal地址}/user-manage.html,这里就是http://localhost:8070/user-manage.html - 显示如下,需要先登录管理员账号才能访问该地址
1.5.2. 创建项目
-
创建个账号提交,再重新登录,点击创建项目
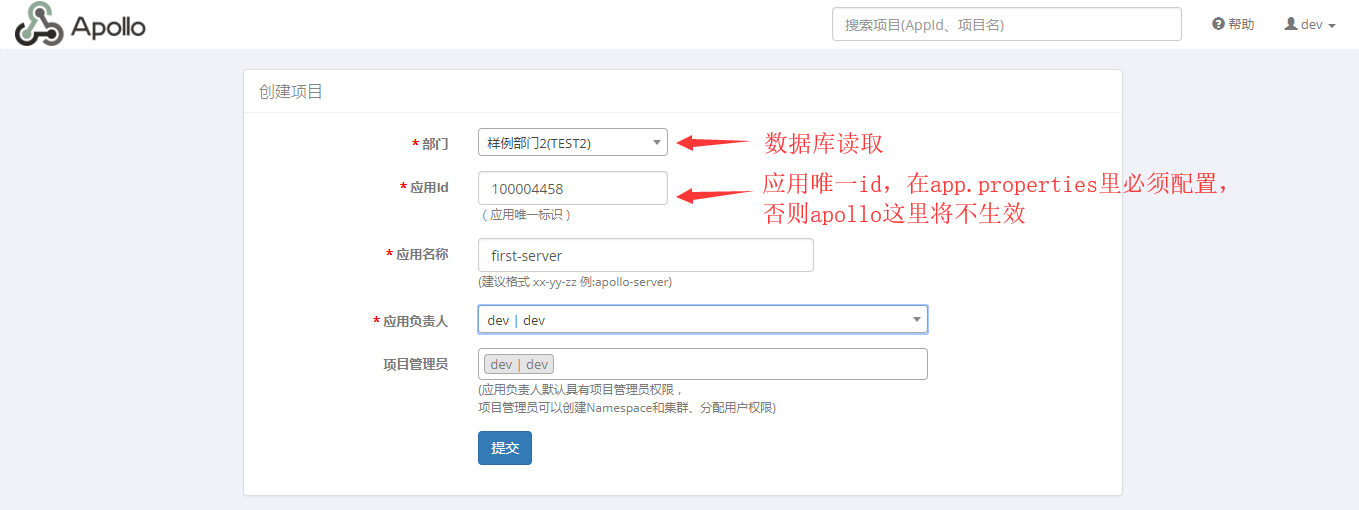
-
查看数据库可看到,部门从数据库serverconfig表读取

1.5.3. 添加配置

注意:需要点击发布才能生效
1.5.4. 客户端修改
- 以项目默认的demo为例,进行修改

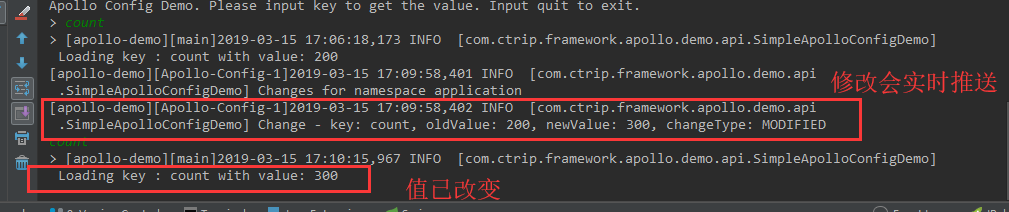
1.5.5. 修改配置
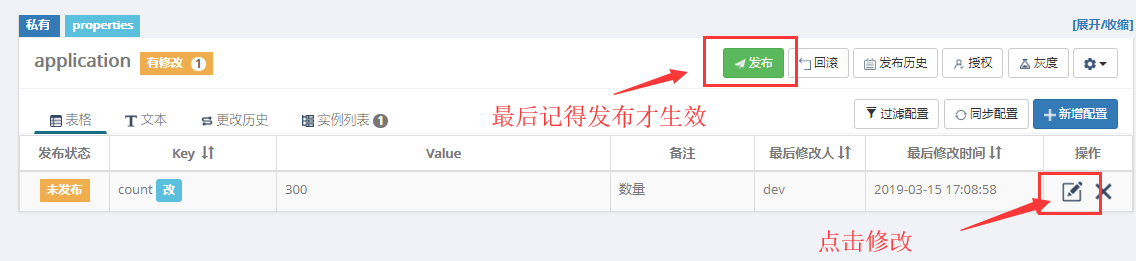
结果
1.6. 总结
通过上述测试已经实现了后台页面配置实时修改,客户端实时接收修改配置值,我们已经初步了解apollo的基本功能,接下来需要研究下客户端需要如何配置才能实现需求了,下章继续_