---------------------siwuxie095
Spring 配置连接池
1、Spring 配置内置连接池
在 applicationContext.xml 中添加如下内容:
<bean id="dataSource" class="org.springframework.jdbc.datasource.DriverManagerDataSource"> <property name="driverClassName" value="com.mysql.jdbc.Driver"/> <property name="url" value="jdbc:mysql:///spring_db"/> <property name="username" value="root"/> <property name="password" value="8888"/> </bean> |
其中:
jdbc:mysql:///spring_db 是 jdbc:mysql://localhost:3306/spring_db 的简写
即 省略了 localhost:3306
2、Spring 配置 DBCP 连接池
(1)导入两个相关 jar 包
1)commons-dbcp
2)commons-pool

Commons DBCP 下载链接:
http://commons.apache.org/proper/commons-dbcp/download_dbcp.cgi
Commons Pool 下载链接:
http://commons.apache.org/proper/commons-pool/download_pool.cgi
(2)在 applicationContext.xml 中添加如下内容:
<!-- 注意:由于使用的是 DBCP 2.x 版本,所以全限定名是:
org.apache.commons.dbcp2.BasicDataSource
如果使用的 DBCP 1.x 版本,则全限定名是:
org.apache.commons.dbcp.BasicDataSource --> <bean id="dataSource" class="org.apache.commons.dbcp2.BasicDataSource"> <property name="driverClassName" value="com.mysql.jdbc.Driver"/> <property name="url" value="jdbc:mysql:///spring_db"/> <property name="username" value="root"/> <property name="password" value="8888"/> </bean> |
3、Spring 配置 C3P0 连接池
(1)导入 c3p0 的 jar 包
C3P0 下载链接:http://mvnrepository.com/artifact/c3p0/c3p0
(2)在 applicationContext.xml 中添加如下内容:
<bean id="dataSource" class="com.mchange.v2.c3p0.ComboPooledDataSource"> <property name="driverClass" value="com.mysql.jdbc.Driver"/> <property name="jdbcUrl" value="jdbc:mysql:///spring_db"/> <property name="user" value="root"/> <property name="password" value="8888"/> </bean> |
4、Spring 配置数据库连接信息到属性文件中
(1)在 src 下创建属性文件 jdbc.properties
jdbc.driverClassName=com.mysql.jdbc.Driver jdbc.url=jdbc:mysql:///spring_db jdbc.username=root jdbc.password=8888 |
(2)在 applicationContext.xml 中引入外部属性文件
1)法一:
<bean class="org.springframework.beans.factory.config.PropertyPlaceholderConfigurer"> <property name="location" value="classpath:jdbc.properties"/> </bean> |
2)法二:
<!-- 注意:此法要引入 context 约束 --> <context:property-placeholder location="classpath:jdbc.properties"/> |
(3)在 applicationContext.xml 中配置连接池
1)法一:配置内置连接池
<bean id="dataSource" class="org.springframework.jdbc.datasource.DriverManagerDataSource"> <property name="driverClassName" value="${jdbc.driverClassName}"/> <property name="url" value="${jdbc.url}"/> <property name="username" value="${jdbc.username}"/> <property name="password" value="${jdbc.password}"/> </bean> |
2)法二:配置 DBCP 连接池
<bean id="dataSource" class="org.apache.commons.dbcp2.BasicDataSource"> <property name="driverClassName" value="${jdbc.driverClassName}"/> <property name="url" value="${jdbc.url}"/> <property name="username" value="${jdbc.username}"/> <property name="password" value="${jdbc.password}"/> </bean> |
3)法三:配置 C3P0 连接池
<bean id="dataSource" class="com.mchange.v2.c3p0.ComboPooledDataSource"> <property name="driverClass" value="${jdbc.driverClassName}"/> <property name="jdbcUrl" value="${jdbc.url}"/> <property name="user" value="${jdbc.username}"/> <property name="password" value="${jdbc.password}"/> </bean> |
参考链接:
5、以内置连接池为例,进行测试
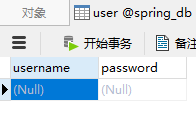
(1)在 MySQL 中手动创建数据库和表
数据库名:spring_db,表名:user,字段:username、password
(2)编写一个测试类
JdbcTemplateDemo.java:
package com.siwuxie095.jdbc;
import org.junit.Test; import org.springframework.context.ApplicationContext; import org.springframework.context.support.ClassPathXmlApplicationContext; import org.springframework.jdbc.core.JdbcTemplate;
public class JdbcTemplateDemo {
/** * 手动加上 @Test 以进行单元测试(将自动导入 JUnit 4 的 jar 包) * * 选中方法名,右键->Run As->JUint Test */ @Test public void add() {
ApplicationContext context=new ClassPathXmlApplicationContext("applicationContext.xml");
JdbcTemplate jdbcTemplate=(JdbcTemplate) context.getBean("jdbcTemplate");
String sql="insert into user values(?,?)";
/** * 调用 update() 方法实现添加,返回值是 int 型, * 创建以接收,表示在数据库中影响的行数 */ int row=jdbcTemplate.update(sql, "小强","4321"); System.out.println(row); }
} |
(3)在配置文件中进行配置
applicationContext.xml:
<?xml version="1.0" encoding="UTF-8"?> <beans xmlns="http://www.springframework.org/schema/beans" xmlns:xsi="http://www.w3.org/2001/XMLSchema-instance" xsi:schemaLocation=" http://www.springframework.org/schema/beans http://www.springframework.org/schema/beans/spring-beans.xsd">
<!-- 配置内置连接池 --> <bean id="dataSource" class="org.springframework.jdbc.datasource.DriverManagerDataSource"> <property name="driverClassName" value="com.mysql.jdbc.Driver"/> <property name="url" value="jdbc:mysql:///spring_db"/> <property name="username" value="root"/> <property name="password" value="8888"/> </bean>
<!-- 配置对象 --> <bean id="jdbcTemplate" class="org.springframework.jdbc.core.JdbcTemplate"> <!-- 把对象 dataSource 传递到模板对象 jdbcTemplate 中
在 JdbcTemplate 源代码中有属性 dataSource 和其 set 方法,所以可以注入 --> <property name="dataSource" ref="dataSource"></property> </bean>
</beans> |
【made by siwuxie095】