注释:该篇博文是借鉴下列文章加上自己实践总结得来,其它文件系统相关参考我的博客:https://www.whyfi.top/blog/ubuntu-remote-file-system/;
a. http://forum.ubuntu.org.cn/viewtopic.php?f=77&t=117754
b. http://blog.chinaunix.net/uid-20164485-id-3324492.html
说明:无盘工作站建立的前提如下:
a. 两台以上计算机
b. 计算机网卡(指有线网卡)具备PXE功能。
c. 若需要建立2台及其以上客户端机的无盘工作站需要交换机。
d. 主机(上面说的计算机)具备较强的运算能力,较大的存储空间,网卡传输能力为100M或者1000M以上
e. 主机的配置需要连接网络(主机最好有无线网卡)
正文:服务器与客户机的相关配置
1. 服务器(有线)配置成DHCP服务器
a. sudo apt-get install dhcpd3-server
b. 配置isc-dhcp-server(/etc/default/isc-dhcp-server)==>INTERFACES="eth0"
c. 配置/etc/dhcp/dhcpd.conf==>
authoritative;
max-lease-time 604800;
default-lease-time 3100;
ddns-update-style none;
ddns-ttl 7200;
allow booting;
allow bootp;
one-lease-per-client true;
subnet 192.168.23.0 netmask 255.255.255.0 {
range dynamic-bootp 192.168.23.1 192.168.23.200;
option routers 192.168.23.1; //与本机静态IP一致
option subnet-mask 255.255.255.0;
option broadcast-address 192.168.23.255;
ignore client-updates;
}
host ub04{
hardware ethernet xx:xx:xx:xx:xx:xx; //为该MAC固定分配IP ...23.2
next-server 192.168.23.1; //与本机静态IP一致,本机的静态IP在/etc/network/interfaces里面配置参考后面
fixed-address 192.168.23.23;
filename "pxelinux.0"; //tftp时传输的文件,此处为客户机开机获取的引导文件
}
d.配置服务器静态IP及相关网络参数/etcc/network/interfaces
auto eth0
iface eth0 inet static
address 192.168.1.1
netmask 255.255.255.0
network
192.168.1.0
broadcast
192.168.1.255
e. 重启相关服务
/etc/init.d/networking restart
/etc/init.d/isc-dhcp-server restart
2. 安装tftp
a. sudo apt-get install tftp,tftpd,tftp-hpa,tftpd-hpa,xinetd,openbsd-inetd
b.配置tftpd-hpa(/etc/default/tftp)
# /etc/default/tftpd-hpa
TFTP_USERNAME="tftp"
TFTP_DIRECTORY="/tftpboot"
TFTP_ADDRESS="0.0.0.0:69"
TFTP_OPTIONS="--secure"
c.配置/etc/xinetd.d/tftp
service tftp
{
socket_type = dgram
protocol = udp
wait = yes
user = root
server = /usr/sbin/in.tftpd
server_args = -s /tftpboot
disable = no
per_source = 11
cps = 100 2
flags = IPv4
}
d. sudo vi /etc/inetd.conf
#:BOOT: TFTP service is provided primarily for booting. Most sites
# run this only on machines acting as "boot servers."
#tftp dgram udp wait nobody /usr/sbin/tcpd /usr/sbin/in.tftpd /srv/tftp (/srv/tftp 为默认tftp目录)
#修改如下文件
tftp dgram udp wait nobody /usr/sbin/tcpd /usr/sbin/in.tftpd /tftproot
e.sudo mkdir /tftproot
f.sudo chmod 777 /tftproot
g.sudo /etc/init.d/openbsd-inetd restart
3.安装nfs
a.安装nfs ==> apt-get install nfs-kernel-server
b.配置exports
/home/client/ub04 192.168.23.23(rw,no_root_squash,sync)
4.安装samba
a.sudo apt-get install samba
b.配置smb.conf
[share]
comment = Shared Folder
path = /opt/samba
public = yes
writable = yes
available = yes
browseable = yes
c. smbpasswd –a shizhai添加用户及密码
d. 重启samba
5. 安装syslinux
在上面DHCP配置文件中涉及到的的pxelinux.0便是这个来自于这个软件包。
sudo apt-get install syslinux
cp /usr/lib/syslinux/pxelinux.0 /tftpboot/ #把这个文件拷贝到我们的tftp目录下,客户机开机使用tftp从tftpboot目录获取
接下来在主机tftpboot目录下为客户机建立启动引导配置目录(自己猜测)
mkdir /tftpboot/pxelinux.cfg
在该目录建立一个默认的客户机引导default ==> vi /tftpboot/pxelinux.cfg/default
LABEL ubuntu #
KERNEL linux
append initrd=initrd.nfs boot=nfs root=/dev/nfs nfsroot=192.168.23.1:/home/client/ub04 ip=dhcp rw
PROMPT 1 #自动选择,不等待客户机干预
TIMEOUT 10 #超时时间
7. 为客户机生成linux内核与文件系统
1.客户机的文件系统生成有多种方式,现在介绍其中两种:
a. 使用debootstrap工具在/home/client/ub04(ub04下面命题客户机的文件系统)下生成一个最简的文件系统,再把生成的文件系统的boot/vmlinux...拷贝 到/tftpboot/下改名为linux作为客户机的公共内核, 然后再sudo chmod 777 linux
b. 使用已安装linux系统(暂称主机1)的文件系统(服务器与该主机1处于同一网段),使用rsync -avzupoglH 主机1user@主机1IP:/* /home/client/ub04/ 在/home/client/ub04下生成了一个文件系统(查询rsync命令)
2. 配置生成的客户机文件系统
修改的文件主要有:fstab、mtab、hosts、hostname、interfaces、udev内容及目录如下:
a. /home/client/ub04/etc/fstab

b. /home/client/ub04/etc/mtab

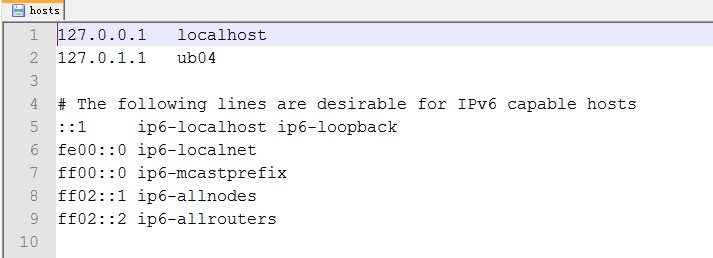
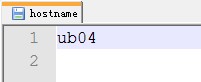
c. /home/client/ub04/etc/hots及hostname
d. /home/client/ub04/etc/network/interfaces

e. udev下面文件rules.d/70-persistent-net.rules需要清空。
3. 到ub04下进行相关系统配置
cd /home/client/ub04/
sudo chroot .
useradd ub04
password ub04
8. 让客户机从网络启动