MAC安裝CocoaPods http://www.cnblogs.com/surge/p/4436360.html
请注意我的环境,这个很重要 xcode版本7.3.2 mac 版本OS X EL Capitan v 10.11.5
pod的安装我就不说了,上面已经很详细了,接下来我说下如何使用
首先我在~/lsg/work/app/myFirst 建了一个简单的swift项目
cd ~/lsg/work/app/myFirst
pod init
会建在当前目录下面建立一个Podfile文件

用XCODE把文件打开,如下所示
# Uncomment this line to define a global platform for your project
# platform :ios, '9.0'

target 'myFirst' do
  # Comment this line if you're not using Swift and don't want to use dynamic frameworks
  use_frameworks!

  # Pods for myFirst

  target 'myFirstTests' do
    inherit! :search_paths
    # Pods for testing
  end

  target 'myFirstUITests' do
    inherit! :search_paths
    # Pods for testing
  end

end
修改成如下代码,我们一个 Alamofire的库
# Uncomment this line to define a global platform for your project
platform :ios, '9.0'

target 'myFirst' do
  # Comment this line if you're not using Swift and don't want to use dynamic frameworks
  use_frameworks!

  # Pods for myFirst

  target 'myFirstTests' do
    inherit! :search_paths
    # Pods for testing
    pod 'Alamofire', '~> 3.4'
  end

  target 'myFirstUITests' do
    inherit! :search_paths
    # Pods for testing
  end

end
执行shell命令 pod install
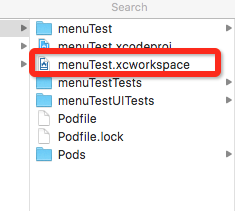
用XCODE打开这个workspace文件,这样就会Pods的里面的安装的库
接下来我们把viewController.swift的代码换成如下代码,
//
//  ViewController.swift
//  menuTest
//
//  Created by shining3d on 6/28/16.
//  Copyright © 2016 小小鸟. All rights reserved.
//

import UIKit
import Alamofire

class ViewController: UIViewController {

    override func viewDidLoad() {
        super.viewDidLoad()
        //设置标签x坐标:10,y坐标:20,长:300,宽:100
        let label=UILabel(frame:CGRectMake(10,20, 300, 100))
        label.text="hangge.com"

        Alamofire.request(.GET, "https://httpbin.org/get", parameters: ["foo": "bar"])
            .responseJSON { response in
                print(response.request)  // original URL request
                print(response.response) // URL response
                print(response.data)     // server data
                print(response.result)   // result of response serialization

                if let JSON = response.result.value {
                    print("JSON: (JSON)")
                }


        }
        self.view.addSubview(label);
        // Do any additional setup after loading the view, typically from a nib.
    }

    override func didReceiveMemoryWarning() {
        super.didReceiveMemoryWarning()
        // Dispose of any resources that can be recreated.
    }


}
运行试一下,即可。