通过本教程,您将了解如何在单个HTML页面上通过几个步骤创建一个简单的第一个应用程序。
我们创建了一个带有两个页面和导航按钮的应用程序来在页面之间导航。
预览
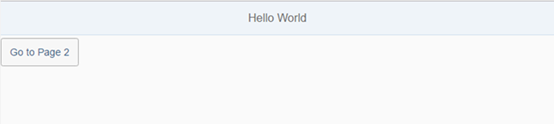
Simple "Hello World" App - First Page
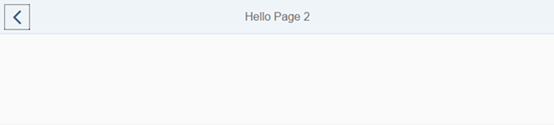
Simple "Hello World" App - Second Page
请注意:您可以在演示应用程序中查看和下载生成的应用程序Demo Apps。
Coding
在以下步骤中,我们将创建一个index.html文件与下面的代码。如果你想直接试用这个应用程序,只需从这里复制并粘贴代码即可。
您还可以通过在https://jsbin.com上创建jsbin示例来启动这个迷你应用程序并修改代码。
Caution:
Adapt the path where the resources are located (<<server>>:<<port>>) according to your installation. For OpenUI5 you can use src="https://openui5.hana.ondemand.com/resources/sap-ui-core.js". For accessing SAPUI5 on the SAP Cloud Platform, for example, use src="https://sapui5.hana.ondemand.com/resources/sap-ui-core.js".
您可以在教程或测试目的中使用对SAPUI5最新稳定版本的引用,但绝不可将其用于生产用途。在实际的应用程序中,您总是必须显式地指定SAPUI5版本。
For more information, see Step 1: Create an HTML Page and Variant for Bootstrapping from Content Delivery Network.
<!DOCTYPE html>

<html>

<head>

       <meta http-equiv="X-UA-Compatible" content="IE=edge">

       <meta charset="utf-8">

       <title>Hello World App</title>

       <script src="http://<<server>>:<<port>>/resources/sap-ui-core.js"

              id="sap-ui-bootstrap"

              data-sap-ui-theme="sap_belize"

              data-sap-ui-libs="sap.m">

       </script>

       <script type="text/javascript">

              sap.ui.getCore().attachInit(function () {

                     // create a mobile app and display page1 initially

                     var app = new sap.m.App("myApp", {

                            initialPage: "page1"

                     });

                     // create the first page

                     var page1 = new sap.m.Page("page1", {

                            title : "Hello World",

                            showNavButton : false,

                            content : new sap.m.Button({

                                   text : "Go to Page 2",

                                   press : function () {

                                          // navigate to page2

                                          app.to("page2");

                                   }

                            })

                     });

                     // create the second page with a back button

                     var page2 = new sap.m.Page("page2", {

                            title : "Hello Page 2",

                            showNavButton : true,

                            navButtonPress : function () {

                                   // go back to the previous page

                                   app.back();

                            }

                     });

                     // add both pages to the app

                     app.addPage(page1).addPage(page2);

                     // place the app into the HTML document

                     app.placeAt("content");

              });

       </script>

</head>

<body class="sapUiBody" id="content">

</body>

</html>
Step 2: Initialize the AppStep 1: Create an HTML Page
2.2.1Step 1: Create an HTML Page
我们首先为应用程序创建一个HTML页面。在这里,我们定义了meta标记、用于加载SAPUI5库的脚本标记和应用程序内容的占位符。
<!DOCTYPE html>

<html>

<head>

       <meta http-equiv="X-UA-Compatible" content="IE=edge">

       <meta charset="utf-8">

       <title>Hello World App</title>

       <script src="http://<<server>>:<<port>>/resources/sap-ui-core.js"

              id="sap-ui-bootstrap"

              data-sap-ui-theme="sap_belize"

              data-sap-ui-libs="sap.m">

       </script>

</head>

<body class="sapUiBody" id="content">

</body>

</html>
▪< !DOCTYPE html>:这一行告诉浏览器这个页面是用HTML5编写的。创建一个名为index.html文件和添加以下部分:
▪头与以下信息:
a.meta标签<meta http-equiv=" x - ui兼容"内容="IE=edge">告诉Microsoft Internet Explorer使用最新的呈现引擎(edge)和<meta charset="utf-8">告诉任何浏览器该文件是utf-8编码(假设您在编辑时使用该编码)或者保存文件)。
b. 标题文本
c.使用以下信息加载和初始化SAPUI5的脚本标记:
c1.资源的位置
d. 您定义加载了哪个库,以及应该使用哪个主题。在我们的示例中,只加载了sa .m库和sap_belize主题。如果您愿意,可以加载其他库和主题
▪HTML <body>标记ID内容和类sapUiBody。这是应用程序的内容将在接下来的步骤中添加的地方
现在,已加载并准备使用包含控件的SAPUI5。
Related Information
Bootstrapping: Loading and Initializing
2.2.2Initialize the App
App .m库提供了一个名为App的控件,它是App的根控件。它初始化body标签的内容,在移动设备的HTML文档上设置一些meta标签,可以在导航时管理多个页面和动画。
index.html
<!DOCTYPE html>

<html>

<head>

    <meta http-equiv="X-UA-Compatible" content="IE=edge">

    <meta charset="utf-8">

    <title>Hello World App</title>

    <script src="http://<server>:<port>/resources/sap-ui-core.js"

        id="sap-ui-bootstrap"

        data-sap-ui-theme="sap_belize"

        data-sap-ui-libs="sap.m">

    </script>

    <script type="text/javascript">

        sap.ui.getCore().attachInit(function () {

            // create a mobile app and display page1 initially

            var app = new sap.m.App("myApp", {

                initialPage: "page1"

            });

        });

    </script>

</head>

<body class="sapUiBody" id="content">

</body>

</html>
而不是使用sap.m.app控制,您还可以手动调用jQuery.sap.initMobile()来设置HTML并使用其他全屏控件,如sap.m.Page或sap.m.Carousel将作为应用程序的根元素。在第二个脚本块中,我们将一个函数附加到全局attachInit事件。一旦加载并初始化SAPUI5,就会调用这个函数。在这里创建app控件,并定义最初要显示的页面。此时,这个页面没有任何内容。
Parent topic: Hello World!
Previous: Step 1: Create an HTML Page
Next: Step 3: Add Content Pages
2.2.3Add Content Pages
应用程序由一组页面、视图和屏幕组成,用户可以在这些页面、视图和屏幕之间导航。现在我们向应用程序添加两个页面。
index.html
<!DOCTYPE html>

<html>

<head>

       <meta http-equiv="X-UA-Compatible" content="IE=edge">

       <meta charset="utf-8">

       <title>Hello World App</title>

       <script src="http://<server>:<port>/resources/sap-ui-core.js"

              id="sap-ui-bootstrap"

              data-sap-ui-theme="sap_belize"

              data-sap-ui-libs="sap.m">

       </script>

       <script type="text/javascript">

              sap.ui.getCore().attachInit(function () {

                     // create a mobile app and display page1 initially

                     var app = new sap.m.App("myApp", {

                            initialPage: "page1"

                     });

                     // create the first page

                     var page1 = new sap.m.Page("page1", {

                            title : "Hello World",

                            showNavButton : false,

                            content : new sap.m.Button({

                                   text : "Go to Page 2",

                                   press : function () {

                                          // navigate to page2

                                          app.to("page2");

                                   }

                            })

                     });

                     // create the second page with a back button

                     var page2 = new sap.m.Page("page2", {

                            title : "Hello Page 2",

                            showNavButton : true,

                            navButtonPress : function () {

                                   // go back to the previous page

                                   app.back();

                            }

                     });

                     // add both pages to the app

                     app.addPage(page1).addPage(page2);

                     // place the app into the HTML document

                     app.placeAt("content");

              });

       </script>

</head>

<body class="sapUiBody" id="content">

</body>

</html>
请注意:sap.m.page控件可以用于app控件的聚合页面,但也可以使用其他控件。该页面有一个用于显示信息的可滚动内容部分,并将创建一个标题和一个可选的页脚区域。
1. 创建一个sap.m.page控件并设置其标题。为了使这个例子简单,内容只是一个按钮,当按钮被按下时,通过调用app.to(“page2”)导航到第二个页面。参数page2是第二个页面的ID。您还可以为导航指定动画类型。默认是一个从右到左的幻灯片动画。
2. 创建显示Back按钮的第二个页面。属性showNavButton被设置为true以显示后退按钮。当它被按下时,事件处理函数调用app.back()。这将把用户带回主页与一个反向动画。
3. 将两个页面都添加到应用程序中,并将应用程序放置在您前面定义为body标记的HTML文件的内容区域:
app.addPage(page1).addPage(page2);

app.placeAt("content");
Summary应用程序现在被放置到HTML中,应用程序使用设备上可用的整个屏幕大小。
1.现在我们已经创建了“Hello World”应用程序,它只有一个HTML文件,只有两个页面。
2.您可以在任何设备上的任何浏览器上运行该应用程序。
3.要在移动设备上使用该应用程序,需要将HTML文件上传到web服务器,并在移动浏览器中调用生成的URL。
4.通过选择按钮来测试两个页面之间的导航。
Parent topic: Hello World!
Previous: Step 2: Initialize the App