版权申明:
- 博客园『优梦创客』的空间:https://www.cnblogs.com/raymondking123
- 优梦创客的官方博客:https://91make.top
- 优梦创客的游戏讲堂:https://91make.ke.qq.com
- 『优梦创客』的微信公众号:umaketop
概要:
- ET4示例程序中的登录流程大致为:实例化UILogin进行登录->实例化UILobby进行匹配→加载Map场景进行游戏
- 由于其流程对于新手有点复杂,这里介绍一种简单的学习方式:
- 直接创建一个StartUI
- 点击“游客登录”按钮执行登录功能
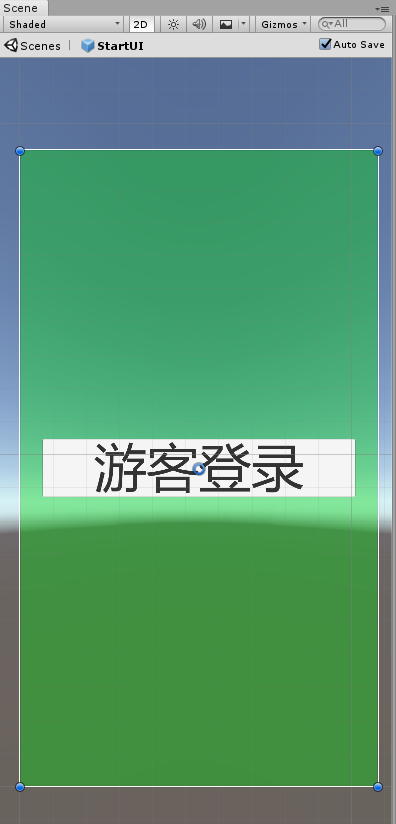
创建一个StartUI:
- 将启动UI做成一个预制体,并命名为StartUI,UI界面如下:
- 由于ET4采用ab包的方式加载资源,所以要:
- 预制体设置Asset Label为:startui.unity3d
- 用ET4的编辑器扩展:Tools→打包工具→选择PC平台进行打包
- 打包后的资源放在???
- 不需要启动服务端或文件服务器,ET4框架可以找到打包后的ab包
- 编辑器状态下会查找预制体而不从ab包加载
- 用代码加载该预制体:
namespace ETHotfix
{
	public static class MyStartUIFactory
	{
		public static UI Create()
		{
			try
			{
				ResourcesComponent rc = ETModel.Game.Scene.GetComponent<ResourcesComponent>();
				rc.LoadBundle(MyUIType.MyStartUI.StringToAB());
				GameObject goPrefab = rc.GetAsset(MyUIType.MyStartUI.StringToAB(), MyUIType.MyStartUI.ToString()) as GameObject;
				GameObject go = UnityEngine.Object.Instantiate(goPrefab);

				UI ui = ComponentFactory.Create<UI,string,GameObject>(MyUIType.MyStartUI.ToString(), go, false);

				ui.AddComponent<MyStartUIComponent>();

				return ui;
			}
			catch (Exception e)
			{
				Log.Error(e);
				return null;
			}
		}
	}
}
点击“游客登录”按钮执行登录功能
namespace ETHotfix
{
[ObjectSystem]
public class MyStartUIAwakeSystem : AwakeSystem<MyStartUIComponent>
{
public override void Awake(MyStartUIComponent self)
{
self.OnAwake();
}
}
public class MyStartUIComponent : Component
{
GameObject goStartButton;
public void OnAwake()
{
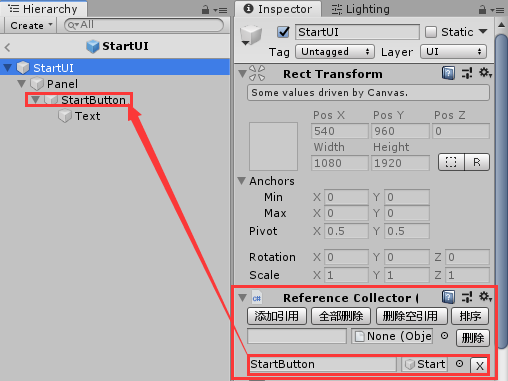
var rc = this.Parent.GameObject.GetComponent<ReferenceCollector>();
goStartButton = rc.Get<GameObject>("StartButton");
goStartButton.GetComponent<Button>().onClick.AddListener(OnStartClick);
}
private void OnStartClick()
{
// Coroutine()方法模拟将OnStartClickAsync()作为协程执行的效果(确保在单线程中执行)
OnStartClickAsync().Coroutine();
}
private async ETVoid OnStartClickAsync()
{
// 处理游客登录点击
try
{
// 1: 创建一个realmSession,并利用此session去call一个rpc消息(模型层session表示具体网络参数和连接,热更层负责通信逻辑,它调用模型层)
ETModel.Session realmModelsession = ETModel.Game.Scene.GetComponent<NetOuterComponent>().Create(GlobalConfigComponent.Instance.GlobalProto.Address);
Session realmHotfixSession = ComponentFactory.Create<Session, ETModel.Session>(realmModelsession);
// 2:若登录失败,会收到异常;若成功,则会得到认证信息(模型层没有C2R_Login的类定义,所以必须配套由热更层的session去call)
var r2cLogin = await realmHotfixSession.Call(new C2R_Login()
{
Account = Guid.NewGuid().ToString(),
Password = "111111",
}) as R2C_Login;
// 3:再利用此认证信息中的网关服务器地址,去创建gateSession
ETModel.Session gateModelsession = ETModel.Game.Scene.GetComponent<NetOuterComponent>().Create(r2cLogin.Address);
Session gateHotfixSession = ComponentFactory.Create<Session, ETModel.Session>(gateModelsession);
// 4:用gateSession去登录gate服(传入登录key)
var g2cLoginGate = await gateHotfixSession.Call(new C2G_LoginGate()
{
Key = r2cLogin.Key
}) as G2C_LoginGate;
// 5:登录成功后,用返回的playerId,创建Player对象
var p = ETModel.ComponentFactory.CreateWithId<Player>(g2cLoginGate.PlayerId);
ETModel.Game.Scene.GetComponent<PlayerComponent>().MyPlayer = p;
// 6:发送登录完成事件
Game.EventSystem.Run(MyEventType.MyLoginFinish);
// 7: 保存热更和模型层Session,以便将来直接通过SessionComponent.Instance单件访问
Game.Scene.AddComponent<SessionComponent>().Session = gateHotfixSession;
ETModel.Game.Scene.AddComponent<ETModel.SessionComponent>().Session = gateModelsession;
}
catch (Exception e)
{
Log.Error(e);
}
}
}
}
- EventSystem.Run引发本地事件,Session.Call|Send引发网络消息
处理登录成功消息:
namespace ETHotfix
{
	[Event(MyEventType.MyLoginFinish)]
	class MyLoginFinish : AEvent
	{
		public override void Run()
		{
			// 移除登录UI
			UI uiLogin = Game.Scene.GetComponent<UIComponent>().Get(MyUIType.MyStartUI.ToString());
			uiLogin.GameObject.SetActive(false);

			// 加载游戏场景(也可以从ab包加载)
			SceneManager.LoadScene(1);
		}
	}
}