第一步:编写两个pojo,比如一个学生表一个课程表 这里使用注解。
需要
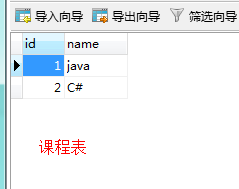
课程表:


 1 package com.qcf.pox;
 2
 3 import java.util.HashSet;
 4 import java.util.Set;
 5
 6 import javax.persistence.Entity;
 7 import javax.persistence.GeneratedValue;
 8 import javax.persistence.GenerationType;
 9 import javax.persistence.Id;
10 import javax.persistence.ManyToMany;
11
12 @Entity
13 public class Course {
14     @Id
15     @GeneratedValue(strategy=GenerationType.AUTO)
16     private int id;
17     private String name;
18     @ManyToMany(mappedBy="courses")
19     private Set<Student2> student2s=new HashSet<Student2>();
20     public int getId() {
21         return id;
22     }
23     public void setId(int id) {
24         this.id = id;
25     }
26     public String getName() {
27         return name;
28     }
29     public void setName(String name) {
30         this.name = name;
31     }
32     public Set<Student2> getStudent2s() {
33         return student2s;
34     }
35     public void setStudent2s(Set<Student2> student2s) {
36         this.student2s = student2s;
37     }
38     public Course(int id, String name, Set<Student2> student2s) {
39         super();
40         this.id = id;
41         this.name = name;
42         this.student2s = student2s;
43     }
44     public Course() {
45         super();
46     }
47
48 }
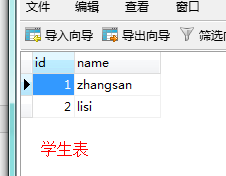
学生表:
 1 package com.qcf.pox;
 2
 3 import java.util.HashSet;
 4 import java.util.Set;
 5
 6 import javax.persistence.CascadeType;
 7 import javax.persistence.Entity;
 8 import javax.persistence.GeneratedValue;
 9 import javax.persistence.GenerationType;
10 import javax.persistence.Id;
11 import javax.persistence.ManyToMany;
12
13 @Entity
14 public class Student2 {
15     @Id
16     @GeneratedValue(strategy=GenerationType.AUTO)
17     private int id;
18     private String name;
19     @ManyToMany(cascade=CascadeType.ALL)
20     private Set<Course> courses=new HashSet<Course>();
21     public int getId() {
22         return id;
23     }
24     public void setId(int id) {
25         this.id = id;
26     }
27     public String getName() {
28         return name;
29     }
30     public void setName(String name) {
31         this.name = name;
32     }
33     public Set<Course> getCourses() {
34         return courses;
35     }
36     public void addCourses(Course courses) {
37         this.courses.add(courses);
38     }
39     public Student2(int id, String name, Set<Course> courses) {
40         super();
41         this.id = id;
42         this.name = name;
43         this.courses = courses;
44     }
45     public Student2() {
46         super();
47     }
48
49 }
第二步:在hibernate.cfg.xml文件中引入这两个po类
1         <mapping class="com.qcf.pox.Student2"/>
2         <mapping class="com.qcf.pox.Course"/>
第三步:编写测试代码
 1 package com.qcf.test;
 2
 3 import org.hibernate.Session;
 4 import org.hibernate.SessionFactory;
 5 import org.hibernate.Transaction;
 6 import org.hibernate.cfg.AnnotationConfiguration;
 7 import org.hibernate.cfg.Configuration;
 8
 9 import com.qcf.pox.Course;
10 import com.qcf.pox.Student2;
11
12 public class TestManyToMany {
13     public static void main(String[] args) {
14         Configuration configuration=new AnnotationConfiguration().configure();
15         SessionFactory factory=configuration.buildSessionFactory();
16         Session session=factory.openSession();
17         Transaction transaction=session.beginTransaction();
18
19         //创建两个课程
20         Course course=new Course();
21         course.setName("java");
22         Course course2=new Course();
23         course2.setName("C#");
24
25         //创建两个学生
26         Student2 student=new Student2();
27         student.setName("zhangsan");
28         Student2 student2=new Student2();
29         student2.setName("lisi");
30
31         student.addCourses(course);
32         student.addCourses(course2);
33
34         student2.addCourses(course);
35         student2.addCourses(course2);
36
37         session.save(student);
38         session.save(student2);
39
40         transaction.commit();
41         session.close();
42
43     }
44
45 }
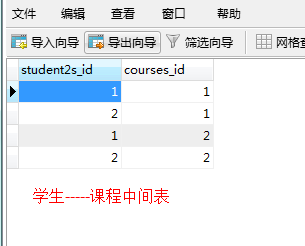
执行成功后的结果: