一、搭建spring boot环境
maven工程
pom文件内容
|
<project xmlns="http://maven.apache.org/POM/4.0.0" xmlns:xsi="http://www.w3.org/2001/XMLSchema-instance" xsi:schemaLocation="http://maven.apache.org/POM/4.0.0 http://maven.apache.org/xsd/maven-4.0.0.xsd">
<modelVersion>4.0.0</modelVersion>
<groupId>com.qm.demo</groupId>
<artifactId>springbootDemo</artifactId>
<version>0.0.1-SNAPSHOT</version>
<parent>
<groupId>org.springframework.boot</groupId>
<artifactId>spring-boot-starter-parent</artifactId>
<version>1.4.2.RELEASE</version>
</parent>
<dependencies>
<dependency>
<groupId>org.springframework.boot</groupId>
<artifactId>spring-boot-starter-web</artifactId>
</dependency>
<dependency>
<groupId>org.springframework.boot</groupId>
<artifactId>spring-boot-starter-data-jpa</artifactId>
</dependency>
<dependency>
<groupId>junit</groupId>
<artifactId>junit</artifactId>
</dependency>
<dependency>
<groupId>MySQL</groupId>
<artifactId>mysql-connector-Java</artifactId>
<version>5.0.8</version>
</dependency>
<dependency>
<groupId>com.alibaba</groupId>
<artifactId>druid</artifactId>
<version>1.0.9</version>
</dependency>
<dependency>
<groupId>org.antlr</groupId>
<artifactId>antlr4-runtime</artifactId>
<version>4.1</version>
</dependency>
<dependency>
<groupId>org.springframework.boot</groupId>
<artifactId>spring-boot-devtools</artifactId>
<optional>true</optional><!-- optional=true,依赖不会传递,该项目依赖devtools;之后依赖myboot项目的项目如果想要使用devtools,需要重新引入 -->
</dependency>
<dependency>
<groupId>org.springframework.boot</groupId>
<artifactId>spring-boot-starter-tomcat</artifactId>
<scope>provided</scope>
</dependency>
</dependencies>
<!-- <build>
<plugins>
java编译插件
<plugin>
<groupId>org.apache.maven.plugins</groupId>
<artifactId>maven-compiler-plugin</artifactId>
<version>3.2</version>
<configuration>
<source>1.7</source>
<target>1.7</target>
<encoding>UTF-8</encoding>
</configuration>
</plugin>
<plugin>
<groupId>org.apache.tomcat.maven</groupId>
<artifactId>tomcat7-maven-plugin</artifactId>
<configuration>
<port>8080</port>
<path>/</path>
<url>http://192.168.25.135:8080/manager/text</url>
用户名
<username>tomcat</username>
密码
<password>tomcat</password>
</configuration>
</plugin>
</plugins>
</build>
-->
</project>
|
项目目录结构
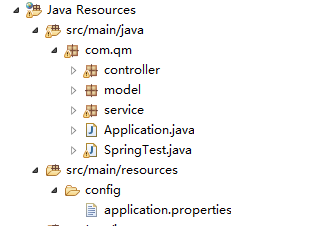
其中springTest类是spring boot内部tomcat启动时要运行的类
其中内容如下
package com.qm;
import org.springframework.boot.SpringApplication;
import org.springframework.boot.autoconfigure.EnableAutoConfiguration;
import org.springframework.boot.autoconfigure.SpringBootApplication;
import org.springframework.boot.web.servlet.ServletComponentScan;
import org.springframework.data.jpa.repository.config.EnableJpaRepositories;
import com.qm.controller.UserController;
@SpringBootApplication
public class SpringTest {
public static void main(String[] args) {
SpringApplication.run(SpringTest.class, args);
}
} |
Application类的作用是外部服务器启动spring boot所要做的一些事。内容如下
|
package com.qm;
import org.springframework.boot.SpringApplication;
import org.springframework.boot.autoconfigure.SpringBootApplication;
import org.springframework.boot.builder.SpringApplicationBuilder;
import org.springframework.boot.web.support.SpringBootServletInitializer;
import org.springframework.context.annotation.ComponentScan;
@SpringBootApplication
@ComponentScan
public class Application extends SpringBootServletInitializer{
/**
* 实现SpringBootServletInitializer可以让spring-boot项目在web容器中运行
*/
@Override
protected SpringApplicationBuilder configure(SpringApplicationBuilder builder) {
builder.sources(this.getClass());
return super.configure(builder);
}
public static void main(String[] args) {
SpringApplication.run(Application.class, args);
}
}
|
application.properties文件内容如下
|
server.port=8080
spring.datasource.url=jdbc:mysql://localhost:3309/springbootdemo
spring.datasource.driver-class-name=com.mysql.jdbc.Driver
spring.datasource.username=root
spring.datasource.password=123456
spring.jpa.show-sql=true
spring.jpa.hibernate.ddl-auto=update
spring.devtools.livereload.enabled=true
//热部署,需要提供的路径
spring.devtools.restart.additional-paths=src\main\java\com\qm
spring.thymeleaf.cache=false
|
踩过的坑
坑一,
一开始以为文件目录,可以随便放,经过坑一的教训,才知道代码文件存放有一定的顺序
如上项目结构图,其中springtest类和application类一定要放在最外面的包里,如com.qm 当启动spring boot时,它会去加载com.qm包及其子包下的所有类,
当你不按顺序时,且代码中有@Autowired注解注入bean时,会报以下错误
Description:
Field userService in com.qm.controller.UserController required a bean of type 'com.qm.service.UserService' that could not be found.
Action:
Consider defining a bean of type 'com.qm.service.UserService' in your configuration.
,即bean找不到。,这是应该注意代码顺序。
坑二
补齐坑一后,在service层的接口继承jpa,然后在controller层使用注入的service方法会报以下错误
Error creating bean with name 'dataController': Unsatisfied dependency expressed through field 'personRepository'; nested exception is org.springframework.beans.factory.BeanCreationException: Error creating bean with name 'personRepository': Invocation of init method failed; nested exception is org.springframework.data.mapping.PropertyReferenceException: No property auto found for type Person!
这是因为hibernate版本的问题,
只要加上
<dependency>
<groupId>org.antlr</groupId>
<artifactId>antlr4-runtime</artifactId>
<version>4.1</version>
这个依赖即可
添加之后,若maven仓库中有该jar包,最好删掉,编译时重新下载
若spring boot正常启动,而地址栏访问不到controller,则此时应该注意,spring boot启动时,未扫描到controller类,
在spring boot入口类上再添加一个注解
@ComponentScan("要扫描的包名")
以上就是我在学spring boot时遇到过得一些坑。