在训练机器学习或深度学习模型时,我们通常需要输入充足的数据量.若数据量比较小,可以对原有的图像数据进行几何变换,改变图像像素的位置并保证特征不变。上面列出的参考资料中已经列出了很多数据增强的方法,这里主要对图像旋转进行介绍。
首先介绍图像旋转及opencv中的函数:getRotationMartrix2D及warpAffine函数,其中getRotationMartrix2D用于获取旋转矩阵,warpAffine用于旋转。其中warpAffine函数中的仿射变换矩阵除了getRotationMartrix2D外,还可以通过getAffineform获得:warp_mat = getAffineform(srcTri, dstTri),dstTri为旋转后的图像坐标,坐标应该与原图像的坐标顺序相对应。左下角为起点,按照顺时针旋转。
- 旋转一幅图像需要三个参数:1.旋转图像所要围绕的中心;2.旋转角度(opencv中正角度是逆时针的);3.可选择:缩放因子
 1  Mat ImageRotate(Mat src, const Point  _center, double angle)
 2  {
 3       Point2f center;
 4       center.x = float(_center.x);
 5       center.y = float(_center.y);
 6
 7       //计算二维旋转的仿射变换矩阵
 8       Mat rot_mat = getRotationMatrix2D(center, angle, 1);
 9
10      // rotate
11      Mat dst;
12      warpAffine(src, dst, rot_mat, Size(src.cols, src.rows), CV_INTER_LINEAR);
13      return dst;
14  }
- 假设已经有一个原图像中的特征点的坐标 Point2f point; 那么计算这个point的对应的仿射变换之后在新的图像中的坐标位置,使用的方法如下函数:
 1 Point getPointAffinedPos(const Point  src, const Point center, double angle)
 2 {
 3     Point dst;
 4     int x = src.x - center.x;
 5     int y = src.y - center.y;
 6
 7     dst.x = cvRound(x * cos(angle) + y * sin(angle) + center.x);
 8     dst.y = cvRound(-x * sin(angle) + y * cos(angle) + center.y);
 9     return dst;
10 }
要特别注意的是,在对一个原图像中的像素的坐标进行计算仿射变换之后的坐标的时候,一定要按照仿射变换的基本原理,将原来的坐标减去仿射变换的旋转中心的坐标,这样仿射变换之后得到的坐标再加上仿射变换旋转中心坐标才是原坐标在新的仿射变换之后的图像中的正确坐标。
 1     Point Leye;
 2     Leye.x = 265;
 3     Leye.y = 265;
 4     CvPoint Reye;
 5     Reye.x = 328;
 6     Reye.y = 265;
 7
 8     // draw pupil
 9     src.at<unsigned char>(Leye.y, Leye.x) = 255;
10     src.at<unsigned char>(Reye.y, Reye.x) = 255;
11
12     imshow("src", src);
13
14     //
15     Point center;
16     center.x = img.cols / 2;
17     center.y = img.rows / 2;
18   //L表示long double,主要用于在某些支持扩展精度的机器上扩展精度
19     double angle = 15L;
20
21     Mat dst = ImageRotate(img, center, angle);
22
23     // 计算原特征点在旋转后图像中的对应的坐标
24     Point l2 = getPointAffinedPos(Leye, center, angle * CV_PI / 180);
25     Point r2 = getPointAffinedPos(Reye, center, angle * CV_PI / 180);
26
27     // draw pupil
28     dst.at<unsigned char>(l2.y, l2.x) = 255;
29     dst.at<unsigned char>(r2.y, r2.x) = 255;
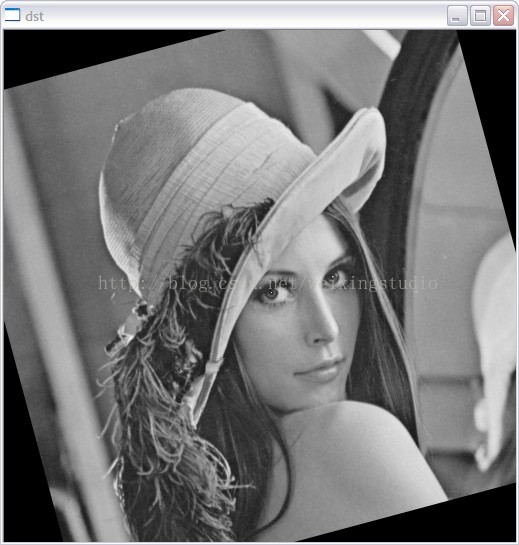
上述代码是先对一幅图片标注两个点,然后对图像进行旋转,并找到旋转后标注点的对应坐标。

如果是扩充GT,可以通过少量标注的GT进行图像的旋转来获取更多的数据,这里涉及到的样本是将GT中的目标抠出来,然后多次旋转图像,再抠取目标,达到扩充GT的目的。博主这里的标注是目标四个角的坐标,先将目标用boundingRect框出,再将矩形扩展为正方形,最后提取对应目标。
- boundingRect边界约束条件
 1 void optimize(Rect& src_temp, Mat src, int& flag)
 2 {
 3     if (src_temp.height >= src_temp.width)
 4     {
 5         float delta = src_temp.height - src_temp.width;
 6         src_temp.x = src_temp.x - delta / 2.0;
 7         src_temp.width = src_temp.height;
 8     }
 9     else
10     {
11         float delta = src_temp.width - src_temp.height;
12         src_temp.y = src_temp.y - delta / 2.0;
13         src_temp.height = src_temp.width;
14     }
15     if (src_temp.x >= 0 && src_temp.y >= 0 && src_temp.x + src_temp.width <= src.cols &&
16         src_temp.y + src_temp.height <= src.rows)
17         flag = 1;
18     else
19         flag = 0;
20 }
- 利用标注的四个点的坐标,抠取图像中的目标
 1 for (int j = 0; j < objectGT.size(); j++)
 2 {
 3     vector<Point2f>contours;
 4     Point2f p[4];
 5     p[0].x = objectGT[j].x0;
 6     p[0].y = objectGT[j].y0;
 7     contours.push_back(p[0]);
 8
 9     p[1].x = objectGT[j].x1 ;
10     p[1].y = objectGT[j].y1 ;
11     contours.push_back(p[1]);
12
13     p[2].x = objectGT[j].x2 ;
14     p[2].y = objectGT[j].y2 ;
15     contours.push_back(p[2]);
16
17     p[3].x = objectGT[j].x3 ;
18     p[3].y = objectGT[j].y3 ;
19     contours.push_back(p[3]);
20     Rect src_temp = boundingRect(contours);
21     int flag = 0;
22     optimize(src_temp, src, flag);
23     Mat src_out;
24     if (flag == 1)
25         src_out = src(src_temp);
26     if (flag == 0)
27         continue;
28 }
- 旋转图像,获取标注点的对应坐标,再进行目标提取
 1  p[0] = getPointAffinedPos(p[0], center, angle * CV_PI / 180);
 2  contours.push_back(p[0]);
 3  p[1] = getPointAffinedPos(p[1], center, angle * CV_PI / 180);
 4  contours.push_back(p[1]);
 5  p[2] = getPointAffinedPos(p[2], center, angle * CV_PI / 180);
 6  contours.push_back(p[2]);
 7  p[3] = getPointAffinedPos(p[3], center, angle * CV_PI / 180);
 8  contours.push_back(p[3]);10   //-------------------
11  Rect src_temp = boundingRect(contours);
12  int flag = 0;
13  optimize(src_temp, src, flag);
14  Mat src_out;
15  if (flag == 1)
16      src_out = src(src_temp);
17  if (flag == 0)
18      continue;