一、说明
1.1 微信发文字、图片、文件一共有五步:
1.锁定对象;
2.将对象复制剪切板;
3.找到微信句柄;
4.复制到微信;
5.点击发送。
1.2 微信句柄说明
需要把指定的人(群)拉出来,形成一个单独的窗口。

1.3 通用代码
import win32gui, win32api, win32con


def get_handle(to_weixin):
    hw = win32gui.FindWindow(None, to_weixin)                # 获取窗口句柄
    win32gui.GetClassName(hw)                                # 获取窗口classname
    win32gui.GetWindowText(hw)                               # 获取窗口标题
    win32gui.GetDlgCtrlID(hw)
    win32gui.SetForegroundWindow(hw)
    print('获取句柄')


def ctrlV():
    win32api.keybd_event(17, 0, 0, 0)                         # ctrl键位码是17
    win32api.keybd_event(86, 0, 0, 0)                         # v键位码是86
    win32api.keybd_event(86, 0, win32con.KEYEVENTF_KEYUP, 0)  # 释放按键
    win32api.keybd_event(17, 0, win32con.KEYEVENTF_KEYUP, 0)
    print("执行粘贴")


def altS():
    win32api.keybd_event(18, 0, 0, 0)                         # Alt
    win32api.keybd_event(83, 0, 0, 0)                         # s
    win32api.keybd_event(83, 0, win32con.KEYEVENTF_KEYUP, 0)  # 释放按键
    win32api.keybd_event(18, 0, win32con.KEYEVENTF_KEYUP, 0)
    print("执行发送")
二、微信发送文字
2.1 代码展示
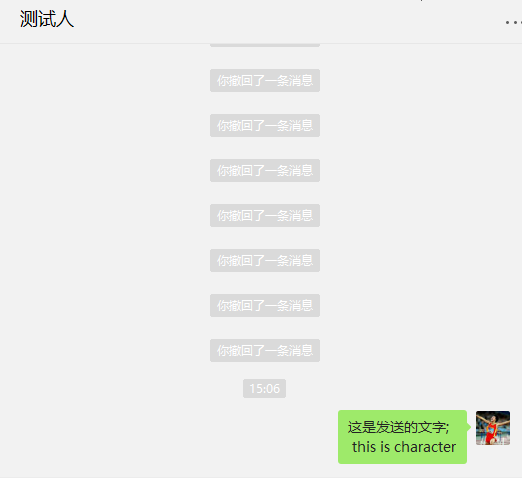
import win32gui, win32api, win32con
import pyperclip


def get_handle(to_weixin):
    hw = win32gui.FindWindow(None, to_weixin)                # 获取窗口句柄
    win32gui.GetClassName(hw)                                # 获取窗口classname
    win32gui.GetWindowText(hw)                               # 获取窗口标题
    win32gui.GetDlgCtrlID(hw)
    win32gui.SetForegroundWindow(hw)
    print('获取句柄')


def ctrlV():
    win32api.keybd_event(17, 0, 0, 0)                         # ctrl键位码是17
    win32api.keybd_event(86, 0, 0, 0)                         # v键位码是86
    win32api.keybd_event(86, 0, win32con.KEYEVENTF_KEYUP, 0)  # 释放按键
    win32api.keybd_event(17, 0, win32con.KEYEVENTF_KEYUP, 0)
    print("执行粘贴")


def altS():
    win32api.keybd_event(18, 0, 0, 0)                         # Alt
    win32api.keybd_event(83, 0, 0, 0)                         # s
    win32api.keybd_event(83, 0, win32con.KEYEVENTF_KEYUP, 0)  # 释放按键
    win32api.keybd_event(18, 0, win32con.KEYEVENTF_KEYUP, 0)
    print("执行发送")


sent_text = '这是发送的文字;
 this is character'
pyperclip.copy(sent_text)

if __name__ == '__main__':
    get_handle(to_weixin= '测试人')
    ctrlV()
    altS()
2.2 效果展示
三、发送图片
3.1 说明
有两种情况
- 截图之后直接发送
- 读取图片然后发送
3.2 截图之后直接发送
3.2.1 截取excel中的区域,然后发送。
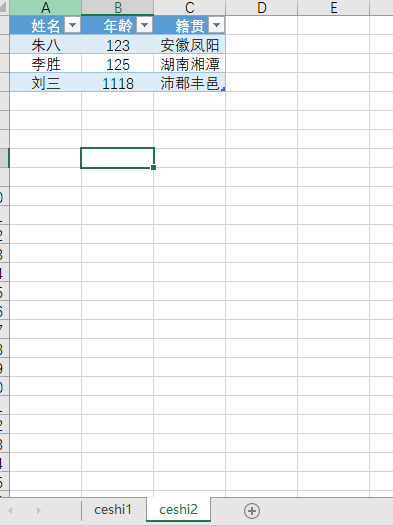
3.2.1.1 excel展示
excel文件路径:E:测试ceshi.xlsx
内容展示:

3.2.1.2 代码展示
使用xlwings来进行截图操作
import win32gui, win32api, win32con
from time import sleep
from PIL import ImageGrab
import xlwings
import pyperclip


def get_handle(to_weixin):
    hw = win32gui.FindWindow(None, to_weixin)                # 获取窗口句柄
    win32gui.GetClassName(hw)                                # 获取窗口classname
    win32gui.GetWindowText(hw)                               # 获取窗口标题
    win32gui.GetDlgCtrlID(hw)
    win32gui.SetForegroundWindow(hw)
    print('获取句柄')


def ctrlV():
    win32api.keybd_event(17, 0, 0, 0)                         # ctrl键位码是17
    win32api.keybd_event(86, 0, 0, 0)                         # v键位码是86
    win32api.keybd_event(86, 0, win32con.KEYEVENTF_KEYUP, 0)  # 释放按键
    win32api.keybd_event(17, 0, win32con.KEYEVENTF_KEYUP, 0)
    print("执行粘贴")


def altS():
    win32api.keybd_event(18, 0, 0, 0)                         # Alt
    win32api.keybd_event(83, 0, 0, 0)                         # s
    win32api.keybd_event(83, 0, win32con.KEYEVENTF_KEYUP, 0)  # 释放按键
    win32api.keybd_event(18, 0, win32con.KEYEVENTF_KEYUP, 0)
    print("执行发送")


def excel_pictures(to_weixin, path_file, pictures_range_list, sheet_list):
    app = xlwings.App(visible=True, add_book=False)
    wb = app.books.open(path_file)
    sleep(1)
    try:
            for i in range(0, len(pictures_range_list)):
                    sheet_name = sheet_list[i]
                    sheet = wb.sheets[sheet_name]
                    range_ = sheet[pictures_range_list[i]]
                    range_.api.CopyPicture()
                    wb.sheets.add('picture')
                    sheet_picture = wb.sheets['picture']
                    sheet_picture.api.Paste()
                    sleep(1)
                    pic = sheet_picture.pictures[0]
                    pic.api.Copy()
                    sleep(1)
                    img = ImageGrab.grabclipboard()
                    sleep(1)
                    get_handle(to_weixin)
                    ctrlV()
                    altS()
                    pic.delete()
                    wb.sheets['picture'].delete()
                    print('#粘贴 成功:%s' % sheet_name)
    except:
        pass
    wb.close()
    app.quit()


def set_text(text):
    pyperclip.copy(text)
    ctrlV()
    altS()


if __name__ == '__main__':
    get_handle(to_weixin='测试人')
    text = '下面是发送从excel中截取图片的测试'
    set_text(text)
    path_file = r'E:测试ceshi.xlsx'
    sheet_list = ['ceshi1', 'ceshi1', 'ceshi2']         # 图片所在的sheet名称。
    pictures_range_list = ['A1:C4', 'G10:I13', 'A1:C4'] # 图片所在的s区域范围。sheet_list必须与pictures_range_list一一对应
    excel_pictures(to_weixin='测试人', path_file=path_file, sheet_list=sheet_list, pictures_range_list=pictures_range_list)
使用win32com来进行截图操作
import win32gui, win32api, win32con
from time import sleep
from win32com.client import Dispatch
import pyperclip
import os


def get_handle(to_weixin):
    hw = win32gui.FindWindow(None, to_weixin)                # 获取窗口句柄
    win32gui.GetClassName(hw)                                # 获取窗口classname
    win32gui.GetWindowText(hw)                               # 获取窗口标题
    win32gui.GetDlgCtrlID(hw)
    win32gui.SetForegroundWindow(hw)
    print('获取句柄')


def ctrlV():
    win32api.keybd_event(17, 0, 0, 0)                         # ctrl键位码是17
    win32api.keybd_event(86, 0, 0, 0)                         # v键位码是86
    win32api.keybd_event(86, 0, win32con.KEYEVENTF_KEYUP, 0)  # 释放按键
    win32api.keybd_event(17, 0, win32con.KEYEVENTF_KEYUP, 0)
    print("执行粘贴")


def altS():
    win32api.keybd_event(18, 0, 0, 0)                         # Alt
    win32api.keybd_event(83, 0, 0, 0)                         # s
    win32api.keybd_event(83, 0, win32con.KEYEVENTF_KEYUP, 0)  # 释放按键
    win32api.keybd_event(18, 0, win32con.KEYEVENTF_KEYUP, 0)
    print("执行发送")


def excel_pictures(to_weixin, path_file, pictures_range_list, sheet_list):
    os.system('taskkill /IM EXCEL.exe /F')    # 杀死正在执行的excel程序,慎用,可不用
    xlapp = Dispatch('Excel.Application')
    wb = xlapp.Workbooks.Open(path_file)
    xlapp.Visible = 1
    xlapp.DisplayAlerts = False  # 必须写
    sleep(1)
    try:
            for i in range(0, len(pictures_range_list)):
                    sheet_name = sheet_list[i]
                    sheet = wb.Worksheets(sheet_name)
                    range_pic = pictures_range_list[i]
                    sheet.Range(range_pic).CopyPicture()
                    wb.Worksheets.Add().Name = 'picture'
                    sheet_picture = wb.Worksheets('picture')
                    sheet_picture.Range('A1').Select()
                    sheet_picture.Paste()
                    sleep(1)
                    xlapp.Selection.ShapeRange.Name = 'pic_name'
                    sheet_picture.Shapes('pic_name').Copy()
                    sleep(1)
                    # img = ImageGrab.grabclipboard()
                    sleep(1)
                    get_handle(to_weixin)
                    ctrlV()
                    sleep(2)
                    altS()
                    wb.Worksheets('picture').Delete()
                    print('#粘贴 成功:%s', sheet_name)
    except:
        pass
    wb.Close(1)


def set_text(text):
    pyperclip.copy(text)
    ctrlV()
    altS()


if __name__ == '__main__':
    get_handle(to_weixin='测试人')
    text = '下面是发送从excel中截取图片的测试'
    set_text(text)
    path_file = r'E:测试ceshi.xlsx'
    sheet_list = ['ceshi1', 'ceshi1', 'ceshi2']         # 图片所在的sheet名称。
    pictures_range_list = ['A1:C4', 'G10:I13', 'A1:C4'] # 图片所在的s区域范围。sheet_list必须与pictures_range_list一一对应
    excel_pictures(to_weixin='测试人', path_file=path_file, sheet_list=sheet_list, pictures_range_list=pictures_range_list)
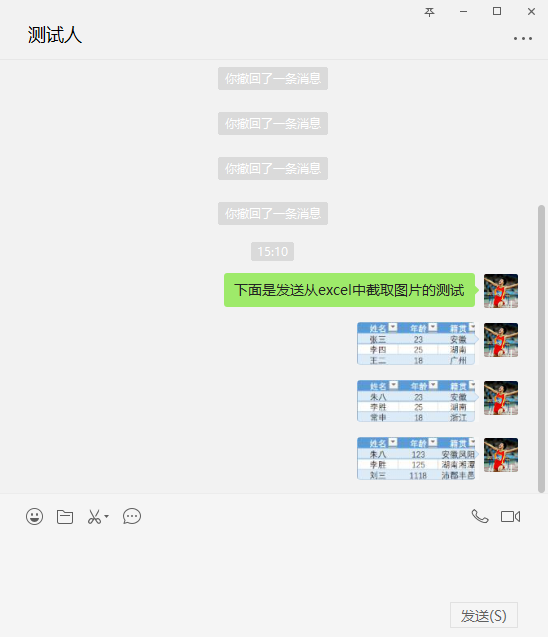
3.2.1.3 效果展示
3.2.1.3 补充说明:
excel如果连接了数据库,是可以自动刷新的。
区域也是可以变化的。
要发送的文字是可以在excel中写好后发送的。
3.3 读取图片并发送(注意不是文件)
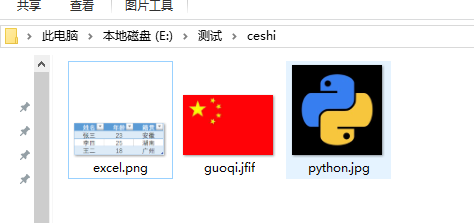
3.3.1 图片展示
3.3.2代码展示
from PIL import Image
from io import BytesIO
from time import sleep
import win32clipboard as clip
import win32gui, win32api, win32con
import os
import pyperclip


def get_handle(to_weixin):
    hw = win32gui.FindWindow(None, to_weixin)  # 获取窗口句柄
    win32gui.GetClassName(hw)  # 获取窗口classname
    win32gui.GetWindowText(hw)  # 获取窗口标题
    win32gui.GetDlgCtrlID(hw)
    win32gui.SetForegroundWindow(hw)
    print('获取句柄')


def ctrlV():
    win32api.keybd_event(17, 0, 0, 0)  # ctrl键位码是17
    win32api.keybd_event(86, 0, 0, 0)  # v键位码是86
    win32api.keybd_event(86, 0, win32con.KEYEVENTF_KEYUP, 0)  # 释放按键
    win32api.keybd_event(17, 0, win32con.KEYEVENTF_KEYUP, 0)
    print("执行粘贴")


def altS():
    win32api.keybd_event(18, 0, 0, 0)  # Alt
    win32api.keybd_event(83, 0, 0, 0)  # s
    win32api.keybd_event(83, 0, win32con.KEYEVENTF_KEYUP, 0)  # 释放按键
    win32api.keybd_event(18, 0, win32con.KEYEVENTF_KEYUP, 0)
    print("执行发送")


def read_picture(path):
    picture_list = os.listdir(path)
    for picture in picture_list:
        path_file = path + "\" + picture
        img = Image.open(path_file)
        output = BytesIO()  # BytesIO实现了在内存中读写bytes
        img.convert("RGB").save(output, "BMP")  # 以RGB模式保存图像
        data = output.getvalue()[14:]
        output.close()
        clip.OpenClipboard()  # 打开剪贴板
        clip.EmptyClipboard()  # 先清空剪贴板
        clip.SetClipboardData(win32con.CF_DIB, data)  # 将图片放入剪贴板
        clip.CloseClipboard()
        ctrlV()
        altS()
        sleep(1)


def set_text(text):
    pyperclip.copy(text)
    ctrlV()
    altS()


if __name__ == '__main__':
    get_handle(to_weixin='测试人')
    text = '下面是发送从文件中读取图片的测试'
    set_text(text)
    path = r'E:测试ceshi'
    read_picture(path=path)
3.3.3 效果展示

四、 发送文件
4.1 说明
4.1.1 发送文件用的方法和前面有点不一样,前面都是指定内容,区域,名称来做的。必要容易控制。
而发送文件是通过指定位置来操作的。
4.1.2 利用PyQt5来给文件建立URL,来操作。参考https://www.cnblogs.com/gujianjian/p/12697716.html
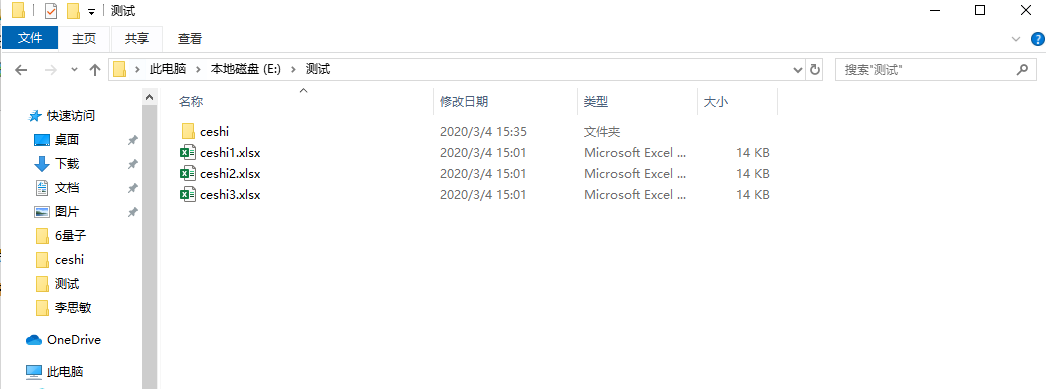
4.2 文件展示
4.2.1 说明
排列顺序按照名称来排列,这样顺序不容易改变。不要轻易往里面放文件
把“ceshi2”以文件的形式发送给指定的人(群)
4.3 代码展示
import  os
from time import sleep
import win32gui, win32api, win32con,win32ui
import pyperclip


def get_handle(to_weixin):
    hw = win32gui.FindWindow(None, to_weixin)                # 获取窗口句柄
    win32gui.GetClassName(hw)                                # 获取窗口classname
    win32gui.GetWindowText(hw)                               # 获取窗口标题
    win32gui.GetDlgCtrlID(hw)
    win32gui.SetForegroundWindow(hw)
    print('获取句柄')


def ctrlV():
    win32api.keybd_event(17, 0, 0, 0)                         # ctrl键位码是17
    win32api.keybd_event(86, 0, 0, 0)                         # v键位码是86
    win32api.keybd_event(86, 0, win32con.KEYEVENTF_KEYUP, 0)  # 释放按键
    win32api.keybd_event(17, 0, win32con.KEYEVENTF_KEYUP, 0)
    print("执行粘贴")


def altS():
    win32api.keybd_event(18, 0, 0, 0)                         # Alt
    win32api.keybd_event(83, 0, 0, 0)                         # s
    win32api.keybd_event(83, 0, win32con.KEYEVENTF_KEYUP, 0)  # 释放按键
    win32api.keybd_event(18, 0, win32con.KEYEVENTF_KEYUP, 0)
    print("执行发送")


def file_copy(path):
    os.system("explorer.exe /n, {}".format(path))
    sleep(10)                                                  # 必须沉睡一段时间,把窗口打开
    win32api.keybd_event(40, 0, 0, 0)                          # 按下向下的按键
    win32api.keybd_event(40, 0, win32con.KEYEVENTF_KEYUP, 0)   # 松开向下的按键
    win32api.keybd_event(40, 0, 0, 0)
    win32api.keybd_event(40, 0, win32con.KEYEVENTF_KEYUP, 0)
    win32api.keybd_event(17, 0, 0, 0)  # ctrl按下
    win32api.keybd_event(67, 0, 0, 0)  # c按下
    win32api.keybd_event(67, 0, win32con.KEYEVENTF_KEYUP, 0)
    win32api.keybd_event(17, 0, win32con.KEYEVENTF_KEYUP, 0)


def set_text(text):
    get_handle(to_weixin='测试人')
    pyperclip.copy(text)
    ctrlV()
    altS()


if __name__ == '__main__':
    text = '下面是发送文件的测试'
    set_text(text)
    path = r'E:测试'
    file_copy(path)
    sleep(5)                             #必须沉睡一会
    get_handle(to_weixin = '测试人')
    ctrlV()
    altS()
4.4 效果展示

4.5 利用PyQt5,建议大家使用这种方法,参考:https://www.cnblogs.com/gujianjian/p/12697716.html
from PyQt5 import QtCore, QtWidgets
import win32gui, win32api, win32con
import time


# 调用win32api的模拟点击功能实现ctrl+v粘贴快捷键
def ctrlV():
    win32api.keybd_event(17, 0, 0, 0)  # ctrl键位码是17
    win32api.keybd_event(86, 0, 0, 0)  # v键位码是86
    win32api.keybd_event(86, 0, win32con.KEYEVENTF_KEYUP, 0)  # 释放按键
    win32api.keybd_event(17, 0, win32con.KEYEVENTF_KEYUP, 0)


# 调用win32api的模拟点击功能实现alt+s微信发送快捷键 (可以根据自己微信发送快捷键是什么来进行调整)
def altS():
    win32api.keybd_event(18, 0, 0, 0)  # Alt
    win32api.keybd_event(83, 0, 0, 0)  # s
    win32api.keybd_event(83, 0, win32con.KEYEVENTF_KEYUP, 0)  # 释放按键
    win32api.keybd_event(18, 0, win32con.KEYEVENTF_KEYUP, 0)


# 调用win32gui调用桌面窗口,获取指定窗口句柄id,激活窗口  ,向函数传递窗口名称to_weixin
def wx_send(to_weixin):
    hw = win32gui.FindWindow(None, to_weixin)  # 获取窗口句柄
    win32gui.GetClassName(hw)  # 获取窗口classname
    title = win32gui.GetWindowText(hw)  # 获取窗口标题
    win32gui.GetDlgCtrlID(hw)
    win32gui.SetForegroundWindow(hw)  # 激活窗口


if __name__ == '__main__':
    app = QtWidgets.QApplication([])
    data = QtCore.QMimeData()
    url = QtCore.QUrl.fromLocalFile(r'E:测试ceshi2.xlsx')
    data.setUrls([url])
    app.clipboard().setMimeData(data)
    clipboard = QtWidgets.QApplication.clipboard()
    time.sleep(2)
    wx_send('测试人')
    ctrlV()
    altS()