第一步:创建服务注册中心
(1)新建名为cloud-eureka-server7001的module
(2)编写POM
<?xml version="1.0" encoding="UTF-8"?>
<project xmlns="http://maven.apache.org/POM/4.0.0"
         xmlns:xsi="http://www.w3.org/2001/XMLSchema-instance"
         xsi:schemaLocation="http://maven.apache.org/POM/4.0.0 http://maven.apache.org/xsd/maven-4.0.0.xsd">
    <parent>
        <artifactId>cloud2020</artifactId>
        <groupId>com.seegot.springcloud</groupId>
        <version>1.0-SNAPSHOT</version>
    </parent>
    <modelVersion>4.0.0</modelVersion>

    <artifactId>cloud-eureka-server7001</artifactId>

    <dependencies>
        <!--eureka-server-->
        <dependency>
            <groupId>org.springframework.cloud</groupId>
            <artifactId>spring-cloud-starter-netflix-eureka-server</artifactId>
        </dependency>
        <dependency>
            <groupId>org.springframework.boot</groupId>
            <artifactId>spring-boot-starter-web</artifactId>
        </dependency>
        <dependency>
            <groupId>org.springframework.boot</groupId>
            <artifactId>spring-boot-starter-actuator</artifactId>
        </dependency>
        <!--引入热部署-->
        <dependency>
            <groupId>org.springframework.boot</groupId>
            <artifactId>spring-boot-devtools</artifactId>
            <scope>runtime</scope>
            <optional>true</optional>
        </dependency>
        <dependency>
            <groupId>org.projectlombok</groupId>
            <artifactId>lombok</artifactId>
            <version>1.18.12</version>
        </dependency>
        <dependency>
            <groupId>org.springframework.boot</groupId>
            <artifactId>spring-boot-starter-test</artifactId>
            <scope>test</scope>
        </dependency>
    </dependencies>

</project>
(2)新增application.yml
server:
  port: 7001

# eureka配置
eureka:
  instance:
    hostname: eureka7001.com #eureka服务端的实例名称
  client:
    # false表示不想注册中心注册自己
    register-with-eureka: false
    # false表示自己端就是注册中心,我的职责就是维护服务实例,并不需要检索服务
    fetch-registry: false
    service-url:
      # 设置Eureka Server交互的地址查询服务和注册服务都需要依赖这个地址
      #defaultZone: http://eureka7002.com:7002/eureka/
      # 单机就是7001自己守望自己
      defaultZone: http://eureka7001.com:7001/eureka/
(3)在主入口开启注册中心
package com.seegot.springcloud;

import org.springframework.boot.SpringApplication;
import org.springframework.boot.autoconfigure.SpringBootApplication;
import org.springframework.cloud.netflix.eureka.server.EnableEurekaServer;

/**
 * @program: cloud2020
 * @description:
 * @author: PP Zhang
 * @create: 2020-06-09 22:15
 */
@SpringBootApplication
@EnableEurekaServer // 表示自己就是注册中心
public class EurekaMain7001 {
    public static void main(String[] args) {
        SpringApplication.run(EurekaMain7001.class,args);
    }
}
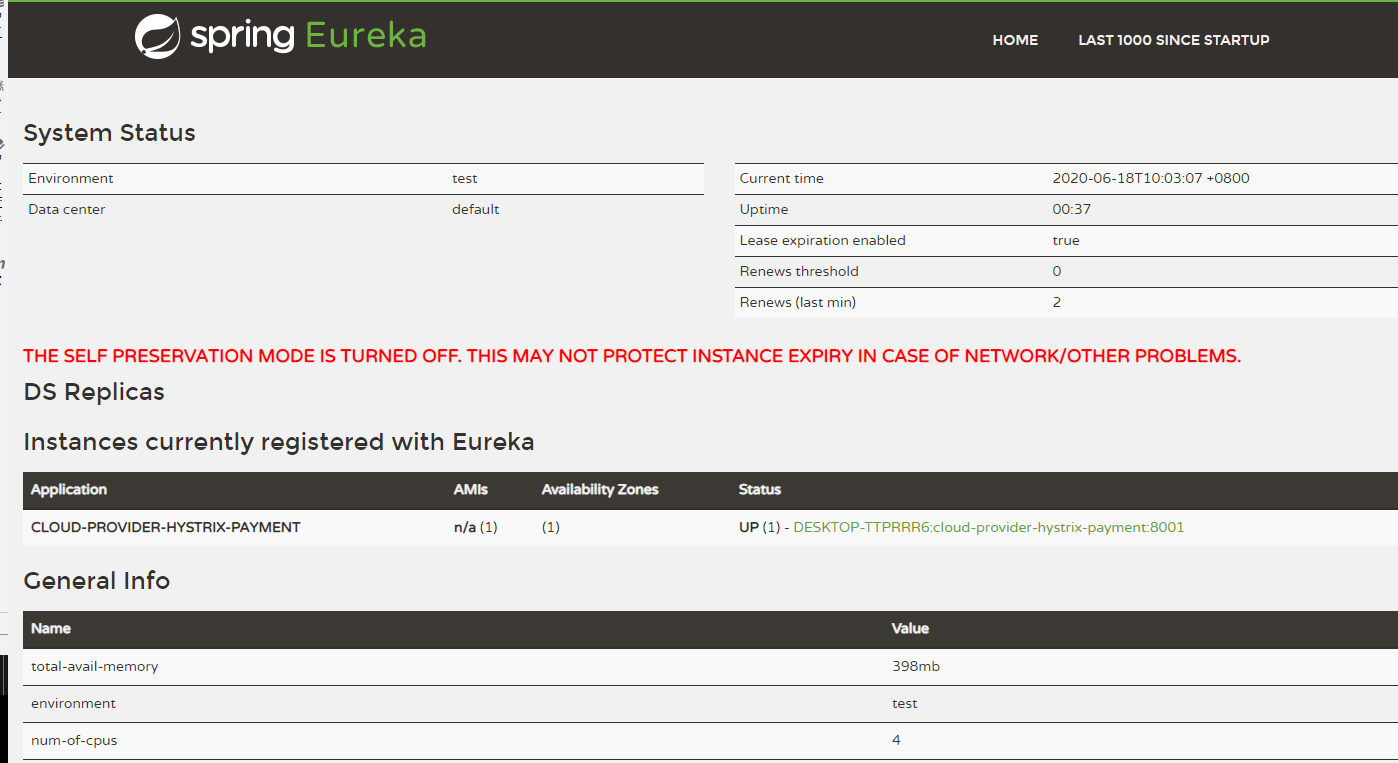
(4)测试
http://eureka7001.com:7001/ 能访问到eureka界面就算成功了
第二步:创建服务生产者
(1)创建名为cloud-provider-hystrix-payment8001的module
(2)编写POM文件
<?xml version="1.0" encoding="UTF-8"?>
<project xmlns="http://maven.apache.org/POM/4.0.0"
         xmlns:xsi="http://www.w3.org/2001/XMLSchema-instance"
         xsi:schemaLocation="http://maven.apache.org/POM/4.0.0 http://maven.apache.org/xsd/maven-4.0.0.xsd">
    <parent>
        <artifactId>cloud2020</artifactId>
        <groupId>com.seegot.springcloud</groupId>
        <version>1.0-SNAPSHOT</version>
    </parent>
    <modelVersion>4.0.0</modelVersion>

    <artifactId>cloud-provider-hystrix-payment8001</artifactId>


    <dependencies>
        <!--注入hystrix依赖-->
        <dependency>
            <groupId>org.springframework.cloud</groupId>
            <artifactId>spring-cloud-starter-netflix-hystrix</artifactId>
        </dependency>
        <!--web-->
        <dependency>
            <groupId>org.springframework.boot</groupId>
            <artifactId>spring-boot-starter-web</artifactId>
        </dependency>
        <!--健康检查、设计、统计-->
        <dependency>
            <groupId>org.springframework.boot</groupId>
            <artifactId>spring-boot-starter-actuator</artifactId>
        </dependency>
        <!--引入热部署-->
        <dependency>
            <groupId>org.springframework.boot</groupId>
            <artifactId>spring-boot-devtools</artifactId>
            <scope>runtime</scope>
            <optional>true</optional>
        </dependency>
        <!--免写get set等-->
        <dependency>
            <groupId>org.projectlombok</groupId>
            <artifactId>lombok</artifactId>
            <version>1.18.12</version>
        </dependency>
        <!--测试-->
        <dependency>
            <groupId>org.springframework.boot</groupId>
            <artifactId>spring-boot-starter-test</artifactId>
            <scope>test</scope>
        </dependency>
        <!--注入eureka client 依赖-->
        <dependency>
            <groupId>org.springframework.cloud</groupId>
            <artifactId>spring-cloud-starter-netflix-eureka-client</artifactId>
        </dependency>
    </dependencies>

</project>
(3)创建application.yml
server:
  port: 8001
spring:
  application:
    name: cloud-provider-hystrix-payment
eureka:
  client:
    register-with-eureka: true
    fetch-registry: true
    service-url:
      # defaultZone: http://eureka7001.com:7001/eureka,http://eureka7002.com:7002/eureka # 如果用集群,开启它
      defaultZone: http://eureka7001.com:7001/eureka # 单机
(4)修改主入口程序
package com.seegot.springcloud;

        import com.netflix.hystrix.contrib.metrics.eventstream.HystrixMetricsStreamServlet;
        import org.springframework.boot.SpringApplication;
        import org.springframework.boot.autoconfigure.SpringBootApplication;
        import org.springframework.boot.web.servlet.ServletRegistrationBean;
        import org.springframework.cloud.client.circuitbreaker.EnableCircuitBreaker;
        import org.springframework.cloud.netflix.eureka.EnableEurekaClient;
        import org.springframework.context.annotation.Bean;

/**
 * @program: cloud2020
 * @description:
 * @author: PP Zhang
 * @create: 2020-06-15 15:29
 */
@SpringBootApplication
@EnableEurekaClient
@EnableCircuitBreaker
public class PaymentHystrixMain8001 {
    public static void main(String[] args) {
        SpringApplication.run(PaymentHystrixMain8001.class,args);
    }

    /**
     * 此配置是为了服务监控而配置的,与服务容错本身无关,springcloud升级后的坑
     * ServletRegistrationBean因为springboot的默认路径不是“/hystrix.stream”
     * 只要在自己的项目里配置上 下面的servlet就可以了
     * */
    @Bean
    public ServletRegistrationBean getServlet(){
        HystrixMetricsStreamServlet streamServlet = new HystrixMetricsStreamServlet();
        ServletRegistrationBean registrationBean = new ServletRegistrationBean(streamServlet);
        registrationBean.setLoadOnStartup(1);
        registrationBean.addUrlMappings("/hystrix.stream");
        registrationBean.setName("HystrixMetricsStreamServlet");
        return registrationBean;
    }

}
(5)新建业务类
package com.seegot.springcloud.service;

import org.springframework.web.bind.annotation.PathVariable;

/**
 * @program: cloud2020
 * @description:
 * @author: PP Zhang
 * @create: 2020-06-15 15:30
 */
public interface PaymentService {
    public String paymentInfo_OK(Integer id);
    public String paymentInfo_TimeOut(Integer id);
    public String paymentCircuitBreaker(Integer id);
}
package com.seegot.springcloud.service.impl;

import cn.hutool.core.util.IdUtil;
import com.seegot.springcloud.service.PaymentService;
import com.netflix.hystrix.contrib.javanica.annotation.HystrixCommand;
import com.netflix.hystrix.contrib.javanica.annotation.HystrixProperty;
import org.springframework.stereotype.Service;
import org.springframework.web.bind.annotation.PathVariable;

import java.util.UUID;
import java.util.concurrent.TimeUnit;

/**
 * @program: cloud2020
 * @description:
 * @author: PP Zhang
 * @create: 2020-06-15 15:31
 */
@Service
public class PaymentServiceImpl implements PaymentService {

    // ==== 服务降级
    /**
    * @Description: 正常访问
    * @Param:
    * @return:
    * @Author: PP Zhang
    * @Date: 2020/6/15
    */
    @Override
    public String paymentInfo_OK(Integer id) {
        return "线程池" + Thread.currentThread().getName() + "paymentInfo_OK,id "+"	"+"!!!!";
    }
    // 一旦服务调用方法失败并抛出异常错误信息后,会自动调用@HystrixCommand标注好的fallbackMethod调用类中指定的方法
    @HystrixCommand(fallbackMethod = "paymentInfo_TimeOutHandler",commandProperties = {
            @HystrixProperty(name = "execution.isolation.thread.timeoutInMilliseconds",value = "5000") // 当前方法5秒以内走正常业务逻辑,超时进行兜底
    }) // 意思当前方法出问题(访问超时等),那么由paymentInfo_TimeOutHandler方法进行兜底处理。
    @Override
    public String paymentInfo_TimeOut(Integer id) {
        // int a = 10/0;
        int timeNum = 3;
        try {
            TimeUnit.SECONDS.sleep(timeNum);
        }catch (InterruptedException e){
            e.printStackTrace();
        }
        return "线程池" + Thread.currentThread().getName() + "paymentInfo_TimeOut,id "+"	"+"!!!! 耗时"+timeNum+"秒钟";
    }
    public String paymentInfo_TimeOutHandler(Integer id){
        return "线程池" + Thread.currentThread().getName() + "paymentInfo_TimeOutHandler,id "+"	"+id+"!~~~~(>_<)~~~~";
    }


    // ====服务熔断 HystrixCommandProperties通过它可以获取下面参数内容。
    @HystrixCommand(fallbackMethod = "paymentCircuitBreaker_fallback",commandProperties = {
            @HystrixProperty(name = "circuitBreaker.enabled",value = "true"),// 是否开启断路器
            @HystrixProperty(name = "circuitBreaker.requestVolumeThreshold", value="10"),// 请求次数
            @HystrixProperty(name = "circuitBreaker.sleepWindowInMilliseconds", value="10000"), // 时间范围
            @HystrixProperty(name = "circuitBreaker.errorThresholdPercentage", value="60"), // 失败率达到多少后跳闸
    })
    @Override
    public String paymentCircuitBreaker(Integer id){
        if (id < 0){
            // 故意抛异常,走paymentCircuitBreaker_fallback方法
            throw new RuntimeException("******id 不能为负数");
        }
        String serialNum = IdUtil.simpleUUID();
        return Thread.currentThread().getName() + "	" + "调用成功,流水号:"+ serialNum;
    }
    public String paymentCircuitBreaker_fallback(@PathVariable("id") Integer id){
        return "id不能为负数,请稍后再试~~~~(>_<)~~~~   id:"+ id;
    }

}
package com.seegot.springcloud.controller;

import com.seegot.springcloud.service.PaymentService;
import lombok.extern.slf4j.Slf4j;
import org.springframework.beans.factory.annotation.Value;
import org.springframework.web.bind.annotation.GetMapping;
import org.springframework.web.bind.annotation.PathVariable;
import org.springframework.web.bind.annotation.RestController;

import javax.annotation.Resource;

/**
 * @program: cloud2020
 * @description:
 * @author: PP Zhang
 * @create: 2020-06-15 15:47
 */
@RestController
@Slf4j
public class PaymentController {
    @Resource
    private PaymentService paymentService;
    @Value("${server.port}")
    private String serverPort;
    /**
    * @Description: 模拟正常的业务流程
    * @Param:
    * @return:
    * @Author: PP Zhang
    * @Date: 2020/6/15
    */
    @GetMapping(value = "/payment/hystrix/ok/{id}")
    public String paymentInfo_OK(@PathVariable("id") Integer id) {
        String result = paymentService.paymentInfo_OK(id);
        log.info("****result"+ result);
        return  result;
    }
    /**
    * @Description: 模拟复杂的业务流程
    * @Param:
    * @return:
    * @Author: PP Zhang
    * @Date: 2020/6/15
    */
    @GetMapping(value = "/payment/hystrix/timeout/{id}")
    public String paymentInfo_TimeOut(@PathVariable("id") Integer id) {
        String result = paymentService.paymentInfo_TimeOut(id);
        log.info("****result"+ result);
        return  result;
    }

    // ==== 服务熔断
    @GetMapping(value = "/payment/ciruit/{id}")
    public String paymentCircuitBreaker(@PathVariable("id") Integer id){
        String result = paymentService.paymentCircuitBreaker(id);
        log.info("--------result" + result);
        return  result;
    }
}
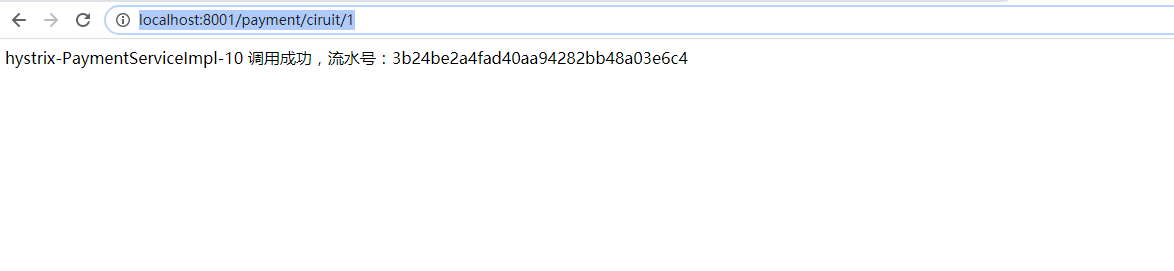
(6)测试
http://localhost:8001/payment/ciruit/1
http://localhost:8001/payment/ciruit/-1
类似如下界面,则成功
第三步:搭建hystrix dashboard
(1)新建名为cloud-consumer-hystrix-dashboard9001的module
(2)编写pom文件
<?xml version="1.0" encoding="UTF-8"?>
<project xmlns="http://maven.apache.org/POM/4.0.0"
         xmlns:xsi="http://www.w3.org/2001/XMLSchema-instance"
         xsi:schemaLocation="http://maven.apache.org/POM/4.0.0 http://maven.apache.org/xsd/maven-4.0.0.xsd">
    <parent>
        <artifactId>cloud2020</artifactId>
        <groupId>com.seegot.springcloud</groupId>
        <version>1.0-SNAPSHOT</version>
    </parent>
    <modelVersion>4.0.0</modelVersion>

    <artifactId>cloud-consumer-hystrix-dashboard9001</artifactId>

    <dependencies>
        <!--图形化-->
        <dependency>
            <groupId>org.springframework.cloud</groupId>
            <artifactId>spring-cloud-starter-netflix-hystrix-dashboard</artifactId>
        </dependency>
        <dependency>
            <groupId>org.springframework.boot</groupId>
            <artifactId>spring-boot-starter-web</artifactId>
        </dependency>
        <dependency>
            <groupId>org.springframework.boot</groupId>
            <artifactId>spring-boot-starter-actuator</artifactId>
        </dependency>
        <dependency>
            <groupId>org.springframework.cloud</groupId>
            <artifactId>spring-cloud-starter-netflix-hystrix</artifactId>
        </dependency>
        <!--引入热部署-->
        <dependency>
            <groupId>org.springframework.boot</groupId>
            <artifactId>spring-boot-devtools</artifactId>
            <scope>runtime</scope>
            <optional>true</optional>
        </dependency>
        <dependency>
            <groupId>org.springframework.boot</groupId>
            <artifactId>spring-boot-starter-test</artifactId>
            <scope>test</scope>
        </dependency>
    </dependencies>

</project>
(3)创建application.yml
server:
  port: 9001
(4)修改主入口程序
package com.atguigu.springcloud;

import org.springframework.boot.SpringApplication;
import org.springframework.boot.autoconfigure.SpringBootApplication;
import org.springframework.cloud.netflix.hystrix.dashboard.EnableHystrixDashboard;

/**
 * @program: cloud2020
 * @description:
 * @author: PP Zhang
 * @create: 2020-06-17 22:22
 */
@SpringBootApplication
@EnableHystrixDashboard // 开启仪表盘
public class HystrixDashboardMain9001 {
    public static void main(String[] args) {
        SpringApplication.run(HystrixDashboardMain9001.class,args);
    }
}
(5)测试
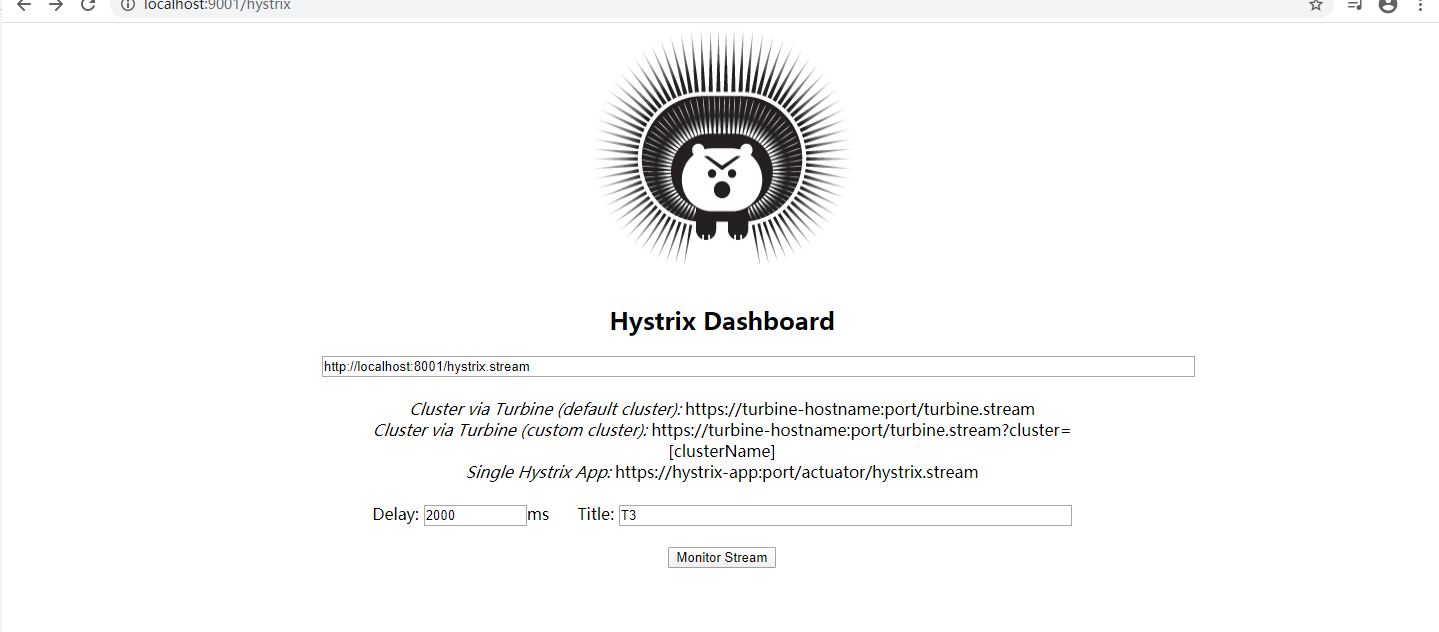
重复访问http://localhost:8001/payment/ciruit/1 多刷些数据,然后在上面这个界面中填写http://localhost:8001/hystrix.stream 并且设置Delay为2000,title可设置也可不设置。点击按钮进入图形界面。
问题:
我这里有报错,我排查了好几处地方,也没找到,代码是没有问题的,个人猜测应该是Hystrix问题,以为一直在报JS错误,报错如下:
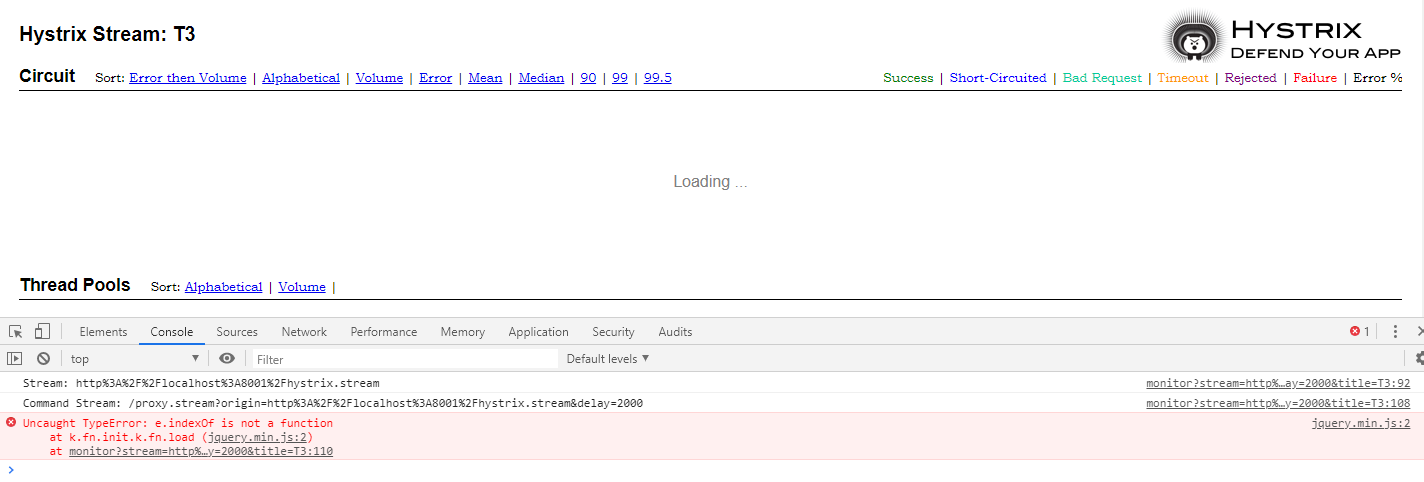
我访问http://localhost:8001/hystrix.stream 是可以看到下图数据:

如果有幸有兄弟们看到这个问题,并且能帮助解决,请留言告知。谢谢。