概述
HTML是英文Hyper Text Mark-up Language(超文本标记语言)的缩写,他是一种制作万维网页面标准语言(标记)。相当于定义统一的一套规则,大家都来遵守他,这样就可以让浏览器根据标记语言的规则去解释它。
浏览器负责将标签翻译成用户“看得懂”的格式,呈现给用户!
如下图:

HTML页面主体格式如下:
 1 <!DOCTYPE html>
 2 <html lang="en">
 3 <head>
 4     <meta charset="UTF-8">
 5     <title>Title</title>
 6    ......
 7 </head>
 8 <body>
 9 .......
10 </body>
11 </html>
下面我们一一来看一下每一个的含义:
<!DOCTYPE html>:
Doctype告诉浏览器使用什么样的html或xhtml规范来解析html文档,建议填写,否则可能会出现位置错误
有和无的区别
- BackCompat:标准兼容模式未开启(或叫怪异模式[Quirks mode]、混杂模式)
- CSS1Compat:标准兼容模式已开启(或叫严格模式[Standards mode/Strict mode])
这个属性会被浏览器识别并使用,但是如果你的页面没有DOCTYPE的声明,那么compatMode默认就是BackCompat,这也就是恶魔的开始 -- 浏览器按照自己的方式解析渲染页面,那么,在不同的浏览器就会显示不同的样式。如果你的页面添加了那么,那么就等同于开启了标准模式,那么浏览器就得老老实实的按照W3C的标准解析渲染页面,这样一来,你的页面在所有的浏览器里显示的就都是一个样子了。
有,用什么?
Doctype告诉浏览器使用什么样的html或xhtml规范来解析html文档, dtd文件则包含了标记、attributes 、properties、约束规则。
Meta(metadata information)
提供有关页面的元信息,例:页面编码、刷新、跳转、针对搜索引擎和更新频度的描述和关键词
- 页面编码(告诉浏览器是什么编码)
< meta http-equiv=“content-type” content=“text/html;charset=utf-8”>
<meta charset="UTF-8">
- 刷新和跳转
< meta http-equiv=“Refresh” Content=“30″>
< meta http-equiv=”Refresh“ Content=”5; Url=http://www.autohome.com.cn“ />
- 关键词
< meta name="keywords" content="星际2,星际老男孩,专访,F91,小色,JOY" >
- 描述
例如:cnblogs
- X-UA-Compatible
微软的IE6是通过XP、Win2003等操作系统发布出来,作为占统治地位的桌面操作系统,也使得IE占据了通知地位,许多的网站开发的时候,就按照IE6的标准去开发,而IE6自身的标准也是微软公司内部定义的。到了IE7出来的时候,采用了微软公司内部标准以及部分W3C的标准,这个时候许多网站升级到IE7的时候,就比较痛苦,很多代码必须调整后,才能够正常的运行。而到了微软的IE8这个版本,基本上把微软内部自己定义的标准抛弃了,而全面的支持W3C的标准,由于基于对标准彻底的变化了,使得原先在早期IE8版本上能够访问的网站,在IE8中无法正常的访问,会出现一些排版错乱、文字重叠,显示不全等各种兼容性错误。
与任何早期浏览器版本相比,Internet Explorer 8 对行业标准提供了更加紧密的支持。 因此,针对旧版本的浏览器设计的站点可能不会按预期显示。 为了帮助减轻任何问题,Internet Explorer 8 引入了文档兼容性的概念,从而允许您指定站点所支持的 Internet Explorer 版本。 文档兼容性在 Internet Explorer 8 中添加了新的模式;这些模式将告诉浏览器如何解释和呈现网站。 如果您的站点在 Internet Explorer 8 中无法正确显示,则可以更新该站点以支持最新的 Web 标准(首选方式),也可以强制 Internet Explorer 8 按照在旧版本的浏览器中查看站点的方式来显示内容。 通过使用 meta 元素将 X-UA-Compatible 标头添加到网页中,可以实现这一点。
当 Internet Explorer 8 遇到未包含 X-UA-Compatible 标头的网页时,它将使用 指令来确定如何显示该网页。 如果该指令丢失或未指定基于标准的文档类型,则 Internet Explorer 8 将以 IE5 模式(Quirks 模式)显示该网页。更多
<meta http-equiv="X-UA-Compatible" content="IE=EmulateIE7" /><meta http-equiv="X-UA-Compatible" content="IE=edge" />
Title
网页头部信息
Link
- css
< link rel="stylesheet" type="text/css" href="css/common.css" >
- icon
< link rel="shortcut icon" href="image/favicon.ico">
Style
在页面中写样式
例如:
< style type="text/css" >  #定义CSS样式 .bb
.bb{
      background-color: red;  #定义背景颜色为红色
   }
< /style>
Script
- 引进文件
-
< script type="text/javascript" src="http://www.googletagservices.com/tag/js/gpt.js"> </script >
- 写js代码
-
< script type="text/javascript" > ... </script >
常用标签及标签效果
标签一般分为两种:块级标签 和 行内标签
- a、span、select 等
- div、h1、p 等
各种符号
http://www.cnblogs.com/web-d/archive/2010/04/16/1713298.htmlp 和 br
p表示段落,默认段落之间是有间隔的!
br 是换行
a标签
< a href="http://www.autohome.com.cn"> </a>
1、target属性,_black表示在新的页面打开
2、锚
H 标签
H1
H2
H3
H4
H5
H6
select 标签
Checkbox
redio

password

button
file

提交文件时: enctype='multipart/form-data' method='POST'
textarea

label

ul ol dl
ul
- ul.li
- ul.li
- ul.li
ol
- ol.li
- ol.li
- ol.li
dl
- 河北省
- 邯郸
- 石家庄
- 山西省
- 太原
- 平遥
table

fieldset
form 表单

文件:enctype='multipart/form-data' method='POST'
CSS及样式效果
css是英文Cascading Style Sheets的缩写,称为层叠样式表,用于对页面进行美化。
存在方式有三种:元素内联、页面嵌入和外部引入,比较三种方式的优缺点。
语法:style = 'key1:value1;key2:value2;'
- 在标签中使用 style='xx:xxx;'
- 在页面中嵌入 < style type="text/css"> </style > 块
- 引入外部css文件
必要性:美工会对页面的色彩搭配和图片的美化负责,开发人员则必须知道是如何实现的。
标签选择器
div{ background-color:red; }
<div > </div>
class选择器
.bd{ background-color:red; }
<div class='bd'> </div>
id选择器
#idselect{ background-color:red; }
<div id='idselect' > </div>
关联选择器
#idselect p{ background-color:red; }
<div id='idselect' > <p> </p> </div>
组合选择器
input,div,p{ background-color:red; }
属性选择器
input[type='text']{ width:100px; height:200px; }
background
border

margin

padding

display
display:none
display:block

display:inline

cursor

- css提供的cursor值
pointer || help || wait || move || crosshair
- 伪造超链接
pointer
- 自定义(一般不用)
mine
浮动

position
http://www.cnblogs.com/canuseethat/archive/2010/09/16/1827804.html透明度


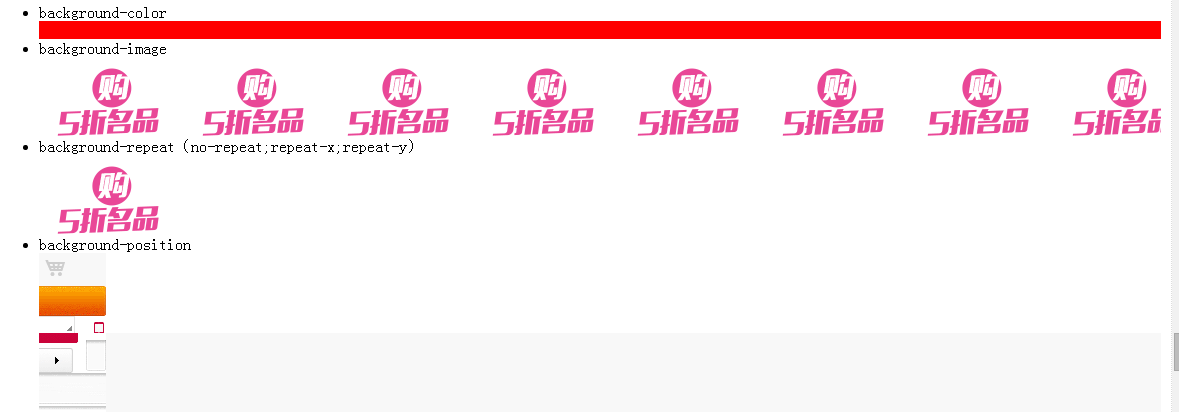
CSS 背景实例:
 1 <html>
 2 <head>
 3
 4 <style type="text/css">
 5
 6 body {background-color: yellow}
 7 h1 {background-color: #00ff00}
 8 h2 {background-color: transparent}
 9 p {background-color: rgb(250,0,255)}
10
11 p.no2 {background-color: gray; padding: 20px;}
12
13 </style>
14
15 </head>
16
17 <body>
18
19 <h1>这是标题 1</h1>
20 <h2>这是标题 2</h2>
21 <p>这是段落</p>
22 <p class="no2">这个段落设置了内边距。</p>
23
24 </body>
25 </html>
查看结果:

 1 <html>
 2 <head>
 3 <style type="text/css">
 4 span.highlight
 5 {
 6 background-color:yellow
 7 }
 8 </style>
 9 </head>
10
11 <body>
12 <p>
13 <span class="highlight">这是文本。</span>
   <span class="highlight">这是文本。</span>
14 </p>
15 </body>
16 </html>
结果:

1 <html>
2 <head>
3 <style type="text/css">
4 body {background-image:url(/i/eg_bg_04.gif);}
5 </style>
6 </head>
7 <body></body>
8 </html>
结果:

CSS 文本实例:
 1 <html>
 2 <head>
 3 <style type="text/css">
 4 body {color:red}
 5 h1 {color:#00ff00}
 6 p.ex {color:rgb(0,0,255)}
 7 </style>
 8 </head>
 9
10 <body>
11 <h1>这是 heading 1</h1>
12 <p>这是一段普通的段落。请注意,该段落的文本是红色的。在 body 选择器中定义了本页面中的默认文本颜色。</p>
13 <p class="ex">该段落定义了 class="ex"。该段落中的文本是蓝色的。</p>
14 </body>
15 </html>
结果:

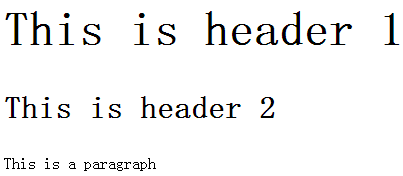
CSS 字体(font)实例:
设置文本的字体大小
 1 <html>
 2 <head>
 3 <style type="text/css">
 4 h1 {font-size: 300%}
 5 h2 {font-size: 200%}
 6 p {font-size: 100%}
 7 </style>
 8 </head>
 9
10 <body>
11 <h1>This is header 1</h1>
12 <h2>This is header 2</h2>
13 <p>This is a paragraph</p>
14 </body>
15
16 </html>
结果:

 1 <html>
 2 <head>
 3 <style type="text/css">
 4 h1 {font-size: 300%}
 5 h2 {font-size: 200%}
 6 p {font-size: 100%}
 7 </style>
 8 </head>
 9
10 <body>
11 <h1>This is header 1</h1>
12 <h2>This is header 2</h2>
13 <p>This is a paragraph</p>
14 </body>
15
16 </html>
结果:
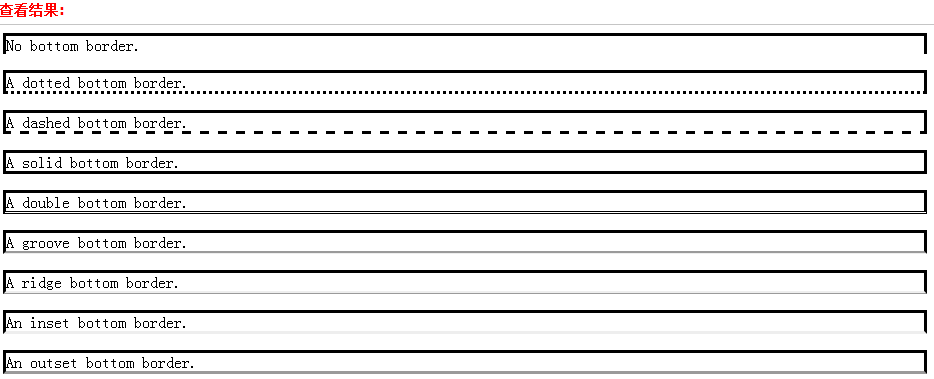
CSS 边框(border)实例:
 1 <html>
 2 <head>
 3 <style type="text/css">
 4 p.dotted {border-style: dotted}
 5 p.dashed {border-style: dashed}
 6 p.solid {border-style: solid}
 7 p.double {border-style: double}
 8 p.groove {border-style: groove}
 9 p.ridge {border-style: ridge}
10 p.inset {border-style: inset}
11 p.outset {border-style: outset}
12 </style>
13 </head>
14
15 <body>
16 <p class="dotted">A dotted border</p>
17
18 <p class="dashed">A dashed border</p>
19
20 <p class="solid">A solid border</p>
21
22 <p class="double">A double border</p>
23
24 <p class="groove">A groove border</p>
25
26 <p class="ridge">A ridge border</p>
27
28 <p class="inset">An inset border</p>
29
30 <p class="outset">An outset border</p>
31 </body>
32
33 </html>
结果:

 1 <html>
 2 <head>
 3 <style type="text/css">
 4 p.soliddouble {border-style: solid double}
 5 p.doublesolid {border-style: double solid}
 6 p.groovedouble {border-style: groove double}
 7 p.three {border-style: solid double groove}
 8 </style>
 9 </head>
10
11 <body>
12 <p class="soliddouble">Some text</p>
13
14 <p class="doublesolid">Some text</p>
15
16 <p class="groovedouble">Some text</p>
17
18 <p class="three">Some text</p>
19 </body>
20
21 </html>

 1 <html>
 2 <head>
 3
 4 <style type="text/css">
 5 p.one
 6 {
 7 border-style: solid;
 8 border-color: #0000ff
 9 }
10 p.two
11 {
12 border-style: solid;
13 border-color: #ff0000 #0000ff
14 }
15 p.three
16 {
17 border-style: solid;
18 border-color: #ff0000 #00ff00 #0000ff
19 }
20 p.four
21 {
22 border-style: solid;
23 border-color: #ff0000 #00ff00 #0000ff rgb(250,0,255)
24 }
25 </style>
26
27 </head>
28
29 <body>

 1 <html>
 2 <head>
 3 <style type="text/css">
 4 p
 5 {
 6 border-style:solid;
 7 border-bottom-color:#ff0000; #设置底部边框的颜色
 8 }
 9 </style>
10 </head>
11
12 <body>
13 <p>This is some text in a paragraph.</p>
14 </body>
15
16 </html>

 1 <html>
 2 <head>
 3 <style type="text/css">
 4 p {border-style:solid}
 5 p.none {border-bottom-style:none}
 6 p.dotted {border-bottom-style:dotted}
 7 p.dashed {border-bottom-style:dashed}
 8 p.solid {border-bottom-style:solid}
 9 p.double {border-bottom-style:double}
10 p.groove {border-bottom-style:groove}
11 p.ridge {border-bottom-style:ridge}
12 p.inset {border-bottom-style:inset}
13 p.outset {border-bottom-style:outset}
14 </style>
15 </head>
16
17 <body>
18 <p class="none">No bottom border.</p>
19 <p class="dotted">A dotted bottom border.</p>
20 <p class="dashed">A dashed bottom border.</p>
21 <p class="solid">A solid bottom border.</p>
22 <p class="double">A double bottom border.</p>
23 <p class="groove">A groove bottom border.</p>
24 <p class="ridge">A ridge bottom border.</p>
25 <p class="inset">An inset bottom border.</p>
26 <p class="outset">An outset bottom border.</p>
27 </body>
28 </html>
 1 <html>
 2 <head>
 3 <style type="text/css">
 4 p.one
 5 {
 6 border-style: solid;
 7 border-bottom-width: 15px
 8 }
 9 p.two
10 {
11 border-style: solid;
12 border-bottom-width: thin
13 }
14 </style>
15 </head>
16 <body>
17
18 <p class="one"><b>注释:</b>"border-bottom-width" 属性如果单独使用的话是不会起作用的。请首先使用 "border-style" 属性来设置边框。</p>
19 <p class="two">Some text. Some more text.</p>
20
21 </body>
22 </html>

左、右和上类似,不在一一赘述。
CSS 外边距 (margin) 实例:
 1 <html>
 2 <head>
 3 <style type="text/css">
 4 p.leftmargin {margin-left: 2cm}
 5 </style>
 6 </head>
 7
 8 <body>
 9 <p>这个段落没有指定外边距。</p>
10 <p class="leftmargin">这个段落带有指定的左外边距。</p>
11 </body>
12
13 </html>

 1 <html>
 2 <head>
 3 <style type="text/css">
 4 p.rightmargin {margin-right: 8cm}
 5 </style>
 6 </head>
 7
 8 <body>
 9 <p>这个段落没有指定外边距。</p>
10 <p class="rightmargin">这个段落带有指定的右外边距。这个段落带有指定的右外边距。这个段落带有指定的右外边距。</p>
11 </body>
12
13 </html>

 1 <html>
 2 <head>
 3 <style type="text/css">
 4 p.topmargin {margin-top: 5cm}
 5 </style>
 6 </head>
 7
 8 <body>
 9 <p>这个段落没有指定外边距。</p>
10 <p class="topmargin">这个段落带有指定的上外边距。</p>
11 </body>
12 </html>

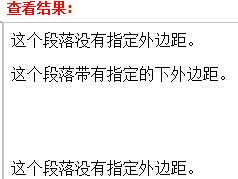
 1 <html>
 2 <head>
 3 <style type="text/css">
 4 p.bottommargin {margin-bottom: 2cm}
 5 </style>
 6 </head>
 7
 8 <body>
 9 <p>这个段落没有指定外边距。</p>
10 <p class="bottommargin">这个段落带有指定的下外边距。</p>
11 <p>这个段落没有指定外边距。</p>
12 </body>
13
14 </html>
 1 <html>
 2 <head>
 3 <style type="text/css">
 4 p.margin {margin: 2cm 4cm 3cm 4cm}
 5 </style>
 6 </head>
 7
 8 <body>
 9
10 <p>这个段落没有指定外边距。</p>
11
12 <p class="margin">这个段落带有指定的外边距。这个段落带有指定的外边距。这个段落带有指定的外边距。这个段落带有指定的外边距。这个段落带有指定的外边距。</p>
13
14 <p>这个段落没有指定外边距。</p>
15
16 </body>
17
18 </html>

CSS 内边距 (padding) 实例:
 1 <html>
 2 <head>
 3 <style type="text/css">
 4 td {padding-bottom: 2cm}
 5 </style>
 6 </head>
 7
 8 <body>
 9 <table border="1">
10 <tr>
11 <td>
12 这个表格单元拥有下内边距。
13 </td>
14 </tr>
15 </table>
16 </body>
17
18 </html>

 1 <html>
 2 <head>
 3 <style type="text/css">
 4 td {padding-top: 2cm}
 5 </style>
 6 </head>
 7
 8 <body>
 9 <table border="1">
10 <tr>
11 <td>
12 这个表格单元拥有上内边距。
13 </td>
14 </tr>
15 </table>
16 </body>
17
18 </html>

 1 <html>
 2 <head>
 3 <style type="text/css">
 4 td {padding-left: 2cm}
 5 </style>
 6 </head>
 7
 8 <body>
 9 <table border="1">
10 <tr>
11 <td>
12 这个表格单元拥有左内边距。
13 </td>
14 </tr>
15 </table>
16 </body>
17
18 </html>

 1 <html>
 2 <head>
 3 <style type="text/css">
 4 td {padding-right: 5cm}
 5 </style>
 6 </head>
 7
 8 <body>
 9 <table border="1">
10 <tr>
11 <td>
12 这个表格单元拥有右内边距。
13 </td>
14 </tr>
15 </table>
16 </body>
17
18 </html>

CSS 列表实例:
 1 <html>
 2 <head>
 3 <style type="text/css">
 4 ul.disc {list-style-type: disc}
 5 ul.circle {list-style-type: circle}
 6 ul.square {list-style-type: square}
 7 ul.none {list-style-type: none}
 8 </style>
 9 </head>
10
11 <body>
12 <ul class="disc">
13 <li>咖啡</li>
14 <li>茶</li>
15 <li>可口可乐</li>
16 </ul>
17
18 <ul class="circle">
19 <li>咖啡</li>
20 <li>茶</li>
21 <li>可口可乐</li>
22 </ul>
23
24 <ul class="square">
25 <li>咖啡</li>
26 <li>茶</li>
27 <li>可口可乐</li>
28 </ul>
29
30 <ul class="none">
31 <li>咖啡</li>
32 <li>茶</li>
33 <li>可口可乐</li>
34 </ul>
35 </body>
36
37 </html>

 1 <html>
 2 <head>
 3 <style type="text/css">
 4 ol.decimal {list-style-type: decimal}
 5 ol.lroman {list-style-type: lower-roman}
 6 ol.uroman {list-style-type: upper-roman}
 7 ol.lalpha {list-style-type: lower-alpha}
 8 ol.ualpha {list-style-type: upper-alpha}
 9 </style>
10 </head>
11
12 <body>
13 <ol class="decimal">
14 <li>咖啡</li>
15 <li>茶</li>
16 <li>可口可乐</li>
17 </ol>
18
19 <ol class="lroman">
20 <li>咖啡</li>
21 <li>茶</li>
22 <li>可口可乐</li>
23 </ol>
24
25 <ol class="uroman">
26 <li>咖啡</li>
27 <li>茶</li>
28 <li>可口可乐</li>
29 </ol>

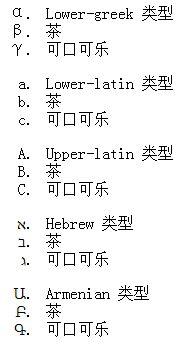
 1 <html>
 2 <head>
 3 <style type="text/css">
 4 ul.none {list-style-type: none}
 5 ul.disc {list-style-type: disc}
 6 ul.circle {list-style-type: circle}
 7 ul.square {list-style-type: square}
 8 ul.decimal {list-style-type: decimal}
 9 ul.decimal-leading-zero {list-style-type: decimal-leading-zero}
10 ul.lower-roman {list-style-type: lower-roman}
11 ul.upper-roman {list-style-type: upper-roman}
12 ul.lower-alpha {list-style-type: lower-alpha}
13 ul.upper-alpha {list-style-type: upper-alpha}
14 ul.lower-greek {list-style-type: lower-greek}
15 ul.lower-latin {list-style-type: lower-latin}
16 ul.upper-latin {list-style-type: upper-latin}
17 ul.hebrew {list-style-type: hebrew}
18 ul.armenian {list-style-type: armenian}
19 ul.georgian {list-style-type: georgian}
20 ul.cjk-ideographic {list-style-type: cjk-ideographic}
21 ul.hiragana {list-style-type: hiragana}
22 ul.katakana {list-style-type: katakana}
23 ul.hiragana-iroha {list-style-type: hiragana-iroha}
24 ul.katakana-iroha {list-style-type: katakana-iroha}
25 </style>
26 </head>
27
28 <body>
29 <ul class="none">
30 <li>"none" 类型</li>
31 <li>茶</li>
32 <li>可口可乐</li>
33 </ul>
34
35 <ul class="disc">
36 <li>Disc 类型</li>
37 <li>茶</li>
38 <li>可口可乐</li>
39 </ul>
40
41 <ul class="circle">
42 <li>Circle 类型</li>
43 <li>茶</li>
44 <li>可口可乐</li>
45 </ul>
46
47 <ul class="square">
48 <li>Square 类型</li>
49 <li>茶</li>
50 <li>可口可乐</li>
51 </ul>
52
53 <ul class="decimal">
54 <li>Decimal 类型</li>
55 <li>茶</li>
56 <li>可口可乐</li>
57 </ul>
58
59 <ul class="decimal-leading-zero">
60 <li>Decimal-leading-zero 类型</li>
61 <li>茶</li>
62 <li>可口可乐</li>
63 </ul>
64
65 <ul class="lower-roman">
66 <li>Lower-roman 类型</li>
67 <li>茶</li>
68 <li>可口可乐</li>
69 </ul>
70
71 <ul class="upper-roman">
72 <li>Upper-roman 类型</li>
73 <li>茶</li>
74 <li>可口可乐</li>
75 </ul>
76
77 <ul class="lower-alpha">
78 <li>Lower-alpha 类型</li>
79 <li>茶</li>
80 <li>可口可乐</li>
81 </ul>
82
83 <ul class="upper-alpha">
84 <li>Upper-alpha 类型</li>
85 <li>茶</li>
86 <li>可口可乐</li>
87 </ul>
88
89 <ul class="lower-greek">
90 <li>Lower-greek 类型</li>
91 <li>茶</li>
92 <li>可口可乐</li>
93 </ul>
94
95 <ul class="lower-latin">
96 <li>Lower-latin 类型</li>
97 <li>茶</li>
98 <li>可口可乐</li>
99 </ul>


 1 <html>
 2 <head>
 3 <style type="text/css">
 4 ul
 5 {
 6 list-style-image: url('/i/eg_arrow.gif')
 7 }
 8 </style>
 9 </head>
10
11 <body>
12 <ul>
13 <li>咖啡</li>
14 <li>茶</li>
15 <li>可口可乐</li>
16 </ul>
17 </body>
18
19 </html>

CSS 表格实例:
 1 <html>
 2 <head>
 3 <style type="text/css">
 4 table.one
 5 {
 6 table-layout: automatic
 7 }
 8 table.two
 9 {
10 table-layout: fixed
11 }
12 </style>
13 </head>
14 <body>
15
16 <table class="one" border="1" width="100%">
17 <tr>
18 <td width="20%">1000000000000000000000000000</td>
19 <td width="40%">10000000</td>
20 <td width="40%">100</td>
21 </tr>
22 </table>
23
24 <br />
25
26 <table class="two" border="1" width="100%">
27 <tr>
28 <td width="20%">1000000000000000000000000000</td>
29 <td width="40%">10000000</td>
30 <td width="40%">100</td>
31 </tr>
32 </table>
33
34 </body>
35 </html>

 1 <!DOCTYPE html PUBLIC "-//W3C//DTD XHTML 1.0 Transitional//EN" "http://www.w3.org/TR/xhtml1/DTD/xhtml1-transitional.dtd">
 2 <html>
 3 <head>
 4 <style type="text/css">
 5 table
 6   {
 7   border-collapse:collapse;
 8   }
 9
10 table, td, th
11   {
12   border:1px solid black;
13   }
14 </style>
15 </head>
16
17 <body>
18 <table>
19 <tr>
20 <th>Firstname</th>
21 <th>Lastname</th>
22 </tr>
23 <tr>
24 <td>Bill</td>
25 <td>Gates</td>
26 </tr>
27 <tr>
28 <td>Steven</td>
29 <td>Jobs</td>
30 </tr>
31 </table>
32 <p><b>注释:</b>如果没有规定 !DOCTYPE,border-collapse 属性可能会引起意想不到的错误。</p>
33 </body>
34 </html>

 1 <!DOCTYPE html PUBLIC "-//W3C//DTD XHTML 1.0 Transitional//EN" "http://www.w3.org/TR/xhtml1/DTD/xhtml1-transitional.dtd">
 2
 3 <html>
 4 <head>
 5 <style type="text/css">
 6 table.one
 7 {
 8 border-collapse: separate;
 9 border-spacing: 10px
10 }
11 table.two
12 {
13 border-collapse: separate;
14 border-spacing: 10px 50px
15 }
16 </style>
17 </head>
18 <body>
19
20 <table class="one" border="1">
21 <tr>
22 <td>Adams</td>
23 <td>John</td>
24 </tr>
25 <tr>
26 <td>Bush</td>
27 <td>George</td>
28 </tr>
29 </table>
30
31 <br />
32
33 <table class="two" border="1">
34 <tr>
35 <td>Carter</td>
36 <td>Thomas</td>
37 </tr>
38 <tr>
39 <td>Gates</td>
40 <td>Bill</td>
41 </tr>
42 </table>
43
44 <p><b>注释:</b>如果已规定 !DOCTYPE,那么 Internet Explorer 8 (以及更高版本)支持 border-spacing 属性。</p>
45
46 </body>
47 </html>
