labllmg标注,得到xml文件,xml转成csv,csv转成tfrecord,就是跑几个脚本。
设置配置文件
到object dection github寻找配置文件sample
如果你下载的是ssd_mobilenet_v1_coco_2017_11_17.tar.gz,就找到 ssd_mobilenet_v1_coco.config,然后打开配置文件,作如下修改:
- PATH_TO_BE_CONFIGURED,改为自己的路径
- num_class,(不包括背景)
- batch_size
- 使用的自己数据从头训练,删掉下面两行
- fine_tune_checkpoint: "ssd_mobilenet_v1_coco_11_06_2017/model.ckpt"
from_detection_checkpoint: true
- fine_tune_checkpoint: "ssd_mobilenet_v1_coco_11_06_2017/model.ckpt"
# SSD with Mobilenet v1 configuration for MSCOCO Dataset.
# Users should configure the fine_tune_checkpoint field in the train config as
# well as the label_map_path and input_path fields in the train_input_reader and
# eval_input_reader. Search for "PATH_TO_BE_CONFIGURED" to find the fields that
# should be configured.

model {
  ssd {
    num_classes: 2 #不包括类别
    box_coder {
      faster_rcnn_box_coder {
        y_scale: 10.0
        x_scale: 10.0
        height_scale: 5.0
        width_scale: 5.0
      }
    }
    matcher {
      argmax_matcher {
        matched_threshold: 0.5
        unmatched_threshold: 0.5
        ignore_thresholds: false
        negatives_lower_than_unmatched: true
        force_match_for_each_row: true
      }
    }
    similarity_calculator {
      iou_similarity {
      }
    }
    anchor_generator {
      ssd_anchor_generator {
        num_layers: 6
        min_scale: 0.2
        max_scale: 0.95
        aspect_ratios: 1.0
        aspect_ratios: 2.0
        aspect_ratios: 0.5
        aspect_ratios: 3.0
        aspect_ratios: 0.3333
      }
    }
    image_resizer {
      fixed_shape_resizer {
        height: 300
         300
      }
    }
    box_predictor {
      convolutional_box_predictor {
        min_depth: 0
        max_depth: 0
        num_layers_before_predictor: 0
        use_dropout: false
        dropout_keep_probability: 0.8
        kernel_size: 1
        box_code_size: 4
        apply_sigmoid_to_scores: false
        conv_hyperparams {
          activation: RELU_6,
          regularizer {
            l2_regularizer {
              weight: 0.00004
            }
          }
          initializer {
            truncated_normal_initializer {
              stddev: 0.03
              mean: 0.0
            }
          }
          batch_norm {
            train: true,
            scale: true,
            center: true,
            decay: 0.9997,
            epsilon: 0.001,
          }
        }
      }
    }
    feature_extractor {
      type: 'ssd_mobilenet_v1'
      min_depth: 16
      depth_multiplier: 1.0
      conv_hyperparams {
        activation: RELU_6,
        regularizer {
          l2_regularizer {
            weight: 0.00004
          }
        }
        initializer {
          truncated_normal_initializer {
            stddev: 0.03
            mean: 0.0
          }
        }
        batch_norm {
          train: true,
          scale: true,
          center: true,
          decay: 0.9997,
          epsilon: 0.001,
        }
      }
    }
    loss {
      classification_loss {
        weighted_sigmoid {
          anchorwise_output: true
        }
      }
      localization_loss {
        weighted_smooth_l1 {
          anchorwise_output: true
        }
      }
      hard_example_miner {
        num_hard_examples: 3000
        iou_threshold: 0.99
        loss_type: CLASSIFICATION
        max_negatives_per_positive: 3
        min_negatives_per_image: 0
      }
      classification_weight: 1.0
      localization_weight: 1.0
    }
    normalize_loss_by_num_matches: true
    post_processing {
      batch_non_max_suppression {
        score_threshold: 1e-8
        iou_threshold: 0.6
        max_detections_per_class: 100
        max_total_detections: 100
      }
      score_converter: SIGMOID
    }
  }
}

train_config: {
  batch_size: 1
  optimizer {
    rms_prop_optimizer: {
      learning_rate: {
        exponential_decay_learning_rate {
          initial_learning_rate: 0.004
          decay_steps: 800720
          decay_factor: 0.95
        }
      }
      momentum_optimizer_value: 0.9
      decay: 0.9
      epsilon: 1.0
    }
  }
#用自己数据从头训练,所以删掉这两行
#fine_tune_checkpoint: "PATH_TO_BE_CONFIGURED/model.ckpt"
#from_detection_checkpoint: true
# Note: The below line limits the training process to 200K steps, which we
  # empirically found to be sufficient enough to train the pets dataset. This
  # effectively bypasses the learning rate schedule (the learning rate will
  # never decay). Remove the below line to train indefinitely.
  num_steps: 200000
  data_augmentation_options {
    random_horizontal_flip {
    }
  }
  data_augmentation_options {
    ssd_random_crop {
    }
  }
}

train_input_reader: {
  tf_record_input_reader {
    input_path: "data/train.record" #训练集tfrecord文件
  }
  label_map_path: "data/tv_vehicle_detection.pbtxt" #标签文件
}

eval_config: {
  num_examples: 4
  # Note: The below line limits the evaluation process to 10 evaluations.
  # Remove the below line to evaluate indefinitely.
  max_evals: 10
}

eval_input_reader: {
  tf_record_input_reader {
    input_path: "data/test.record" #测试集record文件
  }
  label_map_path: "data/tv_vehicle_detection.pbtxt" #标签文件
  shuffle: false
  num_readers: 1
  num_epochs: 1
}
其中标签文件是你要自己新建一个文件如detection.pbtxt,内如如下格式:
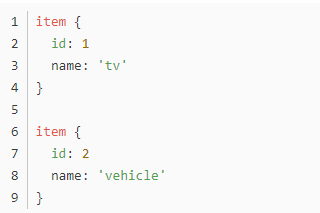
注意id序号要和csv文件中的一致。
训练文件
定位到 models esearchobject_detection文件夹下:
python object_detection/model_main.py
--pipeline_config_path=object_detection/training/ssd_mobilenet_v1_coco.config
--model_dir=object_detection/training
--num_train_steps=50000
--num_eval_steps=2000
--alsologtostderr
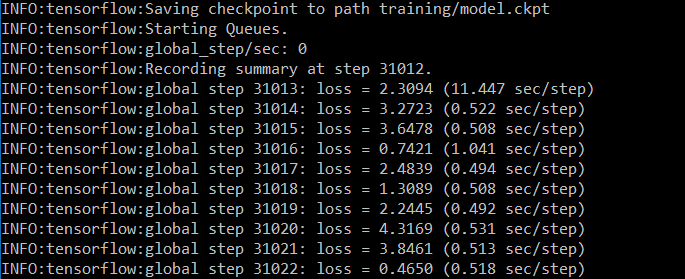
中途打断也不要紧,可以再次运行上述Python命令,会从上次的checkpoint继续。
可视化
tensorboard --logdir=文件夹目录

生成模型pb
export_inference_graph.py 文件
python export_inference_graph.py
--input_type image_tensor
--pipeline_config_path training/ssd_mobilenet_v1_coco.config
--trained_checkpoint_prefix 写自己训练出的模型checkpoint文件,选最大迭代次数的模型,例如:training/model.ckpt-31012
--output_directory 输出文件夹的名字,例如:results
执行完之后,可以在results文件夹下面发现很多文件,aved_model、checkpoint、frozen_inference_graph.pb等。 .pb结尾的就是最重要的frozen model了,我们最开始用demo测试的时候就使用的是frozen.model。
测试模型并输出
# -*- coding: utf-8 -*-
对tutorial做了一点修改,改成py文件

import time
start = time.time()
import numpy as np
import os
import six.moves.urllib as urllib
import sys
import tarfile
import tensorflow as tf
import zipfile
import cv2
from collections import defaultdict
from io import StringIO
from matplotlib import pyplot as plt
from PIL import Image
import pandas as pd
if tf.__version__ < '1.4.0':
  raise ImportError('Please upgrade your tensorflow installation to v1.4.* or later!')

#改变当前工作目录到指定的路径
#默认情况下,Python解释器会搜索当前目录、所有已安装的内置模块和第三方模块
#sys.path,返回的模块搜索路径列表,类似于这样的:
#  [
#    'F:\', 'F:\测试自己的图像识别模型.py',
#    'D:\anaconda\anaconda3.4.2.0\python35.zip',
#    'D:\anaconda\anaconda3.4.2.0\DLLs',
#    'D:\anaconda\anaconda3.4.2.0\lib'
#  ]
os.chdir(r'E:/object_detection/')

#.. 或 ../是父目录,表示将父目录添加进了sys.path
# . 或 ./是当前目录
sys.path.append("..")


from object_detection.utils import label_map_util
from object_detection.utils import visualization_utils as vis_util
#Model preparation
# What model to download.
#MODEL_NAME = 'tv_vehicle_inference_graph'
#MODEL_NAME = 'tv_vehicle_inference_graph_fasterCNN'

#最后生成的那个文件夹名result
MODEL_NAME = 'result'

#MODEL_NAME = 'ssd_mobilenet_v1_coco_2017_11_17'    #[30,21]  best
#MODEL_NAME = 'ssd_inception_v2_coco_2017_11_17'            #[42,24]
#MODEL_NAME = 'faster_rcnn_inception_v2_coco_2017_11_08'         #[58,28]
#MODEL_NAME = 'faster_rcnn_resnet50_coco_2017_11_08'     #[89,30]
#MODEL_NAME = 'faster_rcnn_resnet50_lowproposals_coco_2017_11_08'   #[64, ]
#MODEL_NAME = 'rfcn_resnet101_coco_2017_11_08'    #[106,32]

#PATH_TO_CKPT = 'result' + '/你自己生成的pb模型文件名'
PATH_TO_CKPT = MODEL_NAME + '/frozen_inference_graph.pb'

# 标签问价你在training文件夹下面,当前脚本和training文件夹是同一级的
PATH_TO_LABELS = os.path.join('training', 'detection.pbtxt')

# 目标类倍数
NUM_CLASSES = 2

# 将训练完的载入内存(不用改)
detection_graph = tf.Graph()
with detection_graph.as_default():
  od_graph_def = tf.GraphDef()
  with tf.gfile.GFile(PATH_TO_CKPT, 'rb') as fid:
    serialized_graph = fid.read()
    od_graph_def.ParseFromString(serialized_graph)
    tf.import_graph_def(od_graph_def, name='')

# 载入标签map(不用改)
label_map = label_map_util.load_labelmap(PATH_TO_LABELS)
categories = label_map_util.convert_label_map_to_categories(label_map, max_num_classes=NUM_CLASSES, use_display_name=True)
category_index = label_map_util.create_category_index(categories)

def load_image_into_numpy_array(image):
  (im_width, im_height) = image.size
  # getdata()返回的是2维度的:(width*height , 3)
  # [[1 2 3]
  #  [3 4 5]]类似这种的
  # 因此reshape成3维
  return np.array(image.getdata()).reshape((im_height, im_width, 3)).astype(np.uint8)

# 放图片文件夹的的文件夹名!!!就是test_images文件夹在PATH_TO_TEST_IMAGES_DIR文件夹里面
# 这个脚本和  PATH_TO_TEST_IMAGES_DIR 文件夹 是在同一个目录下的,都在object_detection/下面
PATH_TO_TEST_IMAGES_DIR = 'PATH_TO_TEST_IMAGES_DIR'

# 将PATH_TO_TEST_IMAGES_DIR文件夹目录设置为当前路径
os.chdir(PATH_TO_TEST_IMAGES_DIR)

# os.listdir() 方法用于返回指定的文件夹包含的文件或文件夹的名字的列表,带后缀
# 这个列表以字母顺序。 它不包括 '.' 和'..' 即使它在文件夹中。
# 这个列表里就只有一个元素:test_images文件夹
TEST_IMAGE_DIRS = os.listdir(PATH_TO_TEST_IMAGES_DIR)

# 输出图片的尺寸,inches
IMAGE_SIZE = (12, 8)

#输出图片带画框的结果,这个文件夹和test_images同级
output_image_path = ("PATH_TO_TEST_IMAGES_DIR")

# 另外加了输出识别结果框的坐标,保存为.csv表格文件
output_csv_path = ("输出识别结果表格的路径")

# image_folder:test_images文件夹
for image_folder in TEST_IMAGE_DIRS:
    with detection_graph.as_default():
      with tf.Session(graph=detection_graph) as sess:
        # Definite input and output Tensors for detection_graph
        image_tensor = detection_graph.get_tensor_by_name('image_tensor:0')

        # Each box represents a part of the image where a particular object was detected.
        detection_boxes = detection_graph.get_tensor_by_name('detection_boxes:0')

        # Each score represent how level of confidence for each of the objects.
        # Score is shown on the result image, together with the class label.
        detection_scores = detection_graph.get_tensor_by_name('detection_scores:0')
        detection_classes = detection_graph.get_tensor_by_name('detection_classes:0')
        num_detections = detection_graph.get_tensor_by_name('num_detections:0')

        # 当前路径加test_images文件夹名,再listdir得到的就是所有test图片的path列表。
        TEST_IMAGE_PATHS = os.listdir(os.path.join(image_folder))

        # 新建一个文件夹PATH_TO_TEST_IMAGES_DIRdraw_test_images
        os.makedirs(output_image_path+'draw_'+image_folder)
        data = pd.DataFrame()

        for image_path in TEST_IMAGE_PATHS:
          image = Image.open(image_folder + '//'+image_path)
          width, height = image.size
          # the array based representation of the image will be used later in order to prepare the
          # result image with boxes and labels on it.
          image_np = load_image_into_numpy_array(image)#[width,height,2]

          # 在axis=0即第一个维度扩充一个维度,就是在最外面加了一层括号,shpe=[1,width,height,3]
          # 这样变是因为,输入的图片格式要是四维的
          image_np_expanded = np.expand_dims(image_np, axis=0)

          # run检测,得到结果值
          (boxes, scores, classes, num) = sess.run([detection_boxes, detection_scores, detection_classes, num_detections],
                                                    feed_dict={image_tensor: image_np_expanded})

          # 可视化
          # vis_util是objection模块里的一个函数
          vis_util.visualize_boxes_and_labels_on_image_array(
                                                                image_np,
                                                                np.squeeze(boxes),
                                                                np.squeeze(classes).astype(np.int32),
                                                                np.squeeze(scores),
                                                                category_index,
                                                                use_normalized_coordinates=True,
                                                                line_thickness=8)

          #保存识别结果图片,输出的也是图片,保存在draw_test_images文件夹下
          cv2.imwrite(output_image_path+'draw_'+image_folder+'\'+image_path.split('\')[-1],image_np)

          s_boxes = boxes[scores > 0.5]
          s_classes = classes[scores > 0.5]
          s_scores=scores[scores>0.5]

          #write table
          #保存位置坐标结果到 .csv表格
          for i in range(len(s_classes)):

              newdata= pd.DataFrame(0, index=range(1), columns=range(7))
              newdata.iloc[0,0] = image_path.split("\")[-1].split('.')[0]
              newdata.iloc[0,1] = s_boxes[i][0]*height  #ymin
              newdata.iloc[0,2] = s_boxes[i][1]*width     #xmin
              newdata.iloc[0,3] = s_boxes[i][2]*height    #ymax
              newdata.iloc[0,4] = s_boxes[i][3]*width     #xmax
              newdata.iloc[0,5] = s_scores[i]
              newdata.iloc[0,6] = s_classes[i]

              data = data.append(newdata)
          data.to_csv(output_csv_path+image_folder+'.csv',index = False)

end =  time.time()
print("Execution Time: ", end - start)
object_detection文件夹下的eval_util.py文件打开,visualize_detection_results函数里面min_score_thresh=.5, 可以把这个改小一点,会输出分数更低的框。max_num_predictions=20 调整最多输出的个数。