EF Core 的安装及入门
一、环境准备
- 开发环境:.NET Core 3.1
- IDE工具:Visual Studio 2019
- 数据库:SQL Server 2012
二、EF Core的安装
1.新建一个项目,如创建“Console控制台应用程序”,项目名称为“efc1”。
2.添加包引用(此处我们添加针对SQL Server的支持包,其它数据库类似)
方式1:通过dotnet cli命令行
在需要用EF Core的项目根目录,打开powershell或命令行,执行以下命令。
dotnet add package Microsoft.EntityFrameworkCore
dotnet add package Microsoft.EntityFrameworkCore.SqlServer
方式2:通过Visual Studio的包管理器
从 Visual Studio 菜单中选择“工具”>“NuGet 包管理器”>“管理解决方案的NuGet程序包”
搜索并选择“Microsoft.EntityFrameworkCore”、“Microsoft.EntityFrameworkCore.SqlServer”安装。
以下以“Microsoft.EntityFrameworkCore.SqlServer”为例说明。

安装完成后,在项目的依赖项中就可以看到对应EF Core的包已经被安装好了。

三、类模型与数据库表的创建
EF Core作为一种ORM框架,要完成对数据库的一系列操作,关键需要实现数据库表与类模型的Mapping映射。如以学生信息表Student与类Student模型映射为例。
- 学生信息表Students:(注意此处的表名是复数s)
| 序号 | 字段名 | 数据类型 | 是否主键 | 说明 |
|---|---|---|---|---|
| 1 | StuNo | nchar(10) | 主键 | 学号 |
| 2 | StuName | nvarchar(10) | 姓名 | |
| 3 | Gender | nchar(1) | 性别 | |
| 4 | Birthday | datetime | 出生日期 |
C#的Student类模型:
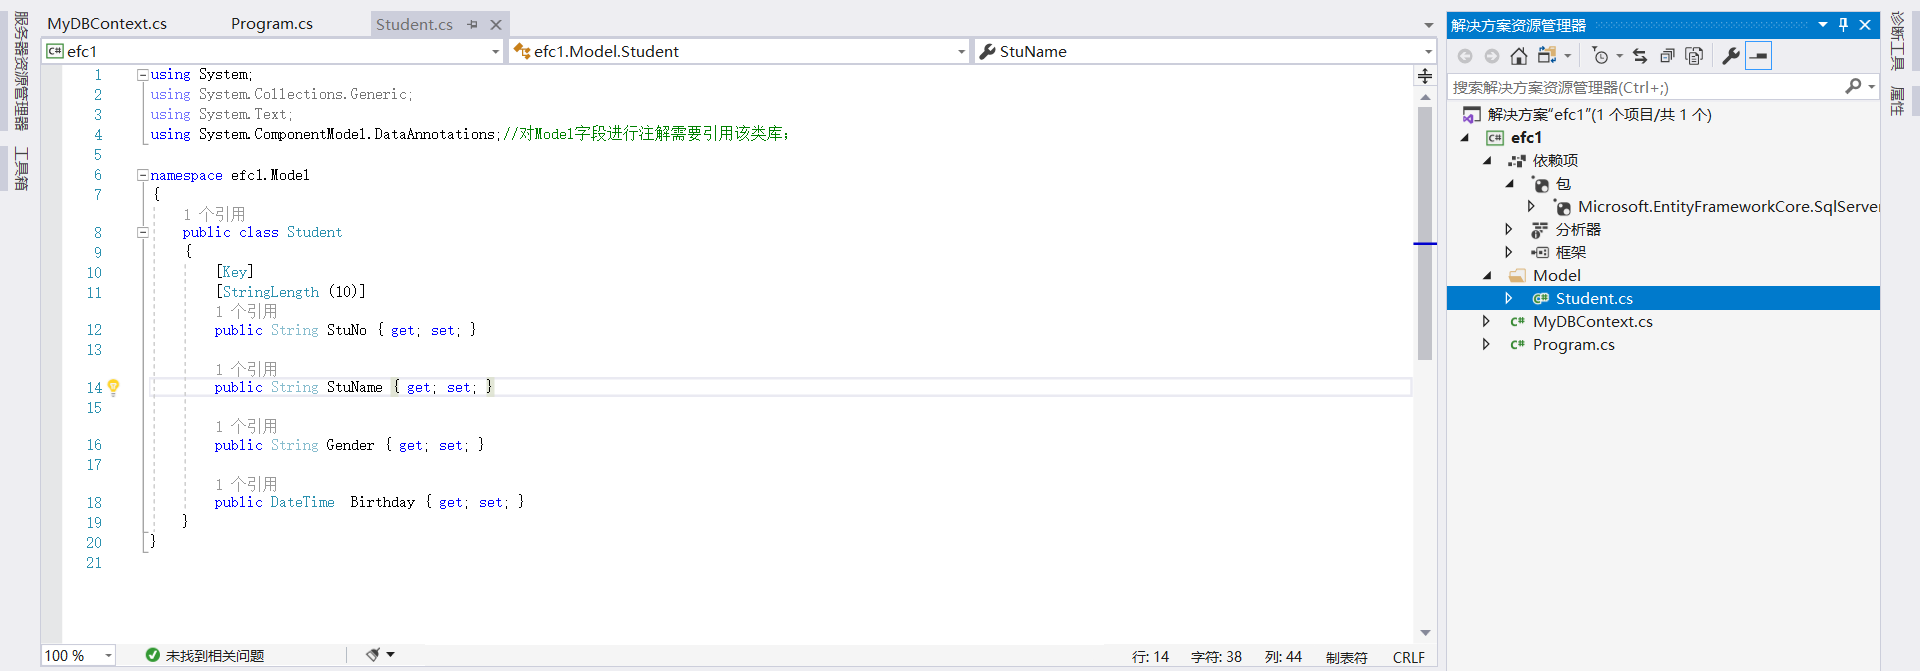
using System;
using System.Collections.Generic;
using System.Text;
using System.ComponentModel.DataAnnotations;//对Model字段进行注解需要引用该类库;

namespace efc1.Model
{
	public class Student
	{
		[Key]
		[StringLength (10)]
		public String StuNo { get; set; }

		public String StuName { get; set; }

		public String Gender { get; set; }

		public DateTime  Birthday { get; set; }
	}
}
四、DbContext与连接字符串
现在为止,我们仅仅是完成了数据库表与C#类模型在形式上的对应关系,他们之间的关联还并未真正建立,因此需要有什么站出来将两者紧密的关联起来,从而实现对C#类模型的操作,可以自动的反映到数据库表中,这就是DbContext类(数据库与实体类模型之间的桥梁)。
我们需要做的:
1.创建一个自己的MyDbContext类(可根据情况自己给定义的类起名字,此处仅是举例为MyDbContext),该类继承自Microsoft.EntityFrameworkCore.DbContext类;
2.在MyDbContext类中,重载父类的OnConfiguring方法,该方法主要完成以下工作:
a)通过UseSqlServer方法,指明数据库提供程序(也就是指明用的什么数据库);
b)指明数据库的连接字符串;
c)定义相应实体模型类的DbSet(变量名应与对应的数据库表名相同),以后的CRUD操作都通过它实现;如果有多个实体模型,在MyDbContext中可以定义多个不同的DbSet。
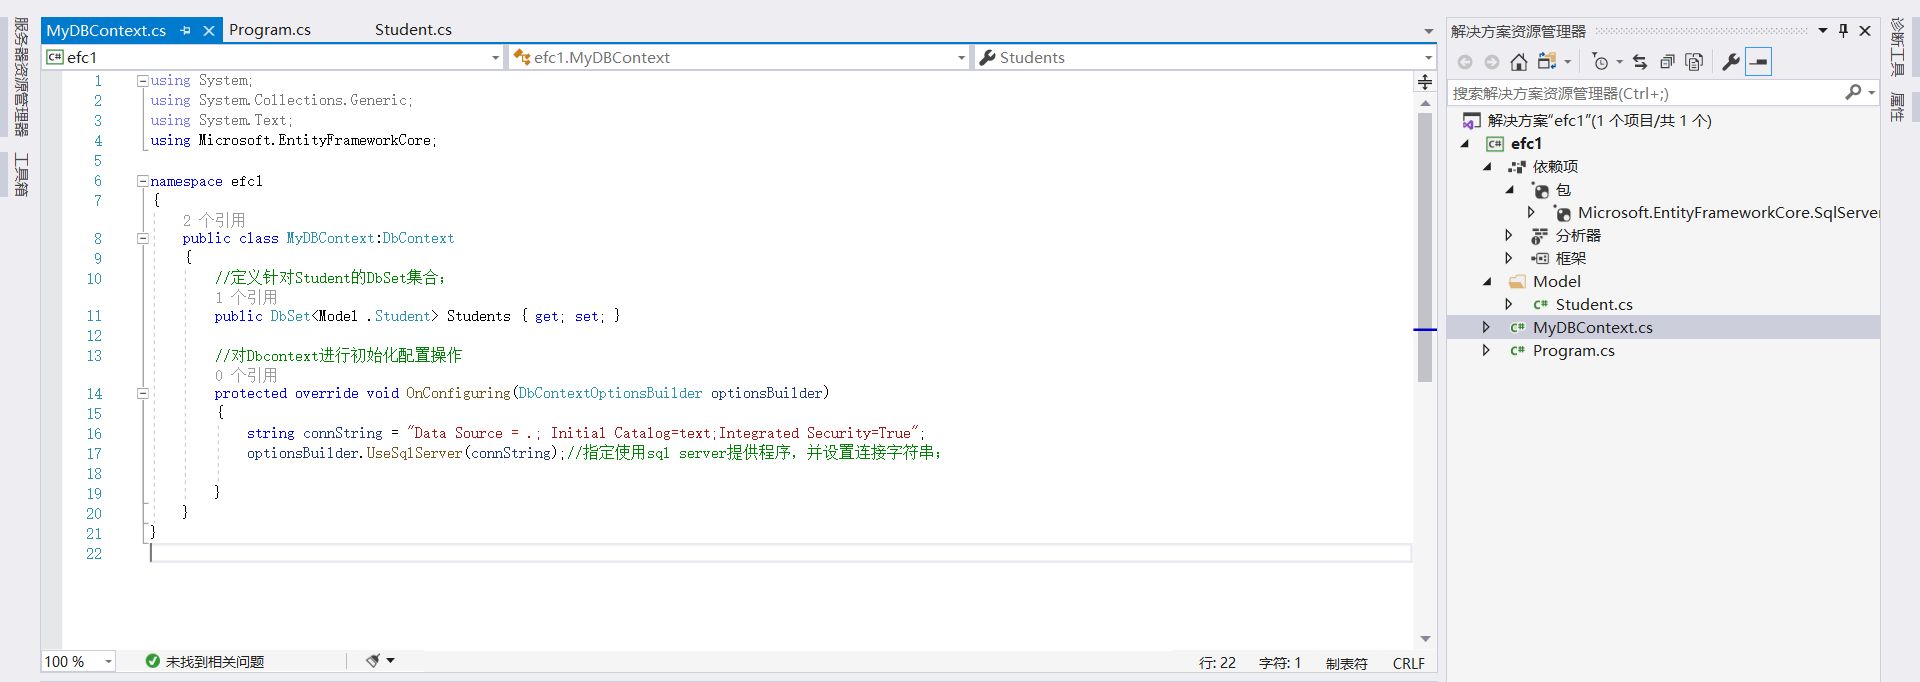
using System;
using System.Collections.Generic;
using System.Text;
using Microsoft.EntityFrameworkCore;

namespace efc1
{
	public class MyDBContext:DbContext
	{
		//定义针对Student的DbSet集合;
		public DbSet<Model .Student> Students { get; set; }

		//对Dbcontext进行初始化配置操作
		protected override void OnConfiguring(DbContextOptionsBuilder optionsBuilder)
		{
			string connString = "Data Source = .; Initial Catalog=text;Integrated Security=True";
			optionsBuilder.UseSqlServer(connString);//指定使用sql server提供程序,并设置连接字符串;

		}
	}
}
五、测试
经过以上步骤,我们已经完成了EF Core的配置,下面我们通过对Student类模型的添加和查询,检验下我们的EF Core是否正常工作。
- 添加

using System;
using System.Linq;
namespace efc1
{
	class Program
	{
		static void Main(string[] args)
		{
			Model.Student m = new Model.Student();
			m.StuNo = new Random().Next(1000000000, 1999999999).ToString();
			m.StuName = "成吉思汗";
			m.Gender = "男";
			m.Birthday = new DateTime(1998, 07, 25);

			using (MyDBContext db = new MyDBContext())
			{
				db.Students.Add(m);//将模型添加至DBSet实体集中
				int cnt = db.SaveChanges();//保存对DbSet实体集的变动(写回数据库)
				Console.WriteLine("受影响的行数为:{0}", cnt);
			}
			Console.ReadKey();
		}
	}
}
- 查询
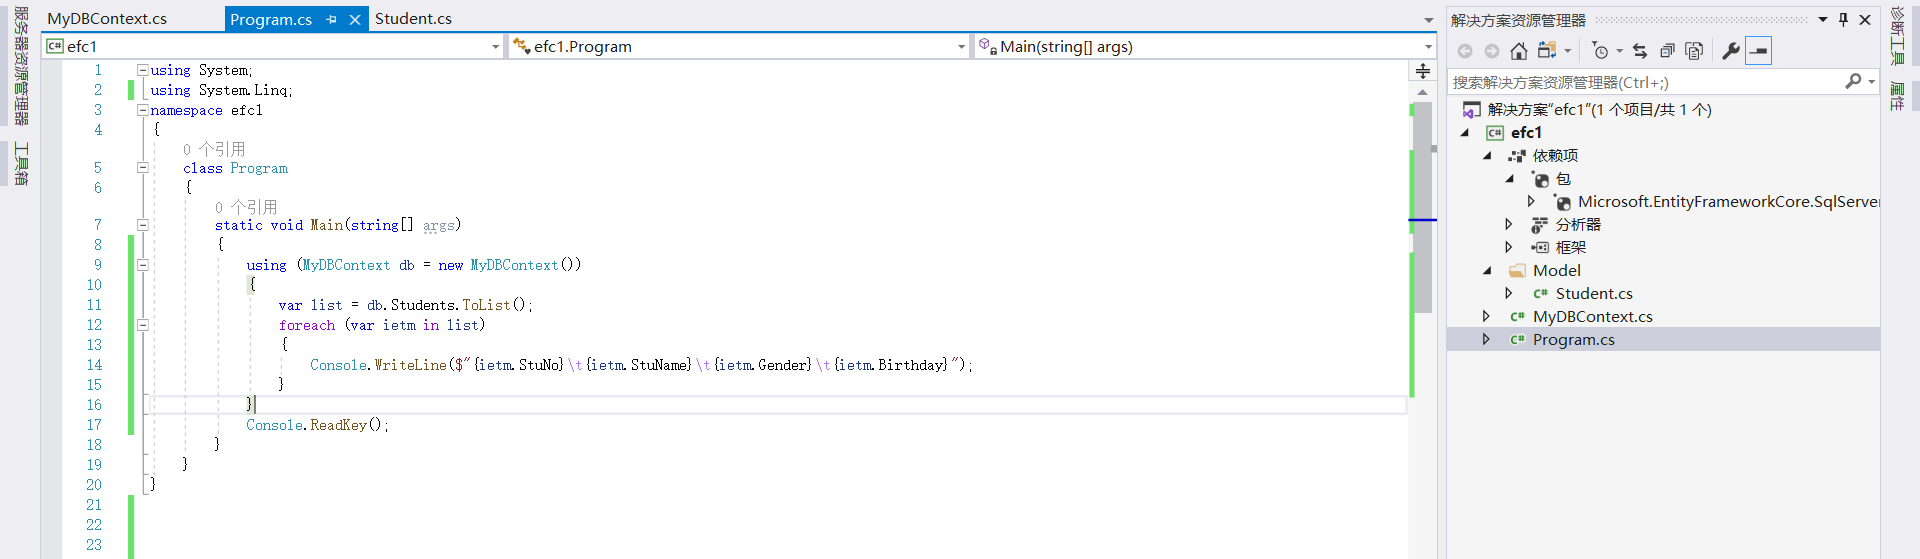
using System;
using System.Linq;
namespace efc1
{
	class Program
	{
		static void Main(string[] args)
		{
			using (MyDBContext db = new MyDBContext())
			{
				var list = db.Students.ToList();
				foreach (var ietm in list)
				{
					Console.WriteLine($"{ietm.StuNo}	{ietm.StuName}	{ietm.Gender}	{ietm.Birthday}");
				}
			}
			Console.ReadKey();
		}
	}
}