|
项目 |
内容 |
|
这个作业属于哪个课程 |
https://www.cnblogs.com/nwnu-daizh |
|
这个作业的要求在哪里 |
https://www.cnblogs.com/nwnu-daizh/p/12031970.html |
|
作业学习目标 |
(1) 掌握Java应用程序的打包操作; (2) 掌握线程概念; (3) 掌握线程创建的两种技术。 (4)学习应用程序的GUI |
第一部分 基础实验总结
一、什么是线程
(1)一个程序同时执行多个任务,通常每一个任务称为一个线程,是线程控制的简称。可以同时运行一个以上的线程称为多线程程序。
(2)每个进程拥有自己的一整套变量,二线程则共享数据。
(3)Java实现多线程的两种途径:
——创建Thread类的子类
——在程序中定义实现Runnable接口的类
(4)Windows 系统是多任务操作系统,它以进程为单位。一个进程是一个包含有自身地址的程序,每个独立执行的程序都称为进程,也就是正在执行的程序。
注意:切记线程与程序有区别,不能混淆(5)既然是多线程操作,它的工作特点为:系统可以分配给每个进程一段有限的执行 CPU 的时间(也称为 CPU 时间片),CPU 在这段时间中执行某个进程,然后下一个时间段又跳到另一个进程中去执行。由于 CPU 切换的速度非常快,给使用者的感受就是这些任务似乎在同时运行,所以使用多线程技术后,可以在同一时间内运行更多不同种类的任务。
二、中断线程
(1) 在Java中,停止一个线程的主要机制是中断,中断并不是强迫终止一个线程,它是一种协作机制,是给线程传递一个取消信号,但是由线程来决定如何以及何时退出。
(2)Thread类定义了如下方法:
public boolean isInterrupted(); 表示测试此线程是否已被中断。此方法不影响线程的中断状态
public void interrupt(); 表示中断线程
public static boolean interrupted(); 表示测试此线程是否已被中断,并清空中断标志位
——interrupt 方法表示中断当前线程,仅仅设置一下线程的中断标记位。
——interrupted 是一个静态的方法,它将返回当前线程的中断位是否被标记,如果是则返回 true 并清空中断标记位,否则返回 false。
public boolean isInterrupted() {
return isInterrupted(false);}
——isInterrupted 方法功能是类似于 interrupted 方法的,只不过无论当前线程是否被中断了,都不会清空中断标志位。
public static boolean interrupted() {
return currentThread().isInterrupted(true);}
private native boolean isInterrupted(boolean ClearInterrupted);
——interrupt()对线程的影响与线程的状态和在进行的IO操作有关
三、线程状态
RUNNABLE:线程在运行或具备运行条件只是在等待操作系统调度
WAITING/TIMED_WAITING:线程在等待某个条件或超时
BLOCKED:线程在等待锁,试图进入同步块
NEW / TERMINATED:线程还未启动或已结束
(1)新创建线程
a.使用new Thread() 创建一个线程。
(2)可运行线程
a.使用Thread.start() 方法之后。启动一个线程,该线程会进入等待队列等待CPU的执行,因此可以细分为runnable和running状态。
(3)被阻塞线程和等待线程
A.阻塞和等待的区别: 阻塞是在等待获取一个排它锁,因为该线程获取不到锁所以被阻塞住而不能允许;而等待则是等待一段时间或者是等待被唤醒,等待状态并不是等待获取锁。
这个状态有个特点,一个线程请求锁,得到之后该线程进入阻塞状态;而其他线程再来请求锁,由于得不到而阻塞;当该锁释放后,被阻塞的线程得到锁就进入了运行状态。 另外要知道
由synchronized 修饰的代码块、方法。使得线程之间有并行变成串行执行。
B.等待线程分为两种情况,其一为有限等待;其二为无限等待。
C.有限等待:处于这种状态的线程,不会被分配CPU执行时间,需要等待其他线程显式地唤醒,然后进入运行状态。
a.调用Thread.join() 方法。将会一直等待上一个线程的执行结束,然后被上一个线程唤醒。
b.调用Object.wait() 方法。将会一直等待,直到其他线程中使用了notify()、notifyAll()进行唤醒。
D.无限等待:处于这种状态的线程,不会被分配CPU执行时间,既可以被其他线程显式地唤醒,也可以在一定时间后由系统自动唤醒,然后进入运行状态。
a. 调用Thread.sleep(timeout) 方法。该方法不会释放持有的对象锁。
b.调用Object.wait(timeout) 方法。该方法会释放持有的锁。
c.调用Thread.join(timeout) 方法。
(4)被终止的线程 :当线程的run() 方法执行结束后,该线程就结束了。
总体的线程状态如图所示:

第二部分 实验总结
实验1: 导入第13章示例程序,测试程序并进行代码注释。
测试程序1
l 在elipse IDE中调试运行教材585页程序13-1,结合程序运行结果理解程序;
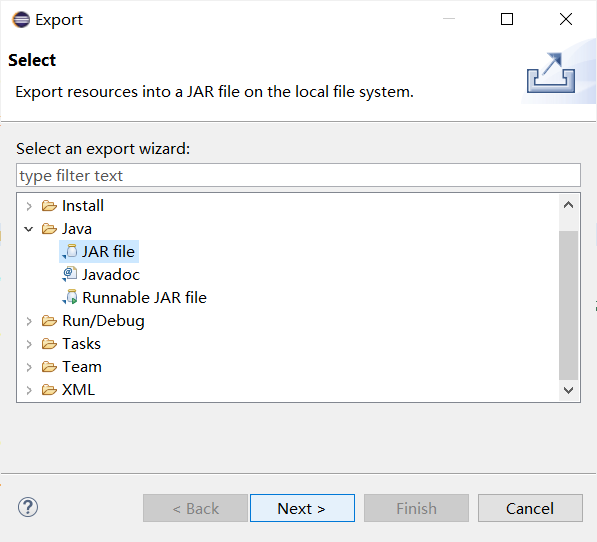
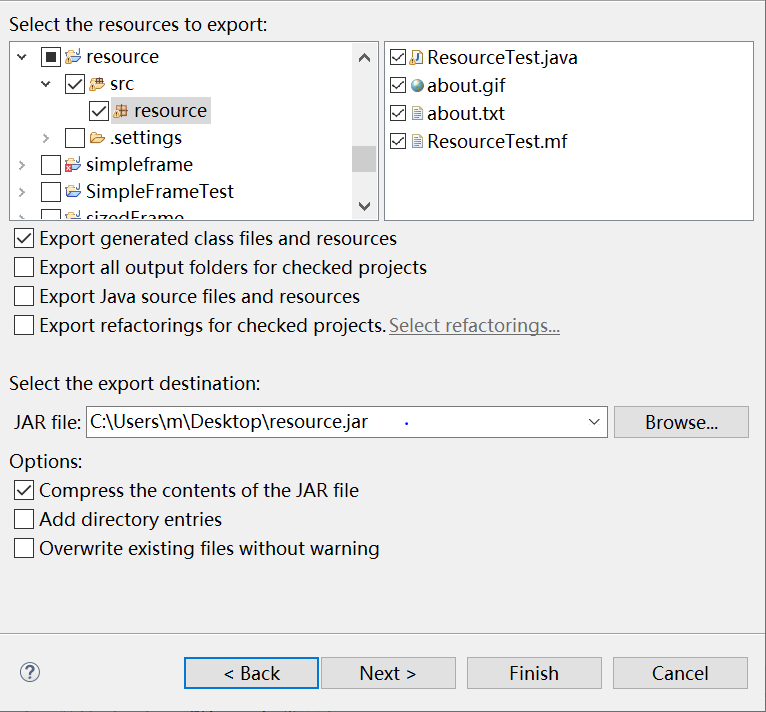
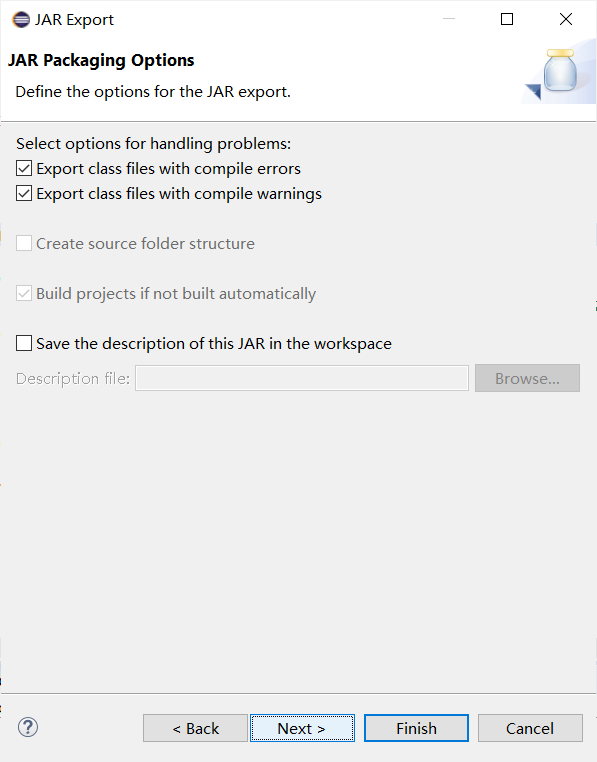
l 将所生成的JAR文件移到另外一个不同的目录中,再运行该归档文件,以便确认程序是从JAR文件中,而不是从当前目录中读取的资源。
l 掌握创建JAR文件的方法;
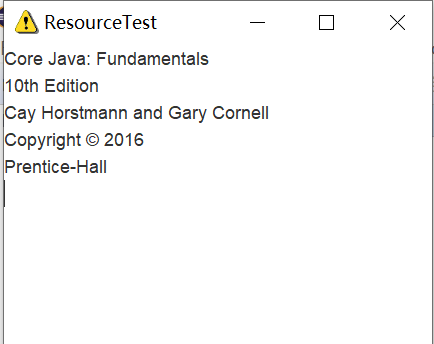
ResourceTest
import java.io.*;
import java.net.*;
import java.util.*;
import javax.swing.*;
* @version 1.41 2015-06-12
* @author Cay Horstmann
*/
public class ResourceTest
{
public static void main(String[] args)
{
EventQueue.invokeLater(() -> {
JFrame frame = new ResourceTestFrame();
frame.setTitle("ResourceTest");
frame.setDefaultCloseOperation(JFrame.EXIT_ON_CLOSE);
frame.setVisible(true);//可视化
});
}
}
* A frame that loads image and text resources.
*/
class ResourceTestFrame extends JFrame
{
private static final int DEFAULT_WIDTH = 300;
private static final int DEFAULT_HEIGHT = 300;
{
setSize(DEFAULT_WIDTH, DEFAULT_HEIGHT);
URL aboutURL = getClass().getResource("about.gif"); //确定目标文件,加载资源代码
Image img = new ImageIcon(aboutURL).getImage(); //设置图标
setIconImage(img);
InputStream stream = getClass().getResourceAsStream("about.txt"); //读取文件
try (Scanner in = new Scanner(stream, "UTF-8"))
{
while (in.hasNext())
textArea.append(in.nextLine() + " ");
}
add(textArea); //添加到文件区域
}
}
实验输出结果截图为:
详细过程为:


 (再次打开的结果与之前一样)
测试程序2:
l 在elipse IDE中调试运行ThreadTest,结合程序运行结果理解程序;
l 掌握线程概念;
l 掌握用Thread的扩展类实现线程的方法;
l 利用Runnable接口改造程序,掌握用Runnable接口创建线程的方法。
class Lefthand extends Thread {
   public void run()
   {
       for(int i=0;i<=5;i++)
       {  System.out.println("You are Students!");
           try{   sleep(500);   }
           catch(InterruptedException e)
           { System.out.println("Lefthand error.");}
       }
  }
}
class Righthand extends Thread {
    public void run()
    {
         for(int i=0;i<=5;i++)
         {   System.out.println("I am a Teacher!");
             try{  sleep(300);  }
             catch(InterruptedException e)
             { System.out.println("Righthand error.");}
         }
    }
}
public class ThreadTest
{
     static Lefthand left;
     static Righthand right;
     public static void main(String[] args)
     {     left=new Lefthand();
           right=new Righthand();
           left.start();
           right.start();
     }
}
实验输出结果截图为:

利用Runnable接口改造后的程序代码为:
 package Thread;

 class Lefthands  implements Runnable{
      public void run() {
          for(int i=0;i<=5;i++)
             {  System.out.println("You are Students!");
                 try{   Thread.sleep(500);   }     //休眠时间为500ms
                 catch(InterruptedException e)     //中断异常
                 { System.out.println("Lefthand error.");}
            }
       }
  }
 class Righthands  implements Runnable{
     public void run() {
         for(int i=0;i<=5;i++)
            {  System.out.println("I am a Teacher!");
                try{   Thread.sleep(300);   }
                catch(InterruptedException e)
                { System.out.println("Righthand error.");}
            }
       }
  }
    public class TheadTest01 {
         public static void main(String args[]) {
             Lefthands L=new Lefthands();
             Righthands R=new Righthands();

             new Thread(L).start();//启动线程
             new Thread(R).start();
     }
}
实验输出结果截图为:

可以通过两种方法实现多线程,分别为:(1)利用Thread类的子类(2)用Runnable()接口实现线程
(1)——定义Thread类的子类并实现用户线程操作,即 run()方法的实现。
——在适当的时候启动线程。
(2)——首先设计一个实现Runnable接口的类;
——然后在类中根据需要重写run方法;
——再创建该类对象,以此对象为参数建立Thread 类的对象;
——调用Thread类对象的start方法启动线程,将 CPU执行权转交到run方法。
测试程序3:
l 在Elipse环境下调试教材625页程序14-1、14-2 、14-3,结合程序运行结果理解程序;
l 在Elipse环境下调试教材631页程序14-4,结合程序运行结果理解程序;
l 对比两个程序,理解线程的概念和用途;
l 掌握线程创建的两种技术。
bounce
package bounce;

import java.awt.geom.*;

/**
 * A ball that moves and bounces off the edges of a rectangle
 * @version 1.33 2007-05-17
 * @author Cay Horstmann
 */
public class Ball
{
   private static final int XSIZE = 15;
   private static final int YSIZE = 15;
   private double x = 0;
   private double y = 0;
   private double dx = 1;
   private double dy = 1;

   /**
    * Moves the ball to the next position, reversing direction if it hits one of the edges
    */
   public void move(Rectangle2D bounds)
   {
      x += dx;
      y += dy;
      if (x < bounds.getMinX())
      {
         x = bounds.getMinX();
         dx = -dx;//当球碰壁时回调球的位置
      }
      if (x + XSIZE >= bounds.getMaxX())
      {
         x = bounds.getMaxX() - XSIZE;
         dx = -dx;
      }
      if (y < bounds.getMinY())
      {
         y = bounds.getMinY();
         dy = -dy;
      }
      if (y + YSIZE >= bounds.getMaxY())
      {
         y = bounds.getMaxY() - YSIZE;
         dy = -dy;
      }
   }

   /**
    * Gets the shape of the ball at its current position.
    */
   public Ellipse2D getShape()
   {
      return new Ellipse2D.Double(x, y, XSIZE, YSIZE);
   }
}
package bounce;

import java.awt.*;
import java.util.*;
import javax.swing.*;

/**
 * The component that draws the balls.
 * @version 1.34 2012-01-26
 * @author Cay Horstmann
 */
public class BallComponent extends JPanel
{
   private static final int DEFAULT_WIDTH = 450;
   private static final int DEFAULT_HEIGHT = 350;

   private java.util.List<Ball> balls = new ArrayList<>();

   /**
    * Add a ball to the component.
    * @param b the ball to add
    */
   public void add(Ball b)
   {
      balls.add(b);
   }

   public void paintComponent(Graphics g)
   {
      super.paintComponent(g); // erase background
      Graphics2D g2 = (Graphics2D) g;
      for (Ball b : balls)
      {
         g2.fill(b.getShape());
      }
   }

   public Dimension getPreferredSize() { return new Dimension(DEFAULT_WIDTH, DEFAULT_HEIGHT); }
}
package bounce;

import java.awt.*;
import java.awt.event.*;
import javax.swing.*;

/**
 * Shows an animated bouncing ball.
 * @version 1.34 2015-06-21
 * @author Cay Horstmann
 */
public class Bounce
{
   public static void main(String[] args)
   {
      EventQueue.invokeLater(() -> {
         JFrame frame = new BounceFrame();
         frame.setDefaultCloseOperation(JFrame.EXIT_ON_CLOSE);
         frame.setVisible(true);
      });
   }
}

/**
 * The frame with ball component and buttons.
 */
class BounceFrame extends JFrame
{
   private BallComponent comp;
   public static final int STEPS = 1000;
   public static final int DELAY = 3;

   /**
    * Constructs the frame with the component for showing the bouncing ball and
    * Start and Close buttons
    */
   public BounceFrame()
   {
      setTitle("Bounce");
      comp = new BallComponent();
      add(comp, BorderLayout.CENTER);
      JPanel buttonPanel = new JPanel();
      addButton(buttonPanel, "Start", event -> addBall()); //start表示加入一个球
      addButton(buttonPanel, "Close", event -> System.exit(0));//系统退出
      add(buttonPanel, BorderLayout.SOUTH);
      pack();
   }

   /**
    * Adds a button to a container.
    * @param c the container
    * @param title the button title
    * @param listener the action listener for the button
    */
   public void addButton(Container c, String title, ActionListener listener)
   {
      JButton button = new JButton(title);
      c.add(button);
      button.addActionListener(listener);
   }

   /**
    * Adds a bouncing ball to the panel and makes it bounce 1,000 times.
    */
   public void addBall()
   {
      try
      {
         Ball ball = new Ball();
         comp.add(ball);

         for (int i = 1; i <= STEPS; i++)
         {
            ball.move(comp.getBounds());
            comp.paint(comp.getGraphics());
            Thread.sleep(DELAY);
         }
      }
      catch (InterruptedException e)//中断异常
      {
      }
   }
}
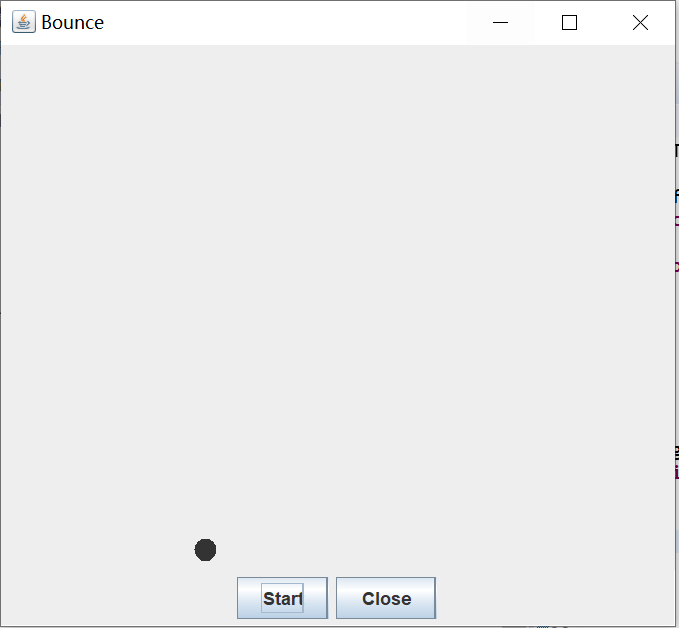
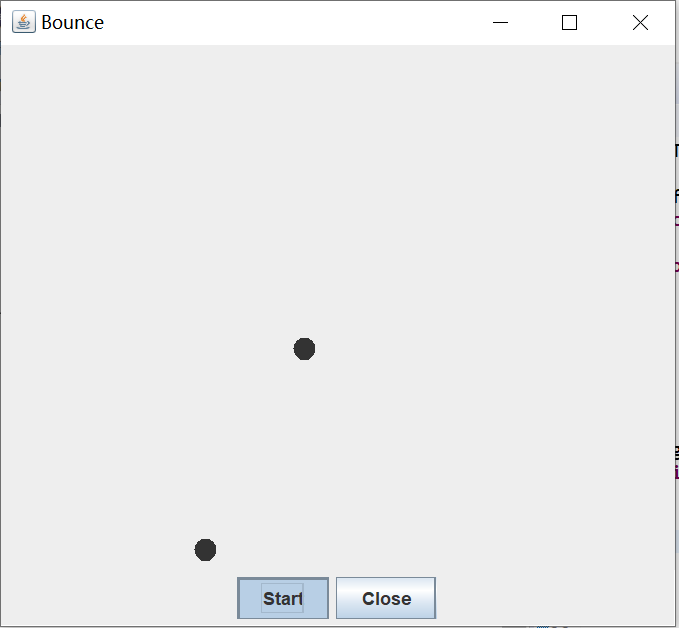
实验输出结果截图为:
bounceThread
package bounceThread;

import java.awt.geom.*;

/**
   A ball that moves and bounces off the edges of a
   rectangle
 * @version 1.33 2007-05-17
 * @author Cay Horstmann
*/
public class Ball
{
   private static final int XSIZE = 15;
   private static final int YSIZE = 15;
   private double x = 0;
   private double y = 0;
   private double dx = 1;
   private double dy = 1;

   /**
      Moves the ball to the next position, reversing direction
      if it hits one of the edges
   */
   public void move(Rectangle2D bounds)
   {
      x += dx;
      y += dy;
      if (x < bounds.getMinX())
      {
         x = bounds.getMinX();
         dx = -dx;
      }
      if (x + XSIZE >= bounds.getMaxX())
      {
         x = bounds.getMaxX() - XSIZE;
         dx = -dx;
      }
      if (y < bounds.getMinY())
      {
         y = bounds.getMinY();
         dy = -dy;
      }
      if (y + YSIZE >= bounds.getMaxY())
      {
         y = bounds.getMaxY() - YSIZE;
         dy = -dy;
      }
   }

   /**
      Gets the shape of the ball at its current position.
   */
   public Ellipse2D getShape()
   {
      return new Ellipse2D.Double(x, y, XSIZE, YSIZE);
   }
}
package bounceThread;

import java.awt.*;
import java.util.*;
import javax.swing.*;

/**
 * The component that draws the balls.
 * @version 1.34 2012-01-26
 * @author Cay Horstmann
 */
public class BallComponent extends JComponent
{
   private static final int DEFAULT_WIDTH = 450;
   private static final int DEFAULT_HEIGHT = 350;

   private java.util.List<Ball> balls = new ArrayList<>();

   /**
    * Add a ball to the panel.
    * @param b the ball to add
    */
   public void add(Ball b)
   {
      balls.add(b);
   }

   public void paintComponent(Graphics g)
   {
      Graphics2D g2 = (Graphics2D) g;
      for (Ball b : balls)
      {
         g2.fill(b.getShape());
      }
   }

   public Dimension getPreferredSize() { return new Dimension(DEFAULT_WIDTH, DEFAULT_HEIGHT); }
}
package bounceThread;

import java.awt.*;
import java.awt.event.*;

import javax.swing.*;

/**
 * Shows animated bouncing balls.
 * @version 1.34 2015-06-21
 * @author Cay Horstmann
 */
public class BounceThread
{
   public static void main(String[] args)
   {
      EventQueue.invokeLater(() -> {
         JFrame frame = new BounceFrame();
         frame.setTitle("BounceThread");
         frame.setDefaultCloseOperation(JFrame.EXIT_ON_CLOSE);
         frame.setVisible(true);
      });
   }
}

/**
 * The frame with panel and buttons.
 */
class BounceFrame extends JFrame
{
   private BallComponent comp;
   public static final int STEPS = 1000;
   public static final int DELAY = 5;


   /**
    * Constructs the frame with the component for showing the bouncing ball and
    * Start and Close buttons
    */
   public BounceFrame()
   {
      comp = new BallComponent();
      add(comp, BorderLayout.CENTER);
      JPanel buttonPanel = new JPanel();
      addButton(buttonPanel, "Start", event -> addBall());
      addButton(buttonPanel, "Close", event -> System.exit(0));
      add(buttonPanel, BorderLayout.SOUTH);
      pack();
   }

   /**
    * Adds a button to a container.
    * @param c the container
    * @param title the button title
    * @param listener the action listener for the button
    */
   public void addButton(Container c, String title, ActionListener listener)
   {
      JButton button = new JButton(title);
      c.add(button);
      button.addActionListener(listener);
   }

   /**
    * Adds a bouncing ball to the canvas and starts a thread to make it bounce
    */
   public void addBall()
   {
      Ball ball = new Ball();
      comp.add(ball);
      Runnable r = () -> {
         try
         {
            for (int i = 1; i <= STEPS; i++)
            {
               ball.move(comp.getBounds());
               comp.repaint();
               Thread.sleep(DELAY);
            }
         }
         catch (InterruptedException e)
         {
         }
      };
      Thread t = new Thread(r);
      t.start();
   }
}
实验输出结果截图为:
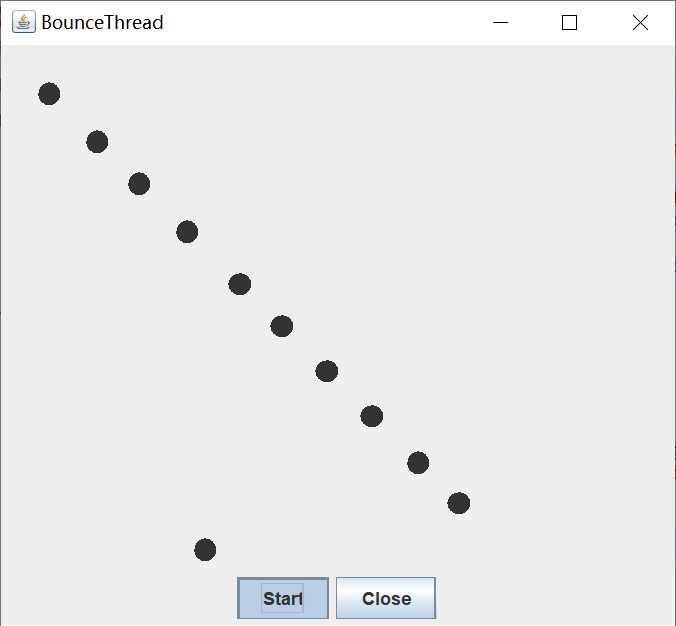

通过对比可以发现bounce中的start按钮只能单次按钮,且前一次的小球的运动情况会影响大奥下一次的小球的进入。即只有当前一次进入运动轨迹的小球走完所有规定路线时下一个小球才可进入。而在bounceThread中灵活地应运了线程的知识,从而它的start键可以多次点击。同时引入多个小球同时运动且相互不影响。以至出现上图中我们在视觉上可以观察到的小球线性的运动轨迹。通过对比这也正是体现了线程的优点——提高系统资源利用率,改善系统性能。
第三部分 实验总结
这周我们主要学习了线程的相关知识,其中多线程的定义联系我们生活中的实例会有助于我们理解。下按时生活中人们在解决问题都会考虑到效率性。我们的程序在解决问题时也一样。多线程就是一个典型的解决问题的方案。这种方法加快了我们解决问题的时间,极大地提高了效率。这些问题在理解上相对容易一些,但是在结对编程的过程当中还是会遇到很多问题,心里想的和做出来的往往差距很大。当然,这还是源于自己学习积累知识太少,所以以后我会更加努力地学习。