一、服务发现——Netflix Eureka
Eureka包含两个组件: Eureka Server和Eureka Client:
Eureka 的作用:提供服务注册和发现功能
- Eureka Server 提供服务发现的功能, 各个微服务会将自己的信息注册到Eureka Server。
- Eureka Client 即服务提供者,将其信息注册到Eureka Server上面。
- 微服务会周期性(默认30秒)地向Eureka Server 发送心跳以维持自己的注册状态,如果Eureka Server 在一定时间(默认90秒)没有接受到某个微服务实例的心跳,Eureka Server 将会注销该实例。
- 默认情况下,Eureka Server 同时也是 Client, 多个Eureka Server 实例之间可以通过复制的方法, 来实现服务注册表数据的同步。
- Eureka Client 会缓存服务注册表中的信息,所以 Eureka Client 无须每次调用微服务都要先查询Eureka Server,能有效地缓解Eureka Server的压力,而且即使所有的Eureka Server节点都宕掉,Client 依然可以根据缓存中信息找到服务提供者。
1、创建Eureka Server服务端
(1)、引入依赖 父工程pom.xml定义SpringCloud版本
 <dependencyManagement>
        <dependencies>
        <dependency>
          <groupId>org.springframework.cloud</groupId>
          <artifactId>spring‐cloud‐dependencies</artifactId>
                 <version>Finchley.M9</version>
                 <type>pom</type>
                 <scope>import</scope>
             </dependency>
         </dependencies>
</dependencyManagement>
(2)、tensquare_eureka模块pom.xml引入eureka-server
 <dependencies>
         <dependency>
             <groupId>org.springframework.cloud</groupId>
             <artifactId>spring‐cloud‐starter‐netflix‐eureka-server</artifactId>
         </dependency>
</dependencies>
(3)、添加application.yml
server:
  port: 6868
eureka:
  client:
    register-with-eureka: false #是否将自己注册到Eureka服务中,本身就是服务无需注册
    fetch-registry: false #是否从Eureka服务中获取注册信息
    service-url:
      defaultZone: http://127.0.0.1:${server.port}/eureka/
(4)编写启动类
import org.springframework.boot.SpringApplication;
import org.springframework.boot.autoconfigure.SpringBootApplication;
import org.springframework.cloud.netflix.eureka.server.EnableEurekaServer;

@SpringBootApplication //SpringBoot    开启注解
@EnableEurekaServer   //EurekaServer  Eureka服务端
public class EurekaServer {
    public static void main(String[] args) {
        SpringApplication.run(EurekaServer.class);
    }
}
(5)、结果:
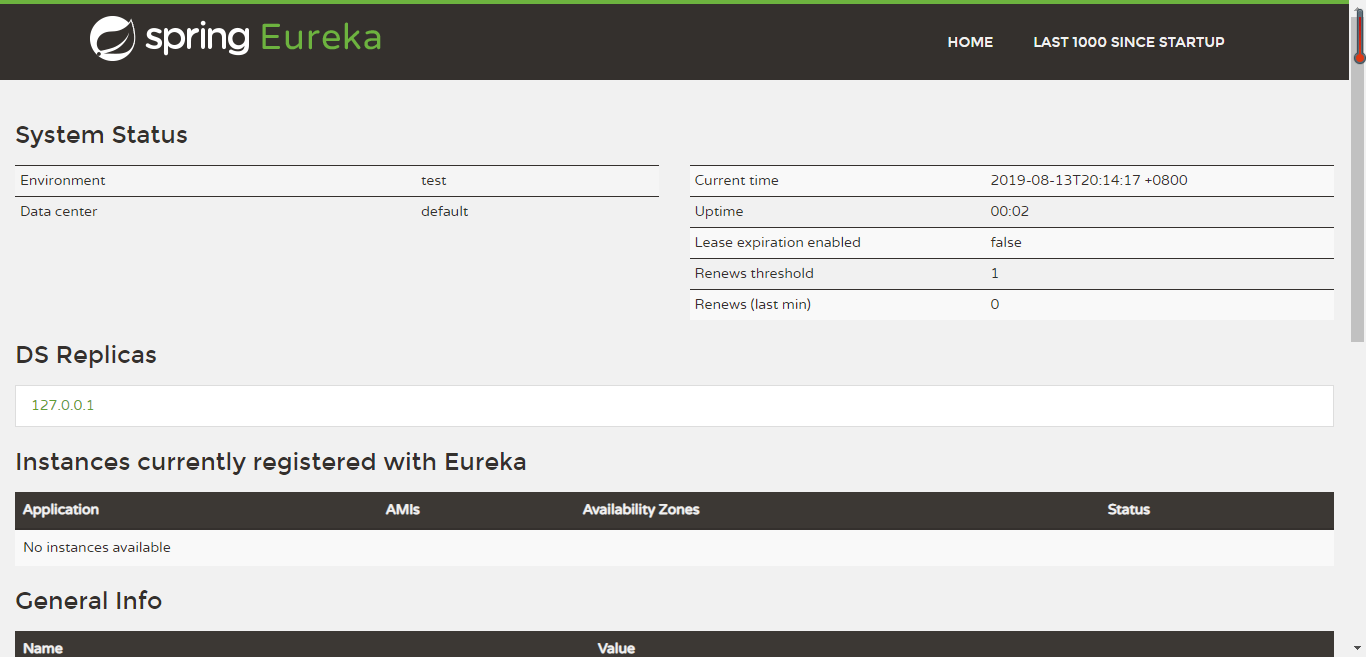
2、创建Eureka Client 服务端
(1)、将其他微服务模块添加依赖
<dependency>
    <groupId>org.springframework.cloud</groupId>
    <artifactId>spring-cloud-starter-netflix-eureka-client</artifactId>
</dependency>
(2)、修改每个微服务的application.yml,添加注册eureka服务的配置
eureka:
  client:
    service-url:
      defaultZone: http://127.0.0.1:6868/eureka/
(3)、修改每个服务类的启动类,添加注解
@EnableEurekaClient
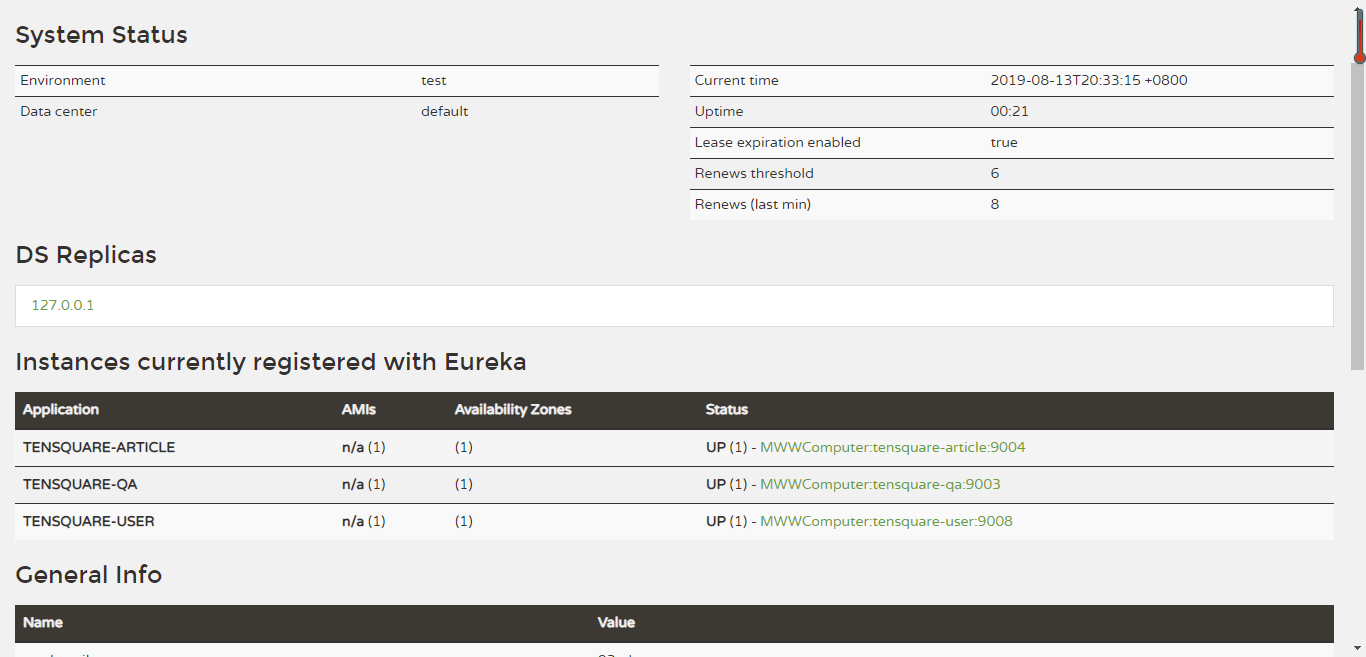
(4)、结果:将每个微服务启动起来,会发现eureka的注册列表中可以看到这些微服 务了
二、服务调用——Netflix Feign 实现服务间的调用
Feign是简化Java HTTP客户端开发的工具(java-to-httpclient-binder),
它的灵感 来自于Retrofit、JAXRS-2.0和WebSocket。
Feign的初衷是降低统一绑定Denominator到 HTTP API的复杂度,不区分是否为restful。
1、在要 通信的 服务上添加依赖
<dependency>
    <groupId>org.springframework.cloud</groupId>
    <artifactId>spring-cloud-starter-openfeign</artifactId>
</dependency>
2、启动类上,添加注解
@SpringBootApplication
@EnableEurekaClient  //客户端标识
@EnableDiscoveryClient //发现服务
@EnableFeignClients //用Feign的方式发现服务
3、创建 com.tensquare.qa.client包,包下创建接口
@FeignClient(value = "tensquare-base")
public interface BaseClient {

    @GetMapping(value = "/label/{labelId}")
    public Result findById(@PathVariable("labelId") String labelId);
}
@FeignClient注解用于指定从哪个服务中调用功能 ,注意 里面的名称与被调用的服务 名保持一致,并且不能包含下划线。
@RequestMapping注解用于对被调用的微服务进行地址映射。注意 @PathVariable注 解一定要指定参数名称,否则出错
4、修改tensquare_qa模块的 ProblemController
    @Autowired
    private BaseClient baseClient;

    @GetMapping(value = "/label/{labelId}")
    public Result findByLabelId(@PathVariable String labelId){
        Result result= baseClient.findById(labelId);
        return result;
    }
5、结果 http://localhost:9003/problem/label/1144250491664994304 获取数据
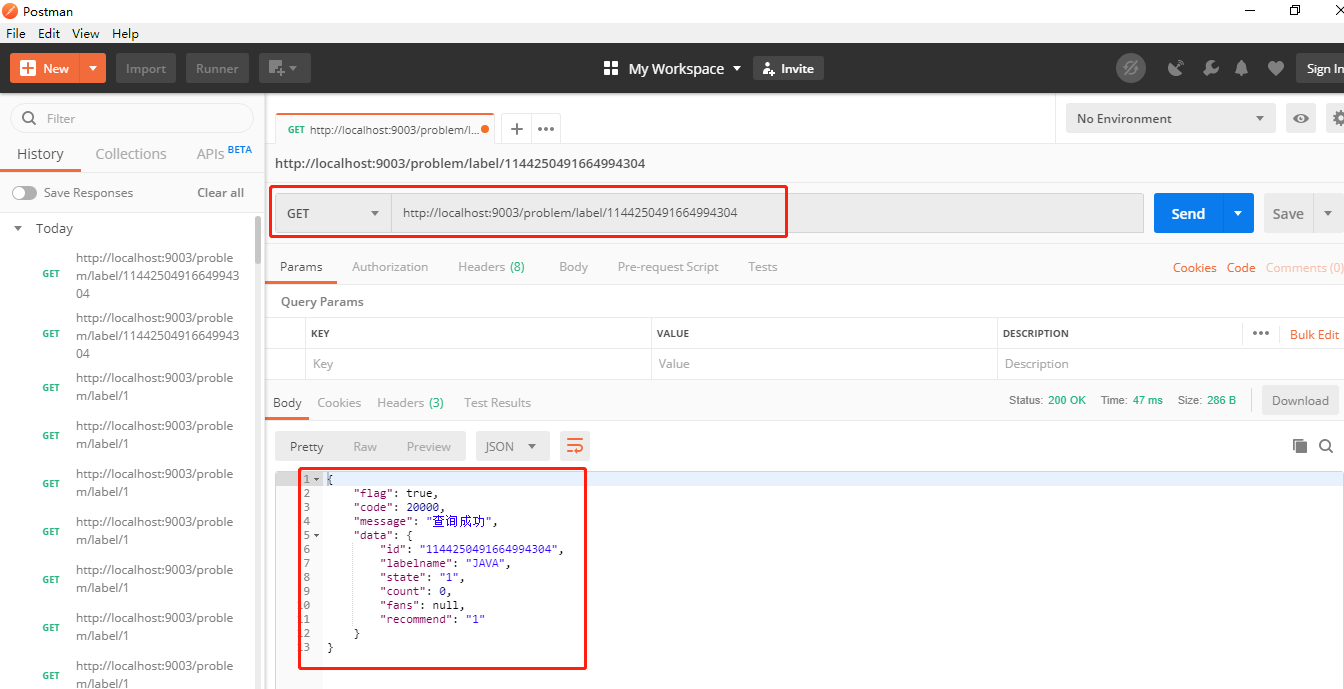
/label/{labelId} 是 teasquare_base 服务中的方法
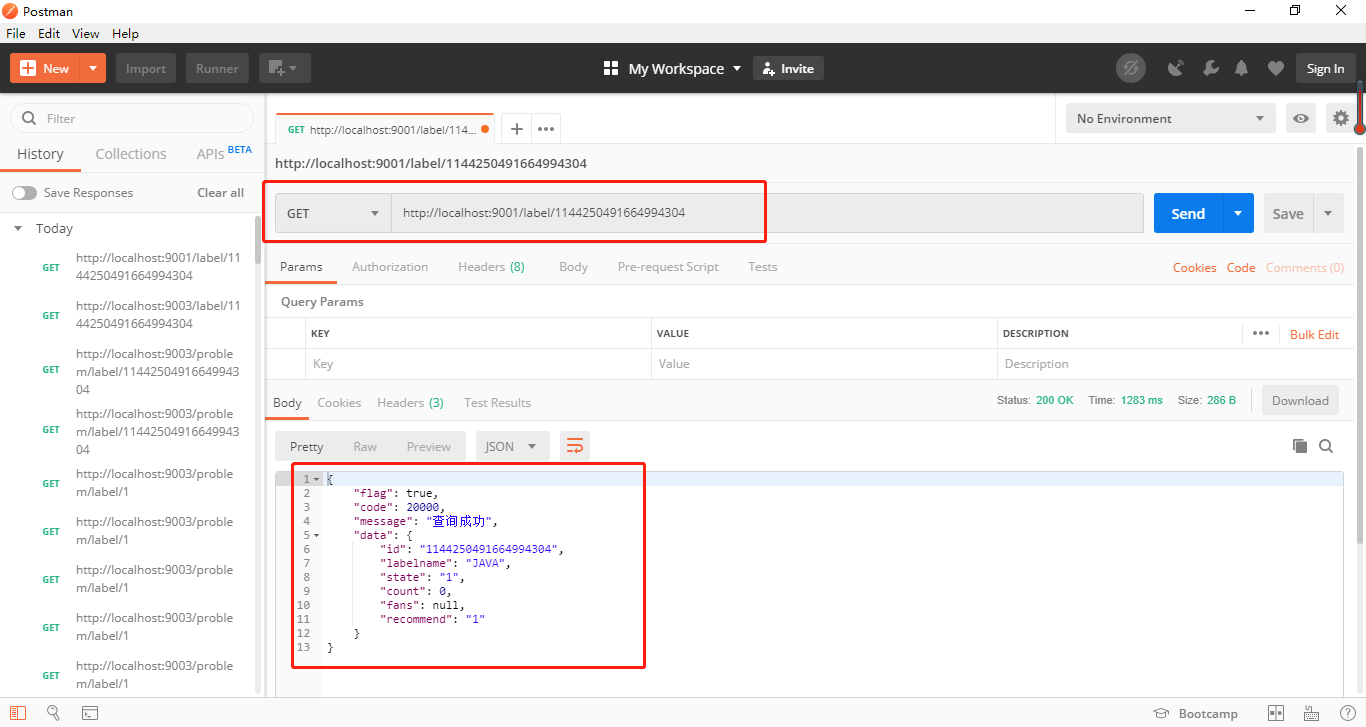
原本可由 :http://localhost:9001/label/1144250491664994304 查询到
三、熔断器——Netflix Hystrix
在微服务架构中通常会有多个服务层调用,基础服务的故障可能会导致级联故障,
进而造成整个系统不可用的情况,这种现象被称为服务雪崩效应。
服务雪崩效应是一种 因“服务提供者”的不可用导致“服务消费者”的不可用,并将不可用逐渐放大的过程。
如何避免产生这种雪崩效应呢?我们可以使用Hystrix来实现熔断器。
Hystrix 能使你的系统在出现依赖服务失效的时候,通过隔离系统所依赖的服务,
防 止服务级联失败,同时提供失败回退机制,
更优雅地应对失效,并使你的系统能更快地 从异常中恢复。
Feign 本身支持Hystrix,不需要额外引入依赖。
1、修改tensquare_qa模块的application.yml ,开启hystrix
feign:
  hystrix:
    enabled: true
2、在com.tensquare.qa.client包下创建impl包,包下创建熔断实现类,实现自接口 LabelClient
@Component
public class BaseClientImpl implements BaseClient {
    @Override
    public Result findById(String labelId) {
        return new Result(false, StatusCode.ERROR,"触发熔断器");
    }
}
3、修改LabelClient的注解
@FeignClient(value = "tensquare-base",fallback = BaseClientImpl.class)
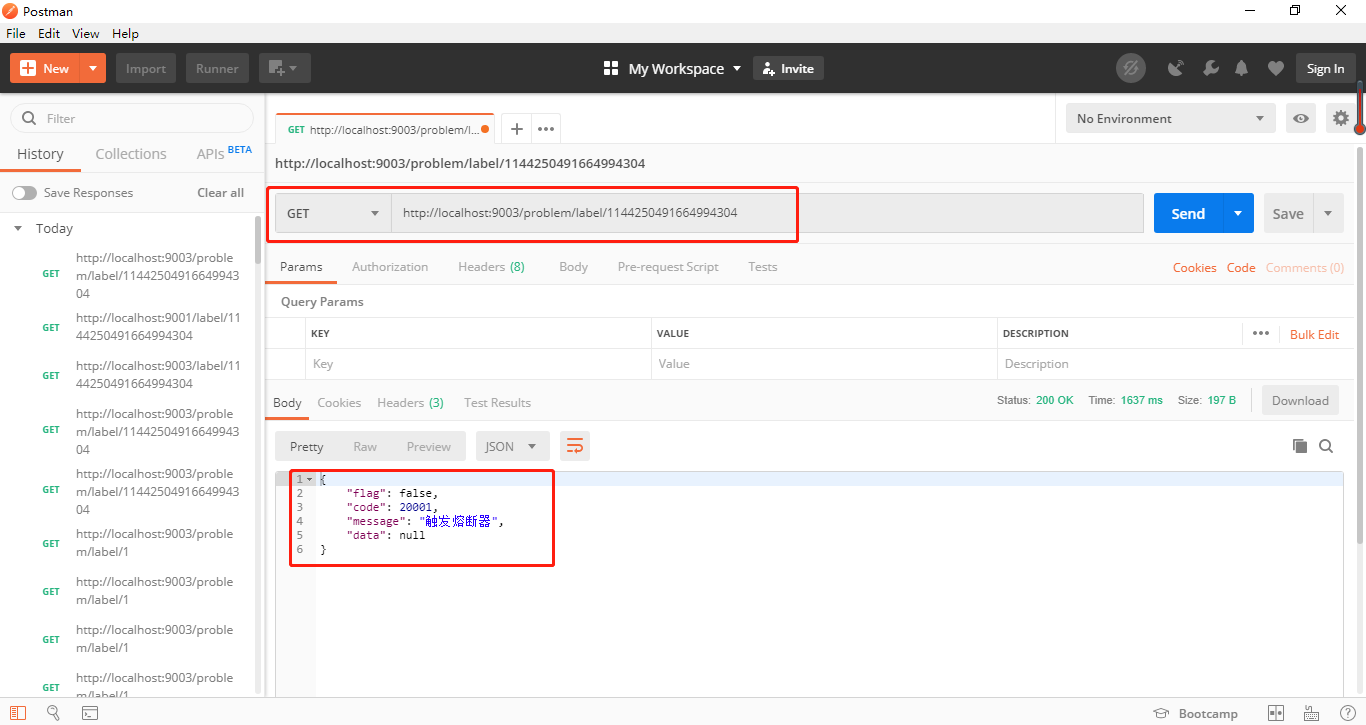
4、测试运行
重新启动问答微服务,测试看熔断器是否运行
四、服务网关——Netflix Zuul
Zuul作用:过滤器,动态路由;
- 验证与安全保障: 识别面向各类资源的验证要求并拒绝那些与要求不符的请求。
- 审查与监控: 在边缘位置追踪有意义数据及统计结果,从而为我们带来准确的生产状态结论。
- 动态路由: 以动态方式根据需要将请求路由至不同后端集群处。
- 压力测试: 逐渐增加指向集群的负载流量,从而计算性能水平。
- 负载分配: 为每一种负载类型分配对应容量,并弃用超出限定值的请求。
- 静态响应处理: 在边缘位置直接建立部分响应,从而避免其流入内部集群。
- 多区域弹性: 跨越AWS区域进行请求路由,旨在实现ELB使用多样化并保证边缘位置与使用者尽可能接近。
1、创建子模块tensquare_web,pom.xml引入eureka-client 和zuul的依赖
 <dependency>
     <groupId>org.springframework.cloud</groupId>
     <artifactId>spring-cloud-starter-netflix-eureka-client</artifactId>
 </dependency>
 <dependency>
     <groupId>org.springframework.cloud</groupId>
     <artifactId>spring-cloud-starter-netflix-zuul</artifactId>
 </dependency>
2、创建application.yml
server:
  port: 9012
spring:
  application:
    name: tensquare-web
eureka:
  client:
    service-url:
      defaultZone: http://127.0.0.1:6868/eureka/
  instance:
    prefer-ip-address: true
zuul:
  routes:
    tensquare-base:
      path: /base/**
      serviceId: tensquare-base
    tensquare-user:
      path: /user/**
      serviceId: tensquare-user
    tensquare-qa:
      path: /qa/**
      serviceId: tensquare-qa
3、编写启动类
@SpringBootApplication
@EnableEurekaClient
@EnableZuulProxy
public class WebApplication {
    public static void main(String[] args) {
        SpringApplication.run(WebApplication.class);
    }
}
4、Zuul过滤器
@Component
public class WebFilter extends ZuulFilter {
    @Override
    public String filterType() {
        return "pre"; // 前置过滤器
    }

    @Override
    public int filterOrder() {
        return 0; // 优先级为0,数字越大,优先级越低
    }

    @Override
    public boolean shouldFilter() {
        return true; // 是否执行该过滤,此处为true,说明需要过滤
    }

    @Override
    public Object run() throws ZuulException {
        System.out.println("zuul过滤器..."); return null;
    }
}
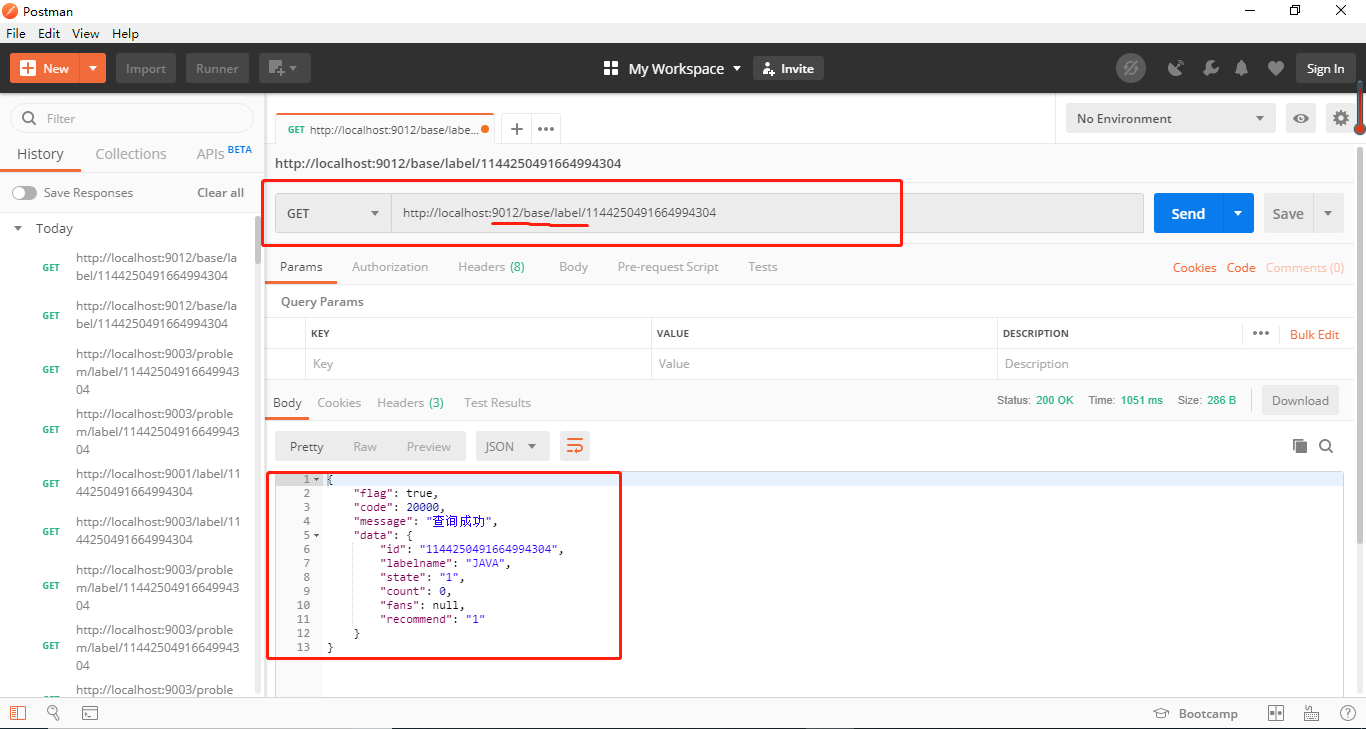
5、结果
工作台输出:zuul过滤器...
原本路径 :http://localhost:9001/label/1144250491664994304 查询到
原本路径 改成这个 9012/base/**
访问路径:http://localhost:9012/base/label/1144250491664994304
五、分布式配置——Spring Cloud Config
在Spring Cloud中,有分布式配置中心组件spring cloud config ,它支持配置服务放在配置服务的内存中(即本地),
也支持放在远程Git仓库 中。在spring cloud config 组件中,分两个角色,一是config server,二是config client。
Config Server是一个可横向扩展、集中式的配置服务器,它用于集中管理应用程序各个 环境下的配置,
默认使用Git存储配置文件内容,也可以使用SVN存储,或者是本地文件 存储。
Config Client是Config Server的客户端,用于操作存储在Config Server中的配置内容。
微服务在启动时会请求Config Server获取配置文件的内容,请求到后再启动容器。
1、配置中心微服务
(1)、创建工程模块 配置中心微服务 tensquare_config,pom.xml引入依赖
<dependency>
     <groupId>org.springframework.cloud</groupId>
     <artifactId>spring-cloud-config-server</artifactId>
</dependency>
(2)、创建启动类ConfigServerApplication
@SpringBootApplication
@EnableConfigServer  //开启配置服务
public class ConfigApplication {
    public static void main(String[] args) {
        SpringApplication.run(ConfigApplication.class);
    }
}
(3)、编写配置文件application.yml
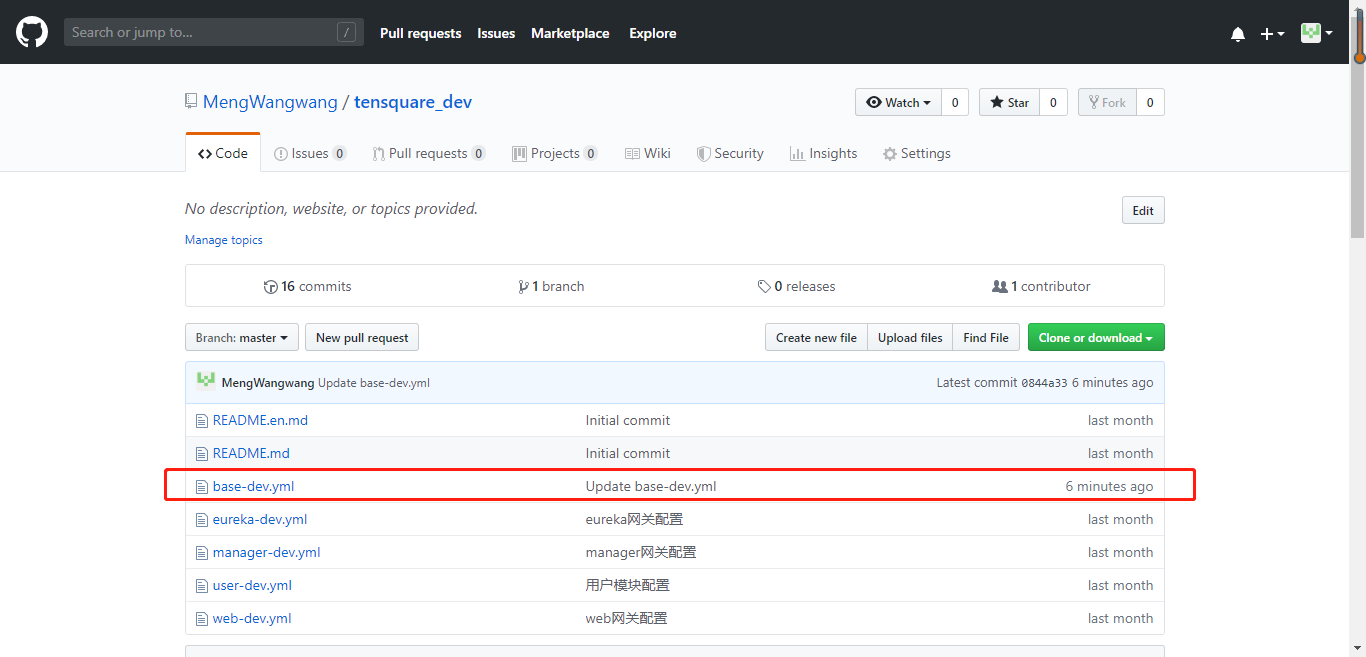
server:
  port: 12000
spring:
  application:
    name: tensquare_config
  cloud:
    config:
      server:
        git:
          uri: https://github.com/MengWangwang/tensquare_dev.git
(4)、测试结果 将 tensquare_base 中的application.yml内容上传到github
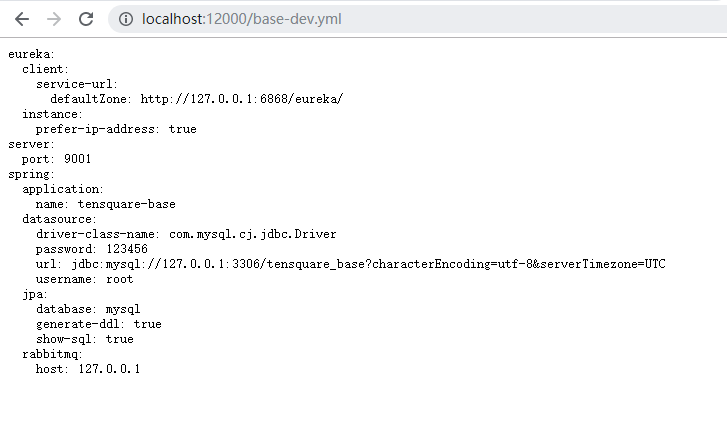
(5)、测试结果 开启 tensquare_config,http://localhost:12000/base-dev.yml测试
2、配置客户端
(1)、在tensquare_base工程添加依赖
<dependency>
    <groupId>org.springframework.cloud</groupId>
    <artifactId>spring-cloud-starter-config</artifactId>
</dependency>
(2)、添加bootstrap.yml ,删除application.yml
spring:
  cloud:
    config:
      name: base
      profile: dev
      label: master
      uri: http://127.0.0.1:12000
(3)测试: 启动工程tensquare_eureka tensquare_config tensquare_base tensquare_common,看是 否可以正常运行
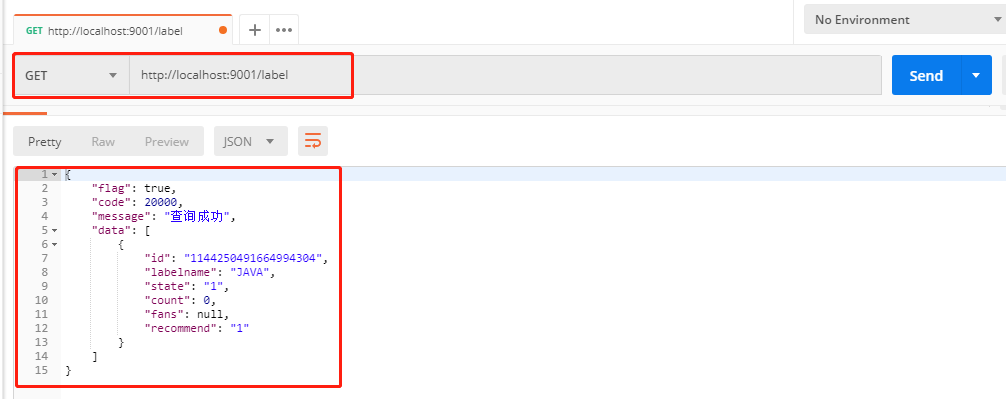
测试路径:http://localhost:9001/label
六、消息总线 —— Spring Cloud Bus
在不重启微服务的情况 下更新配置如何来实现呢? 我们使用SpringCloudBus来实现配置的自动更新
1、配置服务端
(1)、修改tensquare_config工程的pom.xml,引用依赖
<dependency>
    <groupId>org.springframework.cloud</groupId>
    <artifactId>spring-cloud-bus</artifactId>
</dependency>
<dependency>
    <groupId>org.springframework.cloud</groupId>
    <artifactId>spring-cloud-stream-binder-rabbit</artifactId>
</dependency>
(2)、修改application.yml ,添加配置
server:
  port: 12000
spring:
  application:
    name: tensquare_config
  cloud:
    config:
      server:
        git:
          uri: https://github.com/MengWangwang/tensquare_dev.git
  rabbitmq:
    host: 127.0.0.1
management: #暴露触发消息总线的地址
  endpoints:
    web:
      exposure:
        include: bus-refresh
2、配置客户端
(1)、修改tensquare_base工程 ,引入依赖
<dependency>
    <groupId>org.springframework.cloud</groupId>
    <artifactId>spring-cloud-bus</artifactId>
</dependency>
<dependency>
    <groupId>org.springframework.cloud</groupId>
    <artifactId>spring-cloud-stream-binder-rabbit</artifactId>
</dependency>
<dependency>
    <groupId>org.springframework.boot</groupId>
    <artifactId>spring-boot-starter-actuator</artifactId>
</dependency>
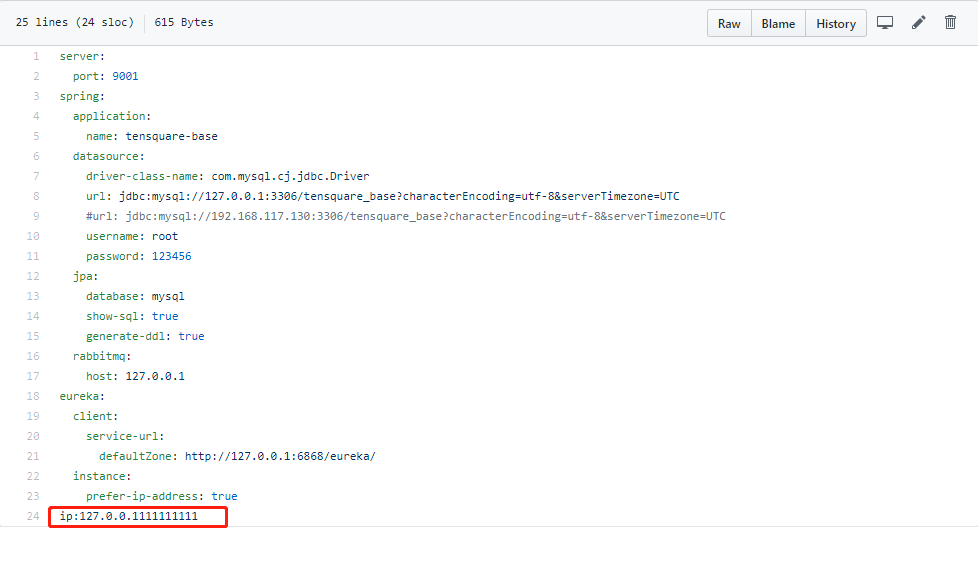
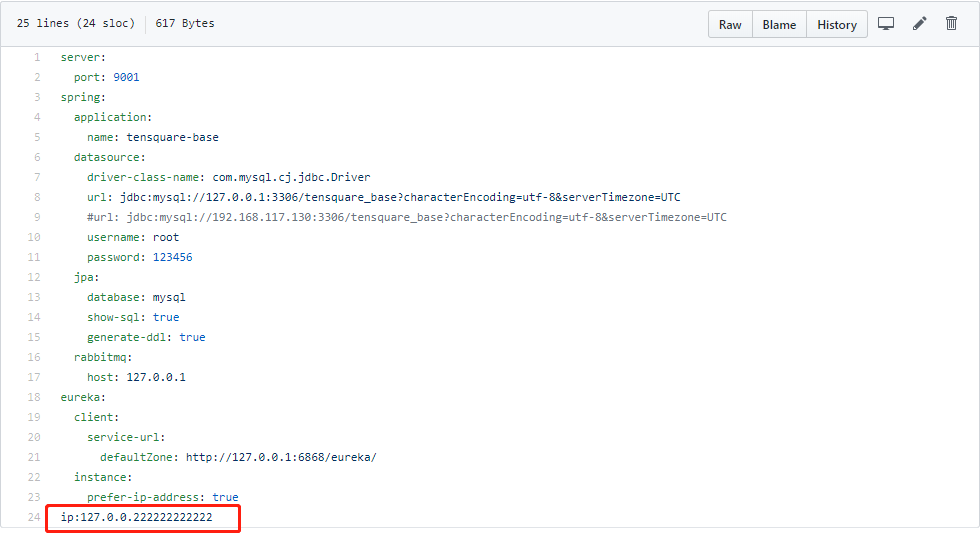
(2)、修改 base-dev.yml 将 ip:127.0.0.1111111111 修改为 ip:127.0.0.222222222
(3)、点击测试 http://127.0.0.1:12000/actuator/bus-refresh,就会刷新配置。
ip:127.0.0.11111111111111
++++++++++++++:Bearer eyJhbGciOiJIUzI1NiJ9.eyJqdGkiOiIxMTQ4NTcwMjc0OTA4NzM3NTM2Iiwic3ViIjoiYWRtaW4iLCJpYXQiOjE1NjMwNzU3ODQsInJvbGVzIjoiYWRtaW4iLCJleHAiOjE1NjMwNzkzODR9.LFKjNF8F6PdbrL_EYgRtOWuAtgYW8Qw2DlWEjdXZGfk
(4)、点击测试 http://localhost:9001/label,查询。
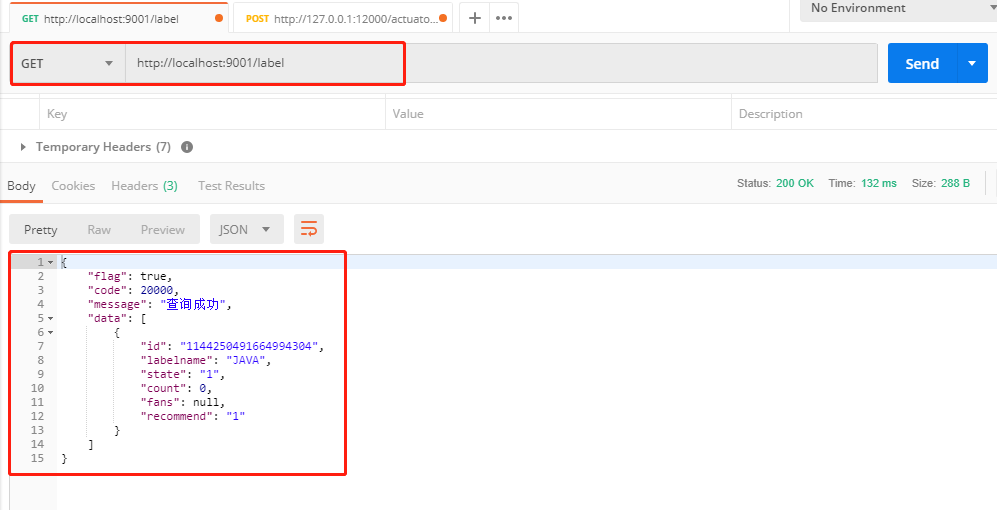
ip:127.0.0.222222222
++++++++++++++:Bearer eyJhbGciOiJIUzI1NiJ9.eyJqdGkiOiIxMTQ4NTcwMjc0OTA4NzM3NTM2Iiwic3ViIjoiYWRtaW4iLCJpYXQiOjE1NjMwNzU3ODQsInJvbGVzIjoiYWRtaW4iLCJleHAiOjE1NjMwNzkzODR9.LFKjNF8F6PdbrL_EYgRtOWuAtgYW8Qw2DlWEjdXZGfk
七、github源码:https://github.com/MengWangwang/tensquare
Spring Cloud Config的GitHub:https://github.com/MengWangwang/tensquare_dev
注:本工程还用到了rabbitMq和redis,以及mongodb,所以启动相关模块时,记得开启工具。