百度Apollo搭建步骤
##一、安装ubuntu16.04
无需多说,安装完成打开命令行。
##二、下载Apollo镜像
git clone https://github.com/ApolloAuto/apollo
若提示未安装git,则安装git。
##三、安装docker-ce
如果你过去安装过其他版本的docker,先删掉:
sudo apt-get remove docker docker-engine docker.io
首先安装依赖:
sudo apt-get install apt-transport-https ca-certificates curl gnupg2 software-properties-common
信任 Docker 的 GPG 公钥:
curl -fsSL https://download.docker.com/linux/ubuntu/gpg | sudo apt-key add -
对于 amd64 架构的计算机,添加软件仓库:
sudo add-apt-repository
"deb [arch=amd64] https://mirrors.tuna.tsinghua.edu.cn/docker-ce/linux/ubuntu
$(lsb_release -cs)
stable"
如果你是树莓派或其它ARM架构计算机,请运行:
echo "deb [arch=armhf] https://mirrors.tuna.tsinghua.edu.cn/docker-ce/linux/ubuntu
$(lsb_release -cs) stable" |
sudo tee /etc/apt/sources.list.d/docker.list
最后安装
sudo apt-get update
sudo apt-get install docker-ce
把当前用户加到docker用户组中:
######添加docker用户组
sudo groupadd docker
######把自己加到docker用户组中
sudo gpasswd -a myusername docker
myusername是指你的用户名
######重启docker后台服务
sudo service docker restart
######切换当前用户到新group
newgrp - docker
######确认docker可以非sudo运行
docker ps
##四、安装ros(apollo里集成ros,就不用安装ros了)
参见:https://www.cnblogs.com/mohuishou-love/p/10079922.html
##五、.安装apollo-kernel(未安装,跳过)
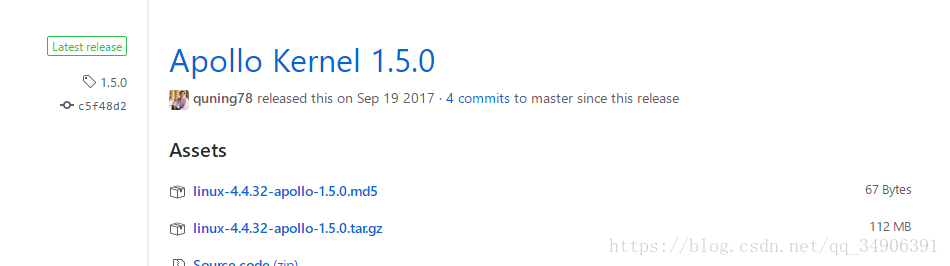
######(1)在Apollo github下载百度编译好的内核
https://github.com/ApolloAuto/apollo-kernel/releases
安装参见:百度无人车ApolloAuto使用入门
https://blog.csdn.net/ss910/article/details/74998172
https://github.com/ApolloAuto/apollo-kernel
为运行Apollo软件提供了kernel层面的支持。
从这里下载linux-4.4.32-apollo-1.0.0.tar.gz:
https://github.com/ApolloAuto/apollo-kernel/releases
解压安装:
tar zxvf linux-4.4.32-apollo-1.0.0.tar.gz
cd install
sudo ./install_kernel.sh
重启系统。
##六、 安装apollo-platform (ubuntu14.04 ,跳过)
https://github.com/ApolloAuto/apollo-platform
相对于原版ROS,做出了如下改进:
。增强了ROS的去中心化特性;
。基于共享内存的更高效的通信;
。支持Protobuf;
下载apollo-platform并解压:
https://github.com/ApolloAuto/apollo-platform/releases
解压缩:
tar zxvf ros-indigo-apollo-1.0.0.x86_64.tar.gz
将文件夹中的ros拷贝到apollo工程中:
rsync -av ros/ ~/apollo/third_party/ros_x86_64
cd apollo
source ./third_party/ros_x86_64/setup.bash
##七、 Apollo编译
执行 service docker start 命令
######1.设置docker环境
cd apollo
bash docker/scripts/dev_start.sh -C #-C表示从中国镜像服务器下载,速度较快(很长时间5个小时)

bash docker/scripts/dev_into.sh
######2.编译Apollo
bash apollo.sh build #若提示权限不足,则sudo su (小时)
######3.启动人机交互界面(HMI)
bash scripts/bootstrap.sh
打开chrome浏览器,输入地址“localhost:8888”即可访问dreamview。
重新打开apollo,演示代码如下:
cd apollo

bash docker/scripts/dev_start.sh -C

bash docker/scripts/dev_into.sh

bash scripts/bootstrap.sh

rosbag play demo_2.0.bag --loop #--loop设置循环回放

localhost:8888
##八、 Apollo演示(出错)
######1.启动docker的release环境
bash docker/scripts/release_start.sh
######2.进入release环境
bash docker/scripts/release_into.sh
######3.回放rosbag
python docs/demo_guide/rosbag_helper.py demo_1.5.bag #下载rosbag
下载测试数据包demo_2.0.bag 参见:https://blog.csdn.net/SingingFisher/article/details/81536096
输入 python docs/demo_guide/rosbag_helper.py demo_2.0.bag 来下载demo_2.0.bag数据包,不过由于资源在github上,所以很大可能是下载不下来的。来这里下载吧:https://pan.baidu.com/s/1jQwavKBzTvHHVnSlwxM1ZQ 密码:1nz8
此时你还在docker环境下:root@in_dev_docker:/apollo,把下载的demo_2.0.bag复制到此处。
cd ~/apollo
bash scripts/hmi.sh
在浏览器输入http://localhost:8887后回车,在Debug中开启Dreamview,然后点击右上方的Dreamview。
在另一个终端里输入:
rosbag play demo_1.5.bag --loop #--loop设置循环回放
打开chrome浏览器,输入地址“localhost:8888”即可在dreamview中看到demo演示。
问题:
(1) 遇到一个问题,总是 build failed
这时候在docker 环境下执行命令:
bazel query //...然后再执行 build 那一句,就正常了。
(2) Error response from daemon: Container CONTAINER_NAME is not running
Build in Visual Studio Code
Install VSCode
The easiest way to install for Debian/Ubuntu based distributions is to download from https://code.visualstudio.com and install the .deb package (64-bit) either through the graphical software center if it's available or through the command line with:
sudo dpkg -i <file>.deb
sudo apt-get install -f # Install dependencies
Start VSCode
Start VSCode with the following command:
code
Open the Apollo project in VSCode
Use the keyboard shortcut (Ctrl+K Ctrl+O) to open the Apollo project.
Build the Apollo project in VSCode
Use the keyboard shortcut (Ctrl+Shift+B) to build the Apollo project.
Run all unit tests for the Apollo project in VSCode
Select the "Tasks->Run Tasks..." menu command and click "run all unit tests for the apollo project" from a popup menu to check the code style for the Apollo project.
If you are currently developing on 16.04, you will get a build error. As seen in the image below, 2 perception tests. To avoid this build error, refer to the how to build Apollo using Ubuntu 16.

(虚拟机+ubuntu16.04+vscode 编译没有出现错误)
Run a code style check task for the Apollo project in VSCode
Select the "Tasks->Run Tasks..." menu command and click "code style check for the apollo project" from a popup menu to check the code style for the Apollo project.
Clean the Apollo project in VSCode
Select the "Tasks->Run Tasks..." menu command and click "clean the apollo project" from a popup menu to clean the Apollo project.
Change the building option
You can change the "build" option to another one such as "build_gpu" (refer to the "apollo.sh" file for details) in ".vscode/tasks.json"
Test
bash docker/scripts/release_start.sh [release tag]
The HMI will automatically start and you can control each apollo module through any web browser by inputting IP address and port number, such as localhost:8887. You can get into the release container if quick fix needed.
bash docker/scripts/release_into.sh
参见:
https://github.com/ApolloAuto/apollo/blob/master/docs/howto/how_to_build_and_release.md#open-the-apollo-project-in-vscode
另外参见:
ubuntu16.04 安装 apollo-kernel,apollo-platform以及apollo
http://www.51apollo.com/2018/08/21/ubuntu16-04-安装-apollo-kernel,apollo-platform以及apollo/
百度阿波罗Apollo r3.0完整安装以及常用操作教程
https://blog.csdn.net/SingingFisher/article/details/81536096
https://blog.csdn.net/ss910/article/details/74998172
https://blog.csdn.net/qq_34906391/article/details/81478968 (重要)
https://blog.csdn.net/jinzhuojun/article/details/80210180
Apollo 2.5 安装踩坑指南