1. 简单介绍
相信许多人最开始使用Springboot之前,都经历过写SpringMVC项目时,处理各种各样配置文件的烦恼。正是因为Springboot简化了配置项目的复杂性,所以采用Springboot可以极大的方便编程人员,就像Springboot官方网站介绍的那样 ------- "Spring Boot makes it easy to create stand-alone, production-grade Spring based Applications that you can "just run". We take an opinionated view of the Spring platform and third-party libraries so you can get started with minimum fuss. Most Spring Boot applications need minimal Spring configuration." 开发人员不需要关注许多复杂的配置文件,甚至可以创建一个Springboot项目,然后直接启动就可以运行。而实现这一切的正是Springboot的自动配置功能。
在我之前的开发过程中,一直没有去深究自动配置功能的原理,因为它实在是太方便了,很多时候甚至不会太在意它的存在。直到上个月面试的时候被面试官问到这个自动配置原理的问题,才发现自己还是需要去补补这方面知识。学会了Springboot自动配置原理不仅可以用来应付面试,很多时候还可以自己编写自动配置类,来实现在多环境或者多项目下代码快速重用。故下面简单的跟随源码去了解Springboot如何实现自动配置。
2. 从@EnableAutoConfiguration注解开始
在我们创建Springboot项目时,一般在项目里会有一个xxxApplication的启动类,在这个启动类上有这么一个注解@SpringBootApplication,如下。
1 import org.springframework.boot.SpringApplication; 2 import org.springframework.boot.autoconfigure.SpringBootApplication; 3 4 @SpringBootApplication 5 public class StarterdemoApplication { 6 7 public static void main(String[] args) { 8 SpringApplication.run(StarterdemoApplication.class, args); 9 } 10 11 }
进入这个注解的源码我们就会发现如下:
 1 /**
 2  * Indicates a configuration class that declares one or more
 3  * @Bean methods and also triggers auto-configuration and component
 4  * scanning. This is a convenience
 5  * annotation that is equivalent to declaring @Configuration,
 6  * @EnableAutoConfiguration and @ComponentScan.
 7  *
 8  * @author Phillip Webb
 9  * @author Stephane Nicoll
10  * @author Andy Wilkinson
11  * @since 1.2.0
12  */
13 @Target(ElementType.TYPE)
14 @Retention(RetentionPolicy.RUNTIME)
15 @Documented
16 @Inherited
17 @SpringBootConfiguration
18 @EnableAutoConfiguration
19 @ComponentScan(excludeFilters = { @Filter(type = FilterType.CUSTOM, classes = TypeExcludeFilter.class),
20         @Filter(type = FilterType.CUSTOM, classes = AutoConfigurationExcludeFilter.class) })
21 public @interface SpringBootApplication {
22 //.....
23 }
其中说明了这个注解的用途是表示这个类是一个能执行自动配置和组件扫描的配置类。@SpringBootApplication注解最主要的是其包含了以下三个注解 ------ @Configuration, 表示这是一个配置类,@EnableAutoConfiguration,表示开启自动配置, @ComponentScan,表示扫描basePackages下的组件。这里面最重要的当属@EnableAutoConfiguration注解。
@EnableAutoConfiguration的作用是开启Spring的自动配置,尝试去配置我们项目可能需要的bean。这个注解可以通过SpringFactoriesLoader类来定位自动配置类,也就是标注了@Configuration的类,并且这些配置的开启往往需要一定的条件,设置这些条件通常是使用@Conditional注解。
当我们进入到@EnableAutoConfiguration的源码时,会发现这个注解通过@Import引入了一个AutoConfigurationImportSelector的类
1 @Target(ElementType.TYPE) 2 @Retention(RetentionPolicy.RUNTIME) 3 @Documented 4 @Inherited 5 @AutoConfigurationPackage 6 @Import(AutoConfigurationImportSelector.class) 7 public @interface EnableAutoConfiguration { 8 9 /** 10 * Environment property that can be used to override when auto-configuration is 11 * enabled. 12 */ 13 String ENABLED_OVERRIDE_PROPERTY = "spring.boot.enableautoconfiguration"; 14 15 /** 16 * Exclude specific auto-configuration classes such that they will never be applied. 17 * @return the classes to exclude 18 */ 19 Class<?>[] exclude() default {}; 20 21 /** 22 * Exclude specific auto-configuration class names such that they will never be 23 * applied. 24 * @return the class names to exclude 25 * @since 1.3.0 26 */ 27 String[] excludeName() default {}; 28 29 }
AutoConfigurationImportSelector类实现了ImportSelector接口,并且重载了选择引入的方法
1 @Override
2     public String[] selectImports(AnnotationMetadata annotationMetadata) {
3         if (!isEnabled(annotationMetadata)) {
4             return NO_IMPORTS;
5         }
6         AutoConfigurationEntry autoConfigurationEntry = getAutoConfigurationEntry(annotationMetadata);
7         return StringUtils.toStringArray(autoConfigurationEntry.getConfigurations());
8     }
这个方法调用了AutoConfigurationImportSelector类的getAutoConfigurationEntry方法,通过被导入的配置类的注解元信息获取到自动配置实体。
 1 protected AutoConfigurationEntry getAutoConfigurationEntry(AnnotationMetadata annotationMetadata) {
 2         if (!isEnabled(annotationMetadata)) {
 3             return EMPTY_ENTRY;
 4         }
 5         AnnotationAttributes attributes = getAttributes(annotationMetadata);
 6         List<String> configurations = getCandidateConfigurations(annotationMetadata, attributes);
 7         configurations = removeDuplicates(configurations);
 8         Set<String> exclusions = getExclusions(annotationMetadata, attributes);
 9         checkExcludedClasses(configurations, exclusions);
10         configurations.removeAll(exclusions);
11         configurations = getConfigurationClassFilter().filter(configurations);
12         fireAutoConfigurationImportEvents(configurations, exclusions);
13         return new AutoConfigurationEntry(configurations, exclusions);
14     }
从上面这个方法的代码我们可以知道,这个方法主要的功能,是获取候选的配置,并且根据特定的属性排除掉一些配置。最关键是搞清楚它是怎么知道通过注解元信息和属性知道那些配置是我们需要的,所以我们还要深入到当前类的getCandidateConfigurations方法一探究竟。
1 protected List<String> getCandidateConfigurations(AnnotationMetadata metadata, AnnotationAttributes attributes) {
2         List<String> configurations = SpringFactoriesLoader.loadFactoryNames(getSpringFactoriesLoaderFactoryClass(),
3                 getBeanClassLoader());
4         Assert.notEmpty(configurations, "No auto configuration classes found in META-INF/spring.factories. If you "
5                 + "are using a custom packaging, make sure that file is correct.");
6         return configurations;
7     }
从上面的源码中我们可以知道,这个方法通过调用SpringFactoriesLoader类的loadFactoryNames方法获取所有候选配置类的全限定类名。继续深入到loadFactoryNames方法中。
 1     /**
 2      * Load the fully qualified class names of factory implementations of the
 3      * given type from META-INF/spring.factories, using the given
 4      * class loader.
 5      * <p>As of Spring Framework 5.3, if a particular implementation class name
 6      * is discovered more than once for the given factory type, duplicates will
 7      * be ignored.
 8      * @param factoryType the interface or abstract class representing the factory
 9      * @param classLoader the ClassLoader to use for loading resources; can be
10      * {@code null} to use the default
11      * @throws IllegalArgumentException if an error occurs while loading factory names
12      * @see #loadFactories
13      */
14     public static List<String> loadFactoryNames(Class<?> factoryType, @Nullable ClassLoader classLoader) {
15         ClassLoader classLoaderToUse = classLoader;
16         if (classLoaderToUse == null) {
17             classLoaderToUse = SpringFactoriesLoader.class.getClassLoader();
18         }
19         String factoryTypeName = factoryType.getName();
20         return loadSpringFactories(classLoaderToUse).getOrDefault(factoryTypeName, Collections.emptyList());
21     }
这个方法从一个数据结构ConcurrentReferenceHashMap中获取到配置类的全限定类名。并且获取键值对信息的位置在META-INF/spring.factories中,这个文件就以键值对的形式保存了自动配置类的全限定类名信息。
2.自动配置的关键META-INF/spring.factories
在有了上面的深入发掘后,我们知道了springboot的启动类通过@EnableAutoConfiguration开启了自动配置,在所有的配置类被载入Spring容器之后,利用这个注解导入的AutoConfigurationImportSelector类的selectImports方法获取自动配置信息。之后经过我们的深入探索,最终发现可能需要被导入的自动配置类信息会以键值对的形式保存在META-INF/spring.factories中。
我们打开一些springboot项目中的包,其实能发现这个文件的存在。
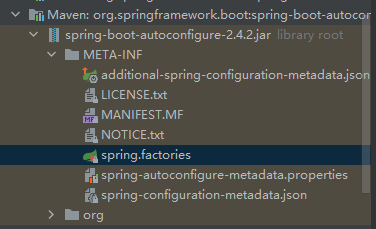
进入到这个文件中,我们会发现自动配置类的全限定类名确实被以键值对的信息保存。
# Auto Configure
org.springframework.boot.autoconfigure.EnableAutoConfiguration=
org.springframework.boot.autoconfigure.admin.SpringApplicationAdminJmxAutoConfiguration,
org.springframework.boot.autoconfigure.aop.AopAutoConfiguration,
org.springframework.boot.autoconfigure.amqp.RabbitAutoConfiguration,
org.springframework.boot.autoconfigure.batch.BatchAutoConfiguration,
至此我们知道了,springboot可以根据META-INF/spring.factories里的信息知道那些配置是需要被导入到项目里的。但是还有一个问题,那就是配置往往有许多详细的设置,例如对于服务器端口,我们可以通过在application.properties或者application,yml中输入server.port=8080来进行设置,那么springboot是怎么通过读取properties或者yml文件来进行详细的设置呢?
这里我们可以根据一些现有的自动配置类来进行分析。
3.从ServletWebServerFactoryAutoConfiguration类入手
这个是官方提供的一个自动配置类,用于自动配置一些servlet web的内容,这里我截取部分源码进行分析。
 1 @Configuration(proxyBeanMethods = false)
 2 @AutoConfigureOrder(Ordered.HIGHEST_PRECEDENCE)
 3 @ConditionalOnClass(ServletRequest.class)
 4 @ConditionalOnWebApplication(type = Type.SERVLET)
 5 @EnableConfigurationProperties(ServerProperties.class)
 6 @Import({ ServletWebServerFactoryAutoConfiguration.BeanPostProcessorsRegistrar.class,
 7         ServletWebServerFactoryConfiguration.EmbeddedTomcat.class,
 8         ServletWebServerFactoryConfiguration.EmbeddedJetty.class,
 9         ServletWebServerFactoryConfiguration.EmbeddedUndertow.class })
10 public class ServletWebServerFactoryAutoConfiguration {
11 //......
12 }
最开始@Configuration表面这是一个配置类,之后就是@ConditionalOnxxx注解,表示这个类在满足这些条件后才能被注册到Spring容器中。最后就是@EnableConfigurationProperties,这个注解可以导入标注了@ConfigurationProperties注解的Bean,这类Bean的作用是扩展配置信息。我们深入到ServerProperties这个类中就能发现其中的意义。
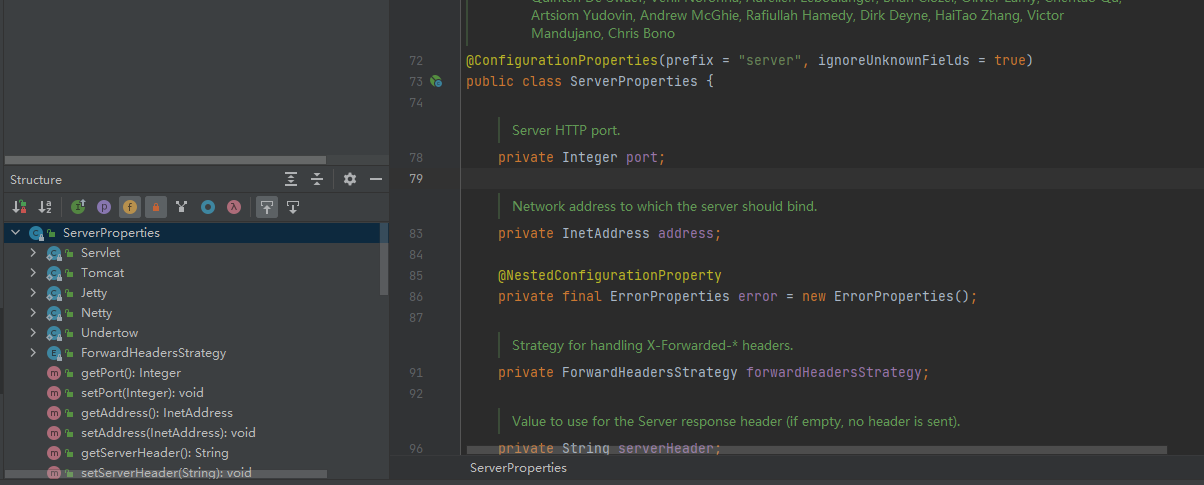
这个类上标注了@ConfigurationProperties表示这是一个配置类。在这个类中有许多详细的属性,细心点就会发现,这个port属性和我们上一节提到的在properties或者yml文件中配置的server.port是不是很类似。其实这个配置类中的属性是可以在application.properties或者application.yml文件中配置的。只需要通过注解定义的前缀prefix来匹配需要配置的属性。
至此,我们弄明白了在application.properties中编写的扩展配置最终会被赋值到xxxProperties类中的属性,从而对自动配置进行拓展。这样我们就不需要编写繁杂的配置文件,只需要在properties中根据已有的属性来写扩展配置。这其实就是Springboot官网的那句话: We take an opinionated view of the Spring platform and third-party libraries so you can get started with minimum fuss. Most Spring Boot applications need minimal Spring configuration.的体现。在这些配置类中采用了大量的默认配置,例如WebMvcAutoConfiguration类中默认配置的前缀prefix和后缀suffix,体现了约定大于配置的思想,方便我们just run!
4.小结
经过我们对于源码的深入探索之后,我们明白了Springboot自动配置的原理。简单来说,就是根据META-INF/spring.factories里面的自动配置类全限定类名,并且在满足一定的条件后,开启需要的自动配置类。而开发者只需要在properties或者yml文件中编写扩展配置信息,这些扩展配置信息会被保存在xxxProperties的Bean中,被装载到xxxAutoConfiguration自动配置类中生效。
这篇博客未来我还打算更新一个手写starter的部分。因为在我们导入springboot的依赖时,很多时候导入的是一些xxx-xxx-starter的依赖,这里面就是自己编写的自动配置类。编写starter有助与我们在多模块开发中复用代码。更重要的原因是我上次面试被问到有没有手写starter,被面试官吊打了哈哈
如有问题欢迎交流。