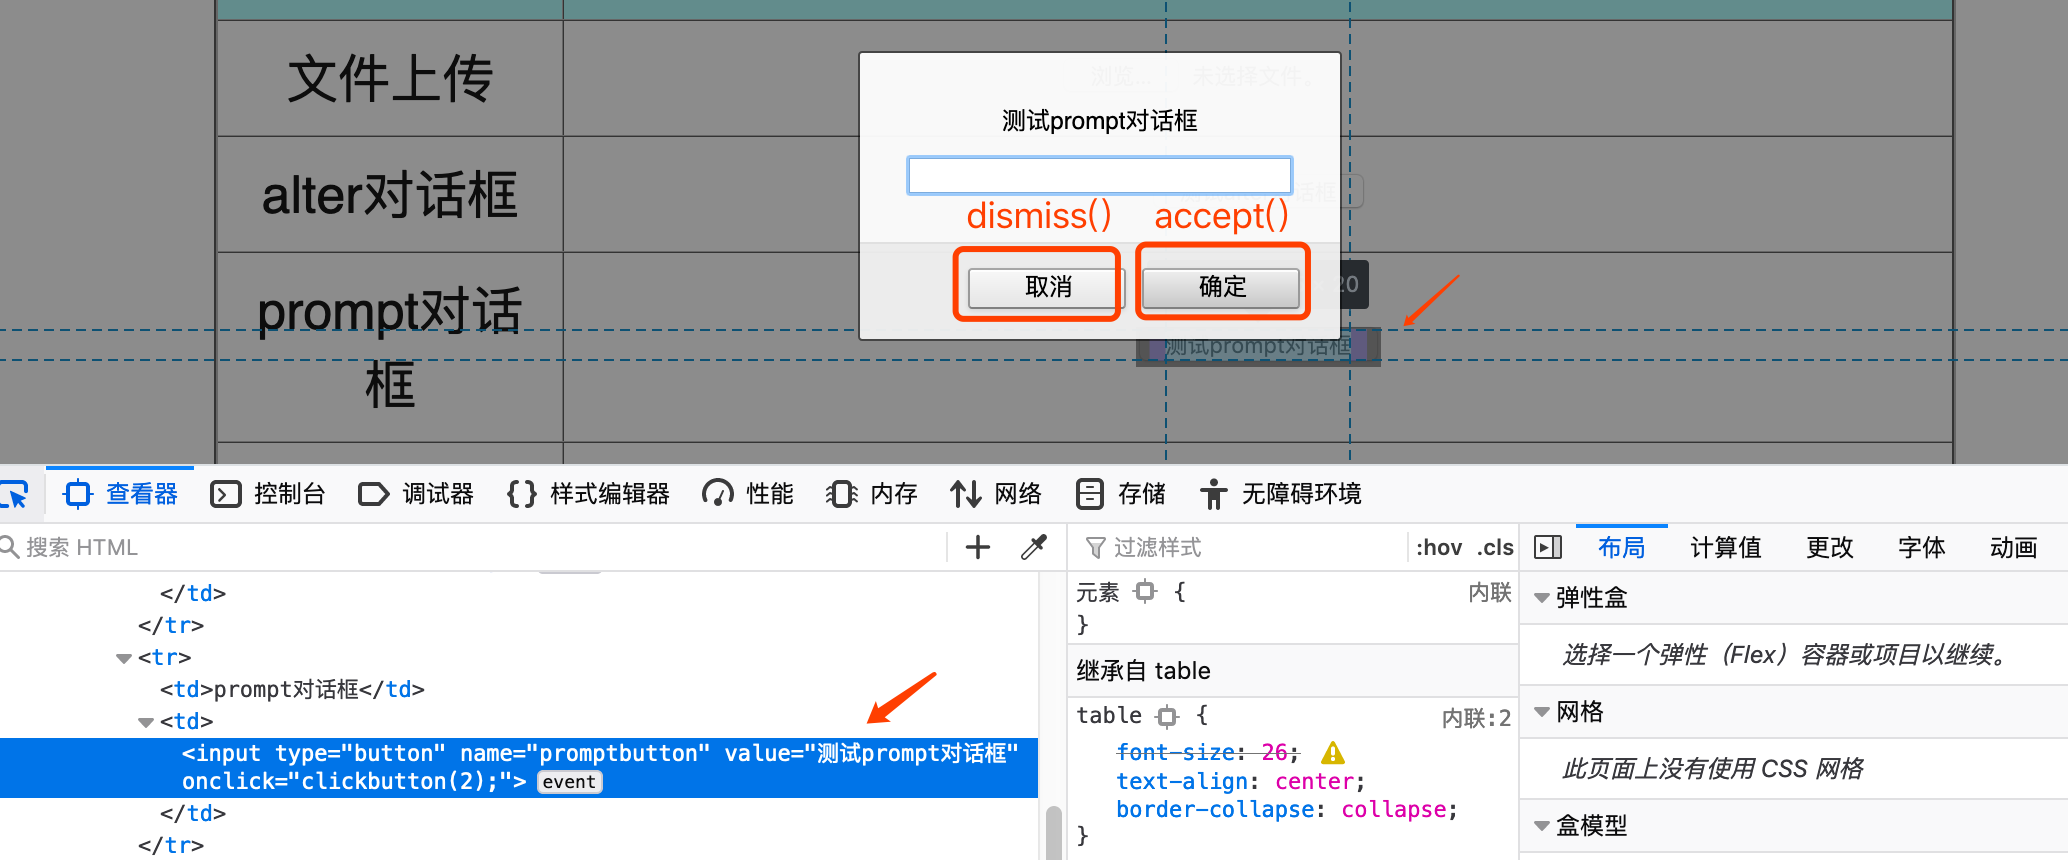
1、js弹窗
三种弹出框:
1) alert(一个按钮)
2) confirm(两个确认,取消)
3) prompt(两个按钮+输入框)
4) 切换到弹框: switch_to.alert()
弹窗的方法:
1)text获取弹框文本
2)accept()确认
3)dimiss()取消
4)send_keys() prompt弹框输入字符。其他两种会报错
举例:
value = driver.switch_to.alert
value.alert() #跳转到js弹窗 | value.accept() 弹窗上的确认(点击确认)
value.dismiss() 弹窗上的取消(关闭弹窗/确认取消) | value.text() 弹窗上的内容
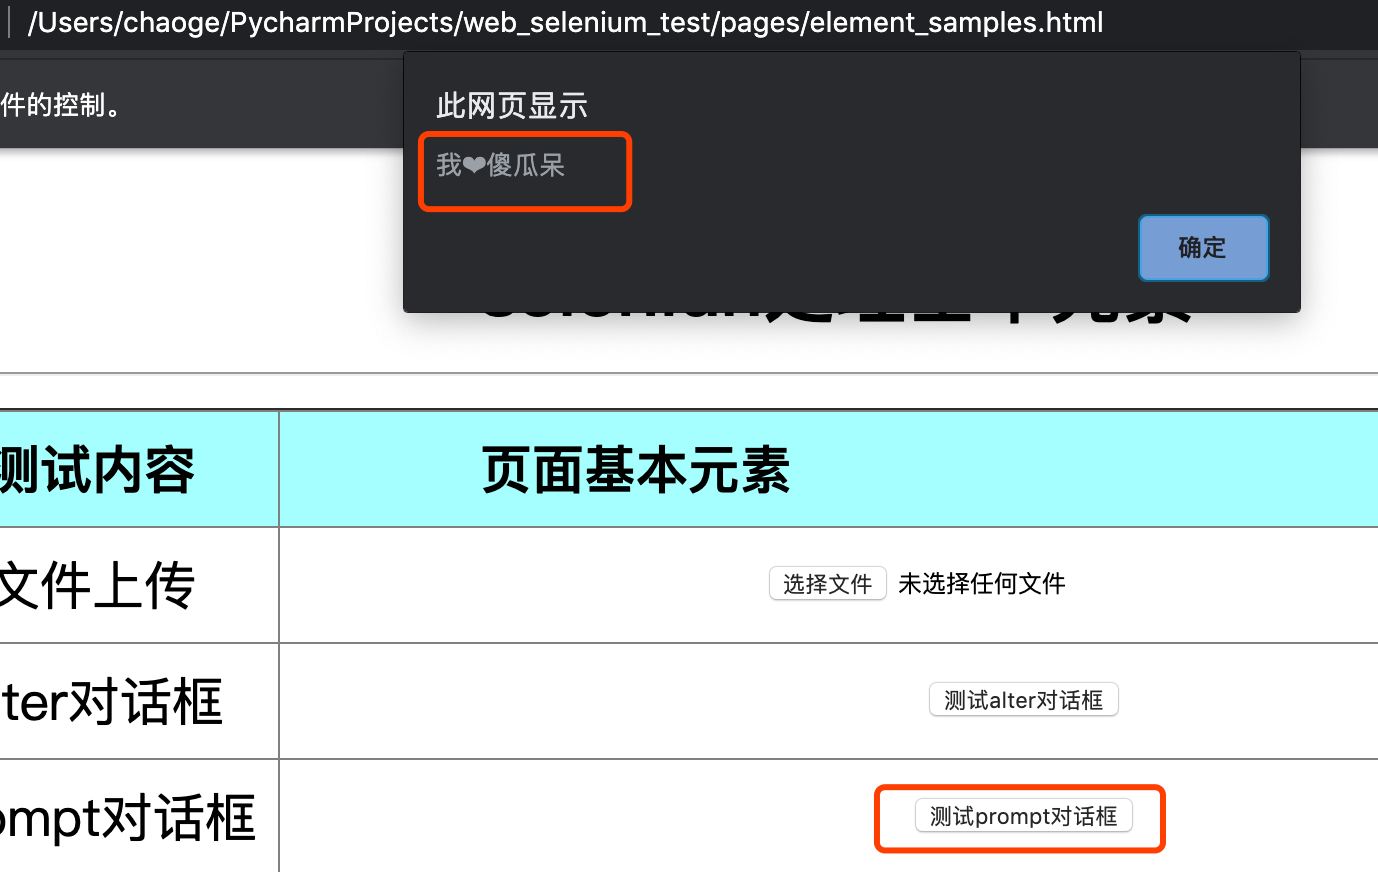
driver.switch_to.alert.send_keys('我❤️傻瓜呆') #弹窗上输入内容,只对prompt有效
driver.switch_to.alert.accept()
2、下拉框处理 需要导包 from selenium.webdriver.support.select import Select
下拉框选择两种方法
#1、下拉框通过元素定位识别
# driver.find_element(By.XPATH,'//select[@id="Selector"]').click()
# 2、通过下拉框对象内置的方法去选择
select_el = driver.find_element(By.XPATH,'//select[@id="Selector"]')
sel = Select(select_el)   #强制转换为下拉框
sel.select_by_visible_text('桃子')
sel.select_by_index(3)
time.sleep(2)
sel.select_by_value("orange")
time.sleep(3)
driver.quit()
3、制作自动弹出一个js弹窗
import os
import time
from selenium import webdriver
current = os.getcwd()
chrome_driver_path =os.path.join(current,'../webdriver/chromedriver')
page_path = os.path.join(current,'../pages/element_samples.html') #本地html文件
driver = webdriver.Chrome(executable_path=chrome_driver_path)
driver.implicitly_wait(2)
driver.get('file://'+page_path)
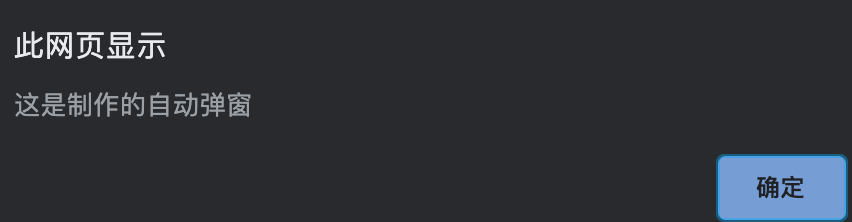
a ='alert("这是制作的自动弹窗")' #借用alert方法制作自动弹窗
driver.execute_script(a) #弹出弹窗
time.sleep(3)
driver.quit()
4、滑动滚动条
import os
import time
from selenium import webdriver

current = os.getcwd()
chrome_driver_path =os.path.join(current,'../webdriver/chromedriver')
page_path = os.path.join(current,'../pages/element_samples.html')    #本地html文件
driver = webdriver.Chrome(executable_path=chrome_driver_path)
driver.implicitly_wait(2)
driver.get('file://'+page_path)

b = 'document.body.scrollTop =%d'    #创建 滚动条滚动长度的对象
for i in range(11):
    if i%2 != 0:
        driver.execute_script(b%1000)      #执行滚动条滚动的语句
        time.sleep(1)
    else:
        driver.execute_script(b%-1000)
        time.sleep(1)
driver.quit()
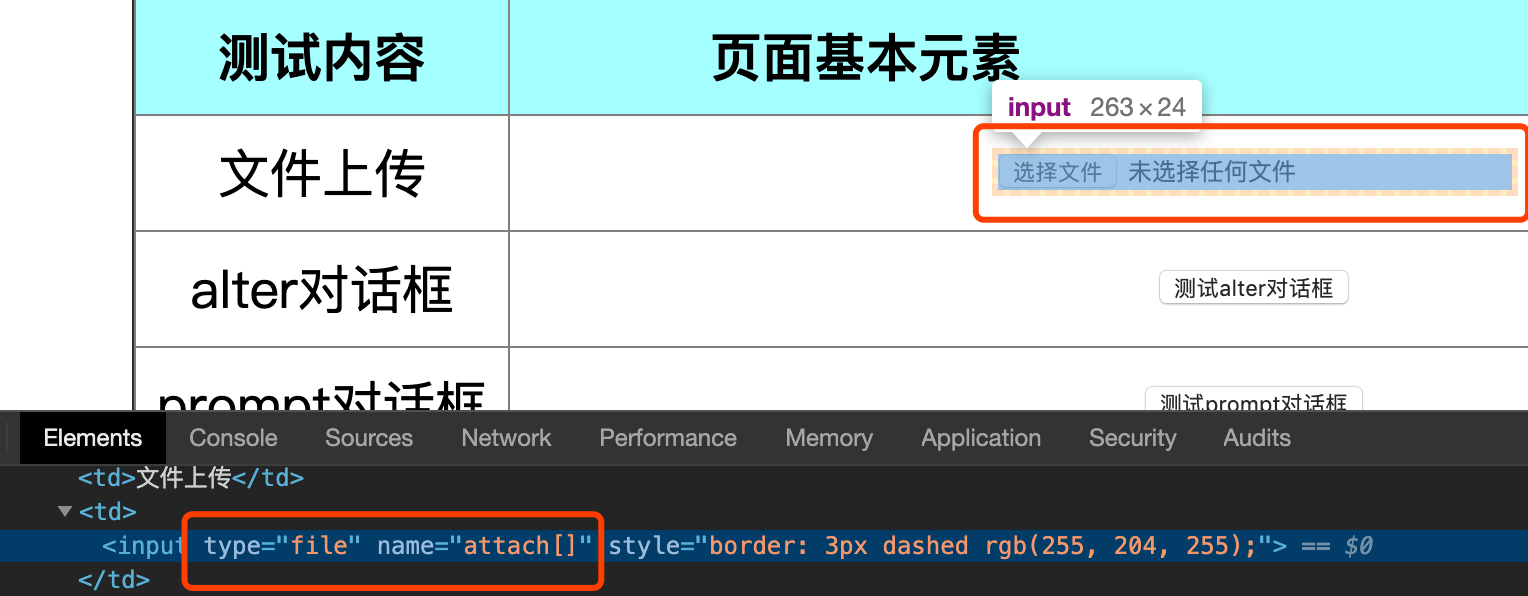
5、判断元素是否被识别到
1)加边框
import os
import time
from selenium import webdriver
from selenium.webdriver.common.by import   By

current = os.getcwd()
chrome_driver_path =os.path.join(current,'../webdriver/chromedriver')
page_path = os.path.join(current,'../pages/element_samples.html')    #本地html文件
driver = webdriver.Chrome(executable_path=chrome_driver_path)
driver.implicitly_wait(2)
driver.get('file://'+page_path)
e = driver.find_element(By.XPATH,'//*/input[@type="file"]')     #先定位要加边框的元素
d =' arguments[0].style.border="3px  dashed #FFCCFF" '    #边框格式  颜色
driver.execute_script(d, e)     #给选择元素加边框
2)点击
3)输入文本
6、移除元素属性
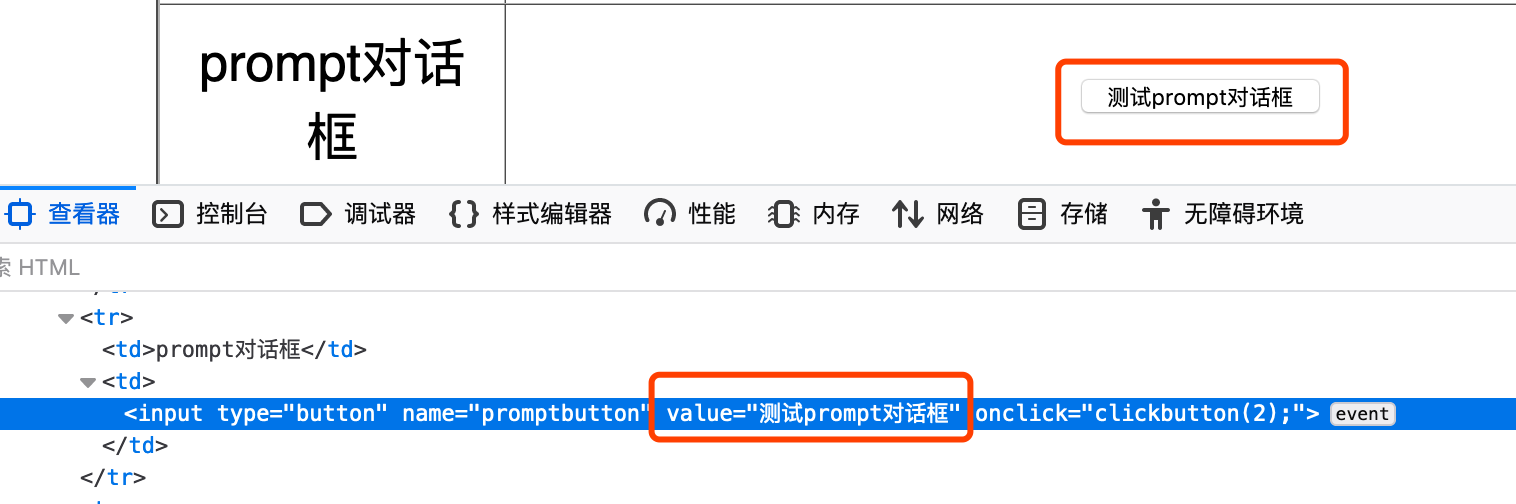
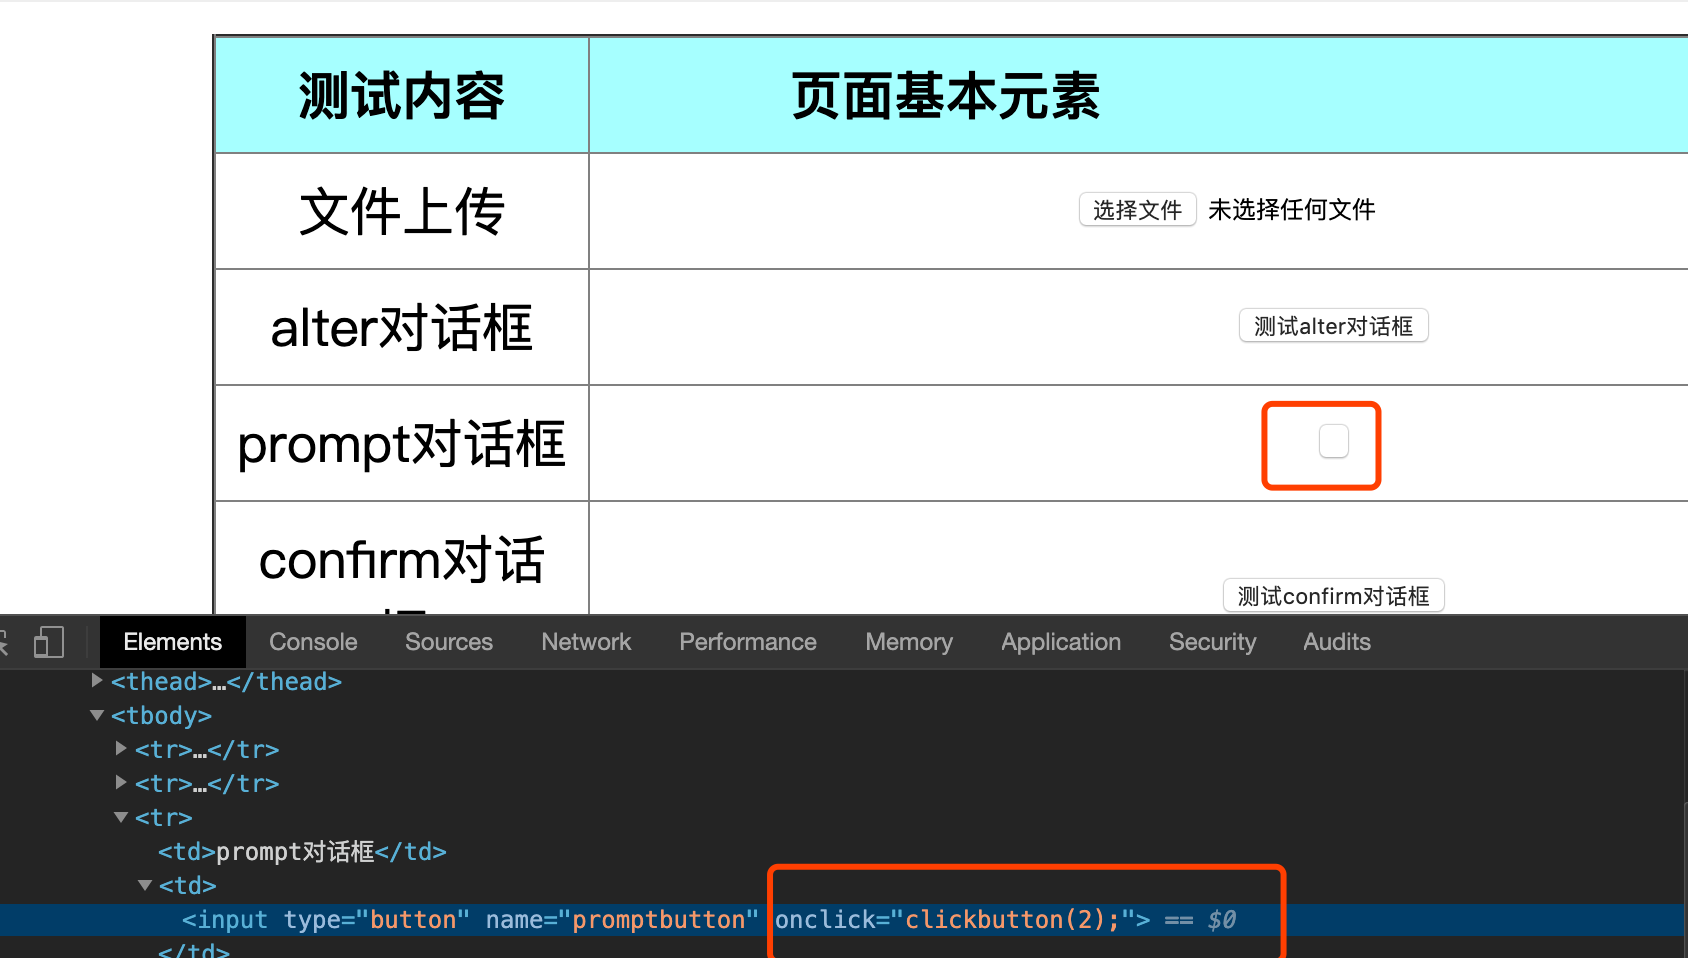
import os
import time
from selenium import webdriver
from selenium.webdriver.common.by import   By

current = os.getcwd()
chrome_driver_path =os.path.join(current,'../webdriver/chromedriver')
page_path = os.path.join(current,'../pages/element_samples.html')    #本地html文件
driver = webdriver.Chrome(executable_path=chrome_driver_path)
driver.implicitly_wait(2)
driver.get('file://'+page_path)
e = driver.find_element(By.XPATH,'//*/input[@value="测试prompt对话框"]')     #先定位要移除的元素
d ='arguments[0].removeAttribute("value")'    #移除元素属性
driver.execute_script(d, e)     #执行脚本
7、修改元素
import os
import time
import selenium
from selenium import webdriver
from selenium.webdriver.common.by import   By

current = os.getcwd()
chrome_driver_path =os.path.join(current,'../webdriver/chromedriver')

driver = webdriver.Chrome(executable_path=chrome_driver_path)
driver.implicitly_wait(2)

driver.get('http://www.baidu.com')
d ='  var user_input =document.getElementById("su").getAttribute("value"); return user_input;'    #获得需要修改的元素
e ="argument[0].setAttribute('value','2020-04-05')"   #设定修改的值
driver.execute_script(d,e)     #执行脚本
time.sleep(3)
driver.quit()