下载地址:https://sourceforge.net/projects/ngrinder/files/
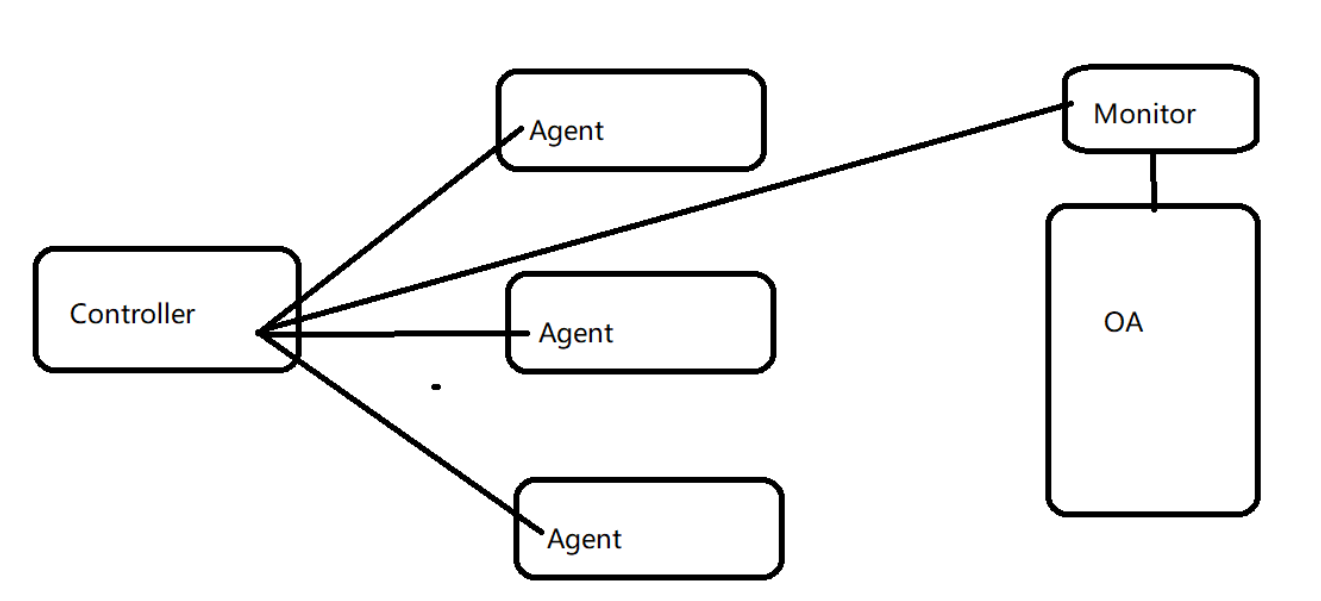
ngrinder工作原理:这里的controller就是ngrinder平台
部署(以windows为例):
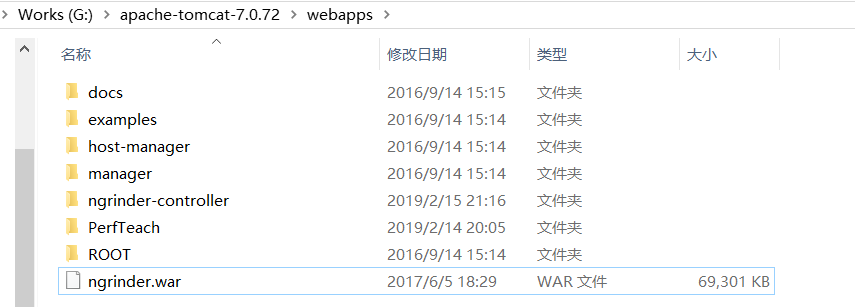
把下载下来的ngrinder-controller.war重命名为ngrinder.war放到tomcat下面,启动tomcat
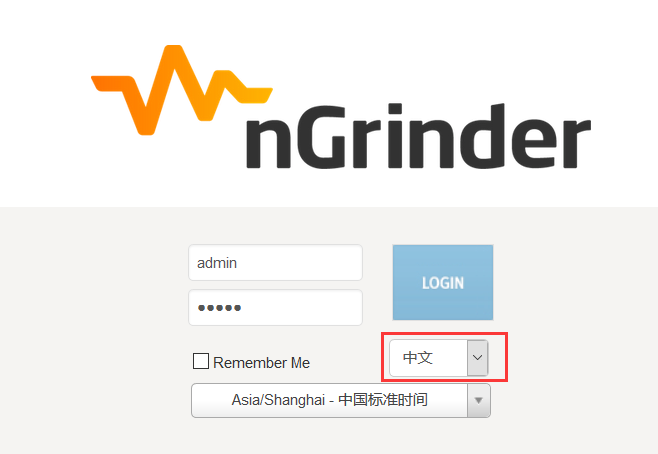
启动完浏览器访问:http://localhost:8080/ngrinder
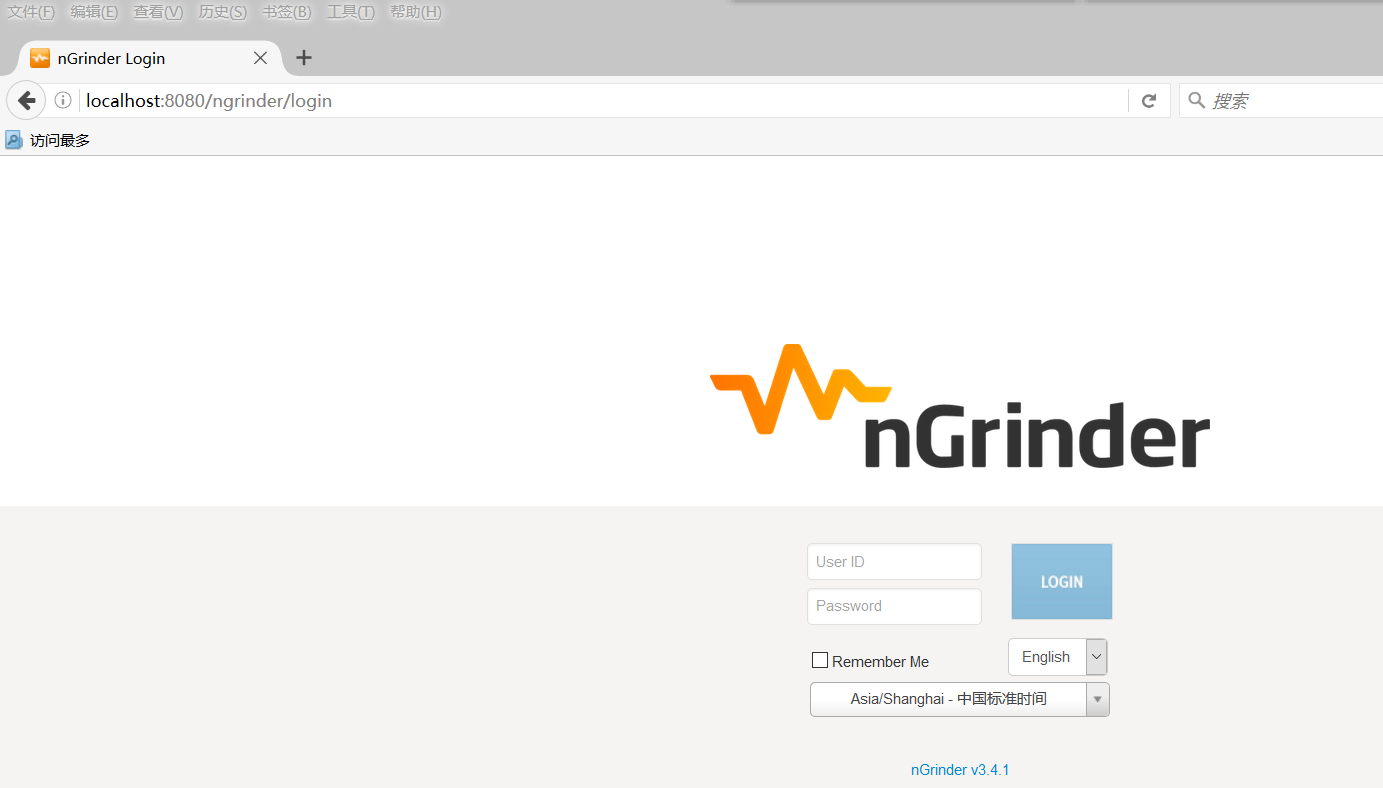
默认用户名admin,密码admin,选择中文
登录成功后下载agent和monitor

解压并启动agent
在机器足够的情况下,应该把agent单独部到一台机器上,由于机器有限这里和ngrinder部到同一台机器
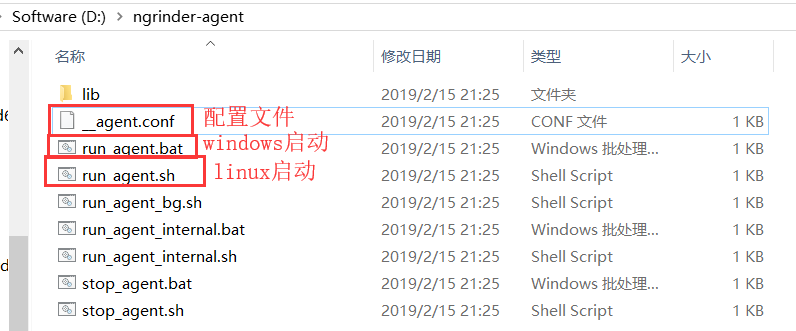
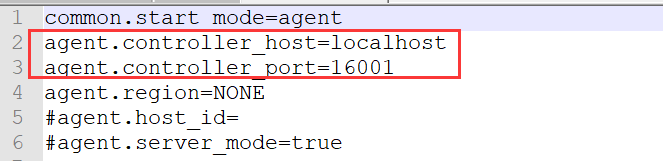
先编辑配置文件:__agent.conf,修改ngrinder所在的ip和端口号(默认端口号16001)
双击启动文件,下面这样就算启动成功了

把前面下载的monitor上传至服务器,并解压


进入到该目录,里面的东西和agent一样
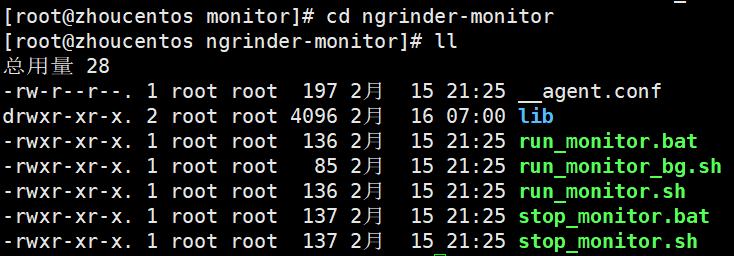
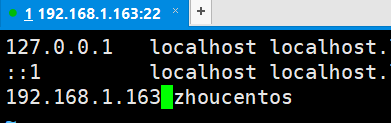
启动,这里第一次报错,说没有找到本机路由,后来查看,是因为当前host里面没有配置当前使用的这个ip


改host文件

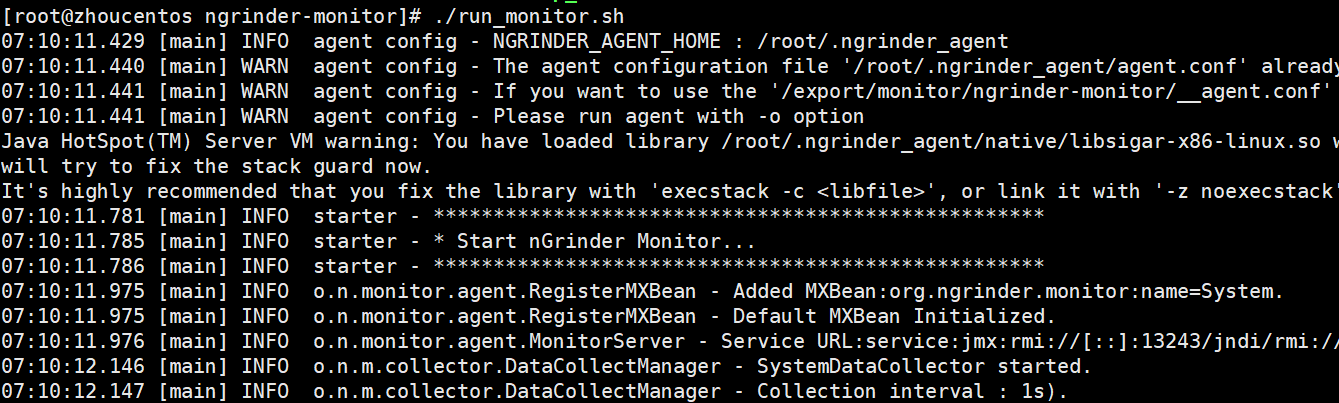
再次启动,成功
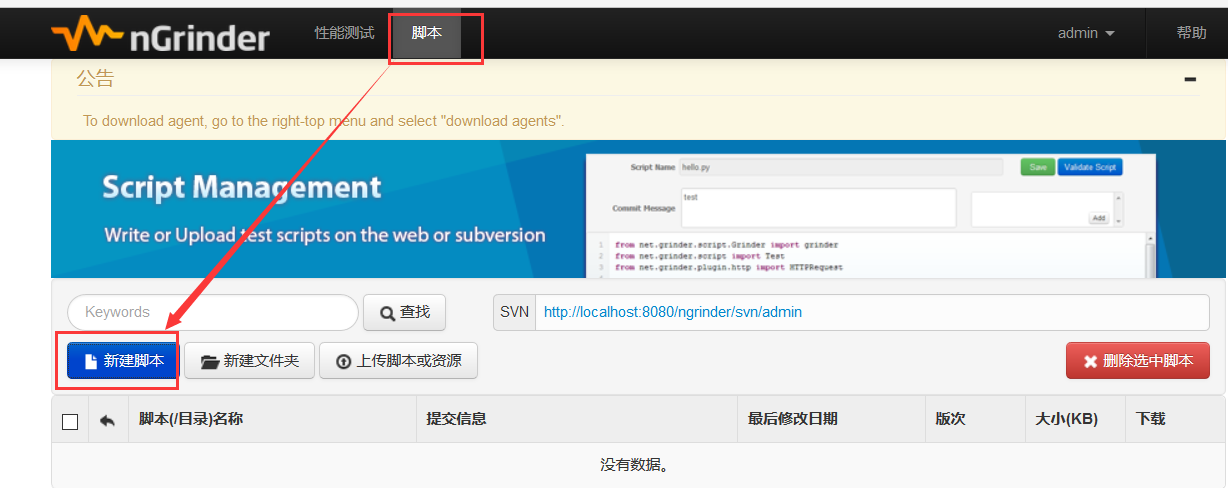
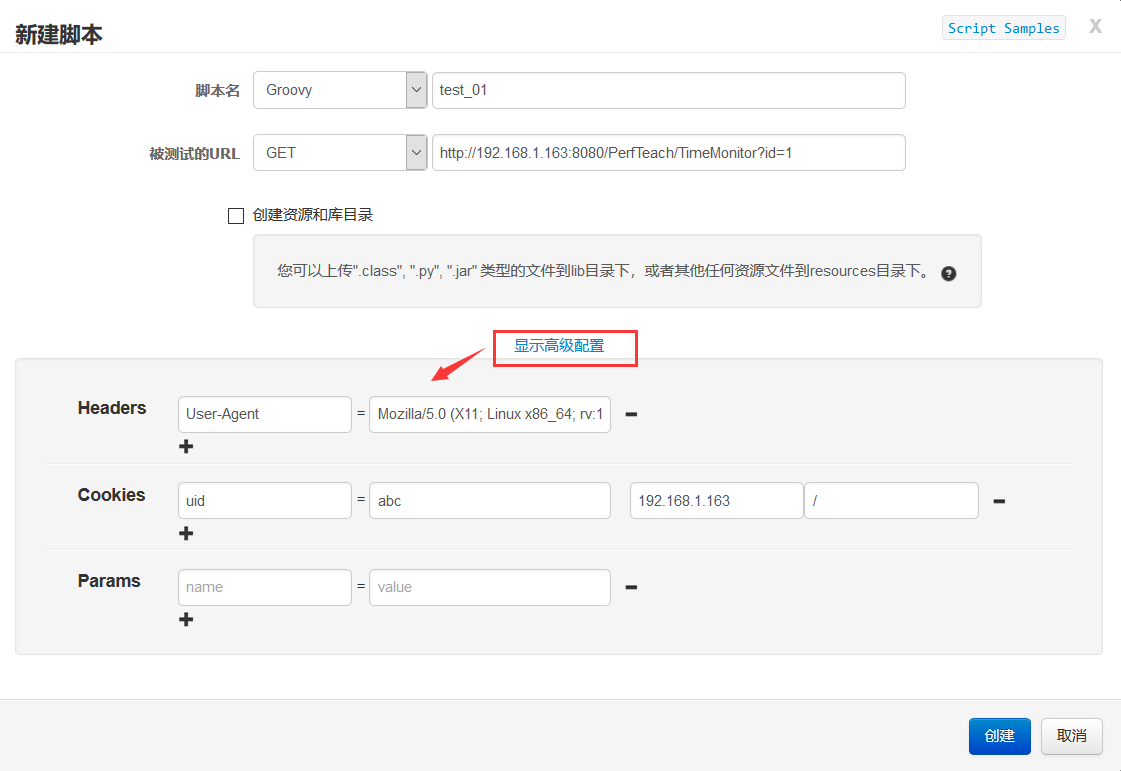
回到ngrinder,编写脚本
这里对java和python哪个熟一点就选哪个

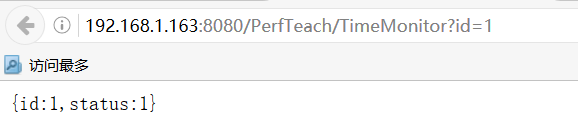
先确认接口是通的:http://192.168.1.163:8080/PerfTeach/TimeMonitor?id=1
Groovy(java版):
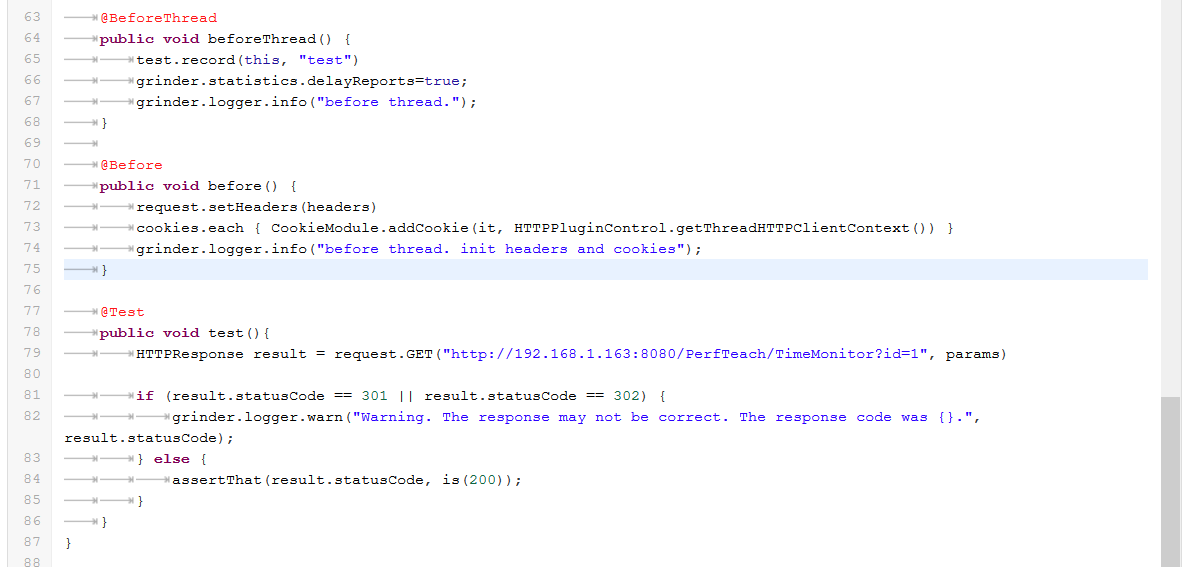
点创建后会生成如下代码:


import static net.grinder.script.Grinder.grinder
import static org.junit.Assert.*
import static org.hamcrest.Matchers.*
import net.grinder.plugin.http.HTTPRequest
import net.grinder.plugin.http.HTTPPluginControl
import net.grinder.script.GTest
import net.grinder.script.Grinder
import net.grinder.scriptengine.groovy.junit.GrinderRunner
import net.grinder.scriptengine.groovy.junit.annotation.BeforeProcess
import net.grinder.scriptengine.groovy.junit.annotation.BeforeThread
// import static net.grinder.util.GrinderUtils.* // You can use this if you're using nGrinder after 3.2.3
import org.junit.Before
import org.junit.BeforeClass
import org.junit.Test
import org.junit.runner.RunWith
import java.util.Date
import java.util.List
import java.util.ArrayList
import HTTPClient.Cookie
import HTTPClient.CookieModule
import HTTPClient.HTTPResponse
import HTTPClient.NVPair
/**
* A simple example using the HTTP plugin that shows the retrieval of a
* single page via HTTP.
*
* This script is automatically generated by ngrinder.
*
* @author admin
*/
@RunWith(GrinderRunner)
class TestRunner {
public static GTest test
public static HTTPRequest request
public static NVPair[] headers = []
public static NVPair[] params = []
public static Cookie[] cookies = []
@BeforeProcess
public static void beforeProcess() {
HTTPPluginControl.getConnectionDefaults().timeout = 6000
test = new GTest(1, "192.168.1.163")
request = new HTTPRequest()
// Set header datas
List<NVPair> headerList = new ArrayList<NVPair>()
headerList.add(new NVPair("User-Agent", "Mozilla/5.0 (X11; Linux x86_64; rv:12.0) Gecko/20100101 Firefox/21.0"))
headers = headerList.toArray()
// Set param datas
List<NVPair> paramList = new ArrayList<NVPair>()
paramList.add(new NVPair("", ""))
params = paramList.toArray()
// Set cookie datas
List<Cookie> cookieList = new ArrayList<Cookie>()
cookieList.add(new Cookie("uid", "abc", "192.168.1.163", "/", new Date(32503647599000L), false))
cookies = cookieList.toArray()
grinder.logger.info("before process.");
}
@BeforeThread
public void beforeThread() {
test.record(this, "test")
grinder.statistics.delayReports=true;
grinder.logger.info("before thread.");
}
@Before
public void before() {
request.setHeaders(headers)
cookies.each { CookieModule.addCookie(it, HTTPPluginControl.getThreadHTTPClientContext()) }
grinder.logger.info("before thread. init headers and cookies");
}
@Test
public void test(){
HTTPResponse result = request.GET("http://192.168.1.163:8080/PerfTeach/TimeMonitor?id=1", params)
if (result.statusCode == 301 || result.statusCode == 302) {
grinder.logger.warn("Warning. The response may not be correct. The response code was {}.", result.statusCode);
} else {
assertThat(result.statusCode, is(200));
}
}
}
点验证脚本,在控制台最下面有日志,可以看到通不通过
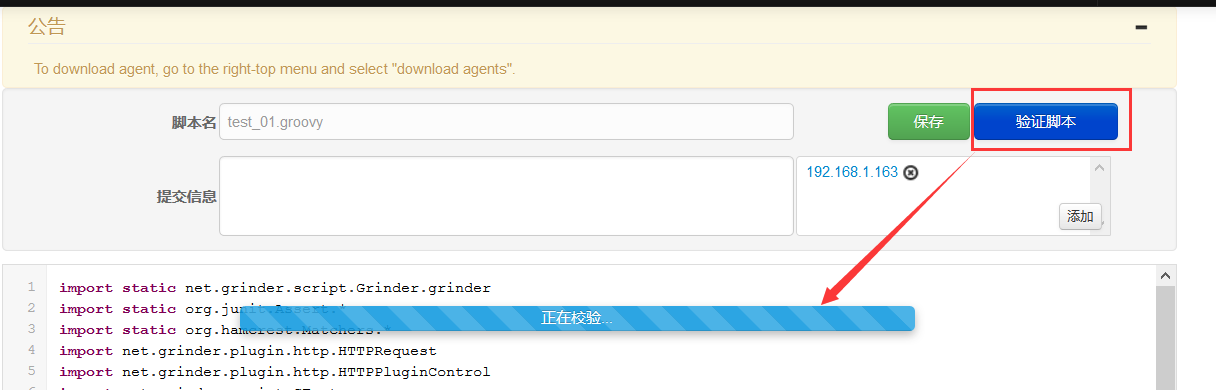

上面那个日志比较乱,为了方便确认接口是否通过,可以在代码里面加断言
调试阶段(脚本调通以后,就删掉这行代码):在请求完成后,打印响应文本
在else里面,把原来的断言注释掉,加一个响应文本与应该返回的文本的断言
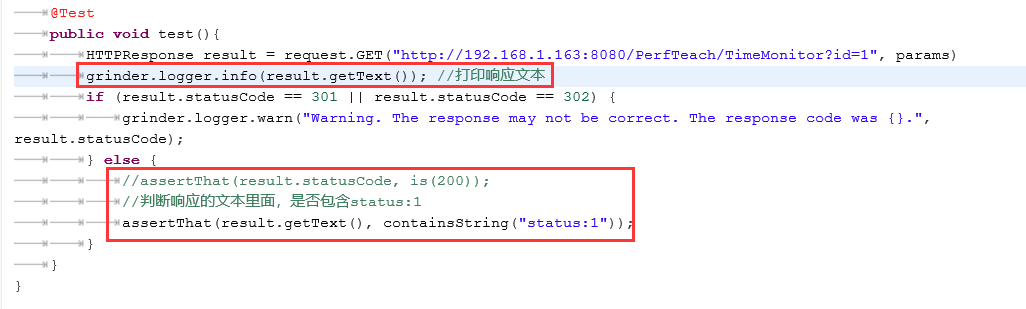
再次验证脚本,看日志,通过

删除掉打印响应文本那行代码,并保存


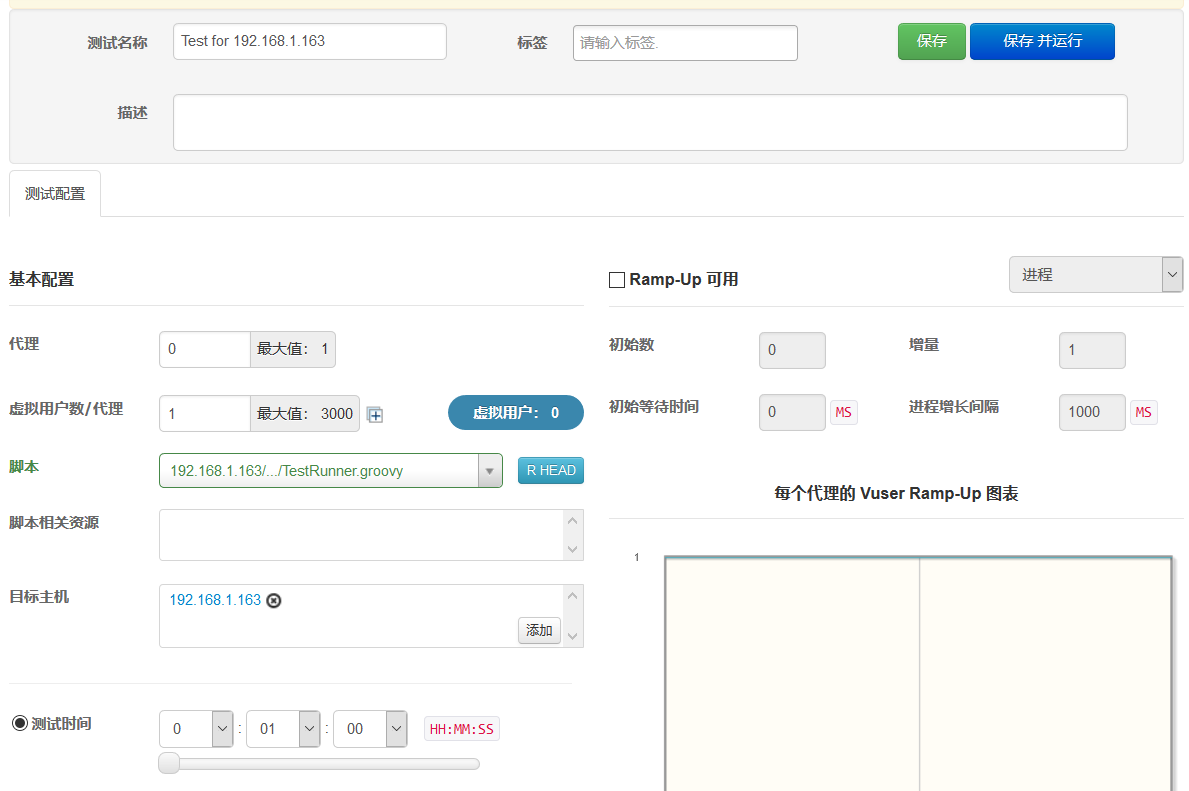
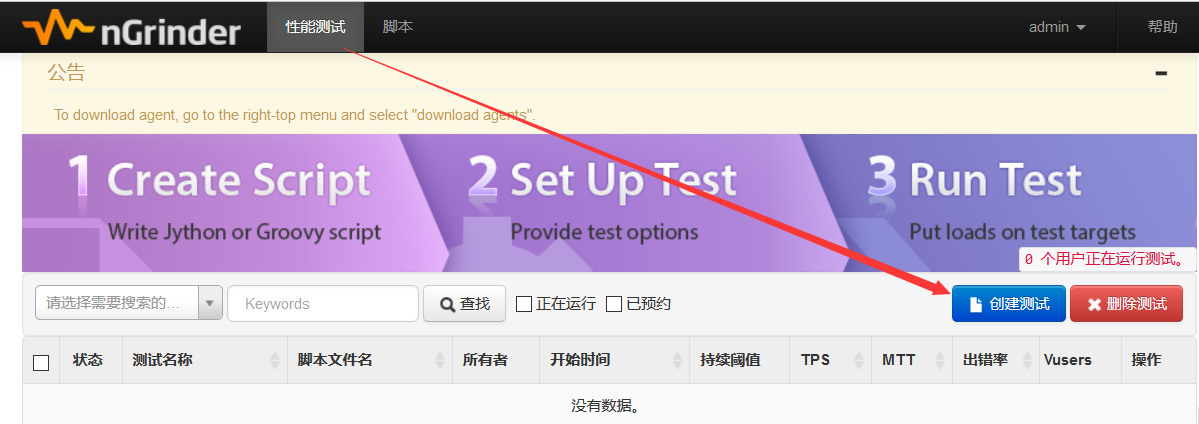
在性能测试中,创建测试
设计相关场景
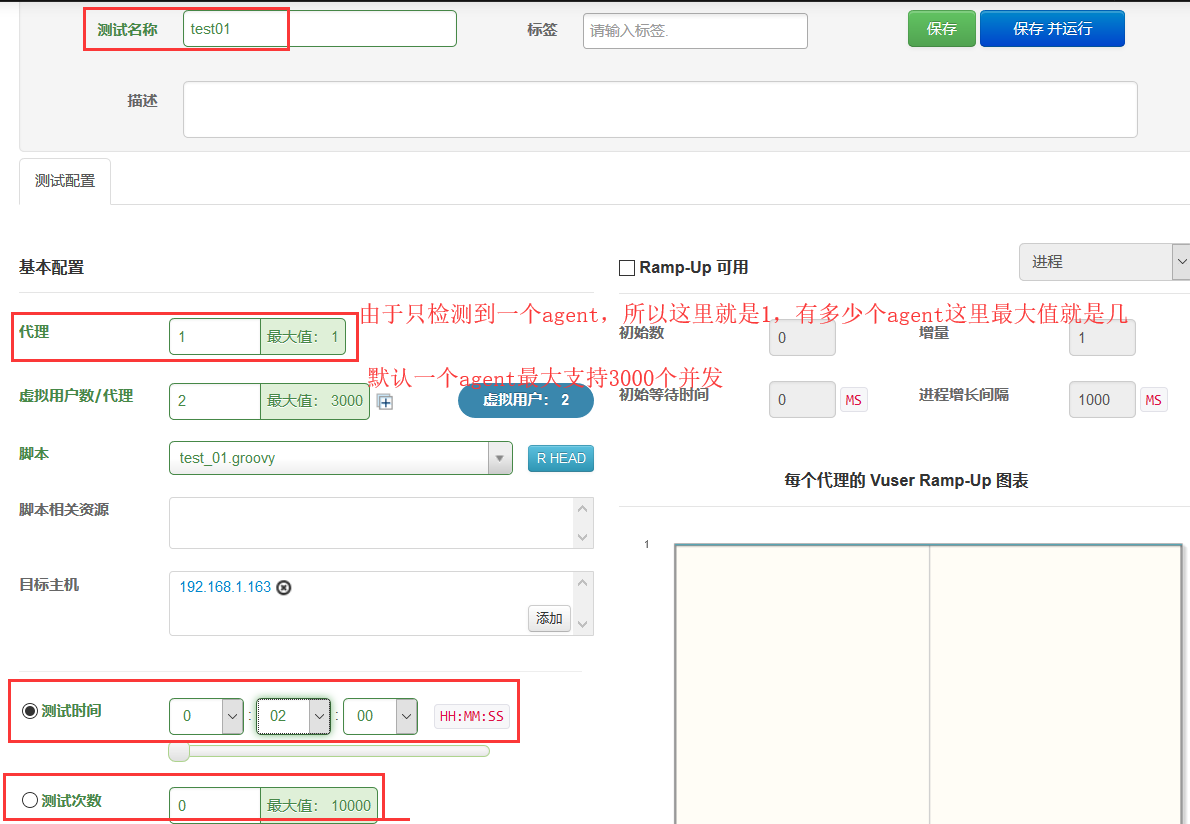
设置好以后,点保存并运行,这里会弹框选择马上运行还是预约运行,这里选马上运行就可以了

agent里面的日志

ngrinder这里也有相应的指标数据

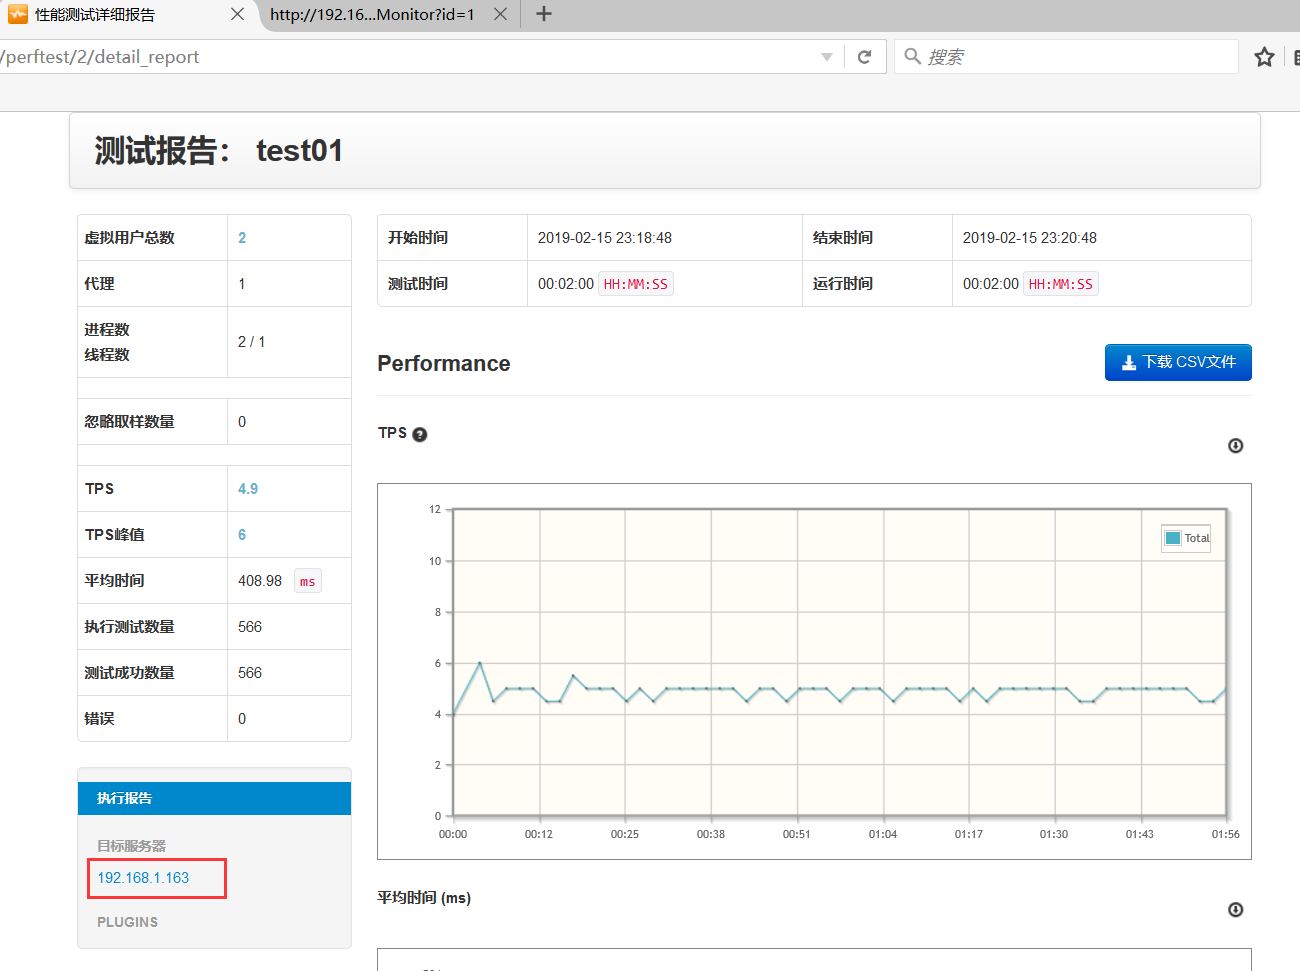
跑完过后,会自动生成测试报告,点详细测试报告,可以看到详细指标

在首页这里,还可以输入url快速开始