1,Netflix Eureka服务端:也称注册中心
1)Eureka包含两个组件:Eureka Server(注册中心)和Eureka Client(服务)。
2,环境
电脑配置:i5 3230M 2*4 g ddr3 128ssd
运行:idea(2019.2) Maven(3.6) springboot(2.3.4) spring-cloud(2.2.5) JKD11
3,创建如下图,服务在注册中心注册,客户端拉取注册中心注册的服务,接下来,一步步实现分布式代码编写

1)首先创建一个注册中心
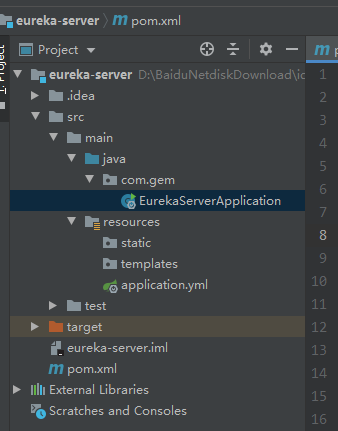
1))如下图项目的目录
2))看一下pom文件


<?xml version="1.0" encoding="UTF-8"?>
<project xmlns="http://maven.apache.org/POM/4.0.0" xmlns:xsi="http://www.w3.org/2001/XMLSchema-instance"
         xsi:schemaLocation="http://maven.apache.org/POM/4.0.0 https://maven.apache.org/xsd/maven-4.0.0.xsd">
    <modelVersion>4.0.0</modelVersion>
    <parent>
        <groupId>org.springframework.boot</groupId>
        <artifactId>spring-boot-starter-parent</artifactId>
        <version>2.3.4.RELEASE</version>
        <relativePath/> <!-- lookup parent from repository -->
    </parent>
    <groupId>com.gem</groupId>
    <artifactId>eureka-server</artifactId>
    <version>0.0.1-SNAPSHOT</version>
    <name>eureka-server</name>
    <description>Demo project for Spring Boot</description>

    <properties>
        <java.version>11</java.version>
    </properties>

    <dependencies>
        <dependency>
            <groupId>org.springframework.boot</groupId>
            <artifactId>spring-boot-starter-web</artifactId>
        </dependency>

        <dependency>
            <groupId>org.projectlombok</groupId>
            <artifactId>lombok</artifactId>
            <optional>true</optional>
        </dependency>
        <dependency>
            <groupId>org.springframework.boot</groupId>
            <artifactId>spring-boot-starter-test</artifactId>
            <scope>test</scope>
            <exclusions>
                <exclusion>
                    <groupId>org.junit.vintage</groupId>
                    <artifactId>junit-vintage-engine</artifactId>
                </exclusion>
            </exclusions>
        </dependency>

        <!-- https://mvnrepository.com/artifact/org.springframework.cloud/spring-cloud-starter-netflix-eureka-server -->
        <!--导入spring cloud-->
        <dependency>
            <groupId>org.springframework.cloud</groupId>
            <artifactId>spring-cloud-starter-netflix-eureka-server</artifactId>
            <version>2.2.5.RELEASE</version>
        </dependency>
    </dependencies>

    <build>
        <plugins>
            <plugin>
                <groupId>org.springframework.boot</groupId>
                <artifactId>spring-boot-maven-plugin</artifactId>
            </plugin>
        </plugins>
    </build>

</project>
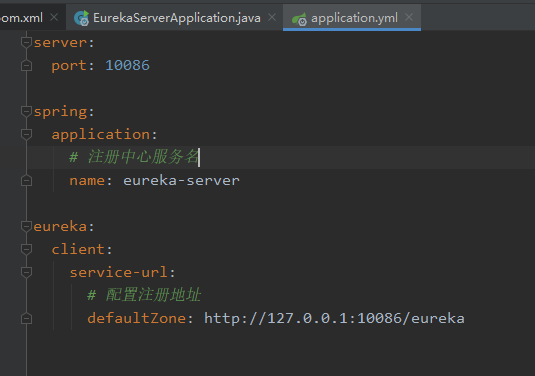
3))看一下yml文件配置
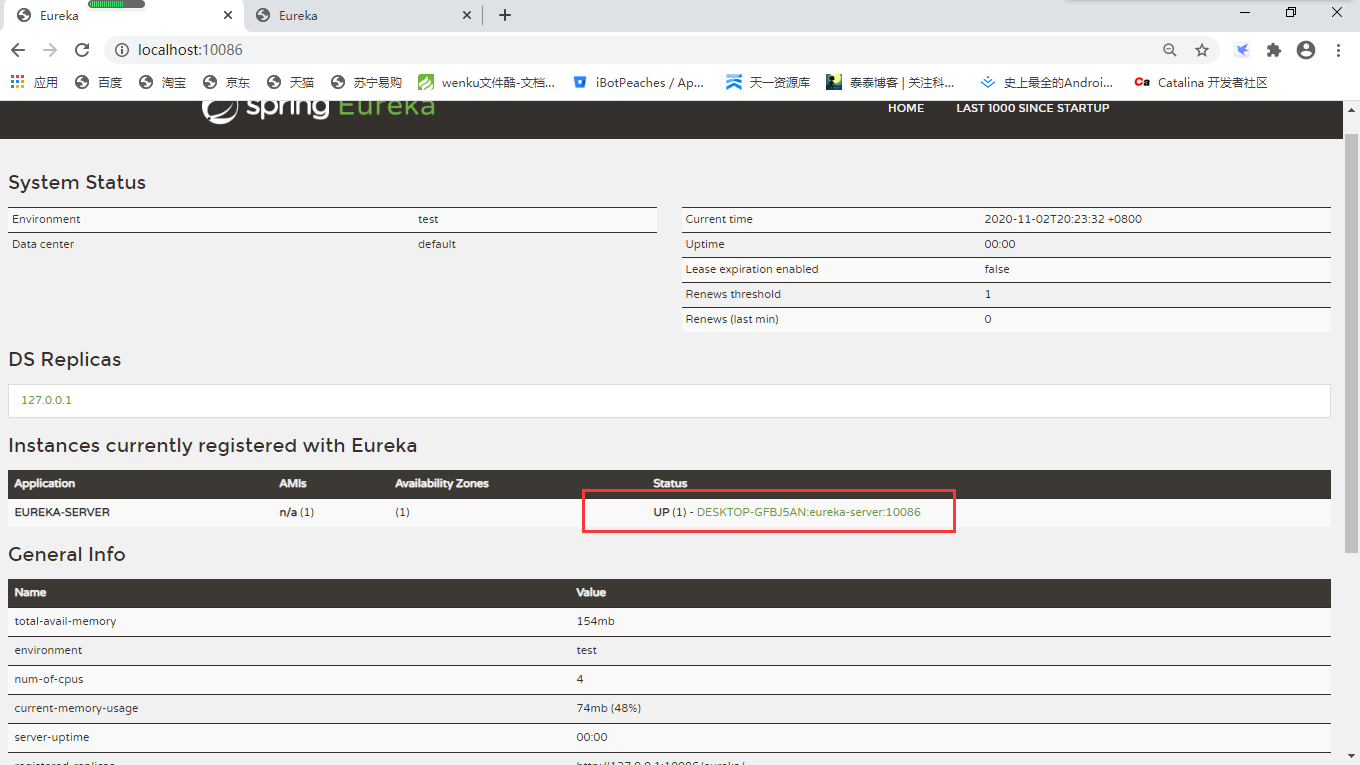
4))启动项目浏览器输入:127.0.0.1:10086,如下图已经成功注册了一个注册中心,接下来我们实现多个注册中心
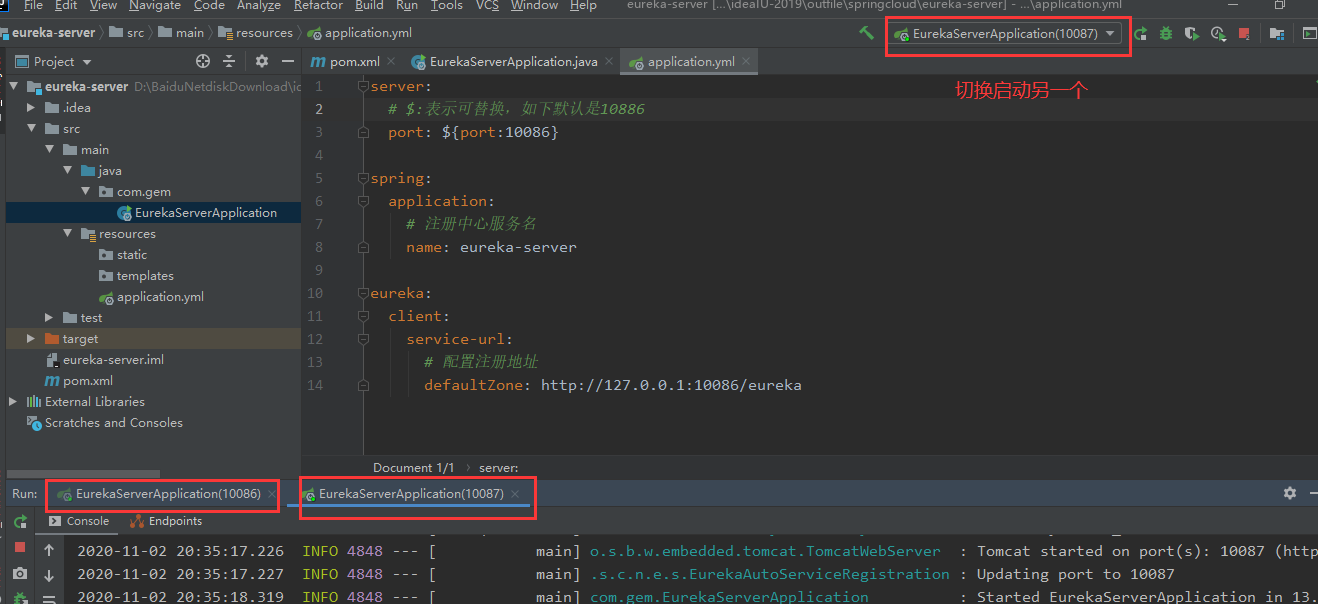
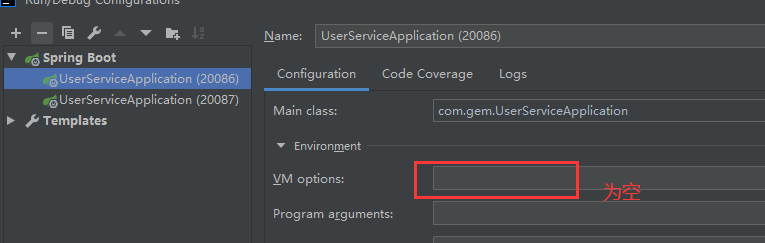
5)) 通过idea复制启动器实现多个注册中心开启,一个服务是独占一个端口的,现在我们修改端口实现

还要更改yml文件的端口号,才可以实现可替换端口。。。。。。。。。

6)) 启动两个
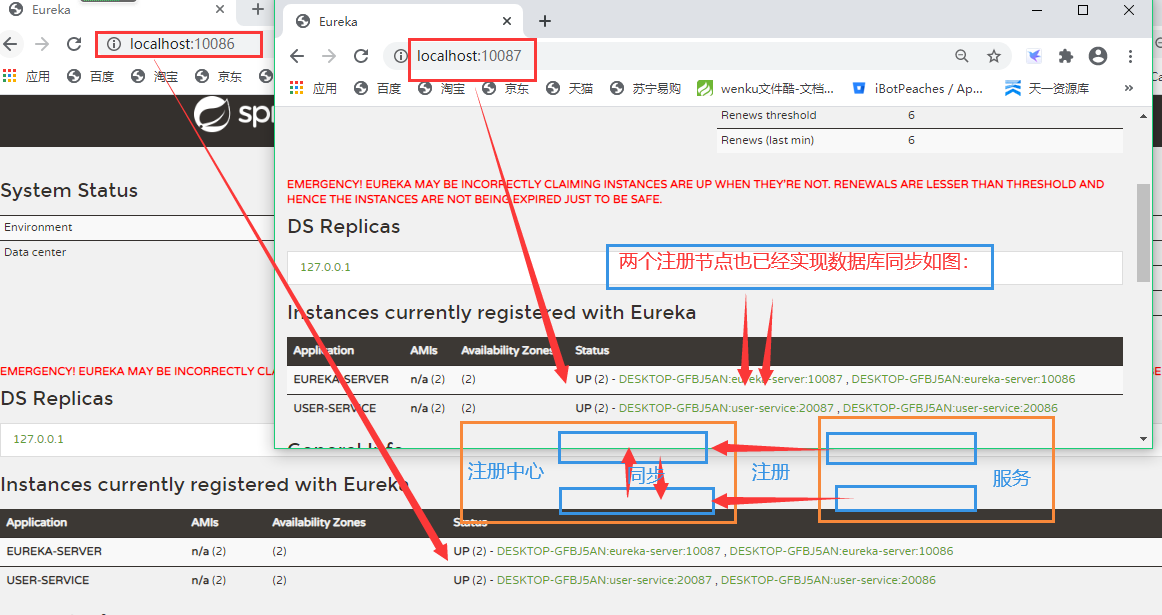
7))运行结果,为什么10086可以有两个?10087只有一个?因为在yml文件已经写死注册地址,导致10087端口号地址不能注册。
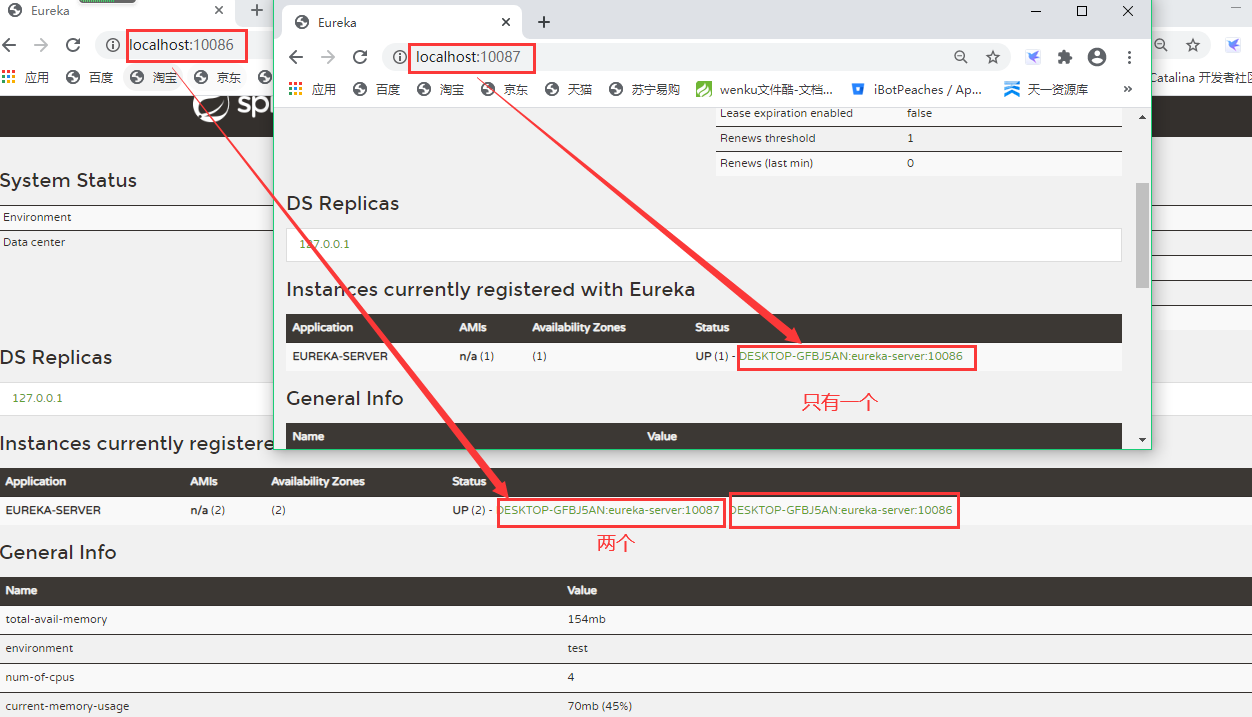
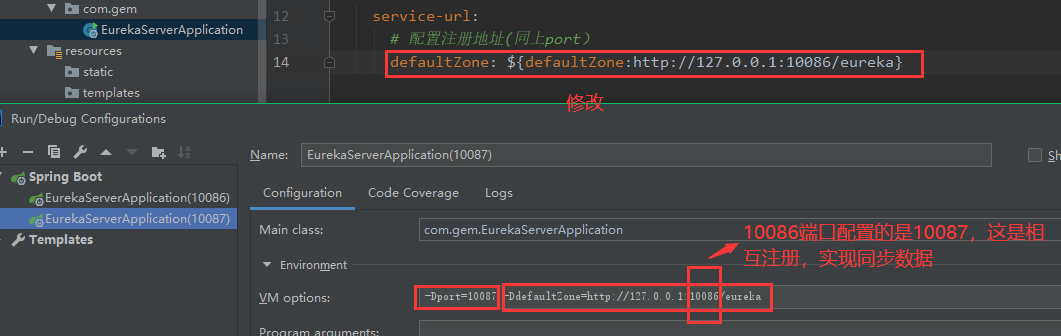
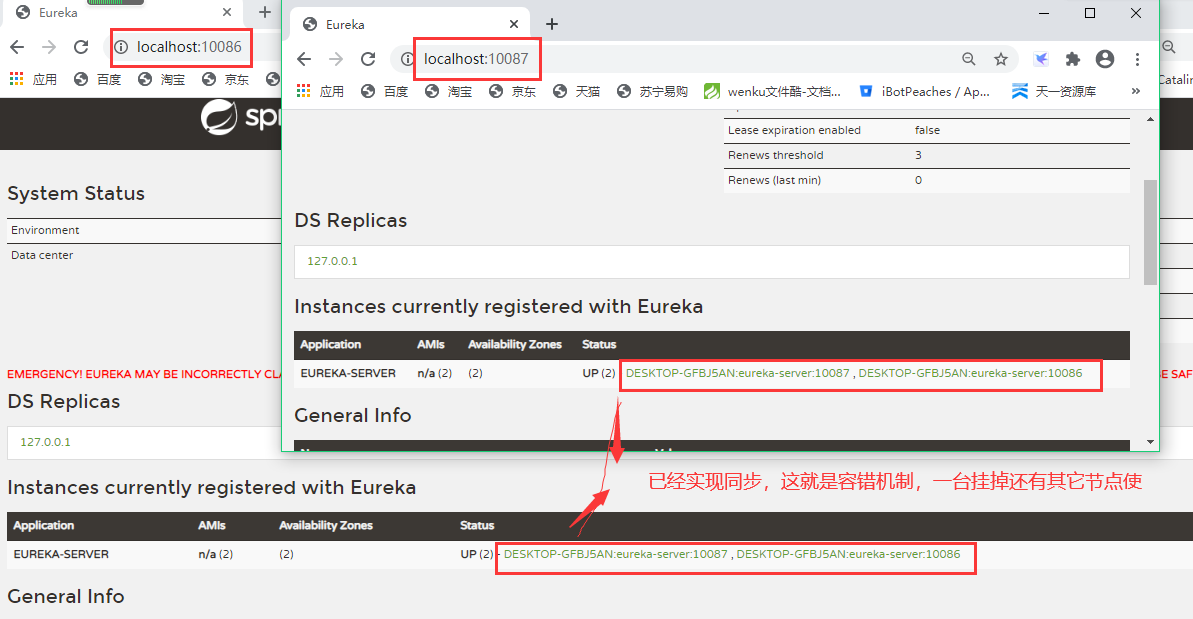
修改注册地址+结果
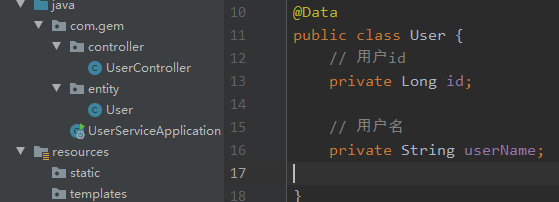
2)现在创建服务了

1))实体类
2))controller


yml文件
# 端口配置,默认端口为20086,如果启动时传入参数,则使用指定参数的端口
server:
  port: ${port:20086}

spring:
  datasource:
    driver-class-name: com.mysql.cj.jdbc.Driver
    url: jdbc:mysql:///ssm?serverTimezone=GMT%2B8
    username: root
    password: root
  # 服务名称
  application:
    name: user-service

eureka:
  client:
    service-url:
      # 注册中心地址
      defaultZone: http://127.0.0.1:10086/eureka,http://127.0.0.1:10087/eureka
  instance:
    # ip地址
    ip-address: 127.0.0.1
    # 更倾向于使用ip,而不是host名
    prefer-ip-address: true
    # 服务续约(renew)的间隔,默认为30秒[心跳]
    lease-renewal-interval-in-seconds: 30
    # 服务失效时间,默认值90秒
    lease-expiration-duration-in-seconds: 90

# 日志记录级别
logging:
  level:
    com.gem: debug
配置端口

结果
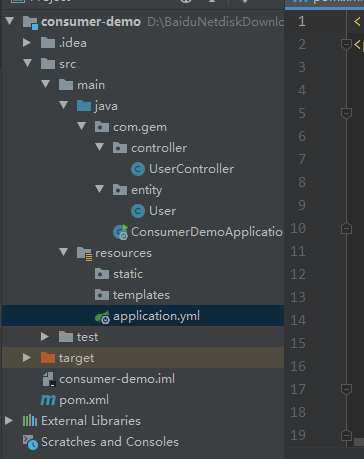
3)现在已经实现注册中心与服务,接下来就是客户端拉取注册中心的存在的服务列表(也就是服务)
yml
spring:
  application:
    name: consumer-demo

eureka:
  client:
    service-url:
      defaultZone: http://127.0.0.1:10086/eureka,http://127.0.0.1:10087/eureka
    # 每个30秒钟重新拉取服务(刷新缓存)
    registry-fetch-interval-seconds: 30

  instance:
    # ip地址
    ip-address: 127.0.0.1
    # 更倾向于使用ip,而不是host名
    prefer-ip-address: true

# 配置Ribbon负载均衡算法(默认轮询,此处改成随机)
#user-service:
#  ribbon:
#    NFLoadBalancerRuleClassName: com.netflix.loadbalancer.RandomRule
main
package com.gem;

import org.springframework.boot.SpringApplication;
import org.springframework.boot.autoconfigure.SpringBootApplication;
import org.springframework.cloud.client.discovery.EnableDiscoveryClient;
import org.springframework.cloud.client.loadbalancer.LoadBalanced;
import org.springframework.context.annotation.Bean;
import org.springframework.web.client.RestTemplate;

@SpringBootApplication
@EnableDiscoveryClient
public class ConsumerDemoApplication {

    public static void main(String[] args) {
        SpringApplication.run(ConsumerDemoApplication.class, args);
    }

    @Bean
    //使用Ribbon实现负载均衡(默认轮询)
    @LoadBalanced
    public RestTemplate restTemplate() {
        return new RestTemplate();
    }
}
controller
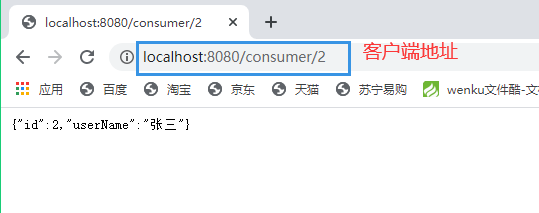
package com.gem.controller;

import com.gem.entity.User;
import org.springframework.beans.factory.annotation.Autowired;
import org.springframework.cloud.client.ServiceInstance;
import org.springframework.cloud.client.discovery.DiscoveryClient;
import org.springframework.web.bind.annotation.GetMapping;
import org.springframework.web.bind.annotation.PathVariable;
import org.springframework.web.bind.annotation.RequestMapping;
import org.springframework.web.bind.annotation.RestController;
import org.springframework.web.client.RestTemplate;

import java.util.List;

@RestController
@RequestMapping("/consumer")
public class UserController {

    @Autowired
    RestTemplate template;

    //localhost:8080/consumer/1
    @GetMapping("/{id}")
    public User queryById(@PathVariable Long id) {

        //获取eureka中注册的user-service实例列表
        String url = "http://user-service/user/"+id;
        System.out.println(url);

        return template.getForObject(url, User.class);
    }
}
运行结果如下图
总结
仅提供借鉴,如有错误请指明(菜鸟~~~~)
附上代码仓库:https://gitee.com/ma_tou/spring-cloud