在SSH中使用注解可以减少配置XML文件,毕竟随着项目规模的扩大,配置bean将把Spring的配置文件(applicationContext.xml)变得很混乱
在Spring的配置文件中开启注解扫描
<context:component-scan base-package="cn.lynu"></context:component-scan>
注意这个base-package就是指定了要扫描的包范围,这里可以指定一个共有的包名以扫描所有类的注解
这里给一个Spring配置文件:
现在只需要配置C3P0和hibernate并开启注解扫描就可以了
<?xml version="1.0" encoding="UTF-8"?>
<beans xmlns="http://www.springframework.org/schema/beans"
       xmlns:xsi="http://www.w3.org/2001/XMLSchema-instance"
       xmlns:aop="http://www.springframework.org/schema/aop"
       xmlns:context="http://www.springframework.org/schema/context"
       xmlns:tx="http://www.springframework.org/schema/tx"
       xsi:schemaLocation="
        http://www.springframework.org/schema/beans http://www.springframework.org/schema/beans/spring-beans.xsd
        http://www.springframework.org/schema/aop http://www.springframework.org/schema/aop/spring-aop.xsd
        http://www.springframework.org/schema/context http://www.springframework.org/schema/context/spring-context.xsd
        http://www.springframework.org/schema/tx http://www.springframework.org/schema/tx/spring-tx.xsd">


<!-- 配置c3p0连接池 -->
    <bean id="dataSource" class="com.mchange.v2.c3p0.ComboPooledDataSource">
      <property name="driverClass" value="com.mysql.jdbc.Driver"></property>
      <property name="jdbcUrl" value="jdbc:mysql://localhost:3306/easyui"></property>
      <property name="user" value="root"></property>
      <property name="password" value="root"></property>
    </bean>


    <!-- 配置hibernate -->
        <!-- 1.先配置sessionFactory -->
    <bean id="sessionFactory" class="org.springframework.orm.hibernate5.LocalSessionFactoryBean">
      <property name="dataSource" ref="dataSource"></property>
      <property name="configLocations" value="classpath:hibernate.cfg.xml"></property>
    </bean>

    <!-- 2.开启事务管理器,用注解方式使用事务 -->
    <bean id="transactionManager" class="org.springframework.orm.hibernate5.HibernateTransactionManager">
      <property name="sessionFactory" ref="sessionFactory"></property>
    </bean>
    <!-- 开启事务,记得在需要开启事务的类上 使用@Transaction-->
    <tx:annotation-driven transaction-manager="transactionManager"/>


    <!-- 开启注解扫描 -->
    <context:component-scan base-package="cn.lynu"></context:component-scan>

</beans>
开始使用注解
1.先从Dao开始,在Dao类上使用@Repository注解声明自己

然后是很关键的一步,我使用了HibernateDaoSupport,需要在Dao中注入sessionFactory,而Dao中就需要调用HibernateDaoSupport中的sessionFactory
    @Resource(name="sessionFactory")
    public void setSF(SessionFactory sf){
        super.setSessionFactory(sf);
    }
setSF这个名字不是固定的,只要是以set打头就行了
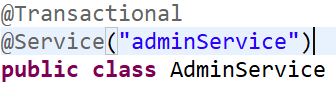
2.在Service类上使用注解@Service
然后使用@Resource注入Dao(使用注解注入属性就不需要set方法)
@Resource(name="adminDao")
private AdminDao adminDao;
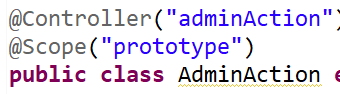
3.在Action类上面使用@Controller指明自己是控制器,使用@Scope("prototype")指明为多实例,action都是多实例的
同样还要使用@Resource(J2EE规范注解,按照名称进行装配)注入Service(使用注解注入属性就不需要set方法)
@Resource(name="adminService")
private AdminService adminService;