一、异步任务
测试如下
1、不是异步方法的时候:
进行等待三秒再进行应答
@Service
public class AsynService {

    public void hello(){
        try {
            Thread.sleep(3000);
        } catch (InterruptedException e) {
            e.printStackTrace();
        }
        System.out.println("处理数据.....");
    }
}
controller类:
@RestController
public class AsyncController {
    @Autowired
    AsyncService asyncService;

    @GetMapping("/hello")
    public String hello(){
        asyncService.hello();
        return "success";
    }
}
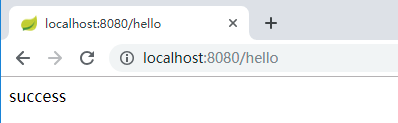
访问链接服务器3秒之后才给出响应;
2、是异步方法的时候
@Service
public class AsynService {

    //告诉spring这是一个异步的方法
    @Async
    public void hello(){
        try {
            Thread.sleep(3000);
        } catch (InterruptedException e) {
            e.printStackTrace();
        }

        System.out.println("处理数据.....");
    }
}
要想@Async注解起效果还需开启允许异步注解
@EnableAsync        //开启异步注解
@SpringBootApplication
public class Springboot04TaskApplication {

    public static void main(String[] args) {
        SpringApplication.run(Springboot04TaskApplication.class, args);
    }

}
二、定时任务
项目开发中经常需要执行一些定时任务
比如凌晨时候,分析一个前一天的日志信息
Spring为我们提供了异步执行任务调度的方式
提供了TaskExecutor、TaskScheduler接口

cron属性:
*代表全部

定时任务方法(这里的例子是星期一到星期六的每天的每小时的每分钟打印一次定时任务开启)
@Service
public class ScheduleService {

    //定时任务
    //cron:second、minute、hour、day of month、day of week
    @Scheduled(cron = "0 * * * * MON-SAT")
    public void hello(){
        System.out.println("定时任务开启...");
    }
}
开启允许定时任务的注解
@EnableScheduling   //开启基于注解的定时任务
@SpringBootApplication
public class Springboot04TaskApplication {

    public static void main(String[] args) {
        SpringApplication.run(Springboot04TaskApplication.class, args);
    }

}
启动服务之后没隔一分钟就打印一次

在任意分钟的0-4s进行打印
    @Scheduled(cron = "0-4 * * * * 0-7")
    public void hello(){
        System.out.println("定时任务开启...");
    }


三、邮件任务
1、引入邮件的依赖
<dependency>
     <groupId>org.springframework.boot</groupId>
     <artifactId>spring-boot-starter-mail</artifactId>
</dependency>
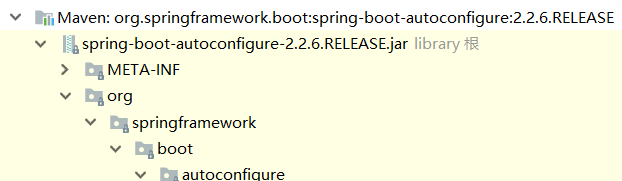
查看springboot的mail的相关自动配置

注入的邮件操作类
    @Bean
    JavaMailSenderImpl mailSender(Session session) {
        JavaMailSenderImpl sender = new JavaMailSenderImpl();
        sender.setDefaultEncoding(this.properties.getDefaultEncoding().name());
        sender.setSession(session);
        return sender;
    }
相关的配置属性
@ConfigurationProperties(
    prefix = "spring.mail"
)
public class MailProperties {
    private static final Charset DEFAULT_CHARSET;
    private String host;
    private Integer port;
    private String username;
    private String password;
    private String protocol = "smtp";
    private Charset defaultEncoding;
    private Map<String, String> properties;
    private String jndiName;
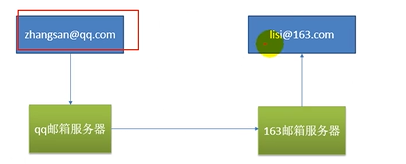
我们是通过中间服务器来发送邮箱的
2、测试发送简单邮件
2.1.配置文件中进行文件配置
spring.mail.username=xxxxxxxxx@qq.com
//注意是授权密码,非登录密码
spring.mail.password=rmdwtmbkrwpibddd
spring.mail.host=smtp.qq.com
//配置ssl安全连接
spring.mail.properties.mail.smtp.ssl.enable=true
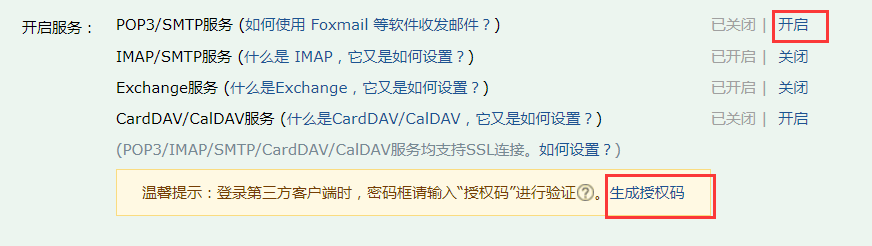
授权密码的获取:
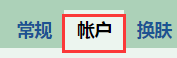
进入qq邮箱,点击设置

点击账户
先开启smtp服务,然后点击获取授权码(需要发送短信)
2.2 写测试方法
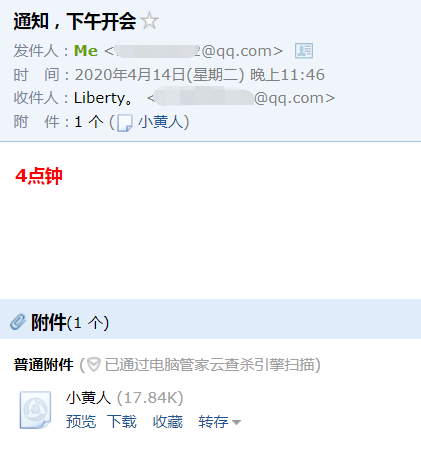
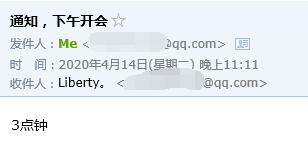
    @Autowired
    JavaMailSenderImpl mailSender;

    @Test
    void contextLoads() {
        SimpleMailMessage mailMessage = new SimpleMailMessage();
        //邮件设置
        //标题
        mailMessage.setSubject("通知,下午开会");
        //内容
        mailMessage.setText("3点钟");
        //收件人邮箱
        mailMessage.setTo("xxxxxxxxxx@qq.com");
        //发件人邮箱
        mailMessage.setFrom("xxxxxxxxx@qq.com");
        mailSender.send(mailMessage);
    }
测试成功
2.3、测试发送复杂邮件(带附件,html代码片段。。。)
    @Test
    public void test02() throws MessagingException {
        //创建一个复杂的消息邮件
        MimeMessage mimeMessage = mailSender.createMimeMessage();
        //用mimeMessageHelper对邮箱进行设置
        MimeMessageHelper mimeMessageHelper = new MimeMessageHelper(mimeMessage,true);
        //标题
        mimeMessageHelper.setSubject("通知,下午开会");
        //内容(可含html代码片段的话在后面添加参数true)
        mimeMessageHelper.setText("<b style='color:red'>4点钟</b>",true);
        //收件人邮箱
        mimeMessageHelper.setTo("1372365122@qq.com");
        //发件人邮箱
        mimeMessageHelper.setFrom("973951192@qq.com");
        //上传附件
        mimeMessageHelper.addAttachment("小黄人",new File("E:\pythonTest\alien_invasion\images\icon.jpg"));
        mailSender.send(mimeMessage);
    }
测试成功