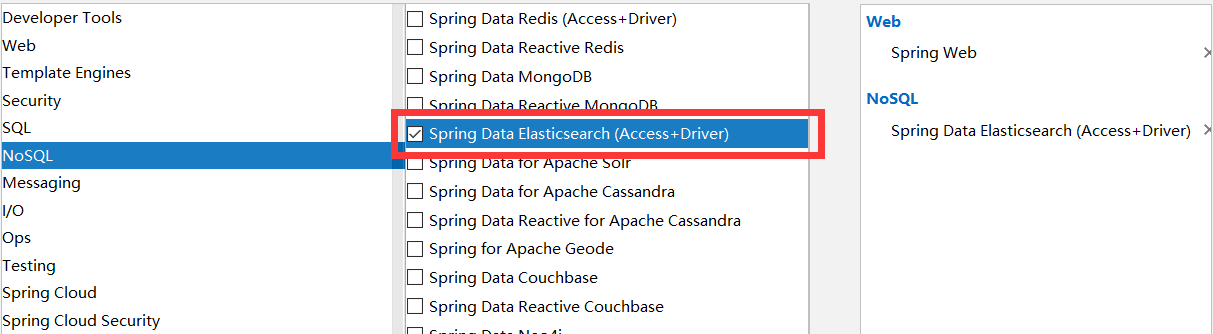
一、整合 新建项目加入依赖(NoSql)


@Bean
@ConditionalOnMissingBean
public TransportClient elasticsearchClient() throws Exception {
    TransportClientFactoryBean factory = new TransportClientFactoryBean();
    factory.setClusterNodes(this.properties.getClusterNodes());
    factory.setProperties(this.createProperties());
    factory.afterPropertiesSet();
    return factory.getObject();
}

private Properties createProperties() {
    Properties properties = new Properties();
    properties.put("cluster.name", this.properties.getClusterName());
    properties.putAll(this.properties.getProperties());
    return properties;
}

public class ElasticsearchProperties {
    private String clusterName = "elasticsearch";
    private String clusterNodes;
    private Map<String, String> properties = new HashMap();

@Bean
@ConditionalOnMissingBean
@ConditionalOnBean({Client.class})
public ElasticsearchTemplate elasticsearchTemplate(Client client, ElasticsearchConverter converter) {
    try {
        return new ElasticsearchTemplate(client, converter);
    } catch (Exception var4) {
        throw new IllegalStateException(var4);
    }
}
二、测试
1、Jest方式
1.1、导入jest依赖
因为springboot默认使用SpringDate ElasticSearch模块进行操作elasticSearch;所以要想使用jest方式操作elasticsearch需要导入jest的依赖(jest的版本可根据自己安装的elasticSearch版本进行像匹配)
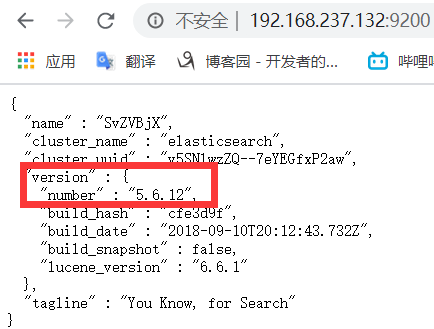
我的elasticSearch的版本为5.6.12,所选的jest版本为5.3.4为例
<!--使用jest操作elasticsearch-->
        <dependency>
            <groupId>io.searchbox</groupId>
            <artifactId>jest</artifactId>
            <version>5.3.4</version>
        </dependency>
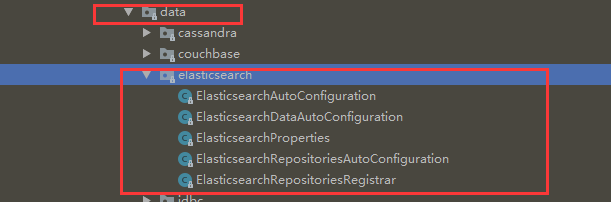
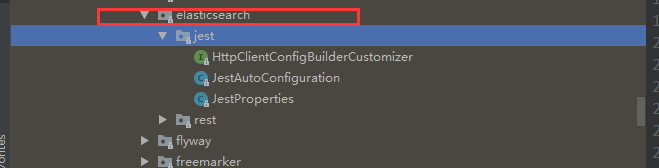
查看jest的一些自动配置:

@Bean(
    destroyMethod = "shutdownClient"
)
@ConditionalOnMissingBean
public JestClient jestClient() {
    JestClientFactory factory = new JestClientFactory();
    factory.setHttpClientConfig(this.createHttpClientConfig());
    return factory.getObject();
}
 :默认访问本机的elasticSearch端口
private List<String> uris = new ArrayList(Collections.singletonList("http://localhost:9200"));
2.2在properties配置文件中修改访问elasticSearch的路径
我在linux虚拟机中开启的elasticSeach,我的linux的ip地址为192.168.237.132,所以配置如下
spring.elasticsearch.jest.uris=http://192.168.237.132:9200
2.3创建一个pojo类
public class Article {
    @JestId         //Jest通过此注解可识别主键
    private Integer id;
    private String author;
    private String title;
    private String content;
.....
2.4单元测试类中写测试方法
    @Autowired
    JestClient jestClient;

    @Test
    public void contextLoads() {
        //1、给Es中索引(保存)一个文档
        Article article = new Article();
        article.setId(1);
        article.setAuthor("zhangsan");
        article.setTitle("好消息");
        article.setContent("Hello World");

        //构建一个索引功能
        /*因为在Article类中@JestId标识了id所以不需要指定id
        Index build = new Index.Builder(article).index("atguigu").type("news").id("1").build();*/
        Index build = new Index.Builder(article).index("atguigu").type("news").build();
        try {
            jestClient.execute(build);
        } catch (IOException e) {
            e.printStackTrace();
        }
    }
2.5运行上面的测试方法可以查看结果:

2.6 测试搜索功能的实现:
    //测试搜索
    @Test
    public void search(){
        //查询表达式(这里的表达式是全文搜索content属性有hello)
        String searchJson = "{
" +
                "    "query" : {
" +
                "        "match" : {
" +
                "            "content" : "hello"
" +
                "        }
" +
                "    }
" +
                "}";
        //构建搜索功能
        Search search = new Search.Builder(searchJson).addIndex("atguigu").addType("news").build();

        try {
            //返回搜索结果
            SearchResult searchResult = jestClient.execute(search);
            System.out.println(searchResult.getJsonString());
        } catch (IOException e) {
            e.printStackTrace();
        }
    }
运行结果:控制台打印
{"took":155,"timed_out":false,"_shards":{"total":5,"successful":5,"skipped":0,"failed":0},"hits":{"total":1,"max_score":0.25811607,"hits":[{"_index":"atguigu","_type":"news","_id":"1","_score":0.25811607,"_source":{"id":1,"author":"zhangsan","title":"好消息","content":"Hello World"}}]}}
2.SpringDataElasticsearch方式
2.1导入Elasticsearch依赖(因为我们创建项目的时候选择了elasticsearch模块,所以已存在依赖)
<!--springboot默认使用springData elasticsearch模块进行操作-->
        <dependency>
            <groupId>org.springframework.boot</groupId>
            <artifactId>spring-boot-starter-data-elasticsearch</artifactId>
        </dependency>
2.2在properties配置文件中增加访问elasticsearch的配置

spring.data.elasticsearch.cluster-name=elasticsearch
#注意通信端口是9300,不是9200
spring.data.elasticsearch.cluster-nodes=192.168.237.132:9300
启动项目,控制台无报错并有显示如下相关信息则配置成功(如果报错有可能是我们的elasticsearch服务和springboot使用的elasticsearch的API不匹配,解决方法为更改springboot的版本或者重新下载匹配springboot版本的elasticsearch)

2.3在项目中操作elasticsearch
SpringdDataElasticsearch操作elasticsearch有两种方式:
1、通过ElasticsearchTemplates来操作
2、编写一个ElasticsearchRepository的子接口,进而通过这个子接口操作
这里我以第二种方式进行演示,第一种方式可自行查阅资料
2.3.1编写一个book类
//指定这个类的存储在atguigu索引下,类型为book
@Document(indexName = "atguigu",type = "book")
public class Book {
    private Integer id;
    private String bookName;
    private String author;
.....
2.3.2创建一个继承ElasticsearchCrudRepository接口的子接口(这样的操作方式很像JPA)
//泛型的第一个参数是要存取数据的类型,第二个参数是主键的类型
public interface BookRepository extends ElasticsearchRepository<Book,Integer> {

}
2.3.3在测试类中进行测试
    @Autowired
    BookRepository bookRepository;

    /**
     * 测试通过继承ElasticsearchRepository接口的子接口操作elasticsearch
     */
    @Test
    public void test2(){
        Book book = new Book();
        book.setId(1);
        book.setBookName("西游记");
        book.setAuthor("吴承恩");
        bookRepository.index(book);
    }
我这里运行之后报错了
NoNodeAvailableException[None of the configured nodes are available: [{#transport#-1}{hd81G50cRECyAth1p8eg4Q}{192.168.237.132}{192.168.237.132:9300}]
]
未找到解决办法,如有大神,望给出解决办法
正因为失败了所以没有查询到,否则就会显示book的信息

2.3.4自定义方法
在BookRepository中自定义方法,方法名有规则,IDEA工具会提示
//泛型的第一个参数是要存取数据的类型,第二个参数是主键的类型
public interface BookRepository extends ElasticsearchRepository<Book,Integer> {
    //自定义方法查询
    public List<Book> findByBookNameLike(String bookName);
}
通过bookRepository可以调用自定义的方法