功能点:
1、 分页
2、数据校验
• jquery前端校验+JSR303后端校验
3、ajax
4、Rest风格的URI;使用HTTP协议请求方式的动词,来表示对资源的操作(GET(查询),POST(新增),PUT(修改),DELETE(删除))
技术点:
基础框架-ssm(SpringMVC+Spring+MyBatis)
数据库-MySQL
前端框架-bootstrap快速搭建简洁美观的界面
项目的依赖管理-Maven
分页-pagehelper
逆向工程-MyBatis Generator
推荐参考的官方文档:
Spring:http://spring.io/docs
MyBatis:http://mybatis.github.io/mybatis-3/
Mybatis-PageHelper:https://github.com/pagehelper/Mybatis-PageHelper
1、新建一个maven工程

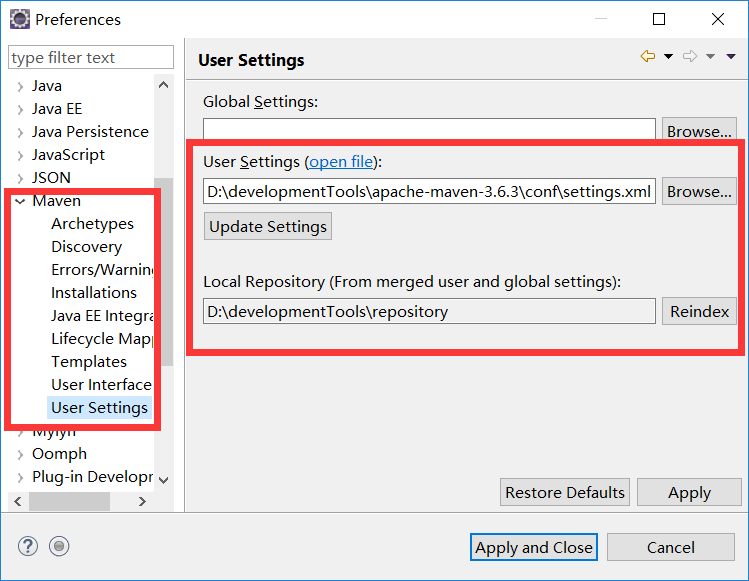
找到maven的settings.xml配置文件
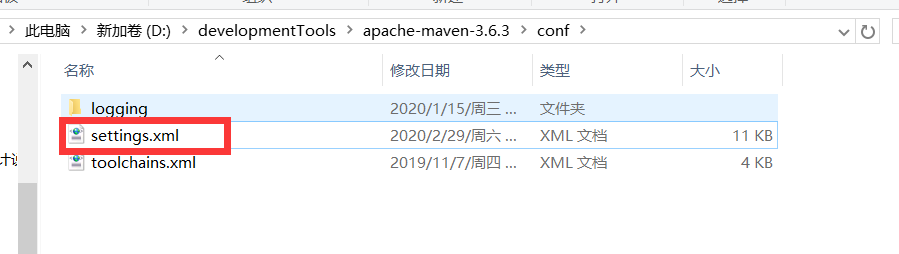
在该配置文件中指定位置加入此段
        <mirror>
            <id>nexus-aliyun</id>
            <mirrorOf>central</mirrorOf>
            <name>Nexus aliyun</name>
            <url>http://maven.aliyun.com/nexus/content/groups/public</url>
        </mirror>

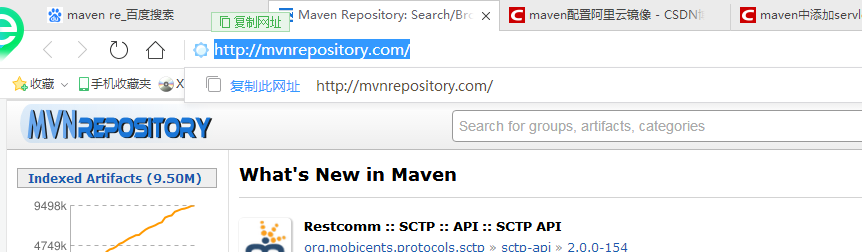
接下面我们在项目的pom.xml中引入项目需要的jar包,到maven所在的网站去搜索就可以了
以导入spring-webmvc为例:
1、进入maven网站
2、搜索spring webmvc
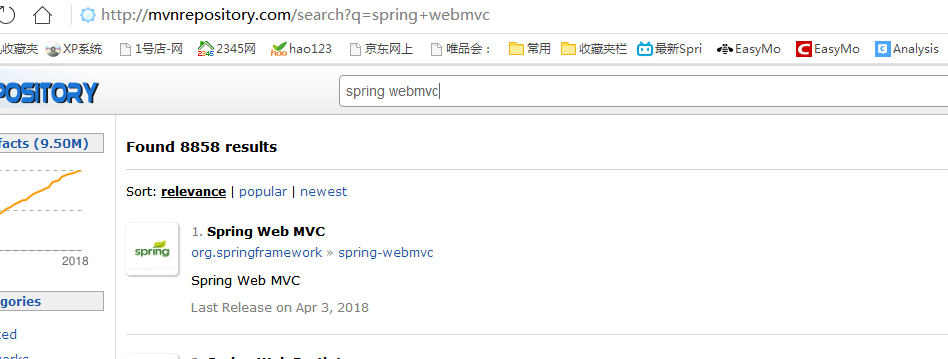
3、点击搜索后的Spring Web MVC进入选择版本,此处我选择的是4.3.7
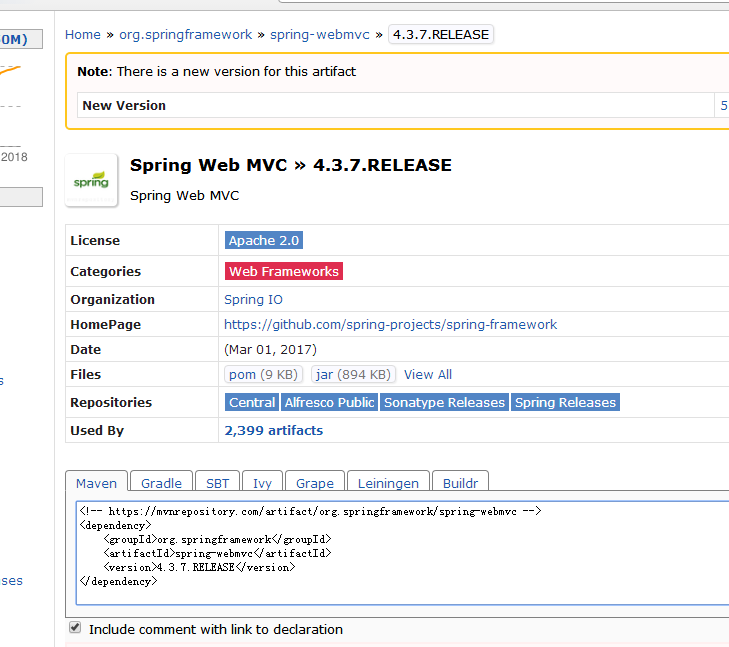
4、 复制依赖添加至pom.xml文件中
如下为我初始时导入的依赖,后续需要再添加即可
<project xmlns="http://maven.apache.org/POM/4.0.0" xmlns:xsi="http://www.w3.org/2001/XMLSchema-instance" xsi:schemaLocation="http://maven.apache.org/POM/4.0.0 http://maven.apache.org/xsd/maven-4.0.0.xsd">
  <modelVersion>4.0.0</modelVersion>
  <groupId>com.atguigu</groupId>
  <artifactId>ssm-crud</artifactId>
  <version>0.0.1-SNAPSHOT</version>
  <packaging>war</packaging>


    <dependencies>
        <!-- springmvc spring -->
        <dependency>
            <groupId>org.springframework</groupId>
            <artifactId>spring-webmvc</artifactId>
            <version>4.3.7.RELEASE</version>
        </dependency>
        <!-- spring-jdbc -->
        <dependency>
            <groupId>org.springframework</groupId>
            <artifactId>spring-jdbc</artifactId>
            <version>4.3.7.RELEASE</version>
        </dependency>
        <!-- spring-aspects -->
        <dependency>
            <groupId>org.springframework</groupId>
            <artifactId>spring-aspects</artifactId>
            <version>4.3.7.RELEASE</version>
        </dependency>
        <!-- spring-test -->
        <dependency>
            <groupId>org.springframework</groupId>
            <artifactId>spring-test</artifactId>
            <version>4.3.7.RELEASE</version>
        </dependency>

        <!-- mybatis -->
        <dependency>
            <groupId>org.mybatis</groupId>
            <artifactId>mybatis</artifactId>
            <version>3.4.2</version>
        </dependency>
        <!-- mybatis整合spring的适配包 -->
        <dependency>
            <groupId>org.mybatis</groupId>
            <artifactId>mybatis-spring</artifactId>
            <version>1.3.1</version>
        </dependency>

        <!-- 数据库连接池和驱动 -->
        <dependency>
            <groupId>com.mchange</groupId>
            <artifactId>c3p0</artifactId>
            <version>0.9.2</version>
        </dependency>
        <dependency>
            <groupId>mysql</groupId>
            <artifactId>mysql-connector-java</artifactId>
            <version>5.1.41</version>
        </dependency>

        <!-- jstl、servlet-api、junit -->
        <dependency>
            <groupId>jstl</groupId>
            <artifactId>jstl</artifactId>
            <version>1.2</version>
        </dependency>
        <dependency>
            <groupId>javax.servlet</groupId>
            <artifactId>servlet-api</artifactId>
            <version>2.5</version>
            <!-- 添加<scope>provided</scope>,因为provided表明该包只在编译和测试的时候用,
                tomcat中也有servlet-api包,所以,当启动tomcat的时候,就不会冲突了: -->
            <scope>provided</scope>
        </dependency>
        <dependency>
            <groupId>junit</groupId>
            <artifactId>junit</artifactId>
            <version>4.12</version>
        </dependency>

      </dependencies>
</project>
3、引入bootstrap前端框架和jQuery
没有bootstrap可在bootstrap中文网下载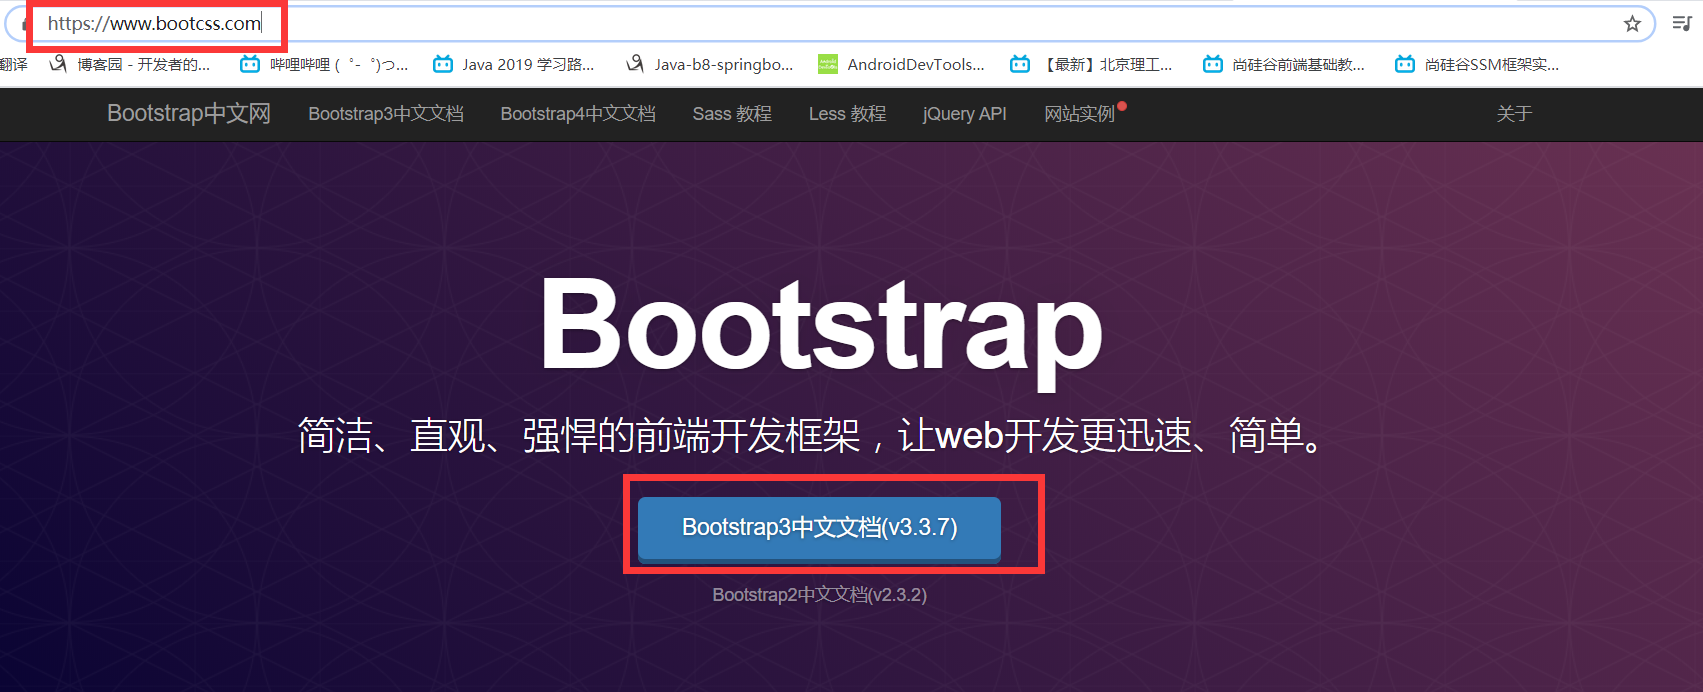
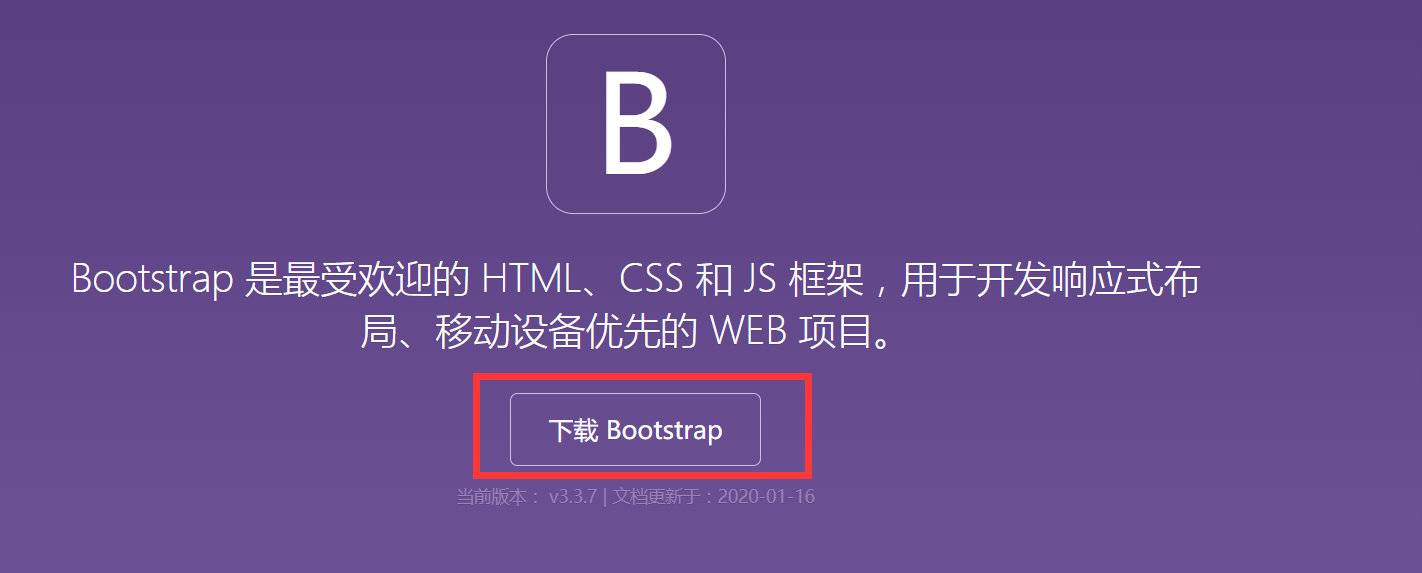

创建一个static文件夹放置静态文件;导入bootstrap和jQuery

页面中引入bootstrap和jQuery并测试一下
<%@ page language="java" contentType="text/html; charset=UTF-8"
    pageEncoding="UTF-8"%>
<!DOCTYPE html PUBLIC "-//W3C//DTD HTML 4.01 Transitional//EN" "http://www.w3.org/TR/html4/loose.dtd">
<html>
<head>
<meta http-equiv="Content-Type" content="text/html; charset=UTF-8">
<title>Insert title here</title>
    <!-- 使用bootstar还需要使用jquery库 -->
    <!-- jQuery (Bootstrap 的所有 JavaScript 插件都依赖 jQuery,所以必须放在前边) -->
<script type="text/javascript" src="static/js/jquery-3.3.1.min.js"></script>
    <!-- 引入bootstrap -->
<link rel="stylesheet" href="static/bootstrap-3.3.7/dist/css/bootstrap.css">
     <!-- 加载 Bootstrap 的所有 JavaScript 插件。你也可以根据需要只加载单个插件。 -->
<script type="text/javascript" src="static/bootstrap-3.3.7/dist/js/bootstrap.js"></script>
</head>
<body>
    <button type="button" class="btn btn-success">(成功)Success</button>

</body>
</html>
<?xml version="1.0" encoding="UTF-8"?>
<web-app xmlns:xsi="http://www.w3.org/2001/XMLSchema-instance" xmlns="http://xmlns.jcp.org/xml/ns/javaee" xsi:schemaLocation="http://xmlns.jcp.org/xml/ns/javaee http://xmlns.jcp.org/xml/ns/javaee/web-app_3_1.xsd" version="3.1">
  <display-name>ssm-crud</display-name>

    <!-- 手动指定spring配置文件的位置 -->
      <context-param>
        <param-name>contextConfigLocation</param-name>
        <param-value>classpath:applicationContext.xml</param-value>
    </context-param>

    <listener>
         <!-- 配置spring提供的监听器,用于监听servletContext对象的创建,同时为我们创建spring容器放在servletContext中,需导spring-web-4.3.8.RELEASE.jar
              (默认加载位置)是在WEB-INF目录中的spring配置文件,同时文件名必须是applicationContext.xml
              指定了上面的contextConfigLocation则按指定的位置加载-->
        <listener-class>org.springframework.web.context.ContextLoaderListener</listener-class>
    </listener>


    <!-- springMVC前端控制器 -->
  <servlet>
      <servlet-name>dispatcherServlet</servlet-name>
      <servlet-class>org.springframework.web.servlet.DispatcherServlet</servlet-class>
      <init-param>
          <!-- contextConfigLocation配置springmvc加载的配置文件;如果不配置默认加载的是/WEB-INF/    servlet名称-servlet.xml -->
          <param-name>contextConfigLocation</param-name>
          <param-value>classpath:springMVC.xml</param-value>
      </init-param>
      <load-on-startup>1</load-on-startup>
  </servlet>
  <servlet-mapping>
      <servlet-name>dispatcherServlet</servlet-name>
      <!-- 第一种:*.action     以.action结尾的由DispatcherServlet解析 -->
      <!-- <url-pattern>*.action</url-pattern> -->
      <!-- 第二种:/        所有的访问地址都由DispatcherServlet解析,对于静态文件的解析需要配置不让DispatcherServlet解析
        使用此种方式可以实现RESTful风格的url-->
      <url-pattern>/</url-pattern>
  </servlet-mapping>

  <!-- 字符编码过滤器放最前面 -->
   <filter>
          <filter-name>CharacterEncodingFilter</filter-name>
          <filter-class>org.springframework.web.filter.CharacterEncodingFilter</filter-class>
          <init-param>
            <param-name>encoding</param-name>
            <param-value>UTF-8</param-value>
        </init-param>
        <init-param>
            <param-name>forceRequestEncoding</param-name>
            <param-value>true</param-value>
        </init-param>
        <init-param>
            <param-name>forceResponseEncoding</param-name>
            <param-value>true</param-value>
        </init-param>
    </filter>
    <filter-mapping>
        <filter-name>CharacterEncodingFilter</filter-name>
        <url-pattern>/*</url-pattern>
    </filter-mapping>


  <!-- Rest风格的URI,将页面普通的post请求转为指定的delete或者put请求 -->
  <filter>
      <filter-name>hiddenHttpMethodFilter</filter-name>
      <filter-class>org.springframework.web.filter.HiddenHttpMethodFilter</filter-class>
  </filter>
  <filter-mapping>
      <filter-name>hiddenHttpMethodFilter</filter-name>
      <url-pattern>/*</url-pattern>
  </filter-mapping>
</web-app>
其它文件的位置
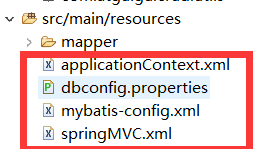
2、springMVC.xml文件的配置
<?xml version="1.0" encoding="UTF-8"?>
<beans xmlns="http://www.springframework.org/schema/beans"
        xmlns:xsi="http://www.w3.org/2001/XMLSchema-instance"
        xmlns:context="http://www.springframework.org/schema/context"
        xmlns:mvc="http://www.springframework.org/schema/mvc"xsi:schemaLocation="
        http://www.springframework.org/schema/beans http://www.springframework.org/schema/beans/spring-beans.xsd
        http://www.springframework.org/schema/context http://www.springframework.org/schema/context/spring-context.xsd
        http://www.springframework.org/schema/mvc http://www.springframework.org/schema/mvc/spring-mvc.xsd">

        <!-- 视图解析器 ;解析jsp,默认使用jstl标签,所以必须导jstl包 -->
        <bean class="org.springframework.web.servlet.view.InternalResourceViewResolver">
            <property name="prefix" value="/WEB-INF/views/"></property>
            <property name="suffix" value=".jsp"></property>
        </bean>

           <!-- 配置只扫描@Controller注解 -->
           <context:component-scan base-package="com.atguigu" use-default-filters="false">
               <!-- 因为这是springmvc配置文件,所以只让扫描带有Controller注解的类;即只扫描控制器
                    include-filter:指定扫描那些,expression是注解的全类名
                    exclude-filter:指定除了这个不扫描,其它都扫描 -->
               <context:include-filter type="annotation" expression="org.springframework.stereotype.Controller"/>
           </context:component-scan>

        <!-- 支持springmvc高级的一些功能,映射动态请求,JSR303校验,快捷的ajax... -->
           <mvc:annotation-driven></mvc:annotation-driven>

        <!-- 将springmvc不能处理的请求交给tomcat;即处理静态资源 -->
        <mvc:default-servlet-handler/>
</beans>
3、spring全局配置文件application.xml
<?xml version="1.0" encoding="UTF-8"?>
<beans xmlns="http://www.springframework.org/schema/beans"
        xmlns:xsi="http://www.w3.org/2001/XMLSchema-instance"
        xmlns:aop="http://www.springframework.org/schema/aop"
        xmlns:context="http://www.springframework.org/schema/context"
        xmlns:mvc="http://www.springframework.org/schema/mvc"
        xmlns:tx="http://www.springframework.org/schema/tx" xsi:schemaLocation="
        http://www.springframework.org/schema/beans http://www.springframework.org/schema/beans/spring-beans.xsd
        http://www.springframework.org/schema/tx http://www.springframework.org/schema/tx/spring-tx.xsd
        http://www.springframework.org/schema/aop http://www.springframework.org/schema/aop/spring-aop.xsd
        http://www.springframework.org/schema/context http://www.springframework.org/schema/context/spring-context.xsd
        http://www.springframework.org/schema/mvc http://www.springframework.org/schema/mvc/spring-mvc.xsd">


        <!-- spring管理除了controller以外的其它组件 -->
        <context:component-scan base-package="com.atguigu">
            <context:exclude-filter type="annotation" expression="org.springframework.stereotype.Controller"/>
        </context:component-scan>

        <!-- ==============================数据源配置============================ -->
        <!-- 引入数据库的配置文件 -->
        <context:property-placeholder location="classpath:dbconfig.properties"/>
        <!-- 数据源 -->
        <bean id="dataSource" class="com.mchange.v2.c3p0.ComboPooledDataSource">
            <property name="jdbcUrl" value="${jdbc.url}"></property>
            <property name="driverClass" value="${jdbc.driver}"></property>
            <property name="user" value="${jdbc.user}"></property>
            <property name="password" value="${jdbc.password}"></property>
        </bean>

        <!-- ==============================spring管理事务====================================== -->
        <bean id="transactionManager" class="org.springframework.jdbc.datasource.DataSourceTransactionManager">
            <property name="dataSource" ref="dataSource"></property>
        </bean>

        <!-- 开启基于注解的声明式事务 -->
        <!-- <tx:annotation-driven transaction-manager="transactionManager"/> -->
        <!-- 使用xml配置的事务 -->
        <aop:config>
            <aop:pointcut expression="execution(* com.atguigu.crud.service..*(..))" id="txPoint"/>
            <aop:advisor advice-ref="txAdvice" pointcut-ref="txPoint"/>
        </aop:config>
        <tx:advice id="txAdvice" transaction-manager="transactionManager">        <!-- 配置事务如何增强 -->
            <tx:attributes>
                <tx:method name="*"/>
                <tx:method name="get*" read-only="true"/>
            </tx:attributes>
        </tx:advice>


      <!-- ====================================整合mybatis===================================== -->
        <!-- 让spring创建sqlSessionFactory -->
        <bean id="sqlSessionFactory" class="org.mybatis.spring.SqlSessionFactoryBean">
            <!-- 结合mybatis的全局配置文件进而创建sqlSessionFactory -->
            <property name="configLocation" value="classpath:mybatis-config.xml"></property>
            <property name="dataSource" ref="dataSource" />
            <!-- 指定mapper配置文件的位置,这样mapper配置文件和mapper接口就可以不需要在相同路径下了 -->
            <property name="mapperLocations" value="classpath:mapper/*.xml"></property>
            <!-- 指定哪些包下的类要创建别名 -->
            <property name="typeAliasesPackage" value="com.atgui.crud.bean" />
        </bean>

        <!-- 扫描所有的mapper接口的实现,让这些mapper能够自动注入
            basepackage:指定mapper接口的包名 -->
        <!-- <mybatis-spring:scan basepackage="com.pxxy.dao"></mybatis-spring:scan> -->
        <bean class="org.mybatis.spring.mapper.MapperScannerConfigurer">
            <property name="basePackage" value="com.atguigu.crud.dao"></property>
        </bean>

        <!-- 配置一个可批量操作的sqlSession -->
        <bean id="sqlSession" class="org.mybatis.spring.SqlSessionTemplate">
            <constructor-arg name="sqlSessionFactory" ref="sqlSessionFactory"></constructor-arg>
            <constructor-arg name="executorType" value="BATCH"></constructor-arg>
        </bean>
</beans>
4、dbconfig.xml的内容
jdbc.driver=com.mysql.jdbc.Driver
jdbc.url=jdbc:mysql://localhost:3306/ssm_crud
jdbc.user=root
jdbc.password=123
5、配置mybatis-config.xml
<?xml version="1.0" encoding="UTF-8" ?>
<!DOCTYPE configuration
 PUBLIC "-//mybatis.org//DTD Config 3.0//EN"
 "http://mybatis.org/dtd/mybatis-3-config.dtd">
    <configuration>

        <!-- settings包含很多重要的设置项
                setting:设置一个设置项
                    name:设置项名
                    value:设置项取值 -->
        <settings>
            <!-- 启动驼峰命名法,即数据库字段last_name可对应对象的lastName属性 -->
            <setting name="mapUnderscoreToCamelCase" value="true"/>

            <!-- 延迟加载设置 -->
            <setting name="lazyLoadingEnabled" value="true"/>
            <setting name="aggressiveLazyLoading" value="false"/>

            <!-- 开启二级缓存,默认开启 -->
            <setting name="cacheEnabled" value="true"/>
        </settings>

    </configuration>
5、使用mybatis的逆向工程(MBG:mybatis generator)生成相应的bean的各种类和配置
1、创建ssm_crud数据库并创建tbl_emp(员工)和tbl_dept(部门)表
CREATE TABLE `tbl_emp` (
  `emp_id` int(11) NOT NULL AUTO_INCREMENT,
  `emp_name` varchar(255) NOT NULL,
  `gender` char(1) DEFAULT NULL,
  `email` varchar(255) DEFAULT NULL,
  `d_id` int(11) DEFAULT NULL,
  PRIMARY KEY (`emp_id`),
  KEY `fk_emp_dept` (`d_id`),
  CONSTRAINT `fk_emp_dept` FOREIGN KEY (`d_id`) REFERENCES `tbl_dept` (`dept_id`)
) ENGINE=InnoDB AUTO_INCREMENT=1002 DEFAULT CHARSET=utf8;


CREATE TABLE `tbl_dept` (
  `dept_id` int(11) NOT NULL AUTO_INCREMENT,
  `dept_name` varchar(255) NOT NULL,
  PRIMARY KEY (`dept_id`)
) ENGINE=InnoDB AUTO_INCREMENT=3 DEFAULT CHARSET=utf8;

2、表创建成功之后,接下来使用mybatis的逆向工程来生成数据库表对应的bean文件和map文件
第一步:需要在pom.xml中添加mybatis 逆向工程的依赖
        <!-- MBG,mybatis逆向工程 -->
        <dependency>
            <groupId>org.mybatis.generator</groupId>
            <artifactId>mybatis-generator-core</artifactId>
            <version>1.3.5</version>
        </dependency>
第二步:在当前工程下面创建一个generatorConfig.xml文件
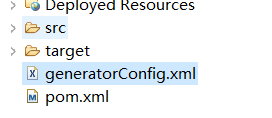
generatorConfig.xml配置的内容
<?xml version="1.0" encoding="UTF-8"?>
<!DOCTYPE generatorConfiguration
        PUBLIC "-//mybatis.org//DTD MyBatis Generator Configuration 1.0//EN"
        "http://mybatis.org/dtd/mybatis-generator-config_1_0.dtd">
<generatorConfiguration>
    <context id="DB2Tables"  targetRuntime="MyBatis3">
        <commentGenerator>
            <property name="suppressDate" value="true"/>
            <!-- 是否去除自动生成的注释 true:是 : false:否 -->
            <property name="suppressAllComments" value="true"/>
        </commentGenerator>

        <!--数据库链接URL,用户名、密码 -->
        <jdbcConnection driverClass="com.mysql.jdbc.Driver"
            connectionURL="jdbc:mysql://localhost:3306/ssm_crud"
            userId="root"
            password="123">
        </jdbcConnection>

        <javaTypeResolver>
            <property name="forceBigDecimals" value="false"/>
        </javaTypeResolver>

        <!-- 生成模型的包名和位置-->
        <javaModelGenerator targetPackage="com.atguigu.crud.bean" targetProject=".srcmainjava">
            <property name="enableSubPackages" value="true"/>
            <property name="trimStrings" value="true"/>
        </javaModelGenerator>

        <!-- 生成映射文件的包名和位置-->
        <sqlMapGenerator targetPackage="mapper" targetProject=".srcmain
esources">
            <property name="enableSubPackages" value="true"/>
        </sqlMapGenerator>

        <!-- 生成DAO的包名和位置-->
        <javaClientGenerator type="XMLMAPPER" targetPackage="com.atguigu.crud.dao" targetProject=".srcmainjava">
            <property name="enableSubPackages" value="true"/>
        </javaClientGenerator>

        <!-- 要生成的表 tableName是数据库中的表名或视图名 domainObjectName是实体类名-->
        <table tableName="tbl_emp" domainObjectName="Employee"></table>
        <table tableName="tbl_dept" domainObjectName="Department"></table>
    </context>
</generatorConfiguration>
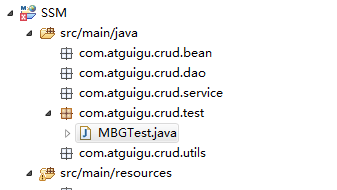
第三步:接下来要运行生成生成对应的配置文件,在test包下建立一个MBGTest类运行之后生成对应的逆向文件
MBGTest类中的内容:
package com.atguigu.crud.test;

import java.io.File;
import java.io.IOException;
import java.sql.SQLException;
import java.util.ArrayList;
import java.util.List;

import org.mybatis.generator.api.MyBatisGenerator;
import org.mybatis.generator.config.Configuration;
import org.mybatis.generator.config.xml.ConfigurationParser;
import org.mybatis.generator.exception.InvalidConfigurationException;
import org.mybatis.generator.exception.XMLParserException;
import org.mybatis.generator.internal.DefaultShellCallback;

public class MBGTest {
    public static void main(String[] args) throws SQLException, IOException, InterruptedException, InvalidConfigurationException, XMLParserException {
        List<String> warnings = new ArrayList<String>();
        boolean overwrite = true;
        File configFile = new File("generatorConfig.xml");
        ConfigurationParser cp = new ConfigurationParser(warnings);
        Configuration config = cp.parseConfiguration(configFile);
        DefaultShellCallback callback = new DefaultShellCallback(overwrite);
        MyBatisGenerator myBatisGenerator = new MyBatisGenerator(config, callback, warnings);
        myBatisGenerator.generate(null);
    }
}
运行MBGTest类
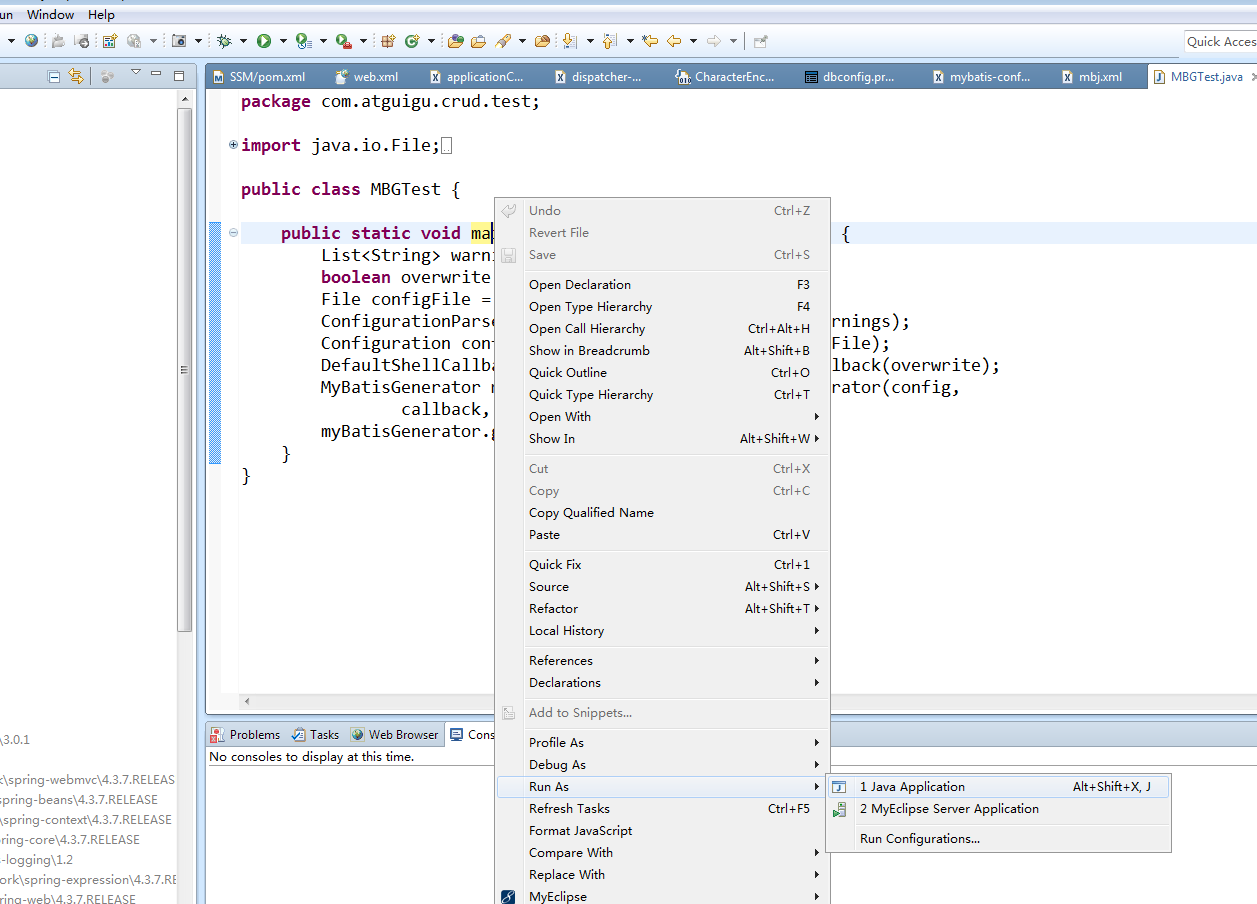
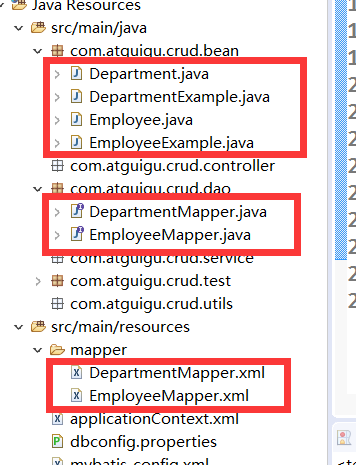
运行完成后便自动生成了相应java类和配置
6、修改mapper文件
上面通过逆向工程生成的代码不一定满足我们的条件,我们需要根据需求进行修改
1、EmployeeMapper增加下面的两个接口,即查询员工时也查出对应的部门信息
public interface EmployeeMapper {
    long countByExample(EmployeeExample example);

    int deleteByExample(EmployeeExample example);

    int deleteByPrimaryKey(Integer empId);

    int insert(Employee record);

    int insertSelective(Employee record);

    List<Employee> selectByExample(EmployeeExample example);

    Employee selectByPrimaryKey(Integer empId);

    //查询出的结果带上部门信息
    List<Employee> selectByExampleWithDept(EmployeeExample example);

    Employee selectByPrimaryKeyWithDept(Integer empId);

    int updateByExampleSelective(@Param("record") Employee record, @Param("example") EmployeeExample example);

    int updateByExample(@Param("record") Employee record, @Param("example") EmployeeExample example);

    int updateByPrimaryKeySelective(Employee record);

    int updateByPrimaryKey(Employee record);
}
2、在Employee.java中增加Department属性
public class Employee {
    private Integer empId;

    private String empName;

    private String gender;

    private String email;

    private Integer dId;

    //希望查询员工时顺便部分信息也查询出来
    private Department department;


    public Employee(Integer empId, String empName, String gender, String email, Integer dId) {
        super();
        this.empId = empId;
        this.empName = empName;
        this.gender = gender;
        this.email = email;
        this.dId = dId;
    }

    public Employee() {
        super();
        // TODO Auto-generated constructor stub
    }

    public Department getDepartment() {
        return department;
    }

    public void setDepartment(Department department) {
        this.department = department;
    }

    public Integer getEmpId() {
        return empId;
    }

    public void setEmpId(Integer empId) {
        this.empId = empId;
    }

    public String getEmpName() {
        return empName;
    }

    public void setEmpName(String empName) {
        this.empName = empName == null ? null : empName.trim();
    }

    public String getGender() {
        return gender;
    }

    public void setGender(String gender) {
        this.gender = gender == null ? null : gender.trim();
    }

    public String getEmail() {
        return email;
    }

    public void setEmail(String email) {
        this.email = email == null ? null : email.trim();
    }

    public Integer getdId() {
        return dId;
    }

    public void setdId(Integer dId) {
        this.dId = dId;
    }
}
3、修改EmployeeMapper.xml文件(黄色部分即为新添加的)
<?xml version="1.0" encoding="UTF-8"?>
<!DOCTYPE mapper PUBLIC "-//mybatis.org//DTD Mapper 3.0//EN" "http://mybatis.org/dtd/mybatis-3-mapper.dtd">
<mapper namespace="com.atguigu.crud.dao.EmployeeMapper">

  <resultMap id="BaseResultMap" type="com.atguigu.crud.bean.Employee">
    <id column="emp_id" jdbcType="INTEGER" property="empId" />
    <result column="emp_name" jdbcType="VARCHAR" property="empName" />
    <result column="gender" jdbcType="CHAR" property="gender" />
    <result column="email" jdbcType="VARCHAR" property="email" />
    <result column="d_id" jdbcType="INTEGER" property="dId" />
  </resultMap>
  <!-- 带有department信息的resultMap -->
  <resultMap id="WithDeptResultMap" type="com.atguigu.crud.bean.Employee">
    <id column="emp_id" jdbcType="INTEGER" property="empId" />
    <result column="emp_name" jdbcType="VARCHAR" property="empName" />
    <result column="gender" jdbcType="CHAR" property="gender" />
    <result column="email" jdbcType="VARCHAR" property="email" />
    <result column="d_id" jdbcType="INTEGER" property="dId" />
    <!-- 用association封装部门信息 -->
    <association property="department" javaType="com.atguigu.crud.bean.Department">
        <id column="dept_id" property="deptId"/>
        <result column="dept_name" property="deptName"/>
    </association>
  </resultMap>
  <sql id="Example_Where_Clause">
    <where>
      <foreach collection="oredCriteria" item="criteria" separator="or">
        <if test="criteria.valid">
          <trim prefix="(" prefixOverrides="and" suffix=")">
            <foreach collection="criteria.criteria" item="criterion">
              <choose>
                <when test="criterion.noValue">
                  and ${criterion.condition}
                </when>
                <when test="criterion.singleValue">
                  and ${criterion.condition} #{criterion.value}
                </when>
                <when test="criterion.betweenValue">
                  and ${criterion.condition} #{criterion.value} and #{criterion.secondValue}
                </when>
                <when test="criterion.listValue">
                  and ${criterion.condition}
                  <foreach close=")" collection="criterion.value" item="listItem" open="(" separator=",">
                    #{listItem}
                  </foreach>
                </when>
              </choose>
            </foreach>
          </trim>
        </if>
      </foreach>
    </where>
  </sql>
  <sql id="Update_By_Example_Where_Clause">
    <where>
      <foreach collection="example.oredCriteria" item="criteria" separator="or">
        <if test="criteria.valid">
          <trim prefix="(" prefixOverrides="and" suffix=")">
            <foreach collection="criteria.criteria" item="criterion">
              <choose>
                <when test="criterion.noValue">
                  and ${criterion.condition}
                </when>
                <when test="criterion.singleValue">
                  and ${criterion.condition} #{criterion.value}
                </when>
                <when test="criterion.betweenValue">
                  and ${criterion.condition} #{criterion.value} and #{criterion.secondValue}
                </when>
                <when test="criterion.listValue">
                  and ${criterion.condition}
                  <foreach close=")" collection="criterion.value" item="listItem" open="(" separator=",">
                    #{listItem}
                  </foreach>
                </when>
              </choose>
            </foreach>
          </trim>
        </if>
      </foreach>
    </where>
  </sql>
  <sql id="Base_Column_List">
    emp_id, emp_name, gender, email, d_id
  </sql>
  <!-- 查询结果带了department信息的字段 -->
  <sql id="WithDept_Column_List">
    e.emp_id, e.emp_name, e.gender, e.email, e.d_id,d.dept_id,d.dept_name
  </sql>

  <!-- 查询员工时带department信息 -->
  <select id="selectByExampleWithDept" parameterType="com.atguigu.crud.bean.EmployeeExample" resultMap="WithDeptResultMap">
    select
    <if test="distinct">
      distinct
    </if>
    <include refid="WithDept_Column_List" />
    from tbl_emp e                <!-- 联表查询 -->
    left join tbl_dept t on e.d_id = d.dept_id
    <if test="_parameter != null">
      <include refid="Example_Where_Clause" />
    </if>
    <if test="orderByClause != null">
      order by ${orderByClause}
    </if>
  </select>


  <select id="selectByPrimaryKeyWithDept" parameterType="java.lang.Integer" resultMap="WithDeptResultMap">
    select
    <include refid="WithDept_Column_List" />
    from tbl_emp e                <!-- 联表查询 -->
    left join tbl_dept t on e.d_id = d.dept_id
    where emp_id = #{empId,jdbcType=INTEGER}
  </select>

  <!-- 查询员工时不带department信息 -->
  <select id="selectByExample" parameterType="com.atguigu.crud.bean.EmployeeExample" resultMap="BaseResultMap">
    select
    <if test="distinct">
      distinct
    </if>
    <include refid="Base_Column_List" />
    from tbl_emp
    <if test="_parameter != null">
      <include refid="Example_Where_Clause" />
    </if>
    <if test="orderByClause != null">
      order by ${orderByClause}
    </if>
  </select>

  <select id="selectByPrimaryKey" parameterType="java.lang.Integer" resultMap="BaseResultMap">
    select
    <include refid="Base_Column_List" />
    from tbl_emp
    where emp_id = #{empId,jdbcType=INTEGER}
  </select>

  <delete id="deleteByPrimaryKey" parameterType="java.lang.Integer">
    delete from tbl_emp
    where emp_id = #{empId,jdbcType=INTEGER}
  </delete>

  <delete id="deleteByExample" parameterType="com.atguigu.crud.bean.EmployeeExample">
    delete from tbl_emp
    <if test="_parameter != null">
      <include refid="Example_Where_Clause" />
    </if>
  </delete>

  <insert id="insert" parameterType="com.atguigu.crud.bean.Employee">
    insert into tbl_emp (emp_id, emp_name, gender,
      email, d_id)
    values (#{empId,jdbcType=INTEGER}, #{empName,jdbcType=VARCHAR}, #{gender,jdbcType=CHAR},
      #{email,jdbcType=VARCHAR}, #{dId,jdbcType=INTEGER})
  </insert>

  <insert id="insertSelective" parameterType="com.atguigu.crud.bean.Employee">
    insert into tbl_emp
    <trim prefix="(" suffix=")" suffixOverrides=",">
      <if test="empId != null">
        emp_id,
      </if>
      <if test="empName != null">
        emp_name,
      </if>
      <if test="gender != null">
        gender,
      </if>
      <if test="email != null">
        email,
      </if>
      <if test="dId != null">
        d_id,
      </if>
    </trim>
    <trim prefix="values (" suffix=")" suffixOverrides=",">
      <if test="empId != null">
        #{empId,jdbcType=INTEGER},
      </if>
      <if test="empName != null">
        #{empName,jdbcType=VARCHAR},
      </if>
      <if test="gender != null">
        #{gender,jdbcType=CHAR},
      </if>
      <if test="email != null">
        #{email,jdbcType=VARCHAR},
      </if>
      <if test="dId != null">
        #{dId,jdbcType=INTEGER},
      </if>
    </trim>
  </insert>

  <select id="countByExample" parameterType="com.atguigu.crud.bean.EmployeeExample" resultType="java.lang.Long">
    select count(*) from tbl_emp
    <if test="_parameter != null">
      <include refid="Example_Where_Clause" />
    </if>
  </select>

  <update id="updateByExampleSelective" parameterType="map">
    update tbl_emp
    <set>
      <if test="record.empId != null">
        emp_id = #{record.empId,jdbcType=INTEGER},
      </if>
      <if test="record.empName != null">
        emp_name = #{record.empName,jdbcType=VARCHAR},
      </if>
      <if test="record.gender != null">
        gender = #{record.gender,jdbcType=CHAR},
      </if>
      <if test="record.email != null">
        email = #{record.email,jdbcType=VARCHAR},
      </if>
      <if test="record.dId != null">
        d_id = #{record.dId,jdbcType=INTEGER},
      </if>
    </set>
    <if test="_parameter != null">
      <include refid="Update_By_Example_Where_Clause" />
    </if>
  </update>

  <update id="updateByExample" parameterType="map">
    update tbl_emp
    set emp_id = #{record.empId,jdbcType=INTEGER},
      emp_name = #{record.empName,jdbcType=VARCHAR},
      gender = #{record.gender,jdbcType=CHAR},
      email = #{record.email,jdbcType=VARCHAR},
      d_id = #{record.dId,jdbcType=INTEGER}
    <if test="_parameter != null">
      <include refid="Update_By_Example_Where_Clause" />
    </if>
  </update>

  <update id="updateByPrimaryKeySelective" parameterType="com.atguigu.crud.bean.Employee">
    update tbl_emp
    <set>
      <if test="empName != null">
        emp_name = #{empName,jdbcType=VARCHAR},
      </if>
      <if test="gender != null">
        gender = #{gender,jdbcType=CHAR},
      </if>
      <if test="email != null">
        email = #{email,jdbcType=VARCHAR},
      </if>
      <if test="dId != null">
        d_id = #{dId,jdbcType=INTEGER},
      </if>
    </set>
    where emp_id = #{empId,jdbcType=INTEGER}
  </update>

  <update id="updateByPrimaryKey" parameterType="com.atguigu.crud.bean.Employee">
    update tbl_emp
    set emp_name = #{empName,jdbcType=VARCHAR},
      gender = #{gender,jdbcType=CHAR},
      email = #{email,jdbcType=VARCHAR},
      d_id = #{dId,jdbcType=INTEGER}
    where emp_id = #{empId,jdbcType=INTEGER}
  </update>
</mapper>
7、通过Spring单元测试进行mapper测试
1、在test包下创建一个MapperTest.java类

2、搭建spring单元测试环境
使用普通Junit测试时需要先要获取springIOC容器然后再获得mapper接口的代理对象再进行测试即如下:
        //1、创建SpringIOC容器
        ApplicationContext applicationContext = new ClassPathXmlApplicationContext("applicationContext.xml");
        //2.从容器中取出mapper
        DepartmentMapper departmentMapper = applicationContext.getBean(DepartmentMapper.class);
现在我们通过spring单元测试更为方便,先搭建spring单元测试环境(黄色部分为说明)
package com.atguigu.crud.test;

import org.junit.Test;
import org.junit.runner.RunWith;
import org.springframework.beans.factory.annotation.Autowired;
import org.springframework.test.context.ContextConfiguration;
import org.springframework.test.context.junit4.SpringJUnit4ClassRunner;

import com.atguigu.crud.dao.DepartmentMapper;

/**
 * 测试Mapper
 * @author liyuhao
 *推荐spring项目就可以使用spring的单元测试。可以自动注入我们需要的组件
 *    1、pom.xml文件中导入SpringTest依赖
 *    2、@ContextConfiguration指定spring配置文件的位置
 *    3、用哪些组件直接使用@Autowired注入即可
 */

@RunWith(SpringJUnit4ClassRunner.class)    //指定使用spring的测试模块
@ContextConfiguration(locations= {"classpath:applicationContext.xml"})
public class MapperTest {

    @Autowired
    DepartmentMapper departmentMapper;

    @Test
    public void testCRUD() {
        /*传统的Junit测试方式
     //1、创建SpringIOC容器
        ApplicationContext applicationContext = new ClassPathXmlApplicationContext("applicationContext.xml");
        //2.从容器中取出mapper
        DepartmentMapper departmentMapper = applicationContext.getBean(DepartmentMapper.class);*/


        System.out.println(departmentMapper);

    }
}
进行测试后控制台输出mapper的代理对象即说明搭建成功

3、测试插入几个部门,在测试方法中添加两条代码

测试成功:
4.测试单个插入员工
注入EmployeeMapper:
添加单个插入员工的代码

测试成功:
5、测试批量插入员工
方式一:此种方式方式效率很低,即一次数据库连接只发送一条SQL语句(不推荐使用)

方式二:获得能批量操作的sqlSession进而获得mapper代理对象(连接一次数据库,然后依次执行每条sql)
1、首先在application.xml中配置一个可批量操作的sqlSession
        <!-- 配置一个可批量操作的sqlSession -->
        <bean id="sqlSession" class="org.mybatis.spring.SqlSessionTemplate">
            <constructor-arg name="sqlSessionFactory" ref="sqlSessionFactory"></constructor-arg>
            <constructor-arg name="executorType" value="BATCH"></constructor-arg>
        </bean>
相当于执行java代码时:
2、在测试类中注入这个配置的sqlSession
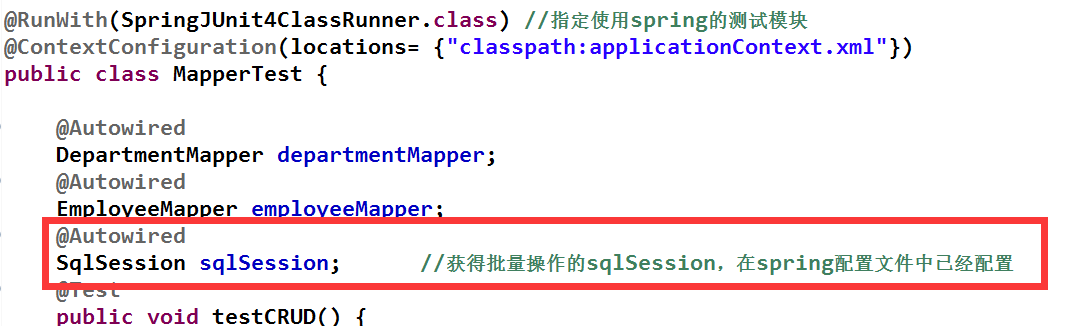
3、进而通过这个可批量操作的sqlSession获得mapper代理对象并执行代码

测试成功:

方式三:当然也可以mapper映射配置文件中使用<foreach>标签拼接sql