异常处理
异常处理的大致流程主要如下。
-
异常信息抛出 ->
ControllerAdvice进行捕获格式化输出内容 -
手动抛出
CustomException并传入ReulstEnum——> 进行捕获错误信息输出错误信息。
自定义异常
@Data
@EqualsAndHashCode(callSuper = false)
public class CustomException extends RuntimeException {

    /**
     * 状态码
     */
    private final Integer code;

    /**
     * 方法名称
     */
    private final String method;


    /**
     * 自定义异常
     *
     * @param resultEnum 返回枚举对象
     * @param method     方法
     */
    public CustomException(ResultEnum resultEnum, String method) {
        super(resultEnum.getMsg());
        this.code = resultEnum.getCode();
        this.method = method;
    }

    /**
     * @param code    状态码
     * @param message 错误信息
     * @param method  方法
     */
    public CustomException(Integer code, String message, String method) {
        super(message);
        this.code = code;
        this.method = method;
    }

}
错误信息枚举
根据业务进行添加。
@Getter
public enum ResultEnum {

    /**
     * 未知异常
     */
    UNKNOWN_EXCEPTION(100, "未知异常"),

    /**
     * 添加失败
     */
    ADD_ERROR(103, "添加失败"),

    /**
     * 更新失败
     */
    UPDATE_ERROR(104, "更新失败"),

    /**
     * 删除失败
     */
    DELETE_ERROR(105, "删除失败"),

    /**
     * 查找失败
     */
    GET_ERROR(106, "查找失败"),

    ;

    private Integer code;

    private String msg;

    ResultEnum(Integer code, String msg) {
        this.code = code;
        this.msg = msg;
    }

    /**
     * 通过状态码获取枚举对象
     * @param code 状态码
     * @return 枚举对象
     */
    public static ResultEnum getByCode(int code){
        for (ResultEnum resultEnum : ResultEnum.values()) {
            if(code == resultEnum.getCode()){
                return resultEnum;
            }
        }
        return null;
    }

}
常用的封装
统一返回 ResultVo
将所有的接口的响应数据的格式进行统一。
@Data
@ApiModel("固定返回格式")
public class ResultVo {

    /**
     * 错误码
     */
    @ApiModelProperty("错误码")
    private Integer code;

    /**
     * 提示信息
     */
    @ApiModelProperty("提示信息")
    private String message;

    /**
     * 具体的内容
     */
    @ApiModelProperty("响应数据")
    private Object data;

}
ResultVOUtil
public class ResultVOUtil {
    //成功,有返回值
    public static ResultVO success(Object object){
        ResultVO resultVO = new ResultVO();
        resultVO.setCode(0);
        resultVO.setMsg("成功");
        resultVO.setData(object);
        return resultVO;
    }
    //成功 没有返回值
    public static ResultVO success(){
        return success(null);
    }
    //错误
    public static ResultVO error(Integer code,String msg){
        ResultVO resultVO = new ResultVO();
        resultVO.setCode(code);
        resultVO.setMsg(msg);
        return resultVO;
    }

    //错误
    public static ResultVO error(ResultEnum resultEnum){
        ResultVO resultVO = new ResultVO();
        resultVO.setCode(resultEnum.getCode());
        resultVO.setMsg(resultEnum.getMsg());
        return resultVO;
    }
}
全局异常拦截
@Slf4j
@RestControllerAdvice
public class GlobalExceptionHandling {

    /**
     * 自定义异常
     */
    @ExceptionHandler(value = CustomException.class)
    public ResultVo processException(CustomException e) {
        log.error("位置:{} -> 错误信息:{}", e.getMethod() ,e.getLocalizedMessage());
        return ResultVoUtil.error(Objects.requireNonNull(ResultEnum.getByCode(e.getCode())));
    }

    /**
     * 通用异常
     */
    @ResponseStatus(HttpStatus.OK)
    @ExceptionHandler(Exception.class)
    public ResultVo exception(Exception e) {
        e.printStackTrace();
        return ResultVoUtil.error(ResultEnum.UNKNOWN_EXCEPTION);
    }
}
多环境配置
SpringBoot多环境配置
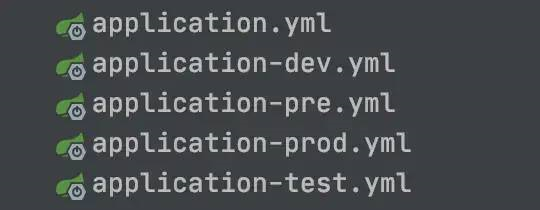
对于一个项目来讲基本都4有个环境dev,test,pre,prod,对于SpringBoot项目多建立几个配置文件就可以了。然后启动的时候可以通过配置spring.profiles.active 来选择启动的环境。
java -jar BasicProject.jar --spring.profiles.active=prod
Maven多环境配置
假如想在打包的时候动态指定环境,这个时候就需要借助Maven的xml来实现。
配置XML
<!--  配置环境  -->
<profiles>
    <profile>
        <!-- 开发 -->
        <id>dev</id>
        <activation>
            <activeByDefault>true</activeByDefault>
        </activation>
        <properties>
            <activatedProperties>dev</activatedProperties>
        </properties>
    </profile>
    <profile>
        <!-- 测试 -->
        <id>test</id>
        <properties>
            <activatedProperties>test</activatedProperties>
        </properties>
    </profile>
    <profile>
        <!-- 准生产 -->
        <id>pre</id>
        <properties>
            <activatedProperties>pre</activatedProperties>
        </properties>
    </profile>
    <profile>
        <!-- 生产 -->
        <id>prod</id>
        <properties>
            <activatedProperties>prod</activatedProperties>
        </properties>
    </profile>
</profiles>
更改application.yml
spring:
  profiles:
    # 选择环境
    active: @activatedProperties@
使用案例
mvn clean package -P prod
mvn clean package -P pre
mvn clean package -P test
打包完可以解压开查看application.yml 会发现 spring.profiles.active=@activatedProperties@ 发生了改变。