一、目录结构

二、获取数据,模板语言渲染
webviews.py
import json
from django.shortcuts import render,HttpResponse
from django.http import JsonResponse
from repository import models
def server(request):
return render(request,'server.html')
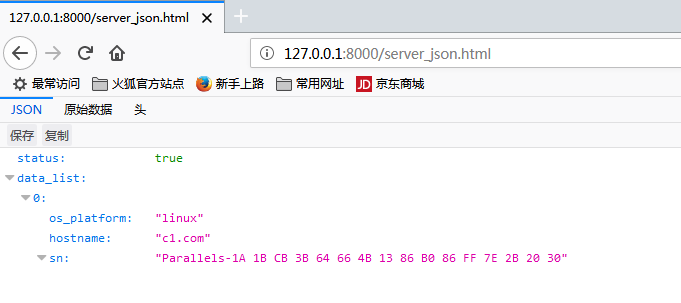
def server_json(request):
server_list = models.Server.objects.values('hostname','sn','os_platform')
response = {
'status':True,
'data_list': list(server_list),
}
return JsonResponse(response)
server.html
<!DOCTYPE html>
<html lang="en">
<head>
    <meta charset="UTF-8">
    <title>Title</title>
    <link rel="stylesheet" href="/static/plugins/bootstrap/css/bootstrap.css" />
</head>
<body>
<h1>服务器列表</h1>

<script src="/static/js/jquery-3.2.1.js"></script>
<script>
    $(function () {
       init();
    });

    /*
    像后台获取数据
     */
    function init() {
        $.ajax({
            url:'/server_json.html',
            type: 'GET',
            data: {},
            dataType: 'JSON',
            success:function (response) {
                console.log(response.data);
            }
        })


    }

</script>

</body>
</html>
三、js获取数据,js动态创建table标签
订制表头:table_config
解决了什么问题?
- 以前我们都是写死的多少行多少咧
- 我这个表有几列?就写三列,这三列叫什么就得订好了
- 如果是这样,前端也要按照这种方式去写,
- 用户管理的页面的时候,又得把这个写一遍
- 前端以后我不写了,到底显示几列?我也不知道,到底多少列,根据我后台的配置文件决定
具体代码如下:
import json
from django.shortcuts import render,HttpResponse
from django.http import JsonResponse
from repository import models

def server(request):
    return render(request,'server.html')

def server_json(request):
    table_config = [
        {
            'q': 'hostname',
            'title': '主机名',
        },
        {
            'q': 'sn',
            'title': '序列号',
        },
        {
            'q': 'os_platform',
            'title': '系统',
        },
    ]

    values = []
    for item in table_config:
        values.append(item['q'])
    server_list = models.Server.objects.values(*values)
    response = {
        'data_list': list(server_list),
        'table_config': table_config
    }

    return JsonResponse(response)
订制显示内容: table_config,data_list
解决了什么问题?
1、前后端分离
- 我在页面生成一个表格 ,在表格里面全都列出来你说行不
- 以后我通过配置文件控制多少列,分别是什么
2、data里面再写个列表,
- 我可以把所有的数据放到我的页面上
- 内容是去数据库里拿
<!DOCTYPE html>
<html lang="en">
<head>
    <meta charset="UTF-8">
    <title>Title</title>
    <link rel="stylesheet" href="/static/plugins/bootstrap/css/bootstrap.css" />
</head>
<body>
<div class="container">
    <h1>服务器列表</h1>
    <table class="table table-bordered">
        <thead id="tHead">
            <tr>

            </tr>
        </thead>
        <tbody id="tBody">

        </tbody>
    </table>

</div>


<script src="/static/js/jquery-3.2.1.js"></script>
<script>
    $(function () {
       init();
    });

    /*
    像后台获取数据
     */
    function init() {
        $.ajax({
            url:'/server_json.html',
            type: 'GET',
            data: {},
            dataType: 'JSON',
            success:function (response) {
                /* 处理表头 */
                initTableHead(response.table_config);
                console.log(response.table_config);
                console.log(response.data_list);
            }
        })


    }

    function initTableHead(table_config) {
        /*
         table_config = [
                {
                    'q': 'hostname',
                    'title': '主机名',
                },
                {
                    'q': 'sn',
                    'title': '序列号',
                },
                {
                    'q': 'os_platform',
                    'title': '系统',
                },
            ]
         */
        $('#tHead tr').empty();
            $.each(table_config,function (k,conf) {

                var th = document.createElement('th');
                th.innerHTML = conf.title;
                $('#tHead tr').append(th);

            });
    }
</script>

</body>
</html>
四、运行截图
五、在工作中如何开发一个你没有学过的项目
学习流程:
- - 搜现成模块
- - 基本使用,找文档
- - 看源码
- - stackoverflow
整体和单独那个先行
先整体后单独