数据库设置/配置
打开mysite/settings.py,我们会发现Django是用的是默认的数据库SQLite,如下图所示:
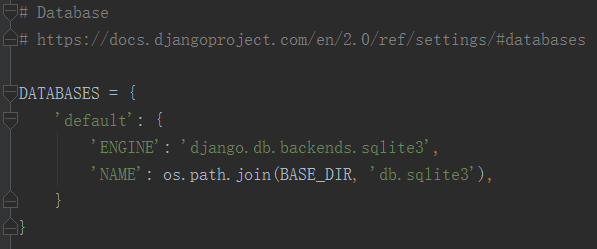
Django也是支持其它数据库的,比如PostgreSQL、MySQL、Oracle等数据库,如果我们想是用其他数据库,只需要安装对应的数据库并且更改settings.py文件中DATABASES项就可以实现,具体参考数据库设置。
- ENGINE:数据库引擎,可选择的值有"django.db.backends.sqlite3","django.db.backends.postgresql","django.db.backends.mysql","django.db.backends.oracle"。或者其他可用的数据库引擎。
- NAME:数据库的名称。如果使用SQLite,数据库的名称就是绝对路径,因为SQLite是一个文件型数据库,在电脑磁盘上,就是一个文件。该路径的默认值是os.path.join(BASE_DIR, 'db.sqlite3'),该文件将会存储在该Django项目目录下。
如果,我们没有使用默认的SQLite数据库,除了上述参数之外,还需要添加USER,PASSWORD和HOST参数,具体配置可以参考DATABASES。
在我们使用数据库之前,我们需要创建数据表,使用下面的命令来实现:
python manage.py migrate
该命令查询INSTALLED_APPS配置,并根据mysite/settings.py文件中数据库的配置来创建对应的数据表,如果我们不需要某些或者全部的数据表,在执行migrate命令之前,可以从INSTALLED_APPS中删除它们。
创建数据模型
在我们的APP:poll中,我们创建两个简单的模型:Question和Choice。每个问题包含:问题内容和发布日期;每个选项包含:选项内容和
票数,并且每个选项都会关联一个问题;
打开polls/models.py文件,并且输入下面Python代码:
from django.db import models


class Question(models.Model):
    question_text = models.CharField(max_length=200)
    pub_date = models.DateTimeField('date published')


class Choice(models.Model):
    question = models.ForeignKey(Question, on_delete=models.CASCADE)
    choice_text = models.CharField(max_length=200)
    votes = models.IntegerField(default=0)
注:每个类,对应一张数据库表;每个类属性,对应数据表的一个字段(数据库表列名)
激活数据模型
根据上面的学习,我们知道想要把我们定义的models在数据库中生成对应的表格,我们必须把我们的APP添加到INSTALLED_APPS中,Django apps的设计哲学是可拔插的,它不会被绑定在Django的安装中。
打开mysite/settings.py文件,输入"polls.apps.PollsConfig",其结果如下所示:
INSTALLED_APPS = [
    'django.contrib.admin',
    'django.contrib.auth',
    'django.contrib.contenttypes',
    'django.contrib.sessions',
    'django.contrib.messages',
    'django.contrib.staticfiles',
    'polls.apps.PollsConfig',
]
现在Django就已经知道包含polls应用了,接下来我们在执行下面的命令:
python manage.py makemigrations polls
我们将会看到下面的结果:
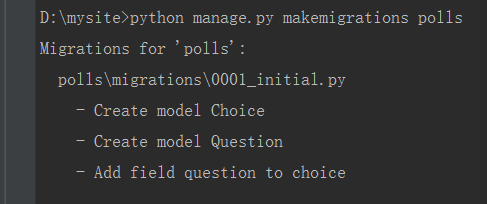
通过makemigrations命令,告诉Django我们对数据模型做了修改并且将这种修改存储起来;我们可以通过polls/migrations/0001_initial.py文件,来查看对models的migration。
我们可以通过sqlmigrate命令查看migration执行的SQL语句,其命令如下:
python manage.py sqlmigrate polls 0001
该命令的返回结果如下:
BEGIN;
--
-- Create model Choice
--
CREATE TABLE "polls_choice" (
    "id" serial NOT NULL PRIMARY KEY,
    "choice_text" varchar(200) NOT NULL,
    "votes" integer NOT NULL
);
--
-- Create model Question
--
CREATE TABLE "polls_question" (
    "id" serial NOT NULL PRIMARY KEY,
    "question_text" varchar(200) NOT NULL,
    "pub_date" timestamp with time zone NOT NULL
);
--
-- Add field question to choice
--
ALTER TABLE "polls_choice" ADD COLUMN "question_id" integer NOT NULL;
ALTER TABLE "polls_choice" ALTER COLUMN "question_id" DROP DEFAULT;
CREATE INDEX "polls_choice_7aa0f6ee" ON "polls_choice" ("question_id");
ALTER TABLE "polls_choice"
  ADD CONSTRAINT "polls_choice_question_id_246c99a640fbbd72_fk_polls_question_id"
    FOREIGN KEY ("question_id")
    REFERENCES "polls_question" ("id")
    DEFERRABLE INITIALLY DEFERRED;

COMMIT;
注意:
- 该命令的执行结果依赖于所使用的数据库,上面是PostgreSQL生成的结果(在SQLite下的结果跟这里会有些差异);
- 表明根据app的名字自动生成,并且名字是模型类名的小写;主键ID也是自动增长的;
- 为了方便起见,Django在外键后面添加了_id,把整个question_id作为choice数据表的一个字段;
- sqlmigrate命令不会真正的在数据库上更改数据,它仅仅是让我们看到Django执行的SQL语句;我们可以使用它来检查Django操作数据库是否成功或者我们是否有权限修通过修改SQL来更改数据库;
接下来,我们再一次执行migrate命令,在数据库中创建上面的模型:
python manage.py migrate
- migrate命令会在数据库中创建所有未被创建的数据模型(Django使用django_migrations这个特殊表格来跟踪哪些数据模型未在数据库中创建对应表格);
总结:改变数据模型
- 修改数据模型(models.py文件)
- 执行命令python manage.py makemigrations为数据模型的改变创建数据迁移
- 执行命令python manage.py migrate将数据模型的改变应用到数据库中
数据交互:数据库API调用
执行下面命令,进入Python的shell交互模型:
python manage.py shell
之所以用上面的命令替代简单的"python"命令,是因为manage.py设置DJANGO_SETTINGS_MODULE环境变量,该文件告诉了Django Python被导入到mysite/settings.py文件的路径;
现在,我们就可以测试数据库的API了,具体如下所示:
>>> from polls.models import Question, Choice   # Import the model classes we just wrote.

# No questions are in the system yet.
>>> Question.objects.all()
<QuerySet []>

# Create a new Question.
# Support for time zones is enabled in the default settings file, so
# Django expects a datetime with tzinfo for pub_date. Use timezone.now()
# instead of datetime.datetime.now() and it will do the right thing.
>>> from django.utils import timezone
>>> q = Question(question_text="What's new?", pub_date=timezone.now())

# Save the object into the database. You have to call save() explicitly.
>>> q.save()

# Now it has an ID.
>>> q.id
1

# Access model field values via Python attributes.
>>> q.question_text
"What's new?"
>>> q.pub_date
datetime.datetime(2018, 3, 19, 2, 10, 19, 966386, tzinfo=<UTC>)

# Change values by changing the attributes, then calling save().
>>> q.question_text = "What's up?"
>>> q.save()

# objects.all() displays all the questions in the database.
>>> Question.objects.all()
<QuerySet [<Question: Question object (1)>]>
问题:<Question: Question object (1)>这个输出结果对我们程序员来说,并不是那么友好,那么我们要怎么做才能让输出那么直观友好呢?下面我们就来解决这个问题:
打开polls/models.py文件,在Question和Choice数据模型中添加一个str()方法,具体代码如下所示:
from django.db import models


class Question(models.Model):
    question_text = models.CharField(max_length=200)
    pub_date = models.DateTimeField('date published')

    def __str__(self):
        return self.question_text


class Choice(models.Model):
    question = models.ForeignKey(Question, on_delete=models.CASCADE)
    choice_text = models.CharField(max_length=200)
    votes = models.IntegerField(default=0)

    def __str__(self):
        return self.choice_text
在数据模型中添加str()方法,其关键作用不仅方便我们在交互模式下的处理,而是因为贯穿在Django自动生成admin中的对于对象的表现的使用;
下面例子是我们自定义的方法(poll/models.py):
import datetime

from django.db import models
from django.utils import timezone


class Question(models.Model):
    # ...
    def was_published_recently(self):
        return self.pub_date >= timezone.now() - datetime.timedelta(days=1)
保存上面的修改,执行命令"python manage.py shell",重新运行一个Python shell交互器:
>>> from polls.models import Question, Choice

# Make sure our __str__() addition worked.
>>> Question.objects.all()
<QuerySet [<Question: What's up?>]>

# Django provides a rich database lookup API that's entirely driven by
# keyword arguments.
>>> Question.objects.filter(id=1)
<QuerySet [<Question: What's up?>]>
>>> Question.objects.filter(question_text__startswith='What')
<QuerySet [<Question: What's up?>]>

# Get the question that was published this year.
>>> from django.utils import timezone
>>> current_year = timezone.now().year
>>> Question.objects.get(pub_date__year=current_year)
<Question: What's up?>

# Request an ID that doesn't exist, this will raise an exception.
>>> Question.objects.get(id=2)
Traceback (most recent call last):
    ...
DoesNotExist: Question matching query does not exist.

# Lookup by a primary key is the most common case, so Django provides a
# shortcut for primary-key exact lookups.
# The following is identical to Question.objects.get(id=1).
>>> Question.objects.get(pk=1)
<Question: What's up?>

# Make sure our custom method worked.
>>> q = Question.objects.get(pk=1)
>>> q.was_published_recently()
True

# Django creates a set to hold the "other side" of a ForeignKey relation
# (e.g. a question's choice) which can be accessed via the API.
>>> q = Question.objects.get(pk=1)

# Display any choices from the related object set -- none so far.
>>> q.choice_set.all()
<QuerySet []>

# Create three choices.
>>> q.choice_set.create(choice_text='Not much', votes=0)
<Choice: Not much>
>>> q.choice_set.create(choice_text='The sky', votes=0)
<Choice: The sky>
>>> c = q.choice_set.create(choice_text='Just hacking again', votes=0)

# Choice objects have API access to their related Question objects.
>>> c.question
<Question: What's up?>

# And vice versa: Question objects get access to Choice objects.
>>> q.choice_set.all()
<QuerySet [<Choice: Not much>, <Choice: The sky>, <Choice: Just hacking again>]>
>>> q.choice_set.count()
3

# Find all Choices for any question whose pub_date is in this year
# (reusing the 'current_year' variable we created above).
>>> Choice.objects.filter(question__pub_date__year=current_year)
<QuerySet [<Choice: Not much>, <Choice: The sky>, <Choice: Just hacking again>]>

# Let's delete one of the choices. Use delete() for that.
>>> c = q.choice_set.filter(choice_text__startswith='Just hacking')
>>> c.delete()
模型关系,更多信息参考模型对象关系;双下划线的使用,参考字段查找;更多操作数据库的API,参考数据库API;至此,数据模型和数据库的基本操作已经讲解完了,我们会在后面的实际使用中加深对它们的理解和操作。