到struts2官网上面下载struts2的jar包,然后解压。
struts2的入门程序,实现简单的用户登录,struts2里面的helllo world。利用eclipse的开发工作如下:
1.首先建立一个web项目struts_01_hello

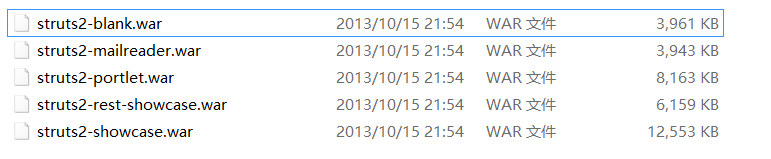
2.在WEB-INF下的lib目录导入struts2所需的jar包,如果不知道要导入哪些jar的话,下载的struts2的工程文件(struts-2.3.15.3)的apps目录下有现成的案例,如struts2-blank.war,把该war文件拷贝到tomcat下,启动Tomcat之后该文件自动解压,之后可以在里面的lib目录下找到最基本的struts2工程所需的jar包。
所需jar如下所示:
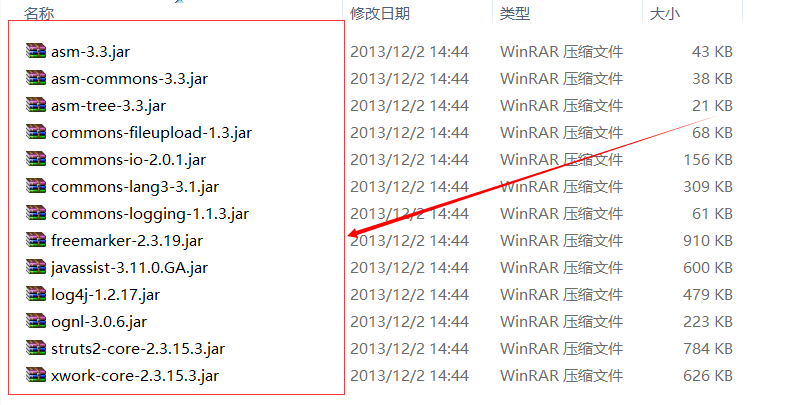
3.编写用户登录页面login.jsp。
1 <%@ page language="java" contentType="text/html; charset=UTF-8" 2 pageEncoding="UTF-8"%> 3 <!DOCTYPE html PUBLIC "-//W3C//DTD HTML 4.01 Transitional//EN" "http://www.w3.org/TR/html4/loose.dtd"> 4 <html> 5 <head> 6 <title>用户登录</title> 7 </head> 8 <body> 9 <div align="center"> 10 <h3>用户登录</h3> 11 <form action="user/login.action" method="post"> 12 <table border="1"> 13 <tr><td>用户名:</td><td><input type="text" name="useName"></td></tr> 14 <tr><td>密 码:</td><td><input type="password" name="usePwd"></td></tr> 15 <tr><center><td colspan="2"><input type="submit" value="登录"> 16 <input type="reset" name="reset" value="取消"> 17 </td></center></tr> 18 </table> 19 </form> 20 </div> 21 <div align="center"> 22 <a href="user/delete.action">删除</a> 23 </div> 24 </body> 25 </html>
4.编写用户登录成功跳转的页面welcome.jsp,该页面没什么内容,就是一个登录成功跳转的页面。
 1 <%@ page language="java" contentType="text/html; charset=UTF-8"
 2     pageEncoding="UTF-8"%>
 3 <!DOCTYPE html PUBLIC "-//W3C//DTD HTML 4.01 Transitional//EN" "http://www.w3.org/TR/html4/loose.dtd">
 4 <html>
 5 <head>
 6 <title>欢迎页面</title>
 7 </head>
 8 <body>
 9 <h1>欢迎你,登录成功</h1>
10 </body>
11 </html>
5.编写用户登录失败跳转的页面welcome.jsp,该页面没什么内容,就是一个登录失败跳转的页面。
 1 <%@ page language="java" contentType="text/html; charset=UTF-8"
 2     pageEncoding="UTF-8"%>
 3 <!DOCTYPE html PUBLIC "-//W3C//DTD HTML 4.01 Transitional//EN" "http://www.w3.org/TR/html4/loose.dtd">
 4 <html>
 5 <head>
 6 <title>出错页面</title>
 7 </head>
 8 <body>
 9 <h1>登录失败</h1>
10 </body>
11 </html>
5.编写Action类,该类继承ActionSupport,当然该类也可以实现Action接口,也可以是一个普通的java类。
 1 package com.pcitc.action.hello;
 2
 3 import com.opensymphony.xwork2.ActionSupport;
 4
 5 public class LoginAction extends ActionSupport {
 6     private static final long serialVersionUID = 1L;
 7     private String useName;
 8     private String usePwd;
 9
10     public String getUseName() {
11         return useName;
12     }
13
14     public void setUseName(String useName) {
15         this.useName = useName;
16     }
17
18     public String getUsePwd() {
19         return usePwd;
20     }
21
22     public void setUsePwd(String usePwd) {
23         this.usePwd = usePwd;
24     }
25
26     public String execute() {
27         if (this.getUseName().equals("admin") && this.getUsePwd().equals("123")) {
28             System.out.println("action执行了,用户名正确" + this.getUseName() + "  "
29                     + this.getUsePwd());
30             return "success";
31         } else
32             System.out.println("action执行了,用户名错误" + this.getUseName() + "  "
33                     + this.getUsePwd());
34         return "error";
35     }
36 }
6.在类路径下,也就是classpath下编写struts.xml文件,该文件也可以按照步骤2的方式从struts2-blank.war去找到,然后拷贝到classpath路径下修改里面的内容即可。struts.xml文件内容如下:
 1 <?xml version="1.0" encoding="UTF-8" ?>
 2 <!DOCTYPE struts PUBLIC
 3     "-//Apache Software Foundation//DTD Struts Configuration 2.3//EN"
 4     "http://struts.apache.org/dtds/struts-2.3.dtd">
 5
 6 <struts>
 7     <package name="parent" namespace="/" extends="struts-default"></package>
 8     <package name="default"  namespace="/user" extends="parent">
 9         <action name="login" class="com.pcitc.action.hello.LoginAction">
10             <result name="success">/welcome.jsp</result>
11             <result name="error">/error.jsp</result>
12         </action>
13     </package>
14 </struts>
7.在web.xml文件里配置struts2的入口,该入口是一个过滤器,配置完成后web.xml里面的内容如下:
 1 <?xml version="1.0" encoding="UTF-8"?>
 2 <web-app xmlns:xsi="http://www.w3.org/2001/XMLSchema-instance" xmlns="http://java.sun.com/xml/ns/javaee" xmlns:web="http://java.sun.com/xml/ns/javaee/web-app_2_5.xsd" xsi:schemaLocation="http://java.sun.com/xml/ns/javaee http://java.sun.com/xml/ns/javaee/web-app_3_0.xsd" id="WebApp_ID" version="3.0">
 3   <display-name>struts_02_hello</display-name>
 4    <welcome-file-list>
 5         <welcome-file>login.jsp</welcome-file>
 6     </welcome-file-list>
 7
 8     <filter>
 9         <filter-name>struts2</filter-name>
10         <filter-class>org.apache.struts2.dispatcher.ng.filter.StrutsPrepareAndExecuteFilter</filter-class>
11     </filter>
12     <filter-mapping>
13         <filter-name>struts2</filter-name>
14         <url-pattern>*.action</url-pattern>
15     </filter-mapping>
16 </web-app>
到这里一个最基本的struts2实现用户登录就已经完成。接下来把项目部署到Tomcat下启动项目,然后在浏览器输入http://localhost:8080/struts_01_hello/就可以访问用户登录界面。

在用户名处输入admin,密码输入123跳转到登录成功页面。

在用户名处和密码处输入错误跳转到登录失败页面。
注意事项:
1. 加载JAR包的几种方法:
a.按照上面步骤的到apps下的struts2-blank.war中去找,然后拷贝到lib目录下。
b.自定义一个struts2的library
2.实现Action的三种方法
a.继承ActionSupport
b.实现Action接口
c. 普通类,有返回值类型为String的无参函数
3.如果想要修改struts.xm配置文件l为别的名字,那么在web.xml里面struts2的入口过滤器里面配置初始化参数
<filter>
        <filter-name>struts2</filter-name>
        <filter-class>org.apache.struts2.dispatcher.ng.filter.StrutsPrepareAndExecuteFilter</filter-class>
        <init-param>
            <param-name>config</param-name>
            <param-value>struts-default.xml,struts-plugin.xml,struts.xml</param-value>
        </init-param>
    </filter>
4.如何解决404错误?
a.检查是否发布
b.发布名和工程名是否一致
c. 配置是否正确
c.1 是否正确配置struts过滤器
c.2 struts.xml是否配置正确