(一)生命周期
在进行视图调用前先了解以下Android运行生命周期

(二)新建视图界面
在右键layout-新建-xml-layoutxmlfile,并添加内容。新建两个线性layout:activity_first.xml activity_second.xml
activity_second.xml
<?xml version="1.0" encoding="utf-8"?>
<LinearLayout xmlns:android="http://schemas.android.com/apk/res/android"
    android:orientation="vertical"
    android:layout_width="match_parent"
    android:layout_height="match_parent">

    <ImageView
        android:id="@+id/iv_pic"
        android:background="@color/colorPrimaryDark"
        android:layout_gravity="center"
        android:layout_width="300dp"
        android:layout_height="200dp" />

    <TextView
        android:text="TestView"
        android:textSize="30dp"
        android:gravity="center"
        android:layout_width="match_parent"
        android:layout_height="wrap_content" />

    <Button
        android:id="@+id/btn_show"
        android:layout_width="match_parent"
        android:layout_height="wrap_content"
        android:text="返回主界面" />

</LinearLayout>
activity_first.xml
<?xml version="1.0" encoding="utf-8"?>
<LinearLayout xmlns:android="http://schemas.android.com/apk/res/android"
    android:orientation="vertical" android:layout_width="match_parent"
    android:layout_height="match_parent">

    <TextView
        android:text="View1"
        android:textSize="30dp"
        android:gravity="center"
        android:layout_width="match_parent"
        android:layout_height="wrap_content" />

</LinearLayout>
(二)新建两个class调用上述两个视图
在com.example.app下新建-class(继承AppCompatActivity),新建两个类:View1Activity View2Activity
View1Activity代码
public class View1Activity extends AppCompatActivity {
    @Override
    protected void onCreate(@Nullable Bundle savedInstanceState) {
        super.onCreate(savedInstanceState);

        setContentView(R.layout.activity_first);//调用视图1
    }
}
View2Activity代码
public class View2Activity extends AppCompatActivity implements View.OnClickListener {
    ImageView imageView;
    @Override
    protected void onCreate(@Nullable Bundle savedInstanceState) {
        super.onCreate(savedInstanceState);

        setContentView(R.layout.activity_second);//调用视图2

        imageView = findViewById(R.id.iv_pic);


        findViewById(R.id.btn_show).setOnClickListener(this);
    }

    @Override
    public void onClick(View v) {
        imageView.setImageResource(R.drawable.child);
    }
}
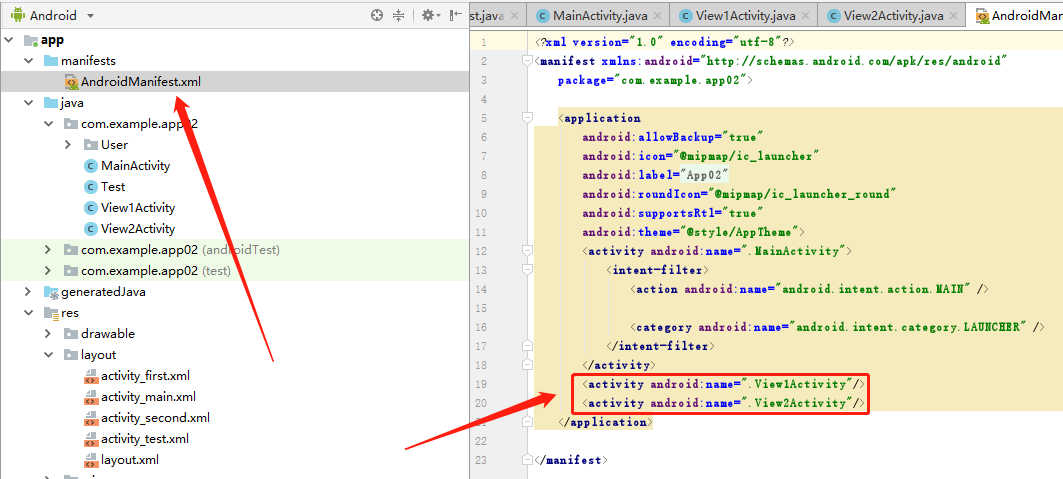
(三)在AndroidManifest.xml中添加上述两个activity
(四)主视图activity_main中调用
<?xml version="1.0" encoding="utf-8"?>
<LinearLayout xmlns:android="http://schemas.android.com/apk/res/android"
    xmlns:app="http://schemas.android.com/apk/res-auto"
    xmlns:tools="http://schemas.android.com/tools"
    android:layout_width="match_parent"
    android:layout_height="match_parent"
    android:orientation="vertical"
    tools:context=".MainActivity">

    <Button
        android:id="@+id/btn_toView1"
        android:text="切换到第1个界面"
        android:layout_width="match_parent"
        android:layout_height="wrap_content" />
    <Button
        android:id="@+id/btn_toView2"
        android:text="切换到第2个界面"
        android:layout_width="match_parent"
        android:layout_height="wrap_content" />

    <ImageView
        android:src="@drawable/child"
        android:background="@color/colorPrimaryDark"
        android:layout_gravity="center"
        android:layout_width="300dp"
        android:layout_height="200dp" />

</LinearLayout>
public class MainActivity extends AppCompatActivity implements View.OnClickListener {

    @Override
    protected void onCreate(Bundle savedInstanceState) {
        super.onCreate(savedInstanceState);
        setContentView(R.layout.activity_main);

        Button toView1Btn=findViewById(R.id.btn_toView1);
        Button toView2Btn=findViewById(R.id.btn_toView2);

        toView1Btn.setOnClickListener(this);
        toView2Btn.setOnClickListener(this);

    }

    @Override
    public void onClick(View v) {
        Intent intent=new Intent();
        switch (v.getId())
        {
            case R.id.btn_toView1:
                intent.setClass(getApplicationContext(),View1Activity.class);
                break;
            case R.id.btn_toView2:
                intent.setClass(getApplicationContext(),View2Activity.class);
                break;
        }
        this.startActivity(intent);
    }
}
PS:androidstudio中layout的xml文件名要小写