什么是爬虫
爬虫就是通过编写程序模拟浏览器上网,然后让其去互联网上抓取数据的过程.
哪些语言可以实现爬虫
1.PHP:可以实现爬虫,但是在实现爬虫中支持多线程和多进程方面做的不好.
2.Java:可以实现爬虫.Java可以非常好的处理和实现爬虫,但是实现爬虫代码比较为臃肿,重构成本较大.
3.c,c++:可以实现爬虫.但是使用这种方式实现爬虫是大佬们能力的体现,却不是明智合理的选择.
4.Python:可以实现爬虫,实现和处理语法简单,代码优美,支持的模块繁多,学习成本低,具有非常强大的框架(scrapy).
爬虫的分类
1.通用爬虫:通过爬虫是搜索引擎"抓取系统"的重要组成部分.主要目的是将互联网上的网页下载到本地,形成一个互联网内容的镜像备份.简单来讲就是尽可能的把互联网上的所有网页下载下来,放到本地服务器里形成备份,在对这些网页做相关处理(提取关键字,去掉广告),最后提供一个用户检索接口.
2.聚焦爬虫:聚焦爬虫是根据指定的需求抓取网络上指定的数据.例如,获取豆瓣上电影排行榜电影,而不是页面所有数据.
3.增量式爬虫:爬到数据后,进行去重.
robots.txt协议
如果自己的门户网站中的指定页面中的数据不想让爬虫程序爬去到的话,那么则可以通过编写一个robots.txt的协议文件来约束爬虫程序.此协议相当于口头协议,并没有使用相关技术强制管制.
http和https协议
协议概念:基于clinet和server之间的一种通信协议
常用请求头信息:
User-Agent:请求载体的身份标识
Connection:通信时对长链接如何处理
常用响应头信息:Content-Type:
三种加密方式:
对称密钥加密
非对称密钥加密
证书加密
requests模块
request模块是python中原生的基于网络请求的模块,可以模拟浏览器发起请求,用法简洁高效.
使用流程:指定url→基于requests模块发起请求→获取响应对象中的数据值→持久化存储
基于requests模块的get请求,爬取搜狗指定词条后的页面数据
import requests
import os
#指定搜索关键字
word = input('enter a word you want to search:')
#自定义请求头信息
headers={
        'User-Agent':'Mozilla/5.0 (Windows NT 10.0; Win64; x64) AppleWebKit/537.36 (KHTML, like Gecko) Chrome/72.0.3626.109 Safari/537.36'
    }
#指定url
url = 'https://www.sogou.com/web'
#封装get请求参数
prams = {
    'query':word,
    'ie':'utf-8'
}
#发起请求
response = requests.get(url=url,params=param)
#获取响应数据
page_text = response.text
with open('./sougou.html','w',encoding='utf-8') as fp:
    fp.write(page_text)
User-Agent:请求载体身份标识,通过浏览器发起的请求, 请求载体为浏览器,则该请求的User-Agent为浏览器的身份标识,使用爬虫程序发起的请求,则该请求的载体为爬虫程序,则该请求的User-Agent为爬虫程序的身份标识。可以通过判断该值来获知该请求的载体究竟是基于哪款浏览器还是基于爬虫程序。
基于requests模块ajax的get请求,爬取豆瓣电影排行榜
import requests
import urllib.request
if __name__ == "__main__":

    #指定ajax-get请求的url(通过抓包进行获取)
    url = 'https://movie.douban.com/j/chart/top_list?'
    #定制请求头信息,相关的头信息必须封装在字典结构中
    headers = {
        #定制请求头中的User-Agent参数,当然也可以定制请求头中其他的参数
            'User-Agent':'Mozilla/5.0 (Windows NT 10.0; Win64; x64) AppleWebKit/537.36 (KHTML, like Gecko) Chrome/72.0.3626.109 Safari/537.36'
',
    }
    #定制get请求携带的参数(从抓包工具中获取)
    param = {
        'type':'5',
        'interval_id':'100:90',
        'action':'',
        'start':'0',
        'limit':'20'
    }
    #发起get请求,获取响应对象
    response = requests.get(url=url,headers=headers,params=param)
    #获取响应内容:响应内容为json串
    print(response.text)
数据解析方式
在大多数爬取的过程中,我们都会指定的使用聚焦爬虫,获取想要的数据,而非网页的全部数据,所以在获取数据后要进行相应的数据解析操作.流程为:指定url→基于requests模块发起请求→获取响应中的数据→数据解析→进行持久化存储.
正则解析
爬取囧事百科指定页面的图片,并保存
import requests
import re
import os
if __name__ == "__main__":
     url = 'https://www.qiushibaike.com/pic/%s/'
     headers={
             'User-Agent':'Mozilla/5.0 (Windows NT 10.0; Win64; x64) AppleWebKit/537.36 (KHTML, like Gecko) Chrome/72.0.3626.109 Safari/537.36'
     }
     #指定起始也结束页码
     page_start = int(input('enter start page:'))
     page_end = int(input('enter end page:'))

     #创建文件夹
     if not os.path.exists('images'):
         os.mkdir('images')
     #循环解析且下载指定页码中的图片数据
     for page in range(page_start,page_end+1):
         print('正在下载第%d页图片'%page)
         new_url = format(url % page)
         response = requests.get(url=new_url,headers=headers)

         #解析response中的图片链接
         e = '<div class="thumb">.*?<img src="(.*?)".*?>.*?</div>'
         pa = re.compile(e,re.S)
         image_urls = pa.findall(response.text)
          #循环下载该页码下所有的图片数据
         for image_url in image_urls:
             image_url = 'https:' + image_url
             image_name = image_url.split('/')[-1]
             image_path = 'images/'+image_name

             image_data = requests.get(url=image_url,headers=headers).content
             with open(image_path,'wb') as fp:
                 fp.write(image_data)
bs4(BeautifulSoup)解析
在使用前,需要安装:pip install bs4,在使用bs4时需要一个第三方库,pip install lxml.
bs4的使用:
使用流程:
    - 导包:from bs4 import BeautifulSoup
    - 使用方式:可以将一个html文档,转化为BeautifulSoup对象,然后通过对象的方法或者属性去查找指定的节点内容
        (1)转化本地文件:
             - soup = BeautifulSoup(open('本地文件'), 'lxml')
        (2)转化网络文件:
             - soup = BeautifulSoup('字符串类型或者字节类型', 'lxml')
        (3)打印soup对象显示内容为html文件中的内容

基础巩固:
    (1)根据标签名查找
        - soup.a   只能找到第一个符合要求的标签
    (2)获取属性
        - soup.a.attrs  获取a所有的属性和属性值,返回一个字典
        - soup.a.attrs['href']   获取href属性
        - soup.a['href']   也可简写为这种形式
    (3)获取内容
        - soup.a.string
        - soup.a.text
        - soup.a.get_text()
       【注意】如果标签还有标签,那么string获取到的结果为None,而其它两个,可以获取文本内容
    (4)find:找到第一个符合要求的标签
        - soup.find('a')  找到第一个符合要求的
        - soup.find('a', title="xxx")
        - soup.find('a', alt="xxx")
        - soup.find('a', class_="xxx")
        - soup.find('a', id="xxx")
    (5)find_all:找到所有符合要求的标签
        - soup.find_all('a')
        - soup.find_all(['a','b']) 找到所有的a和b标签
        - soup.find_all('a', limit=2)  限制前两个
    (6)根据选择器选择指定的内容
               select:soup.select('#feng')
        - 常见的选择器:标签选择器(a)、类选择器(.)、id选择器(#)、层级选择器
            - 层级选择器:
                div .dudu #lala .meme .xixi  下面好多级
                div > p > a > .lala          只能是下面一级
        【注意】select选择器返回永远是列表,需要通过下标提取指定的对象
在诗词网上爬虫取西游记
import requests
import os
from bs4 import BeautifulSoup
headers ={
    'User-Agent':'Mozilla/5.0 (Windows NT 10.0; Win64; x64) AppleWebKit/537.36 (KHTML, like Gecko) Chrome/72.0.3626.109 Safari/537.36'
}
if not os.path.exists('./wenxue'):  #判断是否存在"./wenxue"文件夹,如果不存在就创建
    os.mkdir('./wenxue')
url='http://www.shicimingju.com/book/xiyouji.html'
res=requests.get(url=url,headers=headers).text  #获取网页数据
soup = BeautifulSoup(res,'lxml')    #创建soup对象
text = soup.select('.book-mulu > ul > li > a ')  #解析数据
for title in text:
    tit = title.string
    detail_url = 'http://www.shicimingju.com' + title['href']
    con = requests.get(url=detail_url,headers=headers).text
    soup = BeautifulSoup(con,'lxml')
    content = soup.find('div',class_='chapter_content')
    cont = content.text
    f = open('./wenxue/xiyouji.txt','a',encoding='utf8')
    f.write(tit + cont + '
')
print('over')
f.close
Xpath解析
常用Xpath表达式回顾
属性定位:    //div[@class="top"]    #找到class属性值为top的div标签
层级&索引定位: //div[@class="top"]/ul/li[2]/a  #找到class属性值为top的div的直系子标签ul下的第二个子标签li下的直系子标签a
逻辑运算: //a[@href="" and @class="bottom"] #找到href属性为空并且class属性值为bottom的a标签
模糊匹配: //div[contains(@class,"we")] #class属性值包含we的div标签
             //div[starts-with(@class,"we")] #属性值以we开头的div标签
取文本://div[@class="top"]/p[1]/text() #class为top的div标签下第一个p标签的文本内容
          //div[@class="top"]//text() #class为top的div标签下的文本内容和所有子标签下的文本内容
取属性://div[@class="top"]//li[2]/a/@href  #class属性值为top的div下直系子标签的第二个li下a标签href属性的值
爬取58同城二手房北京昌平沙河地区信息(简略版)
import requests
from lxml import etree
import os
url = 'https://bj.58.com/shahe/ershoufang/?PGTID=0d30000c-0047-e59a-0e64-10a13f0fa5cc&ClickID=1'
headers = {
      'User-Agent':'Mozilla/5.0 (Windows NT 10.0; Win64; x64) AppleWebKit/537.36 (KHTML, like Gecko) Chrome/72.0.3626.109 Safari/537.36'
}
respone = requests.get(url=url,headers=headers).text
tree = etree.HTML(response)
li_list = tree.xpath('//ul[@class="house-list-wrap"]/li')
f = open('58.csv','a',encoding='utf8')
for li in li_list:
    title = li.xpath('./div[2]/h2/a/text()')[0]
    price = li.xpath('./div[3]//text()')
    price = ''.join(price).strip()
    f.write(title+':'+price+'
')
f.close()
Selenium自动化
selenium是python的一个第三方库,对外提供的接口可以操作浏览器,然后让浏览器完成自动化的操作.
环境搭建:
1.安装selenium:pip install selenium
2.获取某一款浏览器的驱动程序(以谷歌浏览器为例)
谷歌浏览器驱动下载地址:http://chromedriver.storage.googleapis.com/index.html
下载的驱动程序必须和浏览器的版本统一,大家可以根据http://blog.csdn.net/huilan_same/article/details/51896672中提供的版本映射表进行对应
from selenium import webdriver
from time import sleep
driver =webdriver.Chrome(executable_path=r'C:UsersAirAnaconda3爬虫chromedriver.exe')  #r是为了防止字符转义,后面是浏览器启动的路径
driver.get(url='https://www.baidu.com/') #用get打开的网页
sleep(2)
text_input = driver.find_element_by_id('kw')  #通过id找到文本框
text_input.send_keys('爱笑会议室')  #输入搜索内容
sleep(2)
driver.find_element_by_id('su').click() #点击搜索按钮
sleep(3)
print(driver.page_source)  #打印网页内容
driver.quit() #退出
温馨提示:当在jupyter内提示找不到selenium模块时,可以去Anacanda3环境下去下载安装,如下图:
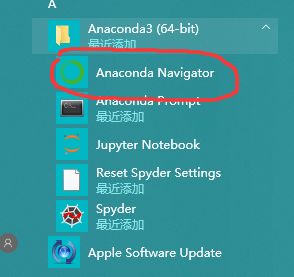
 点击open Terminal,然后进入小黑框输入pip install selenium等待就可以啦.
谷歌'无头'浏览器
当使用selenium操作时,有人会不喜欢他的自动弹出浏览器界面,对用户体验不太好.其实可以把他改为无界面的浏览器,PhantomJS这是一款满足这样需求的浏览器,其自动化操作流程和上述谷歌浏览器是一致的.由于是无界面的,为了能够展示自动化操作,还为用户提供了截屏功能,使用save_sreeenshot函数实现,可谓是用心良苦.由于PhantomJS已经停止更新与维护了,所以推荐大家谷歌的神器--无头浏览器.
from selenium import webdriver
from selenium.webdriver.chrome.options import Options
from time import sleep

chrome_options = Options() #创建参数对象,控制浏览器无界面打开
chrome_options.add_argument('-headless')
chrome_options.add_argument('-disable-gpu')

#创建浏览器对象
driver =webdriver.Chrome(executable_path=r'C:UsersAirAnaconda3爬虫chromedriver.exe',chrome_options=chrome_options)

#网上冲浪
driver.get(url='https://www.baidu.com/')
sleep(2)
text_input = driver.find_element_by_id('kw')
text_input.send_keys('爱笑会议室')
sleep(2)
driver.find_element_by_id('su').click()
driver.save_screenshot('./baidu.jpg') #截图
sleep(3)
print(driver.page_source)
driver.quit()