
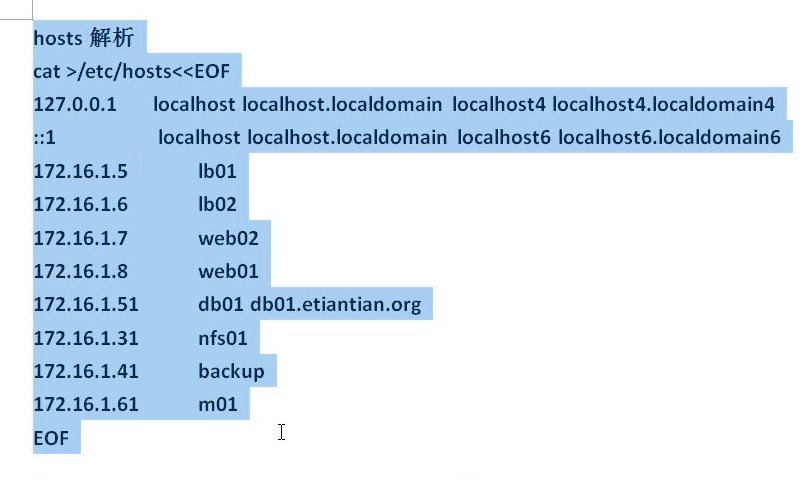
cat >>/etc/hosts<<EOF
127.0.0.1 localhost localhost.localdomain localhost4 localhost4.localdomain4
::1 localhost localhost.localdomain localhost6 localhost6.localdomain6
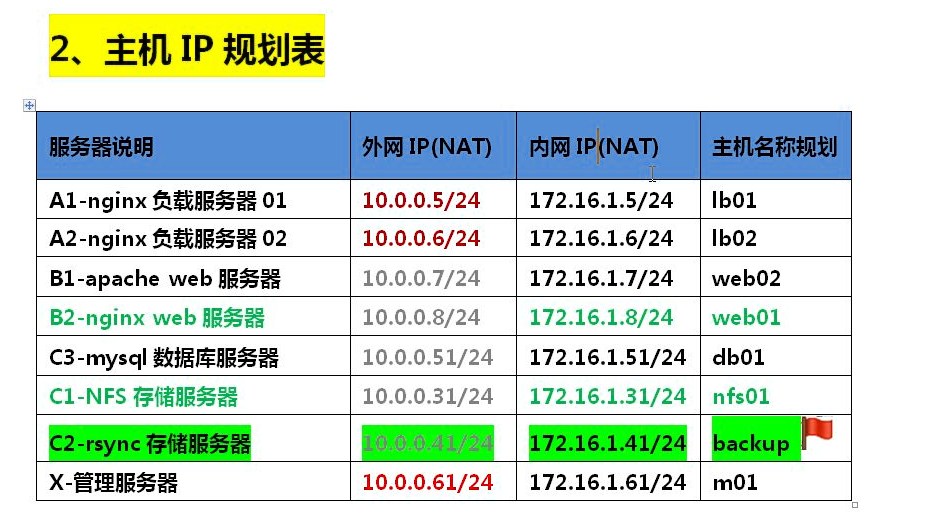
172.16.1.5 lb01
172.16.1.6 lb02
172.16.1.7 web02
172.16.1.8 web01
172.16.1.51 db01 db01.etiantian.org
172.16.1.31 nfs01
172.16.1.41 backup
172.16.1.61 m01
EOF


一键磨板机
#!/bin/sh
if [ $# -ne 2 ];then
echo "/bin/sh $0 hostname PartIP"
exit 1
fi
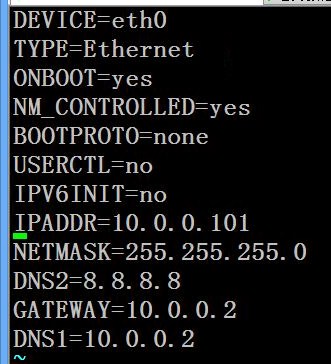
sed -i "s#oldboy#$1#g" /etc/sysconfig/network
hostname $1
sed -i "s#100#$2#g" /etc/sysconfig/network-scripts/ifcfg-eth0
sed -i "s#100#$2#g" /etc/sysconfig/network-scripts/ifcfg-eth1
RSYNC 配置文件
#rsync_config_______________start
#created by oldboy 15:01 2007-6-5
#QQ 31333741 blog:http://oldboy.blog.51cto.com
##rsyncd.conf start##
uid = rsync
gid = rsync
use chroot = no
max connections = 200
timeout = 300
pid file = /var/run/rsyncd.pid
lock file = /var/run/rsync.lock
log file = /var/log/rsyncd.log
[backup]
path = /backup/
ignore errors
read only = false
list = false
hosts allow = 172.16.1.0/24
hosts deny = 0.0.0.0/32
auth users = rsync_backup
secrets file = /etc/rsync.password
#rsync_config_______________end

rsync服务端配置:
1、查安装包
rpm -qa rsync
2、创建用户
useradd rsync -s /sbin/nologin -M
id rsync
#客户端连到服务器用rsync用户权限访问数据。
3、配置文件
/etc/rsyncd.conf
4、创建备份的目录
mkdir /backup
chown -R rsync.rsync /backup
5、创建密码文件,生成账号和密码:
echo "rsync_backup:oldboy" >/etc/rsync.password
chmod 600 /etc/rsync.password
ls -l /etc/rsync.password
cat /etc/rsync.password
6、启动服务
rsync --daemon
lsof -i :873
OVER.
rsync客户端配置:
1、创建密码文件,生成账号和密码:
echo "oldboy" >/etc/rsync.password
cat /etc/rsync.password
chmod 600 /etc/rsync.password
ll /etc/rsync.password
2、测试
Pull: rsync [OPTION...] [USER@]HOST::SRC... [DEST]
rsync [OPTION...] rsync://[USER@]HOST[:PORT]/SRC... [DEST]
Push: rsync [OPTION...] SRC... [USER@]HOST::DEST
rsync [OPTION...] SRC... rsync://[USER@]HOST[:PORT]/DEST
操作命令都是在客户端:
Push:
rsync -avz /backup/ rsync_backup@172.16.1.41::backup --password-file=/etc/rsync.password
rsync -avz /backup/ rsync://rsync_backup@172.16.1.41/backup --password-file=/etc/rsync.password
Pull:
rsync -avz rsync_backup@172.16.1.41::backup/ /backup/--password-file=/etc/rsync.password
rsync -avz rsync://rsync_backup@172.16.1.41/backup/ /backup/ --password-file=/etc/rsync.password
[root@nfs01 ~]# ls -l /proc/sys/fs/inotify/
total 0
-rw-r--r-- 1 root root 0 May 22 17:21 max_queued_events
-rw-r--r-- 1 root root 0 May 22 17:21 max_user_instances
-rw-r--r-- 1 root root 0 May 22 17:21 max_user_watches
关键参数说明:
在/proc/sys/fs/inotify目录下有三个文件,对inotify机制有一定的限制
max_user_watches:设置inotifywait或inotifywatch命令可以监视的文件数量(单进程)。
max_user_instances:设置每个用户可以运行的inotifywait或inotifywatch命令的进程数。
max_queued_events:设置inotify实例事件(event)队列可容纳的事件数量。
实战调整:
[root@sersync_server inotify-tools-3.14]# cat /proc/sys/fs/inotify/max_user_watches
50000000
[root@sersync_server scripts]# cat /proc/sys/fs/inotify/max_queued_events
3276790
[root@client scripts]# echo "50000000" > /proc/sys/fs/inotify/max_user_watches
[root@client scripts]# echo "50000000" > /proc/sys/fs/inotify/max_queued_events
Yum安装方法:
wget -O /etc/yum.repos.d/epel.repo http://mirrors.aliyun.com/repo/epel-6.repo
yum -y install inotify-tools
wget -O /etc/yum.repos.d/epel.repo http://mirrors.aliyun.com/repo/epel-6.repo
yum -y install inotify-tools
这个方式也可以
wget mirrors.aliyun.com/epel/epel-release-latest-6.noarch.rpm
rpm -ivh epel-release-latest-6.noarch.rpm

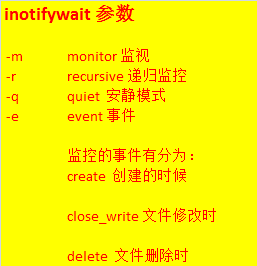
监控
inotifywait -mrq --timefmt '%d/%m/%y %H:%M' --format '%T %w%f' -e create /backup
inotifywait -mrq --timefmt '%d/%m/%y %H:%M' --format '%T %w%f' -e close_write,delete /backup
inotify脚本
cat /server/scripts/inotify.sh
#!/bin/bash
/usr/bin/inotifywait -mrq --format '%w%f' -e create,close_write,delete /backup
| while read file
do
cd /backup&&rsync -az ./ --delete rsync_backup@172.16.1.41::backup --password-file=/etc/rsync.password
done
#!/bin/bash
Path=/data
Ip=172.16.1.41
/usr/bin/inotifywait -mrq --format '%w%f' -e close_write,delete $Path
|while read file
do
if [ -f $file ];then
rsync -az $file --delete rsync_backup@$Ip::nfsbackup --password-file=/etc/rsync.password
else
cd $Path &&
rsync -az ./ --delete rsync_backup@$Ip::nfsbackup --password-file=/etc/rsync.password
fi
done
启动进程并查看
[root@nfs01 backup]# nohup /server/scripts/inotify.sh &
[1] 3637
[root@nfs01 backup]# nohup: ignoring input and appending output to `nohup.out'
^C
[root@nfs01 backup]# ps -ef | grep inotify.sh
root 3637 2842 0 18:25 pts/0 00:00:00 /bin/bash /server/scripts/inotify.sh
root 3639 3637 0 18:25 pts/0 00:00:00 /bin/bash /server/scripts/inotify.sh
root 3641 2842 0 18:26 pts/0 00:00:00 grep --color=auto inotify.sh