接上一篇:IdentityServer4实现OAuth2.0四种模式之密码模式,密码模式将用户的密码暴露给了客户端,这无疑是不安全的,隐藏模式可以解决这个问题,由用户自己在IdentityServer服务器进行登录验证,客户端不需要知道用户的密码。
一,服务端配置
1,添加客户端:在IentityServer项目添加一个客户端用于支持隐藏模式访问。隐藏模式只需要用户登录验证,不需要客户端密码。
IdentityServer.Config.Getlients
public static IEnumerable<Client> GetClients()
        {
            return new Client[] {

                new Client()
                {
                    //客户端Id
                     ClientId="apiClientCd",
                     //客户端密码
                     ClientSecrets={new Secret("apiSecret".Sha256()) },
                     //客户端授权类型,ClientCredentials:客户端凭证方式
                     AllowedGrantTypes=GrantTypes.ClientCredentials,
                     //允许访问的资源
                     AllowedScopes={
                        "secretapi"
                    }
                },
                new Client()
                {
                    //客户端Id
                     ClientId="apiClientPassword",
                     //客户端密码
                     ClientSecrets={new Secret("apiSecret".Sha256()) },
                     //客户端授权类型,ResourceOwnerPassword:用户名密码模式
                     AllowedGrantTypes=GrantTypes.ResourceOwnerPassword,
                     //允许访问的资源
                     AllowedScopes={
                        "secretapi"
                    }
                }
                ,
                new Client()
                {
                    //客户端Id
                     ClientId="apiClientImpl",
                     ClientName="ApiClient for Implicit",
                     //客户端授权类型,Implicit:隐藏模式
                     AllowedGrantTypes=GrantTypes.Implicit,
                     //允许登录后重定向的地址列表,可以有多个
                    RedirectUris = {"https://localhost:5002/auth.html" },
                     //允许访问的资源
                     AllowedScopes={
                        "secretapi"
                    },
                     //允许将token通过浏览器传递
                     AllowAccessTokensViaBrowser=true
                }
            };
        }
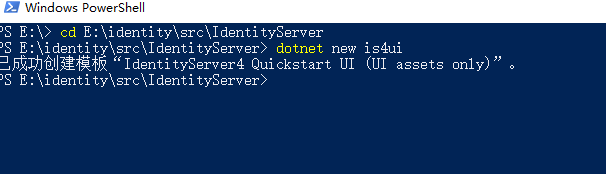
2,添加IdentityServer的ui模板。
微软为IdentityServer4创建了一系列的模板,可以在命令行中使用dotnet new -i IdentityServer4.Templates安装。然后在IdentityServer项目根据目录下打开命令行,运行dotnet new is4ui 安装IdentityServer的ui模板。会自动添加Quickstart、wwwroot、Views三个文件夹到此目录
添加好ui模板后,还需要启用IdentityServer项目的mvc功能。修改IdentityServer.Startup.ConfigureServices,添加一行代码
services.AddMvc();
修改IdentityServer.Startup.Configure,添加二行代码
          //访问wwwroot目录静态文件
            app.UseStaticFiles();
            //使用Mvc中间件
            app.UseMvcWithDefaultRoute();
二,Mvc客户端配置
添加跳传页面
在第一步的客户端实例化中配置了RedirectUris = {"https://localhost:5002/auth.html" },这是一个跳转页面,用户在IdentityServer上登录成功后将会带着access_token自动跳转到这个页面。现在这个页面还没有创建。
在IdentityMvc项目的wwwroot目录下创建一个名为auth的html页面。用于redirect_uri。如果uri瞄点中带有token,把token显示在页面上。
IdentityMvc/wwwroot/auth.html
<!DOCTYPE html>
<html>
<head>
    <meta charset="utf-8" />
    <title></title>
    <script type="text/javascript">
        var token = null;
        window.onload = function () {
            var url = window.location.href;

            var array = url.split("#");
            if (array.length > 1) {
                token = array[1];
             document.getElementById("content").innerHTML = token;
            }
        }
    </script>
</head>
<body>
    <div id="content"></div>
</body>
</html>
三,获取access_token
根据OAuth2.0协议,隐藏模式需要传的参数如下所示。
client_id:客户端Id
redirect_uri=重定向Url,用户登录成功后跳回此地址
response_type=token,固定值,表示获取token
scope=secretapi,此token需要访问的api
接受参数的地址则是IdentityServer的Discover文档中的authorization_endpoint节点。把参数和地址拼接成以下地址:http://localhost:5000/connect/authorize?client_id=apiClientImpl&redirect_uri=https://localhost:5002/auth.html&response_type=token&scope=secretapi,直接访问,会跳转到用户登录页面

使用之前添加的用户:apiUser登录,确认授权访问secretapi这个api资源
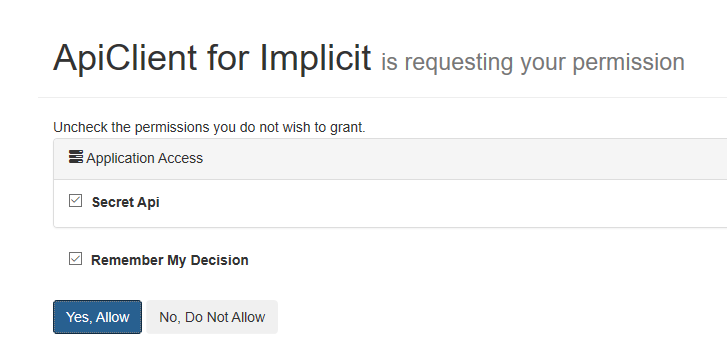
确认后,浏览器将会自动跳转到redirect_url,也就是我们第一步建立的html页面。

发现token已经被打印出来了。使用这个token用于Bearer授权验证就可以访问标识为secretapi的api资源。访问一下之前的测试接口。

隐藏模式解决了客户端模式用户身份验证和授权的问题,也解决了密码模式面临的用户密码暴露的问题,适应于全前端没有后端的第三方应用。但由于token携带在url中,安全性方面不能保证。下一篇讲的授权码模式在安全性方面做得更好。