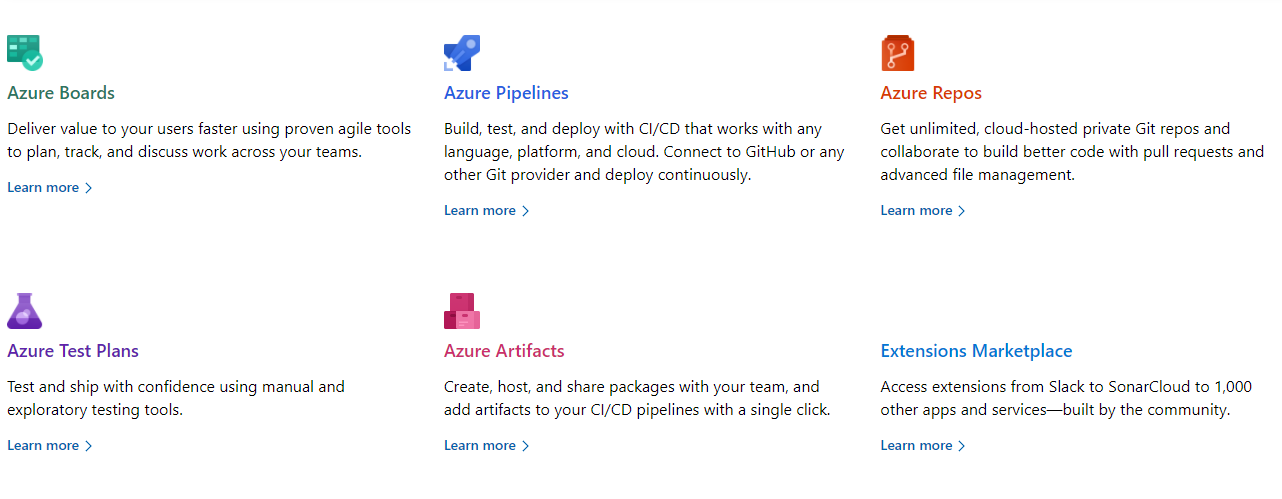
Azure DevOps is a Microsoft product that provides version control, reporting, requirements management, project management, automated builds, testing, and release management capabilities. It covers the entire application lifecycle, and enables DevOps capabilities
In this article, we'll use Azure Pipeline to export managed solution from DEV then import into PROD environment.
You could check our other articles around this topic here, and you can also consult this article that talk about the Azure DevOps by using an other way with Power DevOps Tools
We'll complete the following steps:
- Signup for a free Azure DevOps account
- Create a new Project
- Install Power Platform Build Tools into Azure DevOps
- Create first build pipeline to export CRM solution
- Run your first build pipeline
- Create a release pipeline to import CRM solution to a target environment
- Run your first release
- Conclusion
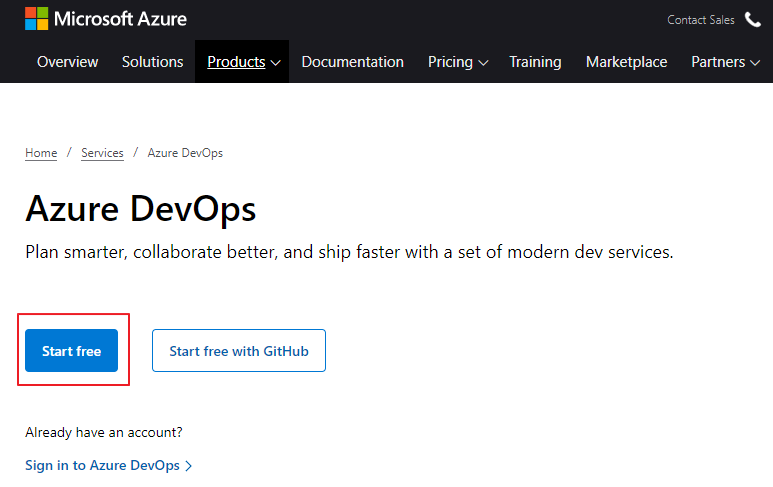
Step 1: Signup for a free Azure DevOps account
Go to https://azure.microsoft.com/en-us/services/devops/ then select "Start free"
Step 2. Create a new project
After creating a new empty project, you'll see a screen like this
Step 3: Install Power Platform Build Tools into Azure DevOps
Microsoft Power Platform Build Tools are a collection of Power Platform-specific Azure DevOps build tasks that eliminate the need to manually download custom tooling and scripts to manage the application lifecycle of apps built on Microsoft Power Platform
We can use Power Platform Build Tools to automate common build and deployment tasks related to Power Platform.
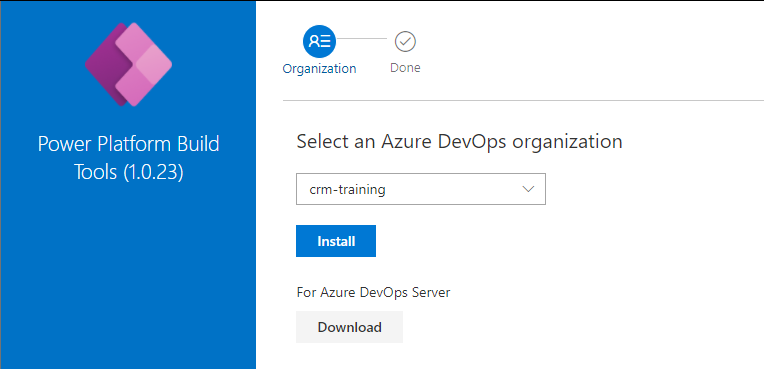
Go to Power Platform Build Tools and get it free

Select an organization and install it
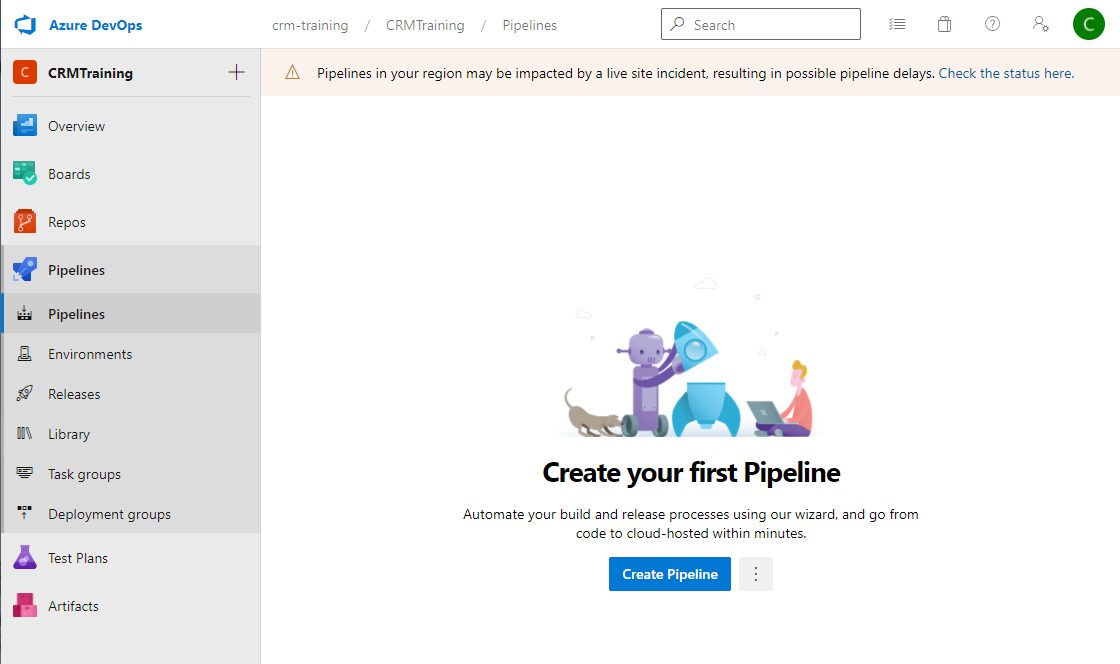
Step 4. Create first pipeline
Step 4.1 Create an empty pipeline
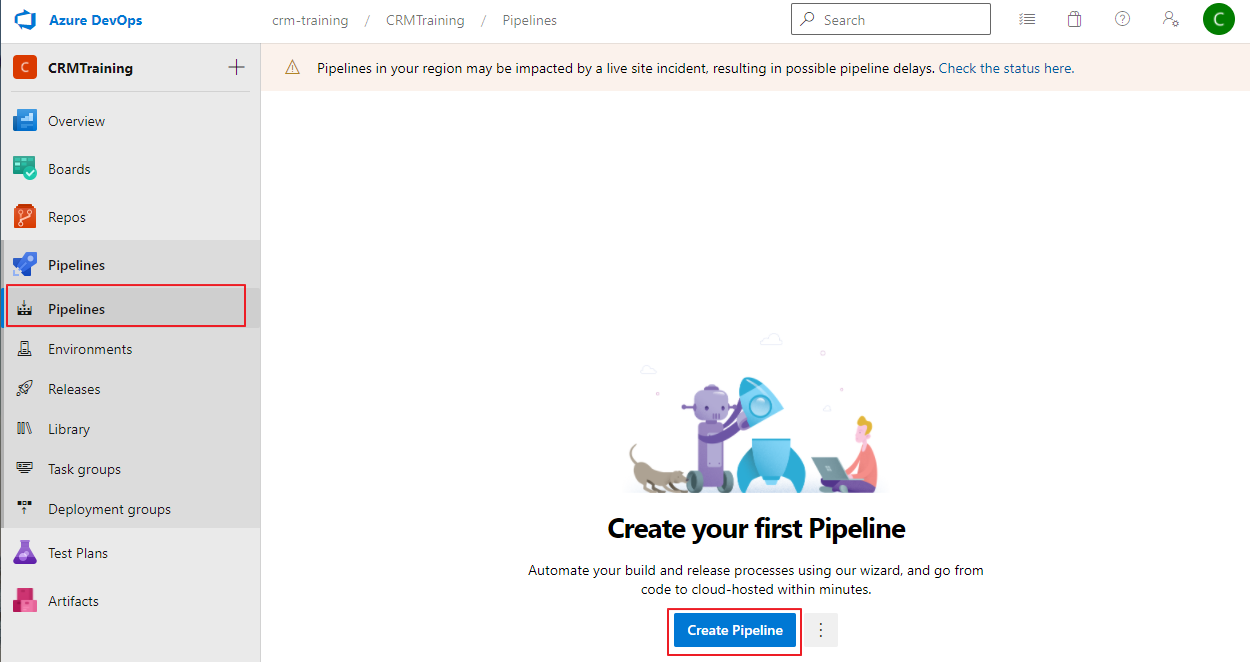
Go the pipeline in the left sidebar, create a new pipeline
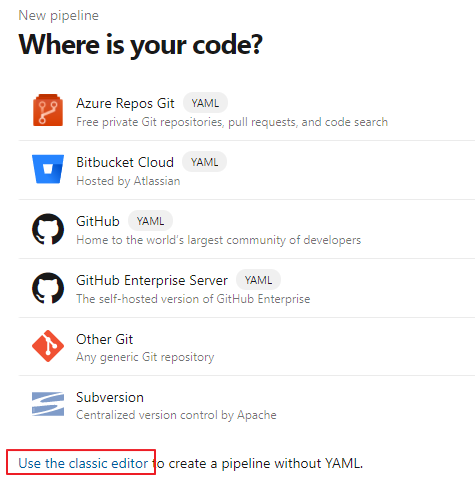
Use the classic editor, this is the easiest way to start with Azure pipeline, it provide intuitive UI to configure pipeline
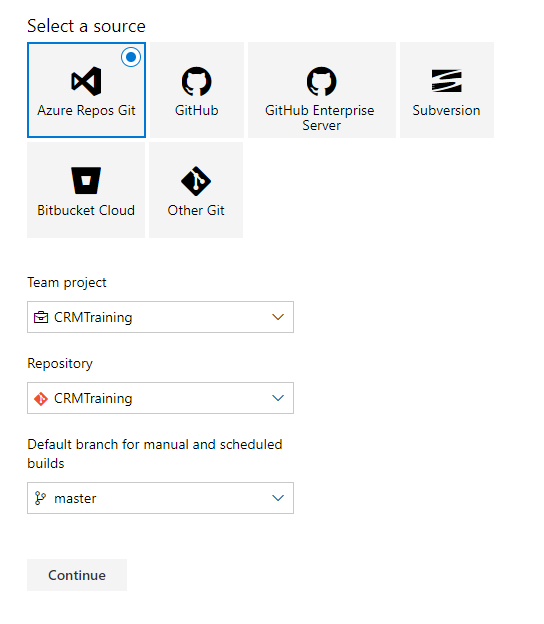
Select the source code and continue
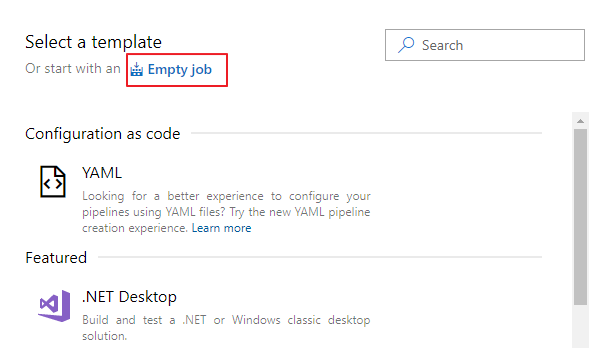
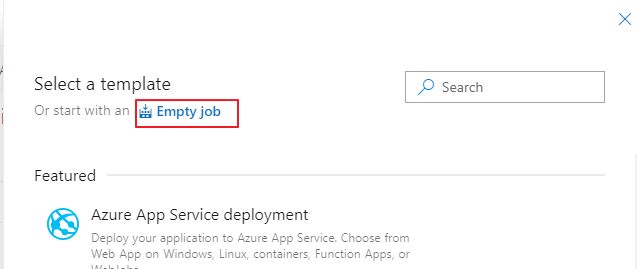
Start with an empty job
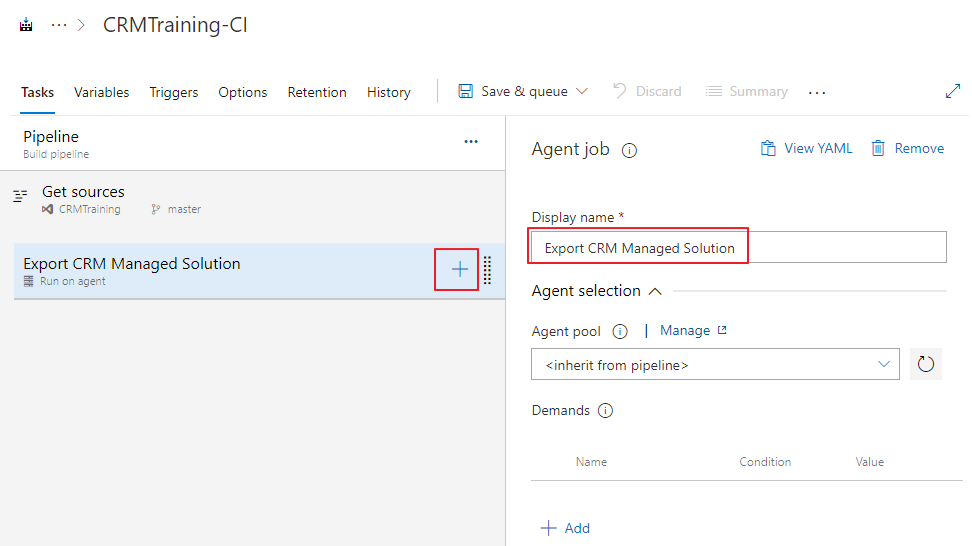
Change the display name of the agent job and create a new task for it
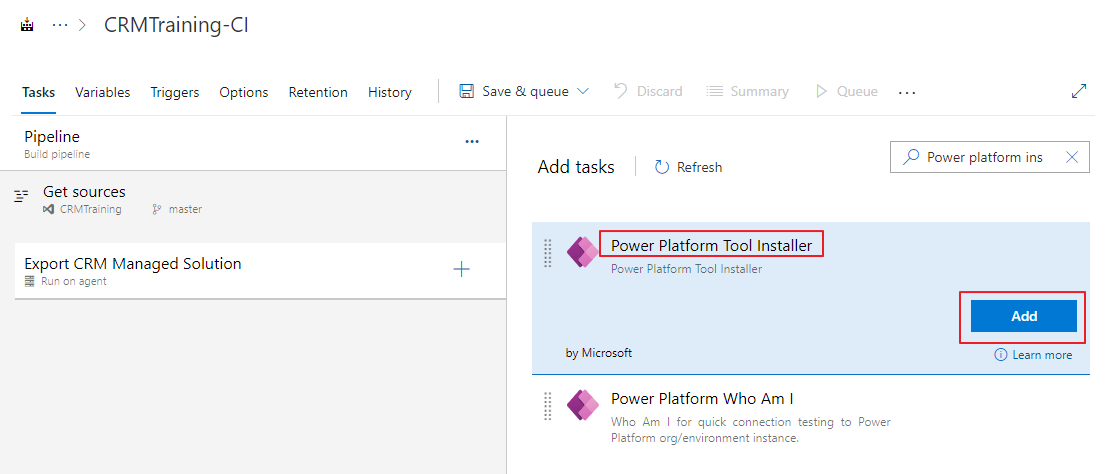
Search for "power platform", you should see a lot of tasks related to Power Platform that we install in step 3 Power Platform Build Tools (1.0.23)
Step 4.2 Add Agent Job "Power Platform Tool Install"
Let add Power Platform Tool Install first, this is the required step
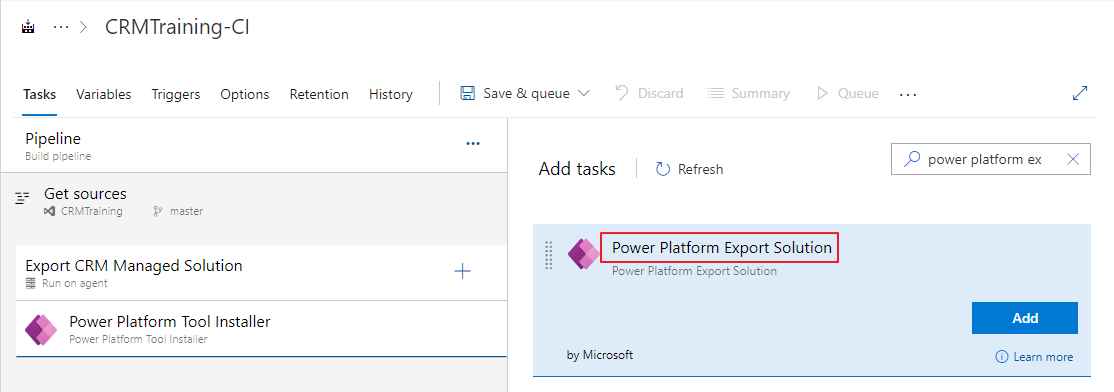
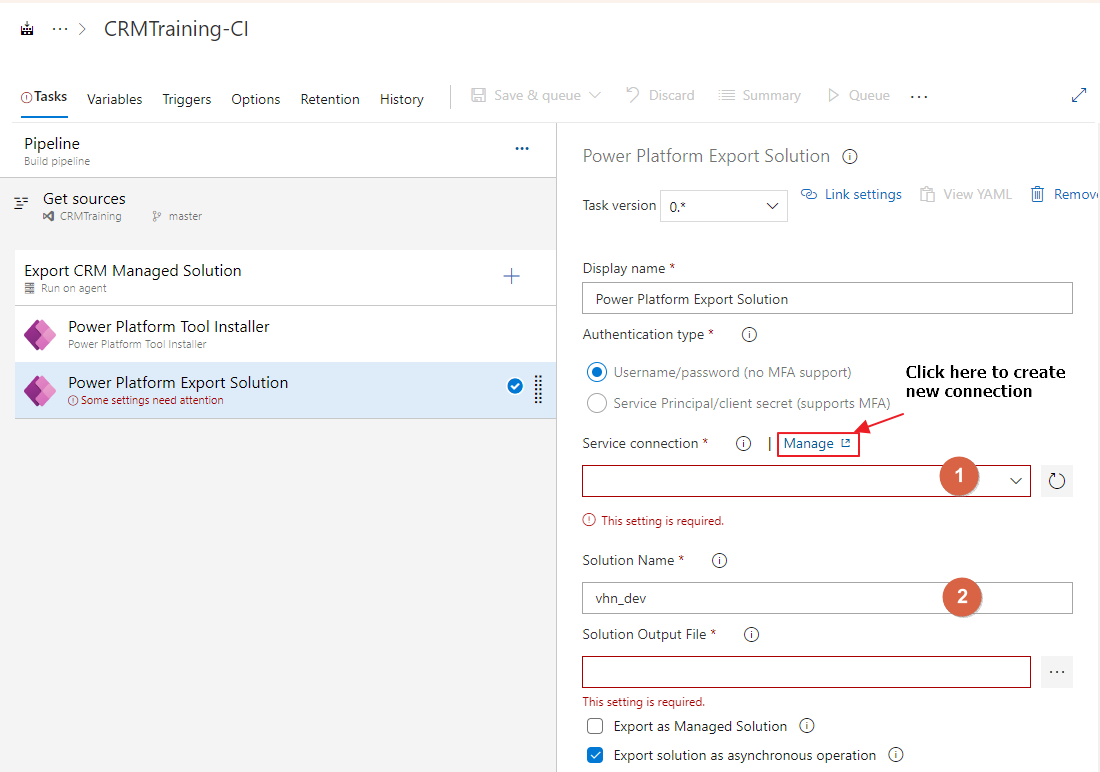
Step 4.3 Add Agent Job "Power Export Solution"
Leave everything default, then create a new task "Power Platform Export Solution"
Step 4.4 Create a connection to CRM
To export a solution, you need a connection to CRM and the name of the solution in DEV environment
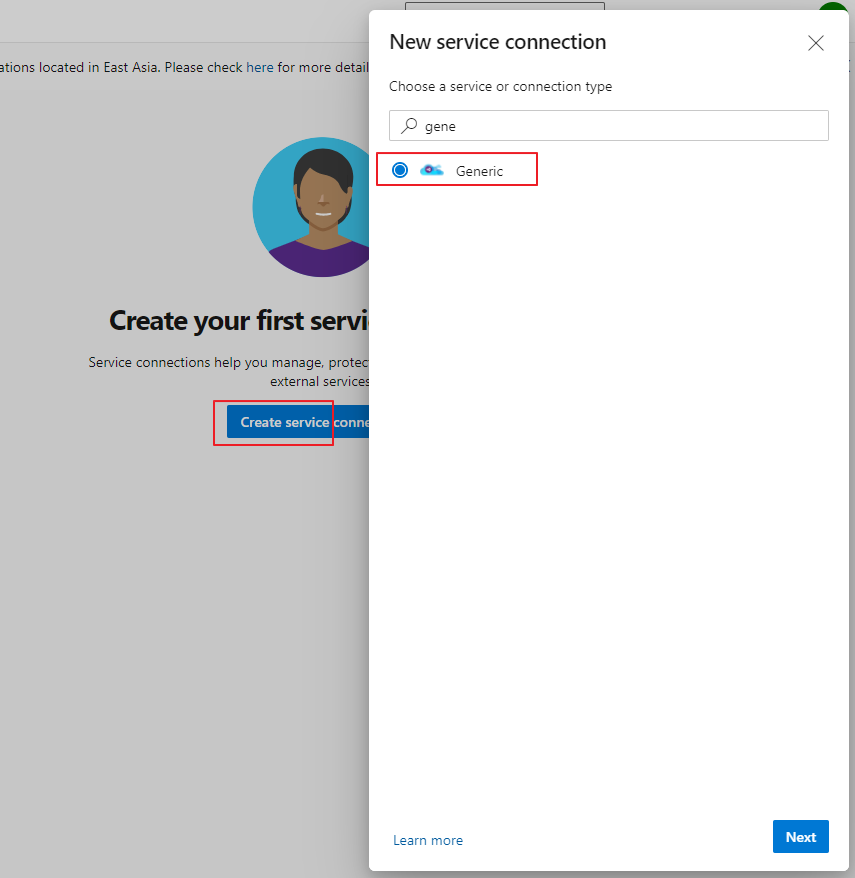
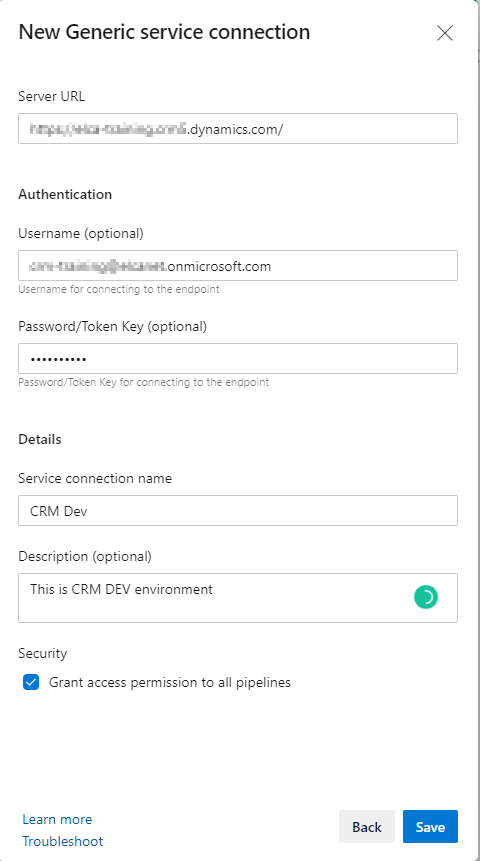
Click "Save", then come back to your pipeline, click the refresh icon, your new created connection should be in the list
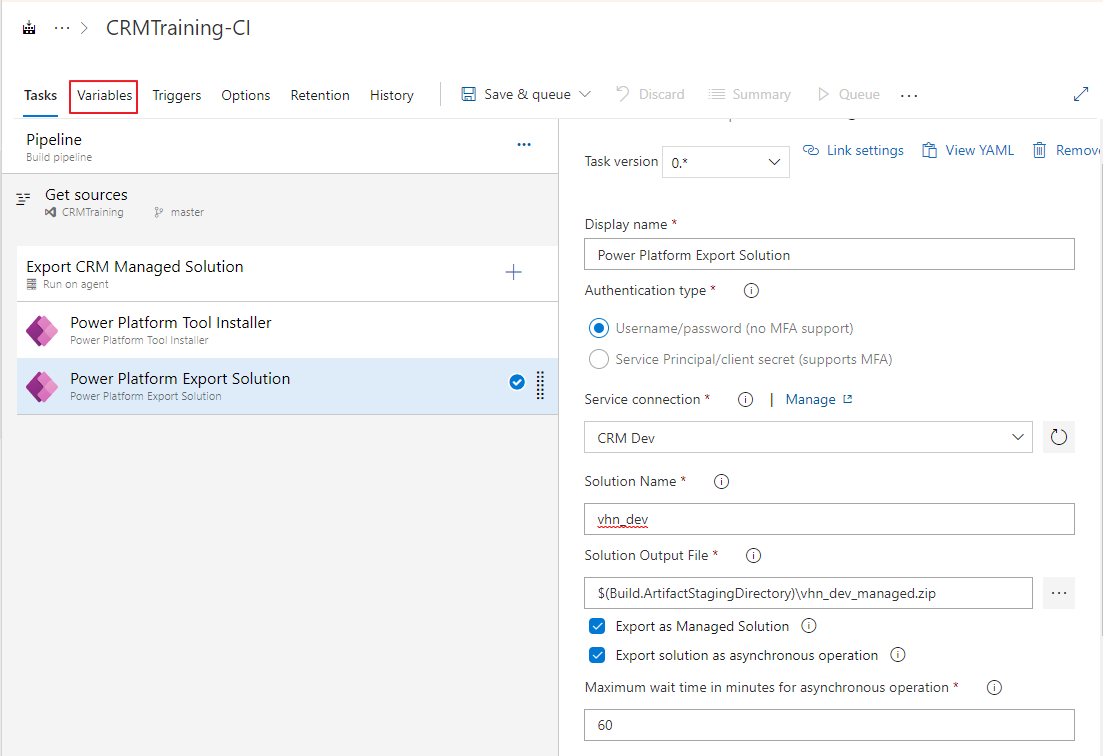
Step 4.5 Using variables
Hint: you can use it in the config form. There are 2 kinds of variables:
- Static variable manually defined in this pipeline
- The variable group from Azure Key-Val. You need to connect Azure Key-Val to Azure DevOps
Save the pipeline, it's ready to run.
Publish the pipeline artifact so that we can use it in the release pipeline (in further steps)
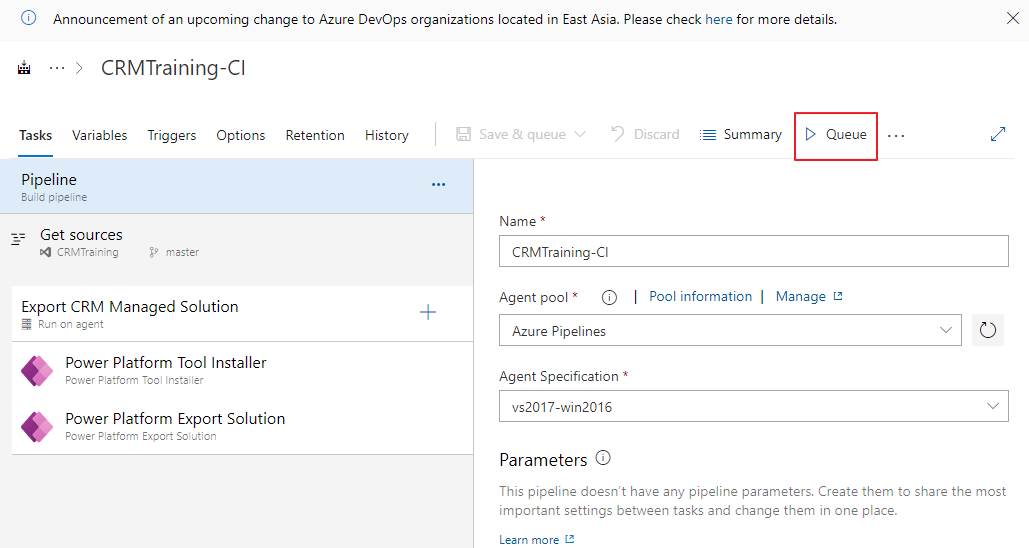
Step 5. Run your first pipeline
Open the pipeline and press the button "Queue"
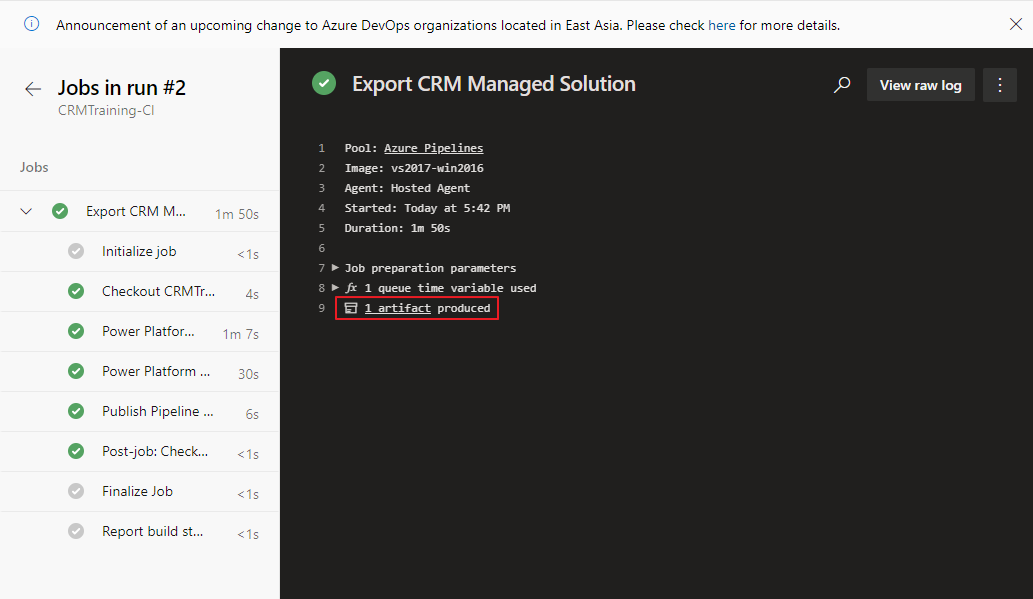
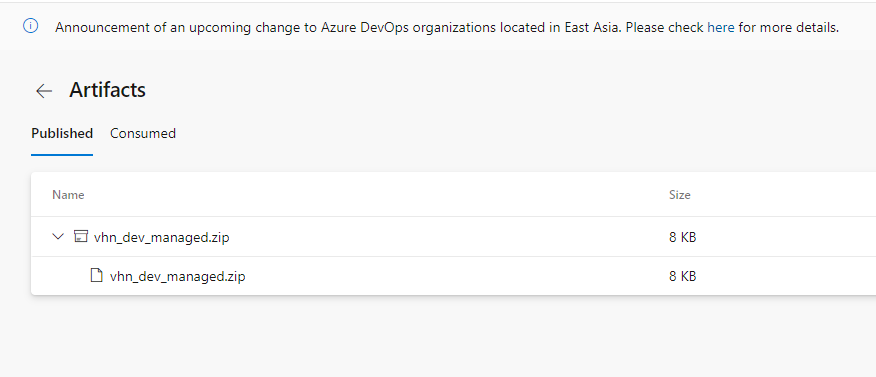
You should see the artifact produced after the pipeline run successfully.
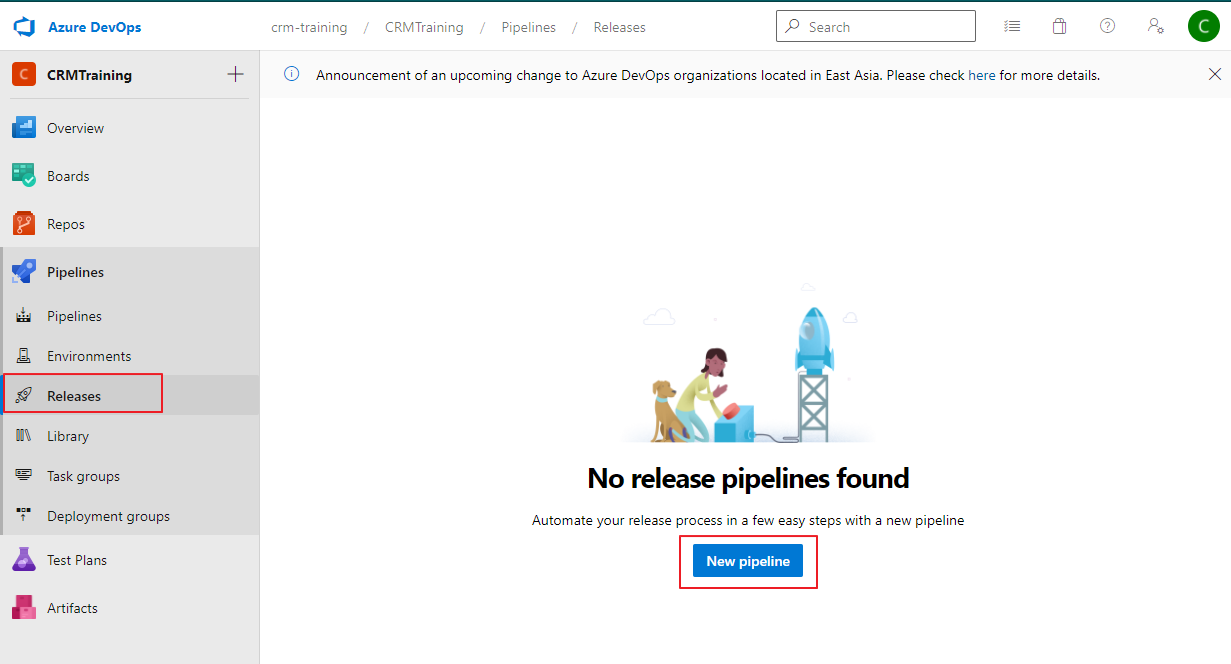
Step 6. Create a release pipeline to import CRM solution to the target environment
We already implemented the Build Pipeline to export CRM Solution from DEV environment and upload it to Azure Artifact.
In this step, we'll import the managed solution (output in step 5) to PROD environment.
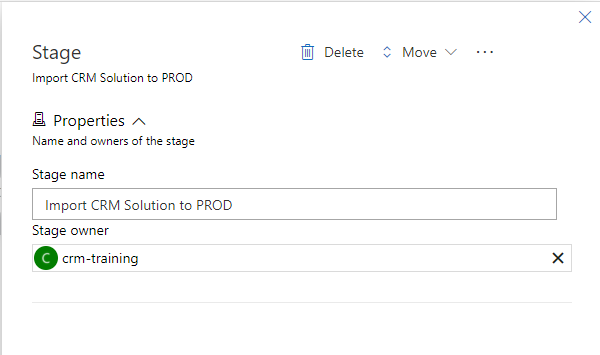
Step 6.1 Create a new Release Pipeline and select new Empty Job
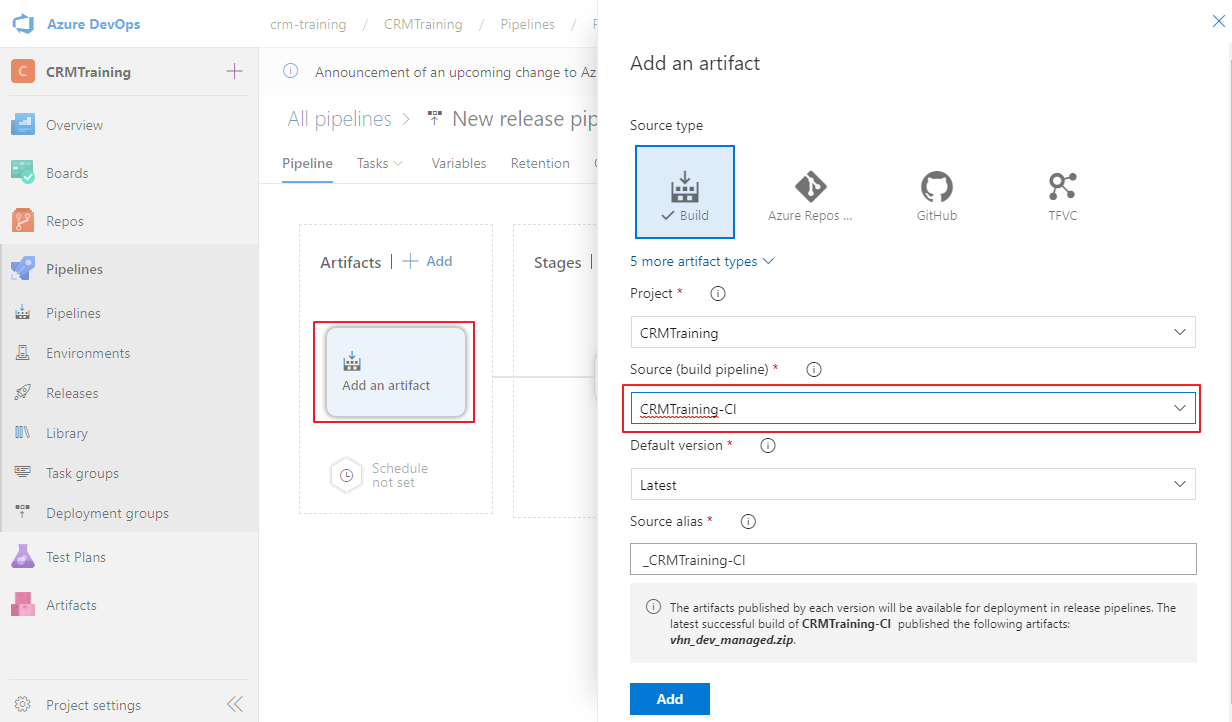
Step 6.2 Add Artifact from step 5
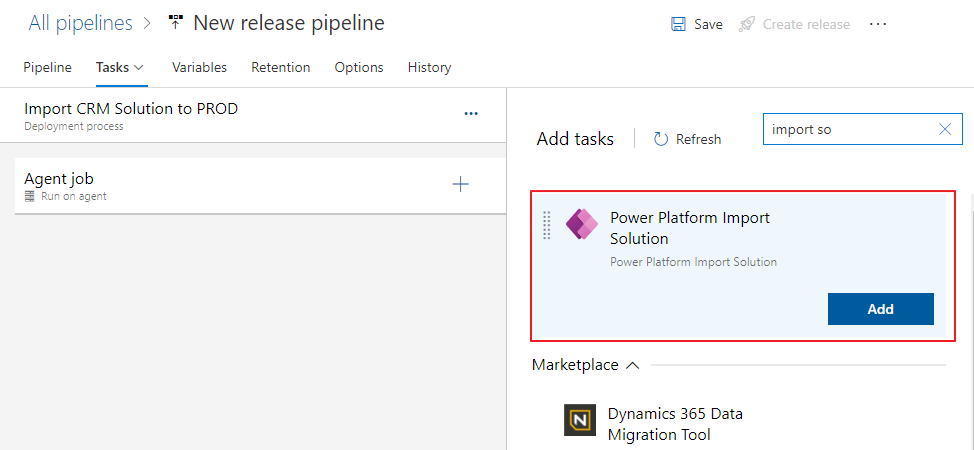
Step 6.3 Add Agent Job to import solution
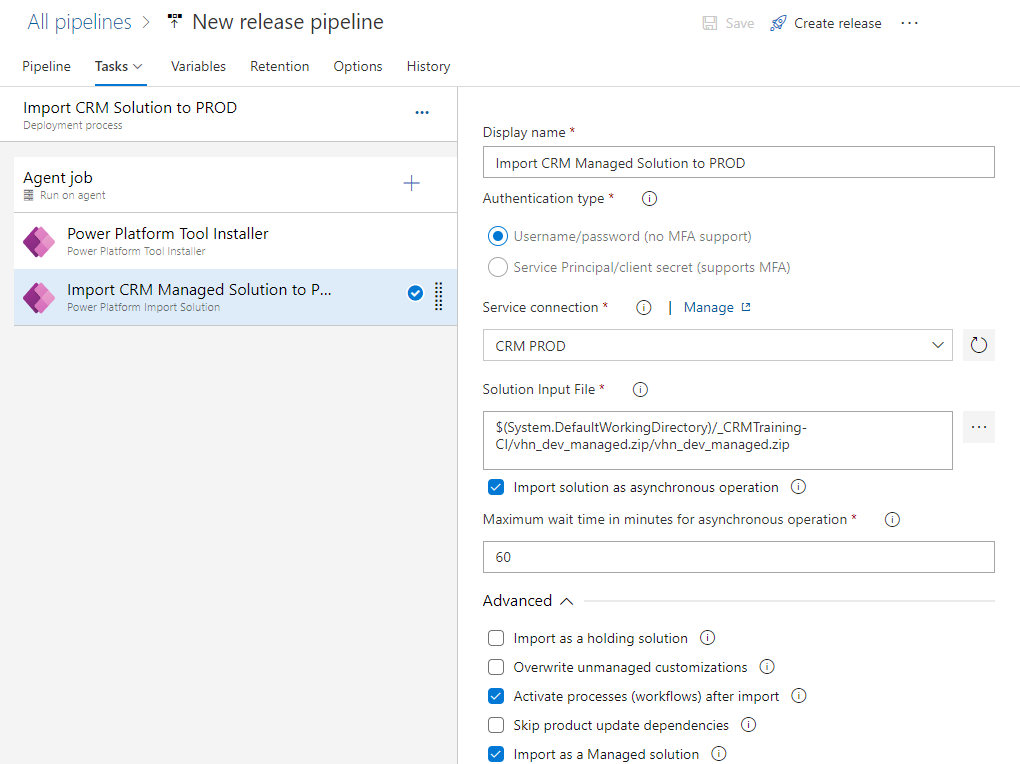
Step 6.4 Config the Agent Job
The job "Power Platform Import Solution" need the following required inputs:
- Service connection: the connection to CRM. Authenticate with your Power Platform environment with a username/password. Does not support MFA.
- Solution Input File: specify the path and file name of the solution zip file (from the Build Pipeline step 5)
Step 7. Run your first release
You can click on the button Create Release to create a release (execute pipeline)

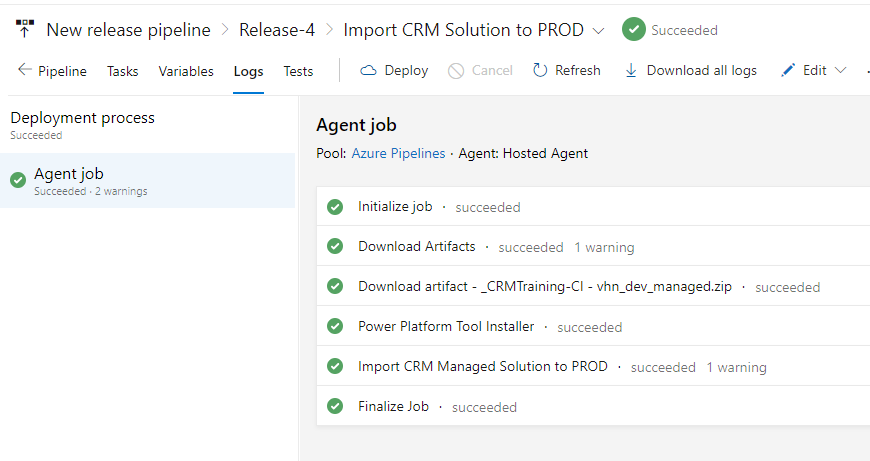
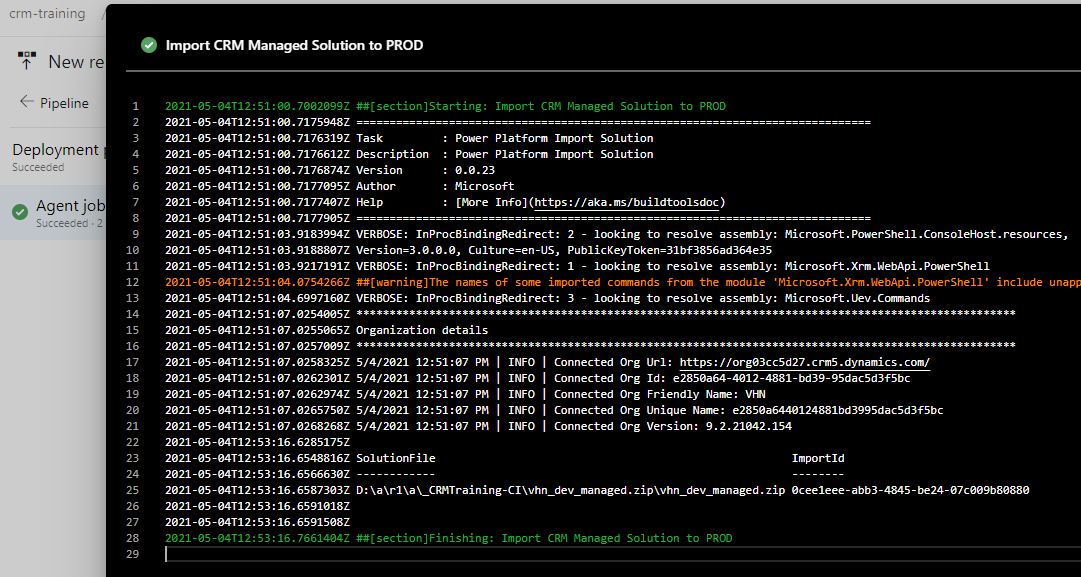
Now, navigate to PROD, you should see the solution was imported correctly.
That's all
Conclusion:
- Using Azure Pipeline is simple, you can set up a basic build and release/deployment in some minutes.
- Azure DevOps has a free plan so that you can use it for a personal or small project. Free plan includes:
- 1 Free Microsoft-hosted CI/CD and
- 1 Free Self-Hosted CI/CD
- 2 GiB free Artifact storage then starting at $2 per GiB
- You have a lot of built-in jobs for your pipeline. You can do other build and deploy tasks not just for export and import CRM solution.
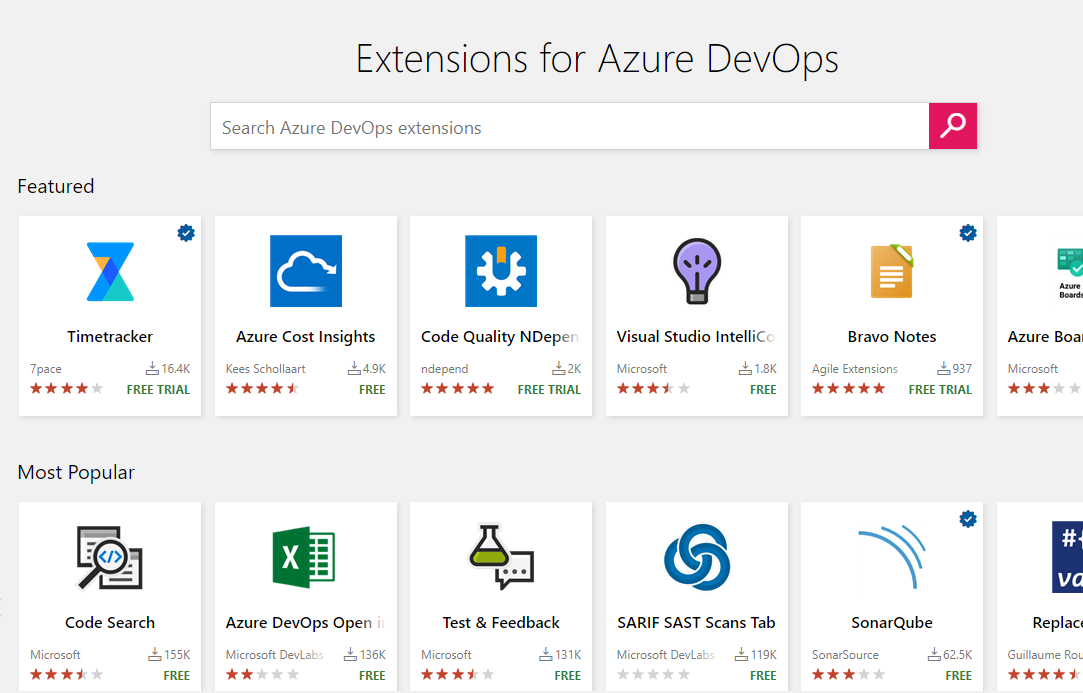
- You can also add free job from the market place (Extensions for Azure DevOps)