https://www.bilibili.com/video/BV1ug4y1z7fQ?from=search&seid=2127281453570494480
Nginx("engine x")是一个高性能的 HTTP 和 反向代理 服务器,也是一个IMAP/POP3/SMTP 代理服务器。Nginx是Igor Sysoev为俄罗斯访问量第二的Rambler.ru站点开发的。国内用户有:新浪、赶集...
|
TERM, INT |
fast shutdown |
|
QUIT |
graceful shutdown 优雅的关闭进程,即等请求执行结束后在关闭 |
|
HUP |
changing configuration, keeping up with a changed time zone (only for FreeBSD and Linux), starting new worker processes with a new configuration, graceful shutdown of old worker processes 改变配置文件,平滑的重新读取配置文件。使用新配置文件启动时,他会慢慢的使用新配置文件接收的nginx接收请求,然后将旧的nginx关闭。 |
|
USR1 |
re-opening log files 重读写日志,在日志按月/日分割时有用。由于linux写文件真正指向的是磁盘上的那个inode节点,和文件名称无关,所以你要想让nginx重新将日志写到一个新文件里,光靠改文件名和替换文件名是没用的,因为nginx是一直往那个inode节点里写,和文件叫啥名没关系。这个时候你要想去备份日志文件就需要使用这个信号量了。 |
|
USR2 |
upgrading an executable file 平滑的升级nginx |
|
WINCH |
graceful shutdown of worker processes 优雅的关闭旧的进程(配合USER2使用) |
sudo kill -INT nginx进程号
sudo kill -HUP nginx进程号

# 如果不想总是使用pid去控制,我们还可以使用pid文件去控制(本质上还是通过pid文件里的进程号控制)
sudo kill -HUP `cat /usr/local/nginx/nginx.pid` # 这样只要记住进程id文件地址就行
sudo kill -usr1 `cat /usr/local/nginx/nginx.pid`
sudo kill -quit `cat /usr/local/nginx/nginx.pid`

# 除了使用信号量,还可以使用nginx提供的一些命令去操作,但没有使用信号量丰富
/usr/local/nginx/nginx -s reload
/usr/local/nginx/nginx -s start
/usr/local/nginx/nginx -s stop
/usr/local/nginx/nginx -s quit
/usr/local/nginx/nginx -s reopen  # 相当于USER1
log_format  main  '$remote_addr - $remote_user [$time_local] "$request" '
                      '$status $body_bytes_sent "$http_referer" '
                      '"$http_user_agent" "$http_x_forwarded_for"';
server {
        listen       80;
        server_name  localhost;

        #charset koi8-r;

        access_log  logs/host.access.log  main;

        location / {
            root   html;
            index  a.html index.html index.htm;
        }
}
2、在nginx根目录的html目录下新建a.html如下:
<html>
hello! welcome nginx!

<script>
window.location.href="/?time="+ new Date().getTime()
</script>

</html>
3、重启nginx,使用浏览器请求nginx,查看./logs/目录下的日志大小,会发现hosts.access.log越来越大,此时我们mv hosts.access.log并不会改变inode。
bash-4.2$ ll
total 24
-rw-r--r--. 1 root   root  8269 Apr 29 14:05 access.log
-rw-r--r--. 1 nobody root 10087 Apr 29 14:15 error.log
-rw-r--r--  1 root   root     0 Apr 29 14:30 host.access.log

-bash-4.2$ ll
total 472
-rw-r--r--. 1 root   root   8269 Apr 29 14:05 access.log
-rw-r--r--. 1 nobody root  10087 Apr 29 14:15 error.log
-rw-r--r--  1 root   root 214162 Apr 29 14:39 host.access.log
-bash-4.2$

-bash-4.2$ mv host.access.log ./host.access.bak.log

-bash-4.2$ ll  # inode节点并没有变,所以依旧往那个节点里写日志
total 472
-rw-r--r--. 1 root   root   8269 Apr 29 14:05 access.log
-rw-r--r--. 1 nobody root  10344 Apr 29 14:59 error.log
-rw-r--r--  1 root   root 346912 Apr 29 15:00 host.access.bak.log

-bash-4.2$ sudo kill -usr1 `cat /usr/local/nginx/nginx.pid`

-bash-4.2$ ll  # 执行reopen后,重新将日志输出到host.access.log,改变了inode
total 1276
-rw-r--r--. 1 root   root   8269 Apr 29 14:05 access.log
-rw-r--r--. 1 nobody root  10405 Apr 29 15:01 error.log
-rw-r--r--  1 root   root 492007 Apr 29 15:01 host.access.bak.log
-rw-r--r--  1 nobody root 329970 Apr 29 15:03 host.access.log

-bash-4.2$ ll  # host.access.bak.log大小不在改变,但host.access.log在不停的增加,自此,就完成了日志的备份
total 1276
-rw-r--r--. 1 root   root   8269 Apr 29 14:05 access.log
-rw-r--r--. 1 nobody root  10405 Apr 29 15:01 error.log
-rw-r--r--  1 root   root 492007 Apr 29 15:01 host.access.bak.log
-rw-r--r--  1 nobody root 397212 Apr 29 15:04 host.access.log
work_process 1; # 有1个工作的子进程,可以自行修改,但太大无益,因为要争夺CPU,一般设置为CPU数*核数

event {
    # 一般配置nginx连接的特性
    # 如一个worker能同时允许产生多少连接
    worker_connections 1024; # 这是指 一个子进程最大允许连接1024个连接(这个参数要和系统配置配合才能有更好的效果)
}

http { # 这是配置http服务器的主要段

    # 可以配置多个server

    # 基于域名的虚拟主机
    server {
        listen 80; # 你要监听哪一个端口
        server_name z.com; # 域名

        location / {
            root html; # 你项目的根目录在哪里?可以是相对路径(相对/usr/local/nginx,也就是nginx的安装目录),也可以是绝对路径
            index index.html; # 如果别人请求没有写明具体文件名时,默认给他哪个访问页面,这里设置给它根目录下的index.html页面
        }
    }

     # 基于端口的虚拟主机
    server {
        listen 20200; # 你要监听哪一个端口
        server_name z.com; # 域名

        location / {
            root html; # 你项目的根目录在哪里?可以是相对路径(相对/usr/local/nginx,也就是nginx的安装目录),也可以是绝对路径
            index index.html; # 如果别人请求没有写明具体文件名时,只写了请求根目录,默认将请求转发到/index.html,这里设置的是根目录下的index.html页面
        }
    }

    # 基于ip的虚拟主机
    server { # 这是虚拟主机段
        listen 20200; # 你要监听哪一个端口
        server_name 10.1.192.130; # 你要监听哪一个域名

        location / {
            root html; # 你项目的根目录在哪里?可以是相对路径(相对/usr/local/nginx,也就是nginx的安装目录),也可以是绝对路径
            index index.html;  #如果别人请求没有写明具体文件名时,只写了请求根目录,默认将请求转发到/index.html,这里设置的是根目录下的index.html页面
        }
    }

}

syntax句法格式,没有默认值,server的上下文环境是用在http内。
基于域名的虚拟主机,修改nginx的server_name之后,重新软起动nginx,并且修改hosts文件,否则是访问不到nginx的,因为这个z.com域名并不属于本机,所以当本机发起z.com请求的时候会先去hosts文件里找,找不到这个域名就回去互联网上去解析去找,所以我们需要在本机配置hosts
sudo vim /etc/hosts
# 加入一行
10.1.192.130 z.com

# 再次访问nginx
curl z.om # 即可看到nginx首页信息了
当我只修改ip的时候,访问curl localhost依旧会得到nginx首页信息,localhost就相当于本机,而端口为80,所以就直接到80端口,nginx开放的端口也恰好为80,所以就获取到了首页。
基于端口的虚拟主机,我们依旧设置的是原来的z.com的域名,但是端口号改成20200,当再次访问:
-bash-4.2$ curl z.com
curl: (7) Failed connect to z.com:80; Connection refused

-bash-4.2$ curl z.com:20200 # 再次出现nginx首页信息
基于ip的虚拟主机,如果我请求只写ip不写端口20200的话,nginx找不到端口,就会去找默认的80端口,所以会将请求发送到第一个基于域名的虚拟主机,而不是发送到第三个,所以我们基于ip的虚拟主机需要在nginx中指明ip,请求时指明端口。

如上图官方说明,syntax表示location的句法,没有默认值,context表示location的上下文可以在server内配置,也可以在location内配置(嵌套)。
location有”定位“的意思,根据Uri来进行不同的定位。在虚拟主机的配置中,是必不可少的,location可以把网站的不同部分,定位到不同的处理方式上。比如,碰到.php,如何调用PHP解释器? -- 这时就需要location。
location [=|~|~*|^~] pattern {

}
# 中括号可以不写任何参数,此时称为一般匹配,也可以写参数
# 因此,大类型可以分为3种
location = pattern {} [精准匹配]
location pattern{} [一般匹配]
location ~ pattern {} [正则匹配]
一般匹配patt,先理解成”字符串“,在理解成”正则表达式“,尽量的多匹配URI,如果有多个一般匹配,谁匹配上的长度大,以谁为准。
# 案例1:

location =/ {
    root /var/www/html;
    index index.htm index.html;
}


location / {
    root   html;
    index  index.html index.htm;
}
# 当我们在浏览器只输入一个ip去访问nginx的时候,我们最终应该是访问一个目录或文件才是,
# 而不应该是个ip,所以当我们不写具体文件而只写10.1.192.130这个请求的时候,nginx
# 下的location里的index属性就发挥了作用,它将会把这个请求理解成
# 10.1.192.130/index.htm,它就内部把请求转发到10.1.192.130/index.htm上了,
# 这就相当于我们在浏览器地址栏访问了10.1.192.130/index.htm的效果一样。

# 整个流程下来先走精准匹配,精准匹配命中,匹配到了/,但/只是一个目录,它无法直接给你
# 回应,它最终要给你引导到索引页上,因此它内部给你转到/index.htm,此时请求就变成了10.1.192.130/index.htm,
# 再次匹配,精准匹配没命中,而一般匹配命中,此时访问的已不在是一个目录,而是一个
# 文件,所以他就会直接在root指定了目录下找这个index.htm文件返回给你。
# 案例2:

location /index.html {
    root   html;
    index  index.html index.htm;
}

location =/index.html {
    root /var/www/html;
    index index.htm index.html;
}

# 此时我们在地址栏中输入10.1.192.130/index.html,按照推理,nginx应该返回给我们的是/var那
# 个里面的index.html,输入访问后正如我们预测,说明精准匹配的优先级大于一般匹配。

# 此时,我们如果还在地址栏中只输入10.1.192.130,按照推测,精准匹配没有命中,一般匹配也没
# 有命中,当都没有命中时会怎么样呢?如果都没有命中的话,nginx会继承nginx服务器的配置,
# 也就是说,如果没命中任何一个location时会在内部将uri重新定位到10.1.192.130/index.html,
# 如果这个uri又没命中,那直接返回根目录下的index.html。
# 验证:输入10.1.192.130后,没有命中任何一个location,走继承的配置内部将路由转到10.1.192.130/index.html
# 这个uri命中精准匹配,所有应该返回的是var目录下的index.html,如我们所料。

# 在改一下:
location /index.htm {
    root   html;
    index  index.html index.htm;
}

location =/index.htm {
    root /var/www/html;
    index index.htm index.html;
}
# 如上,还是访问10.1.192.130,都没命中,然后走继承的配置内部转10.1.192.130/index.html,发现精准的
# 没命中,一般的命中了,逾期返回结果是根html目录下的index.html,如我们所料。

# 我们在来改
location = /index.htm {
        root   /var/www/html;
        index  index.html index.htm;
    }

location /php.html {
        root   html;
        index  php.html index.html;
    }
    # 创建一个php.html ,内容随意

   # 推理输入10.1.192.130,两个location都没命中,继承默认配置内部重定向10.1.192.130/index.html又
   # 没命中,直接返回根目录下的index.html,如我们所料。我在将精准匹配的index.htm改成index.html
   # 预期又会出现var那个目录里的index.html,再次访问10.1.192.130,果然,又如我们预期的那样。
location / {
    root   html; # 在html目录下新建image目录,并添加一张home.jpg图片
    index  index.html index.htm;  # 在index.html中添加一行<img  src="./image/home.jpg" />
}

location ~ image {
    root   /var/www/image; # 新建image目录,然后用另一张也叫home.jpg的图
    index  index.html index.htm;
}

# 官方解释:正则表达式由前面的“〜*”修饰符(不区分大小写)或“〜”修饰符(不区分大小写)指定。
#  为了找到与给定请求匹配的位置,nginx首先检查使用前缀字符串定义的位置(前缀位置)。 其中,将选
# 择并记住具有最长匹配前缀的位置。 然后按照在配置文件中出现的顺序检查正则表达式。 正则表达式的搜
# 索在第一个匹配项上终止,并使用相应的配置。 如果未找到与正则表达式匹配的内容,则使用前面记住的
# 前缀位置的配置。如果最长的匹配前缀位置具有“ ^〜”修饰符,则不检查正则表达式。
# 同样,使用“ =”修饰符可以定义URI和位置的精确匹配。 如果找到完全匹配的内容,搜索将终止。
# 例如,如果“ /”请求频繁发生,则定义“ location = /”将加快这些请求的处理速度,因为搜索将在第一次
# 比较后立即终止。 这样的位置显然不能包含嵌套位置。

# 正则匹配的优先级大于一般匹配,如上两个location,当访问10.1.192.130/image/home.jpg时都会命中,
# 但一般匹配命中后并不会直接将结果返回,而是继续走正则匹配,如果正则匹配还命中,则使用正则匹配
# 的结果返回。

# 访问10.1.192.130/,此时命中一般匹配,访问html目录下的index.html,而它引用着html目录下的
# image/home.jpg,但访问的结果却是:

# 没有找到?我们看一下nginx的error.log
#0: *102 open() "/var/www/image/image/home.jpg" failed (2: No such file or directory), client...
# 目录写错了
location ~ image {
    root   /var/www;
    index  index.html index.htm;
}
# 再次访问成功简单home.jpg图

当我们发送一个请求时,请求头会带有浏览器能支持的压缩算法,如下:Accept-Encoding:gzip,deflate,br
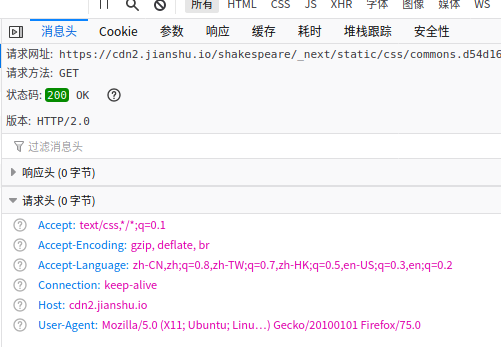
返回的响应结果可以根据Accept-Encoding里的某种算法进行压缩,并告诉请求方自己选择的压缩算法是哪种,如下:
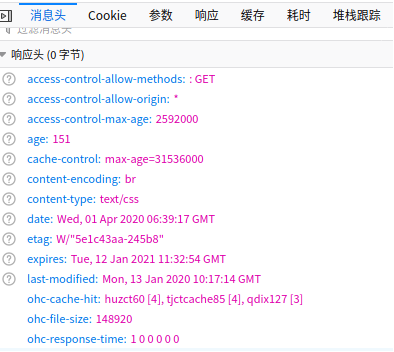
浏览器请求---》声明可以接受gzip压缩或deflate压缩或compress或sdch压缩,从http协议的角度看--请求头 声明 accecpt-encoding:gzip deflate sdch(是指压缩算法,其中sdch是google倡导的一种压缩算法,目前支持的服务器不多)
服务器响应---》把内容用浏览器能支持的某种压缩算法压缩---》发给浏览器---》浏览器解码---》渲染解码后的内容。
2×10^8 × 9×10^4 字节 == 2×10^8 × 9×10^4 × 10^-9 = 18×K×G = 18 T
图片/mp3这样二进制文件,不必压缩,因为能压缩的地方比较小,比如100->80字节,压缩比较消耗的CPU资源,所以这样的不建议压缩。
比较小的不建议压缩(和gzip_min_length设置的值相关)。
gzip on|off; # 是否开启gzip
gzip_buffers 32 4K|16 8K # 缓冲(压缩在内存中缓冲几块?每块多大?)
gzip_comp_level[1-9] # 推荐6 压缩级别越高,压的越小,越浪费CPU计算资源
gzip_disable # 正则匹配uri,什么样的uri不进行gzip
gzip_min_length 200 # 开始压缩的最小大小(在小就不要在压缩了,在压缩的意义不大)
gzip_http_version 1.0|1.1 # 开始压缩的http协议版本,可以不设置,目前几乎全是1.1协议了
gzip_proxied # 如果请求者是代理服务器,代理服务器该如何缓存我的内容?允许不允许
gzip_types text/plain,application/xml # 对哪些类型的文件用压缩[参加mime.types中写法],如t/xt,/xml,/css,/js等系统默认对html进行压缩,所以可不写html
gzip_vary on|off # 是否传输gzip压缩标志
nginx的缓存设置,可以提高网站的性能,对于网站的图片,尤其是新闻站,图片一旦发布,改动的可能是非常小的,我们希望能否在用户访问一次后,图片缓存在用户的浏览器端,且时间比较长的缓存。这需要用到nginx的expires设置,设置方式:
# 在location或if段里,来写
#格式
expires 30s;
expires 30m;
expires 2h;
expires 30d;

# 注意:服务器的日期要准确,如果服务器的日期落后于实际日期,可能导致缓存失效。
原理是:服务器响应文件内容时,同时响应etag标签(内容的签名,内容一变,它也变)和last_modified_since这两个标签值,浏览器下次请求时,头信息发送这两个标签,服务器检测文件有没有发生变化,若无,直接返回etag,last_modfied_since,浏览器得知内容无改变,于是直接调用本地缓存。这个过程也请求了服务器,但是传递的内容极少,对于变化周期较短的,如静态html,js,css比较适于这个方式。
server {
        listen       80;
        server_name  localhost;

    gzip on;
    gzip_buffers 32 4k;
    gzip_comp_level 6;
    gzip_min_length 200;
    gzip_types text/css application/x-javascript text/plain; # 具体参见mime.types
    gzip_vary on;

   access_log  logs/host.access.log  main;

    location ~ image {
        expires 3m;
            root   /var/www;
            index  index.html index.htm;
        }

    location / {
            root   html;
            index  index.html index.htm;
        }

    }

用nginx做反向代理和负载均衡非常简单,它支持两个用法:1个proxy,1个upstream,分别用来做反向代理,和负载均衡。
以反向代理为例,nginx不自己处理php的相关请求,而是把php的相关请求转发给apache来处理。

这就是传说的“动静分离”,动静分离不是一个严谨的说法,叫反向代理比较规范。
location ~ .php$ {
    proxy_pass   http://127.0.0.1;  # 注意一定要写协议
}
# 如上,只是代理一个服务器,如果你要把任务分给多台机器,那就形成了负载均衡,就不能单单在location写多个proxy_pass了,需要借助upstream
nginx反向代理中在location里proxy_pass只能配置一台服务器,反向代理后端如果有多台服务器,自然可形成负载均衡,但proxy_pass如何指向多台服务器?把多台服务器用upstram指定绑定在一起并起个组名,然后proxy_pass指向该组即可。

默认的负载均衡算法就是针对后端服务器的顺序,逐个请求。也有其他负载均衡算法,如一致性哈希,需要安装第三方模块。
由于我们server是使用nginx作为代理,如果我们的server打印日志信息,那此时请求的ip却不是真实用户的请求ip而是nginx服务器的ip,这是因为对于我们的server来说,nginx就是那个请求者,这样是不利于我们查找真实用户ip的,怎么办呢?其实我们只需要在nginx转发请求的时候把真实用户的ip也传递到后端,后端在获取不就好了吗?使用proxy_set_header指令,将值设置在header里,然后在日志里获取即可。
location / {
    proxy_set_header  X-Forwarded-For  $remote_addr;
    proxy_pass http://dynamic;
}
# 一般约定成俗的是将源ip设置在x-forwarded-for内,因为
log_format  main  'CDN_IP:$remote_addr - CLIENT_IP:$HTTP_CDN_SRC_IP - $remote_user [$time_local] "$request" '
                      '$status $body_bytes_sent "$http_referer" '
                      '"$http_user_agent" "$http_x_forwarded_for" '
# nginx的log_format里已经引用了 x_forwarded_for这个变量,这是nginx约定的。
注意在upstream配置的server里不能是localhost(是一个保留域名),只能是ip或域名(非保留域名)
# 使用案例片段:
http {

    log_format  main  '$remote_addr - $remote_user [$time_local] "$request" '
                      '$status $body_bytes_sent "$http_referer" '
                      '"$http_user_agent" "$http_x_forwarded_for"';

    # 使用默认算法进行负载均衡
    upstream imgserver {
            server 127.0.0.1:81 fail_timeout=5s max_fails=3 weight=1;
        server 127.0.0.1:82 fail_timeout=5s max_fails=3 weight=1;
    }

    # 指定两个虚机分别占用81、82端口
    server {
        listen 81;
        server_name localhost;

        access_log  logs/81-access.log  main;

        root   /var/www;
            index  index.html index.htm;
    }

    server {
        listen 82;
        server_name localhost;

        access_log  logs/82-access.log  main;

        root   /var/www;
            index  index.html index.htm;
    }

    server {
            listen       80;
            server_name  localhost;

             access_log  logs/host.access.log  main;

        location ~ image {
            proxy_set_header  X-Forwarded-For  $remote_addr;
            proxy_pass http://imgserver;
        }

        location / {
                root   html;
                index  index.html index.htm;
            }
    }
}
nginx之间支持对memcached的访问,但对于redis不提供之间支持,如果是将页面等信息之间缓存在memcached之中,下次再次请求nginx时nginx之间从memcached里取出,这就实现了在接入层的直接缓存。[nginx+redis实现接入层高性能缓存技术]
但是对于有多台memcached,某个key去请求哪个memcached?回调php又帮nginx把内容存储在哪个memcached?就以/user2.html为例,a b c d e 5台server,请求谁?回调php,又把user信息写在哪?多台mc时,nginx与php,如何保持集群上的算法同步?
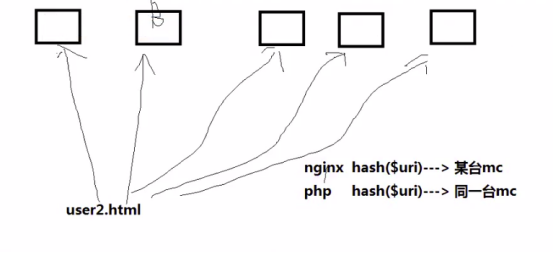
nginx的第三方模块一致性哈希算法解决了这个问题,先看官方简介:ngx_http_upstream_consistent_hash是一个负载平衡器,它使用一个内部一致的哈希环来选择正确的后端节点。它被设计为与memcache兼容。哈希策略= php-memcache模块的一致性。这意味着您可以使用php-memcache模块将值存储到memcached集群中,然后NGINX可以在集群中找到该值并从那里读取它。
nginx下载并安装第三方模块ngx_http_upstream_consistent_hash
cd /usr/local/src
sudo wget https://github.com/replay/ngx_http_consistent_hash/archive/master.zip
unzip master.zip
cd ./ngx_http_consistent_hash-master


# 查看之前nginx安装参数
cd /usr/local/nginx
./nginx  -V
    nginx version: nginx/1.4.2
    built by gcc 7.4.0 (Ubuntu 7.4.0-1ubuntu1~18.04.1)
    TLS SNI support enabled
    configure arguments: --sbin-path=/usr/local/nginx/nginx --conf-path=/usr/local/nginx/nginx.conf --pid-path=/usr/local/nginx/nginx.pid --with-http_ssl_module --with-pcre=/usr/local/src/pcre-8.37 --with-zlib=/usr/local/src/zlib-1.2.11 --with-openssl=/usr/local/src/openssl-1.0.1t

# 重新编译安装nginx
cd /usr/local/src/nginx-1.4.2
# 查看nginx配置参数帮助
./configure --help|grep add
    ...
    --add-module=PATH                  enable an external module

sudo pkill -9 nginx
sudo rm -rf /usr/local/nginx

# 使用--add-module为nginx添加第三方模块
sudo ./configure --sbin-path=/usr/local/nginx/nginx --conf-path=/usr/local/nginx/nginx.conf --pid-path=/usr/local/nginx/nginx.pid --with-http_ssl_module --with-pcre=/usr/local/src/pcre-8.37 --with-zlib=/usr/local/src/zlib-1.2.11 --with-openssl=/usr/local/src/openssl-1.0.1t --add-module=/usr/local/src/ngx_http_consistent_hash-master
# 修改objs目录下的Makefile文件 去除第三行的-Werror
sudo gedit ./objs/Makefile
sudo make && make install
upstream somestream {
  consistent_hash $request_uri;
  server 10.50.1.3:11211;
  server 10.50.1.4:11211;
  server 10.50.1.5:11211;
}

...

server {
  listen       80;
  server_name  localhost;

  location / {
    default_type text/html;
    set $memcached_key $request_uri;
    memcached_pass somestream;
    error_page      500 404 405 = @fallback;
  }

  location @fallback {
    root /srv/www/whatever;
    fastcgi_intercept_errors on;
    error_page 404 = @404;

    set $script $uri;
    set $path_info "";

    include /usr/local/nginx/conf/fastcgi_params;
    fastcgi_param SCRIPT_FILENAME /srv/www/whatever/test.php;
    fastcgi_param SCRIPT_NAME $script;
    fastcgi_param REQUEST_URI $uri;
    fastcgi_pass   127.0.0.1:9000;
  }
}
server {
        ...
        #charset koi8-r;
        access_log  logs/host.access.log  main;
        ...
}
这说明 该serevr,它的访问日志文件是 logs/host.access.log,使用的日志格式是“main”格式,除了main格式,你可以定义其他格式。
# main格式,main格式是我们定义好的一种日志格式,并起个名字便于引用
log_format  main  '$remote_addr - $remote_user [$time_local] "$request" '
                      '$status $body_bytes_sent "$http_referer" '
                      '"$http_user_agent" "$http_x_forwarded_for"';

# 远程ip-远程用户/用户时间 请求方法(如GET/POST) 请求的body长度   referer来源信息
# http-user-agent用户代理/蜘蛛 被转发的请求的原始ip

# 这个referer来源信息是只你是从哪里访问到我这个地址的,可能是百度,google,或者站内地址
# http-user-agent用户可能使用浏览器作为代理去解析response,或其他代理等
修改日志格式只能去修改nginx.conf,不能修改站点default.conf,但可以在站点里复用父类配置
http {
    include       /etc/nginx/mime.types;
    default_type  application/octet-stream;

    log_format  main  'CDN_IP:$remote_addr - CLIENT_IP:$HTTP_CDN_SRC_IP - $remote_user [$time_local] "$request" '
                      '$status $body_bytes_sent "$http_referer" '
                      '"$http_user_agent" "$http_x_forwarded_for" '
                      '(REQUEST TIME:"$request_time") (RESPONSE TIME:"$upstream_response_time")';
     ...
    server {
        ...
    }
}

# log配置时间说明:
$request_time – Full request time, starting when NGINX reads the first byte from the client and ending when NGINX sends the last byte of the response body
$upstream_connect_time – Time spent establishing a connection with an upstream server
$upstream_header_time – Time between establishing a connection to an upstream server and receiving the first byte of the response header
$upstream_response_time – – Time between establishing a connection to an upstream server and receiving the last byte of the response body
# 站点内复用日志配置
server {
      listen       80 default_server
      ;
      listen       [::]:80 default_server;
      server_name  localhost;

      #charset koi8-r;
      # 复用http内的main日志格式
      access_log  /var/log/nginx/host.access.log  main;

      location / {
          include /etc/nginx/uwsgi_params;
          uwsgi_connect_timeout 30;
          uwsgi_pass django;
          root   /usr/share/nginx/html;
          index  index.html index.htm;
      }
实际上使用的是linux定时器+shell脚本【使用USER1信号】
# 知识补充:linux操作系统获取设置日期
$ date # 获取当前日志
Wed Apr 29 13:43:09 CST 2020

$ date -d yesterday # 获取昨天的日期
Tue Apr 28 13:43:24 CST 2020

$ date -d yesterday +%Y%m%d
20200428
-bash-4.2$ pwd
/usr/local/nginx/logs

-bash-4.2$ sudo touch crontab_nginx.sh
-bash-4.2$ sudo vim crontab_nginx.sh
BASEDIR="/usr/local/nginx/logs"

logfile="$BASEDIR/access.log.$(date -d yesterday +%Y%m%d%H%M)"

mv $BASEDIR/host.access.log $logfile

kill -usr1 `cat /usr/local/nginx/nginx.pid`

-bash-4.2$ sudo crontab -e # 编辑一个定时任务,编辑完后会自动启动
*/1 * * * * bash /usr/local/nginx/logs/crontab_nginx.sh

-bash-4.2$ ll
total 624
-rw-r--r--. 1 root   root   8269 Apr 29 14:05 access.log
-rw-r--r--  1 nobody root 428832 Apr 29 15:31 access.log.202004281537
-rw-r--r--  1 nobody root      0 Apr 29 15:37 access.log.202004281538
-rw-r--r--  1 nobody root 143970 Apr 29 15:39 access.log.202004281539
-rw-r--r--  1 nobody root  29325 Apr 29 15:39 access.log.202004281540
-rw-r--r--  1 root   root    179 Apr 29 15:36 crontab_nginx.sh
-rw-r--r--. 1 nobody root  10662 Apr 29 15:38 error.log
-rw-r--r--  1 nobody root      0 Apr 29 15:40 host.access.log
除了使用年月日时分切割日志你还可以按照年月划分目录去存储日志,或者按照文件日期+文件大小切割
# 需要获取今天的日志文件列表,对文件列表里每个文件名分割,对分割后的数组判断
# 如果存在某文件名分割后的长度大于3,直接在原来基础上继续加一,否则取当前日期加.1为后缀
BASEDIR="/usr/local/nginx/logs"

logfile="$BASEDIR/access.log.$(date -d yesterday +%Y%m%d%H%M)"

# 过滤当日日志文件
# ls -a access.log access.log.$(date -d yesterday +%Y%m%d%H)0*

# 获取某个文件的大小
size=`ls -l /usr/local/nginx/logs/host.access.log | awk '{print $5}'`

# 字符串截取
STR="123,45,6ab,c"
FINAL=`echo ${STR: -1}`

# 字符串分割成数组
string="78 9 12"
array=(${string//,/ })

# 数组排序
echo ${array[@]}
array=$(echo ${array[@]} | python -c "print ' '.join(sorted(raw_input().split(' '), key=lambda x:int(x)))")
echo ${array[@]}

# for循环
#for var in ${array[@]}
#do
#   echo $var
#done

# 取数组元素
#echo ${array[-1]}

#echo ${#array[@]}

#echo $FINAL


# if语句
#if [ $size -gt 300]
#then
#  mv $BASEDIR/host.access.log $logfile
#  kill -usr1 `cat /usr/local/nginx/nginx.pid`
1、对于开发人员--合并css,背景图片,减少mysql查询等
2、对于运维nginx的expires,利用浏览器缓存等减少查询
减少请求的操作我们都做好了后,接下来的响应是不可避免的了,接下来该考虑如何更好的响应高并发请求,我们要做的是把工作内容“平均”分给每台服务器,最理想的状态,每台服务器的性能都被充分利用。
/usr/local/httpd/bin/ab --help

# 2000并发请求5000次nginx的首页
/usr/local/httpd/bin/ab -c 2000 -n 5000 http://localhost/index.html
1、socket: Too many open files (24)
2、apr_socket_recv: Connection reset by peer (104)
在Unix系统中将一切都视为文件,无论是硬盘,软盘,打印机器,鼠标,网络请求都当成文件来处理,网络请求的并发超过了系统默认支持的最大打开链接数目,先查看一下系统支持最大打开连接数:
ulimit -a # 查看用户资源使用限制极限
core file size          (blocks, -c) 0
data seg size           (kbytes, -d) unlimited
scheduling priority             (-e) 0
file size               (blocks, -f) unlimited
pending signals                 (-i) 31347
max locked memory       (kbytes, -l) 16384
max memory size         (kbytes, -m) unlimited
open files                      (-n) 1024
pipe size            (512 bytes, -p) 8
POSIX message queues     (bytes, -q) 819200
real-time priority              (-r) 0
stack size              (kbytes, -s) 8192
cpu time               (seconds, -t) unlimited
max user processes              (-u) 30000
virtual memory          (kbytes, -v) unlimited
file locks                      (-x) unlimited
针对ulimit说明:显示(或设置)用户可以使用的资源的限制(limit),这限制分为软限制(当前限制)和
硬限制(上限),其中硬限制是软限制的上限制,应用程序在运行过程中使用的系统资源不超过相应的软限制,任何的超越都导致进程的终止。
对于ulimit参数描述,ulimit不限制用户可以使用的资源,但设置对可打开的最大文件数(max open files)和可同时运行的最大进程数(max user processes)无效。
-a 列出所有当前资源极限
-c 设置core文件的最大值.单位:blocks
-d 设置一个进程的数据段的最大值.单位:kbytes
-f Shell 创建文件的文件大小的最大值,单位:blocks
-h 指定设置某个给定资源的硬极限。如果用户拥有 root 用户权限,可以增大硬极限。任何用户均可减少硬极限
-l 可以锁住的物理内存的最大值
-m 可以使用的常驻内存的最大值,单位:kbytes
-n 每个进程可以同时打开的最大文件数。 n的取值一般为2的指数幂
-p 设置管道的最大值,单位为block,1block=512bytes
-s 指定堆栈的最大值:单位:kbytes
-S 指定为给定的资源设置软极限。软极限可增大到硬极限的值。如果 -H 和 -S 标志均未指定,极限适用于以上二者
-t 指定每个进程所使用的秒数,单位:seconds
-u 可以运行的最大并发进程数
-v Shell可使用的最大的虚拟内存,单位:kbytes
# 我们请求的并发数为2000,而系统允许的最大打开连接数(open files)才1024,所以我们要调大这个参数,调大到多少,看机器的性能
ulimit -n 10000  # 只是在当前命令行临时修改,当命令行被关闭,设置的该值也随即失效。root用户下,是可以设置的。
bash: ulimit: open files: 无法修改 limit 值: 不允许的操作

# 由于我不是root用户,所以我是不能直接设置max open files的,解决办法:
# 查看系统最大打开文件数系统级硬限制:
cat /proc/sys/fs/file-max   # 直接修改这个数可以修改系统预设的硬限制
6553560  #  这个数已经很大了,我们没必要在动

# 1、修改系统预设的预设的硬限制
vi /etc/sysctl.conf  # 在文件最后加入fs.file-max=6553560
sysctl -p # 使修改生效,或者直接修改/proc/sys/fs/file-max也可以修改系统预设的硬限制

# 2、修改系统用户级文件打开数限制
vi /etc/security/limits.conf # 在文件最后加入(这里我只修改了对我自己的限制,使用"*"设置的话则对所有用户生效)
liuwei            soft    nofile            100000   # 文件打开数,用户级软限制,针对liuwei用户
liuwei            hard    nofile            300000  # 文件打开数,用户级硬限制
liuwei            soft    nproc            100000  # 可使用线程数,用户级软限制,与我们要解决的这个问题无关
liuwei            soft    nproc            300000  # 可使用线程数,用户级硬限制,与我们要解决的这个问题无关

# 3、保存;重启系统生效
ulimit -n
1024

ulimit -n 10000
我擦,上面设置的不行,即没有生效,又不让直接设置。最终在这里找到了答案,可能是因为ubuntu的gnome terminal默认是none-login的,所以我们在配置文件中修改并没有影响到当前的terminal,所有我们使用su username登陆后试试
su liuwei

ulimit -n # 这回正常了,是我们之前设置的软链接数目
100000

# 我们su root试试,看看ulimit -n是不是我们设置的10000,发现root下ulimit -n还是1024,因为
# 我们之前修改只是针对liuwei用户并不是*也不是root所以他们并不会影响。
apr_socket_recv这是一个操作系统内核的一个参数,在高并发下,内核会认为系统受到了SYN flood攻击(洪水攻击),会发送cookies(possible SYN flooding on port 80.Sending cookies),这样会减慢影响请求的速度,所以在应用服务器上设置这个参数为0,即禁用系统保护就可以进行大并发量测试了。
vim /etc/sysctl.conf  # 修改net.ipv4.tcp_syncookies=0
sysctl -p

# 还可以直接设置系统运行参数,立即生效,重启系统后失效
echo 0 > /proc/sys/net/ipv4/tcp_syncookies

# 其他内核参数说明
net.ipv4.tcp_max_syn_backlog  # 决定了SYN_RECV状态队列的数量,一般默认值为512或1024,
# 即超过这个数量,系统将不再接受新的TCP连接请求,一定程度上可以防止系统资源耗尽。可根据
# 情况增加该值以接受更多的连接请求。

net.ipv4.tcp_tw_recycle  # 参数决定是否加速TIME_WAIT的sockets,默认为0。

net.ipv4.tcp_tw_reuse # 参数决定是否可将TIME_WAIT状态的sockets用于新的TCP连接
# ,默认为0

net.ipv4.tcp_max_tw_buckets # 参数决定TIME_WAIT状态的sockets总数量,可根据连接
# 数和系统资源需要进行设置。
# 测试使用
/usr/local/httpd/bin$ ./ab -c 100 -n 500 http://10.1.192.130/index.html
This is ApacheBench, Version 2.3 <$Revision: 1874286 $>
Copyright 1996 Adam Twiss, Zeus Technology Ltd, http://www.zeustech.net/
Licensed to The Apache Software Foundation, http://www.apache.org/

Benchmarking 10.1.192.130 (be patient)
Completed 100 requests
Completed 200 requests
Completed 300 requests
Completed 400 requests
Completed 500 requests
Finished 500 requests


Server Software:        nginx/1.18.0
Server Hostname:        10.1.192.130
Server Port:            80

Document Path:          /index.html
Document Length:        612 bytes

Concurrency Level:      100 # 并发数
Time taken for tests:   2.268 seconds # 总耗时
Complete requests:      500 # 500 个请求
Failed requests:        0  # 0个错误
Total transferred:      422500 bytes
HTML transferred:       306000 bytes
Requests per second:    220.49 [#/sec] (mean)
Time per request:       453.539 [ms] (mean)
Time per request:       4.535 [ms] (mean, across all concurrent requests)
Transfer rate:          181.95 [Kbytes/sec] received

Connection Times (ms)
              min  mean[+/-sd] median   max
Connect:        9  169 289.9     77    1123
Processing:    14  163 168.3     99    1331
Waiting:        8  162 168.3     98    1331
Total:         22  332 338.6    197    1821

Percentage of the requests served within a certain time (ms)
  50%    197
  66%    228
  75%    422
  80%    469
  90%    795  # 90%的请求在1秒内完成了
  95%   1161
  98%   1247
  99%   1809
 100%   1821 (longest request)
nginx的观察统计模块,方便我们观察每时每刻到底有多少并发多少等待,便于我们调优,使用的是--with-http_stub_status_module,使用/usr/sbin/nginx -V查看是否安装了这个模块,如果没安装安装。
server {
    listen     localhost:80;

    location /status {
        stub_status on; # 开启统计模块
        access_log off;   # 禁止日志
        allow 127.0.0.1; # 允许访问的ip,其他的ip一律禁止
        deny all;
    }
}
分析:对于nginx请求无非是读取mysql或磁盘上的html等文件,那就必须要有两个步骤要走,1、建立socket连接。2、打开文件。
要建立socket连接,要考虑两个硬性的限制,第一你的socket连接能不能建立这么多,你的内存是不是足够大,因为socket连接上的信息在内存维护着。
打开文件并沿socket返回,要考虑操作系统允不允许你打开那么多文件,默认状况下,一个进程同时只能打开1024个文件。
高并发无非就是能建立足够多的socket和打开足够多的文件,还有就是你的网卡,万兆以太网能撑得住流量。
排查问题,也要注意观察这两点,主要从系统的dmesg和nginx的error.log来观察。

# socket
  # 系统层面
      #1、 最大连接数 somaxconn   打开足够多的连接【餐馆:把座位搞得足够多】
      #2、加快tcp连接的回收 recycle    有人用完了连接快速回收【餐馆里来人坐下吃饭,服务员在催吃完快走】
      #3、空的tcp连接是否允许回收利用 reuse   【有人点餐没来的急吃饭或不吃了,这个座位立刻被回收利用】
      #2、洪水攻击-不做洪水攻击 【来的客人越多越好,不做洪水抵御】
  # nginx层面
      # 子进程允许打开的连接(worker_connections)

# 文件
    #nginx层面
        #1、子进程允许打开的文件 worker_limit_nofile    一个子进程最大能打开多少个文件

  #系统层面
      #1、ulimit -n 设一个比较大的值
keep_alivetime  0;  # 高并发下,tcp连接非常珍贵,在http1.1中为了防止频繁的握手,会保持着一个tcp连接,在这个连接之上可能还会继续请求
# 一些css,js等其它连接,在nginx中这个keep_alivetime默认为65s,也就是说在高并发下,tcp资源这么珍贵的情况下,它不仅占着,还一直保持
# 着65s的连接。所以在高并发下建议讲该值设置为2s以下。
worker_limit_nofile 10000   # 全局区配置
event {
    worker_connections 10240;
}
ulimit -n 30000  # 设置最大文件连接数目,uninx把一切都当做文件,包括网络链接也认为是文件,所以要设置足够大的链接数目
cat 10000 > /proc/sys/net/core/somaxconn
cat 1 > /proc/sys/net/ipv4/tcp_tw_recycle
cat 1 > /proc/sys/net/ipv4/tcp_tw_reuse
cat 0 > /proc/sys/net/ipv4/tcp_tw_syncookies
# 客户端要求也能撑得住
ulimit
upstream timed out (110: Connection timed out) while reading response header from upstream
https://blog.csdn.net/u014218983/article/details/81217032
https://www.cnblogs.com/succour/p/6305574.html
server {
    listen       80;
    server_name  XXX.rong360.com;

    large_client_header_buffers 4 16k;     # 读取大型客户端请求头的缓冲区的最大数量和大小
    client_max_body_size 300m;     #设置nginx能处理的最大请求主体大小。
    client_body_buffer_size 128k;  #请求主体的缓冲区大小。
    proxy_connect_timeout 600;
    proxy_read_timeout 600;
    proxy_send_timeout 600;
    proxy_buffer_size 64k;
    proxy_buffers   4 32k;
    proxy_busy_buffers_size 64k;
    proxy_temp_file_write_size 64k;

    ……
    location / {
        uwsgi_send_timeout 600;        # 指定向uWSGI传送请求的超时时间,完成握手后向uWSGI传送请求的超时时间。
        uwsgi_connect_timeout 600;   # 指定连接到后端uWSGI的超时时间。
        uwsgi_read_timeout 600;        # 指定接收uWSGI应答的超时时间,完成握手后接收uWSGI应答的超时时间。
        ……
    }
在测试环境使用k8s部署的时候,当启动一个nginx,在启动十个server容器时,正常建立请求是没问题的,但是我现在关闭九个server容器,支流一个时,我再次发请求就出现了以下情况:

响应时间打印了10个,我刚才是关闭了九个server容器的,但是nginx依旧没反应过来,还把请求往我那关闭的容器里发,导致请求不到耗时超长,nginx再次转发到其他容器,直到有一个容器响应了为止。解决办法:重新部署nginx+重新部署server