1.spring boot 的自动配置提供的方便快捷的数据库操作服务,只需要进行少量配置即可连接数据库。spring boot 在org.springframework.boot.autoconfigure.jdbc.DataSourceConfiguration 配置了多种数据源
(1)org.apache.tomcat.jdbc.pool.DataSource
(2)com.zaxxer.hikari.HikariDataSource
(3)org.apache.commons.dbcp.BasicDataSource
(4)org.apache.commons.dbcp2.BasicDataSource
默认使用的是org.apache.tomcat.jdbc.pool.DataSource,除了这几种数据源之外我们也可以添加其它的数据源。这几个数据源之间通过全局配置文件的spring.datasource.type配置进行切换。
2.我们使用默认的方式来访问数据库
(1)在全局配置文件中配置数据库相关信息,就可以完成数据源的简单配置
spring.datasource.url=jdbc:mysql://localhost:3306/stock
spring.datasource.username=root
spring.datasource.password=1q2w3e
spring.datasource.driver-class-name=com.mysql.jdbc.Driver
(2)接下来使用JdbcTemplate 来访问数据库
@Controller
public class EmpController {
    @Autowired
    JdbcTemplate jdbcTemplate;

    @GetMapping("/getEmp")
    @ResponseBody
    public List<Map<String, Object>> getEmp() {
        List<Map<String, Object>> list =jdbcTemplate.queryForList("select * from stock_code");
        return list;
    }
}
(3)输出结果

3.在实际项目开发中往往不会使用默认的方式连接数据库,我们需要的是一些高性能的连接池,下面我们就来将默认的方式切换为使用阿里的druid连接池工具。
(1)修改配置文件中的数据源类型,并添加druid的其他配置
spring:
  datasource:
    url: jdbc:mysql://localhost:3306/stock
    username: root
    password: 1q2w3e
    driver-class-name: com.mysql.jdbc.Driver
    type: com.alibaba.druid.pool.DruidDataSource

    initialSize: 5
    minIdle: 5
    maxActive: 20
    maxWait: 60000
    timeBetweenEvictionRunsMillis: 60000
    minEvictableIdleTimeMillis: 300000
    validationQuery: SELECT 1 FROM DUAL
    testWhileIdle: true
    testOnBorrow: false
    testOnReturn: false
    poolPreparedStatements: true
    #配置监控统计拦截的filters,去掉后监控界面sql无法统计,'wall'用于防火墙
    filters: stat,wall,log4j
    maxPoolPreparedStatementPerConnectionSize: 20
    useGlobalDataSourceStat: true
    connectionProperties: druid.stat.mergeSql=true;druid.stat.slowSqlMillis=500
(2)将druid数据源添加到容器中,并将配置属性值注入(关于配置属性注入可以参考第5篇的相关介绍)和配置druid的应用监控统计功能。
package com.springboot.config;

import java.util.Arrays;
import java.util.HashMap;
import java.util.Map;

import javax.sql.DataSource;

import org.springframework.boot.context.properties.ConfigurationProperties;
import org.springframework.boot.web.servlet.FilterRegistrationBean;
import org.springframework.boot.web.servlet.ServletRegistrationBean;
import org.springframework.context.annotation.Bean;
import org.springframework.context.annotation.Configuration;

import com.alibaba.druid.pool.DruidDataSource;
import com.alibaba.druid.support.http.StatViewServlet;
import com.alibaba.druid.support.http.WebStatFilter;

@Configuration
public class DruidConfig {

    @ConfigurationProperties(prefix="spring.datasource")
    @Bean
    public DataSource druid() {
        return new DruidDataSource();
    }


    //配置druid监控管理管理后台的Servlet
    @Bean
    public ServletRegistrationBean statViewServlet(){
        ServletRegistrationBean bean = new ServletRegistrationBean(new StatViewServlet(), "/druid/*");
        Map<String,String> initParams = new HashMap<String,String>();

        initParams.put("loginUsername","admin");
        initParams.put("loginPassword","123456");
        initParams.put("allow","");//默认就是允许所有访问
        initParams.put("deny","192.168.1.251");

        bean.setInitParameters(initParams);
        return bean;
    }


    //配置一个druid统计监控范围的filter
    @Bean
    public FilterRegistrationBean webStatFilter(){
        FilterRegistrationBean bean = new FilterRegistrationBean();
        bean.setFilter(new WebStatFilter());

        Map<String,String> initParams = new HashMap<>();
        initParams.put("exclusions","*.js,*.css,/druid/*");

        bean.setInitParameters(initParams);

        bean.setUrlPatterns(Arrays.asList("/*"));

        return  bean;
    }
}
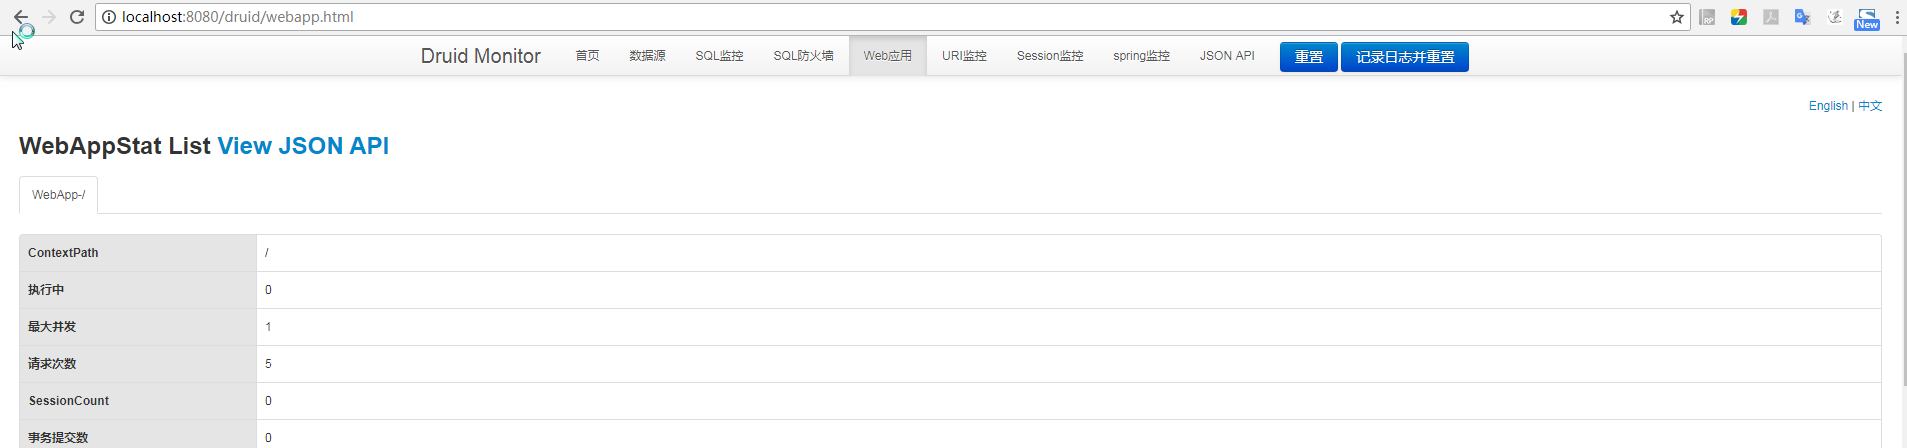
(3)运行结果

durid监控管理后台