实验三 敏捷开发与XP实践 http://www.cnblogs.com/rocedu/p/4795776.html, Eclipse的内容替换成IDEA
参考 http://www.cnblogs.com/rocedu/p/6371315.html#SECCODESTANDARD 安装alibaba 插件,解决代码中的规范问题。
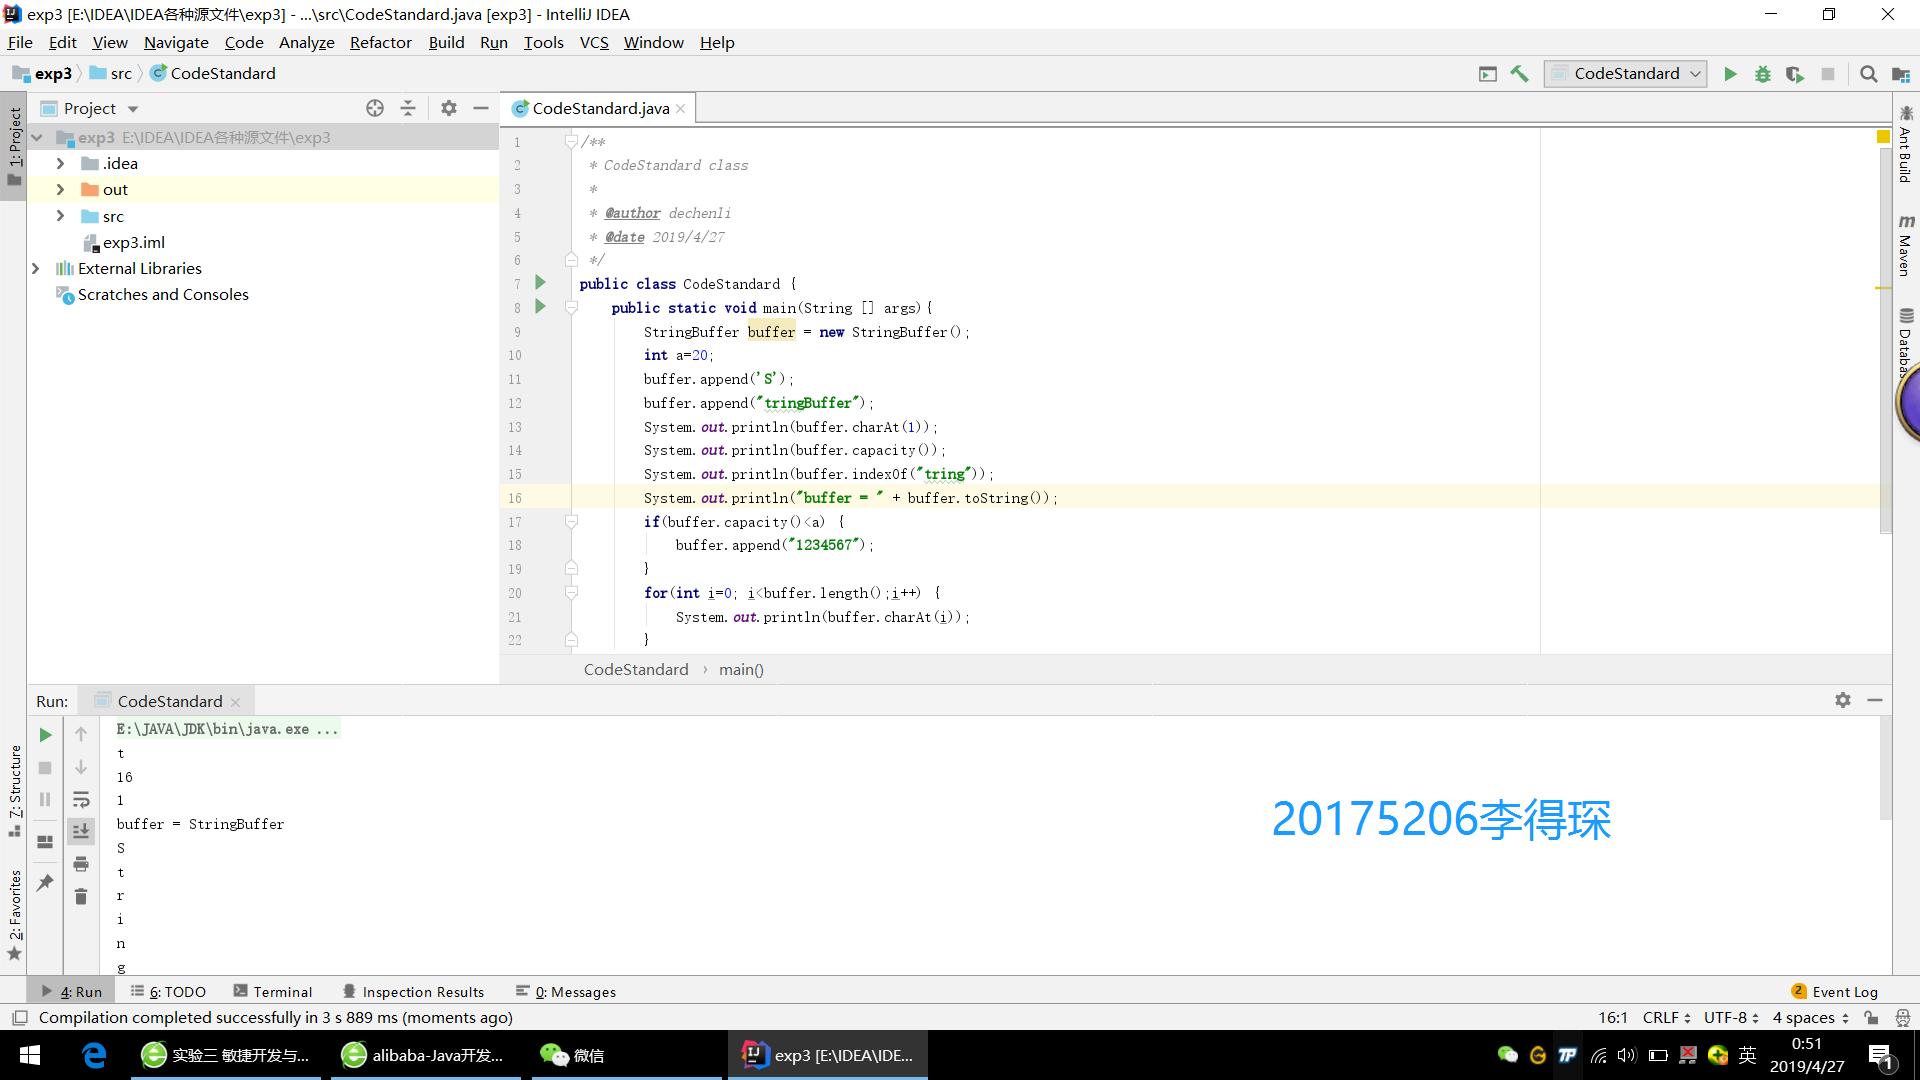
在IDEA中使用工具(Code->Reformate Code)把下面代码重新格式化,再研究一下Code菜单,找出一项让自己感觉最好用的功能。提交截图,加上自己学号水印。
老师提供的源代码:
public class CodeStandard {
public static void main(String [] args){
StringBuffer buffer = new StringBuffer();
buffer.append('S');
buffer.append("tringBuffer");
System.out.println(buffer.charAt(1));
System.out.println(buffer.capacity());
System.out.println(buffer.indexOf("tring"));
System.out.println("buffer = " + buffer.toString());
if(buffer.capacity()<20)
buffer.append("1234567");
for(int i=0; i<buffer.length();i++)
System.out.println(buffer.charAt(i));
}
}
实验步骤
1.首先右键单击你想要格式化的文件,然后看到下面有编码规约扫描的选项,点击后根据block/critical/major三种提示进行代码格式化的操作。
规范后的代码如下
/**
 * CodeStandard class
 *
 * @author dechenli
 * @date 2019/4/27
 */
public class CodeStandard {
    public static void main(String[] args) {
        StringBuffer buffer = new StringBuffer();
        int a = 20;
        buffer.append('S');
        buffer.append("tringBuffer");
        System.out.println(buffer.charAt(1));
        System.out.println(buffer.capacity());
        System.out.println(buffer.indexOf("tring"));
        System.out.println("buffer = " + buffer.toString());
        if (buffer.capacity() < a) {
            buffer.append("1234567");
        }
        for (int i = 0; i < buffer.length(); i++) {
            System.out.println(buffer.charAt(i));
        }
    }
}
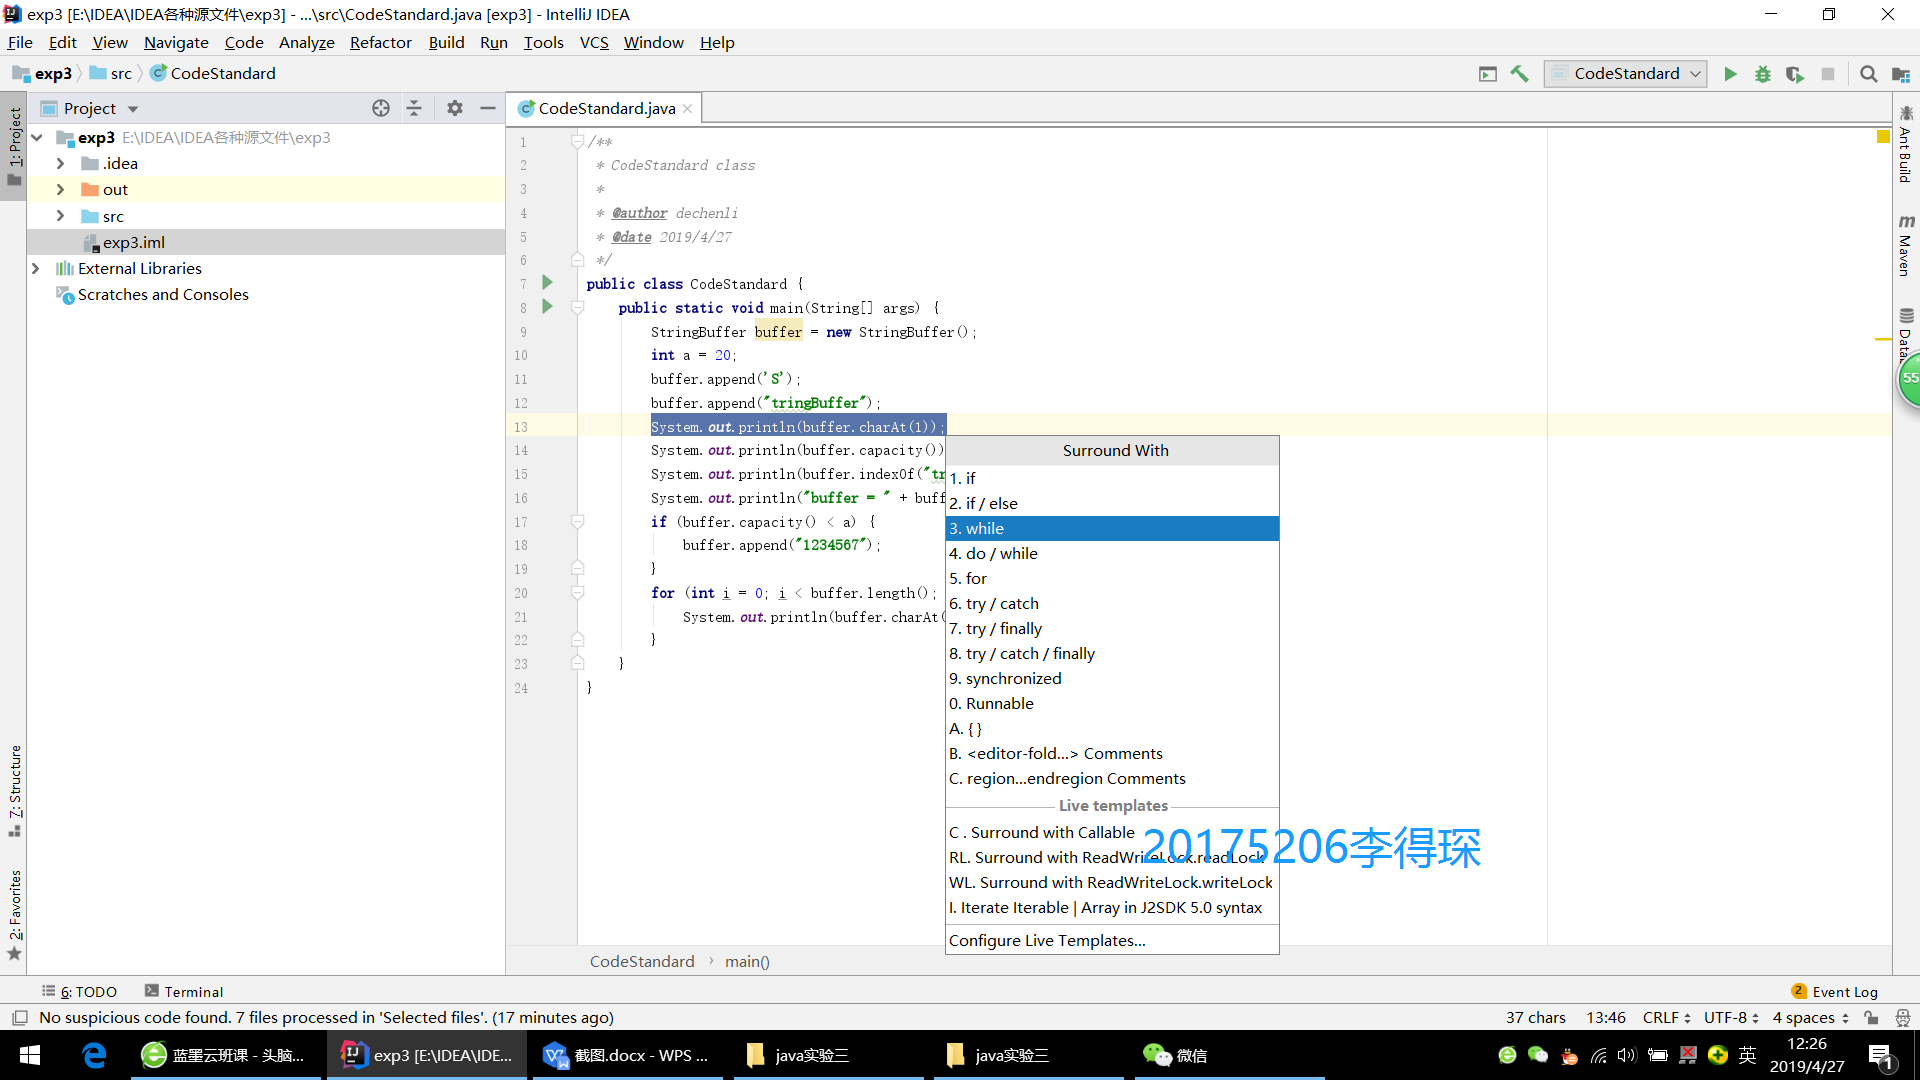
2.点击Code>后进行功能查找,寻找出自己感觉最好用的功能。
Move Statement Down(Ctrl + Shift + 向下箭头):方法、代码上移
Move Statement Up ( Ctrl + Shift + 向上箭头):方法、代码上移
Override Methods(Ctrl+O):重载基本类
Comment with Line Comment(Ctrl+/):本行变成注释
Comment with Block Comment(Ctrl+Shift+/):将选中的代码块变成注释
Surround with(Ctrl+Alt+T):使用if-else、for、while等语句
- Java中的一般的命名规则有:
1.要体现各自的含义
2.包、类、变量用名词
3.方法名用动宾
4.包名全部小写,如:io,awt
5.类名第一个字母要大写,如:HelloWorldApp
6.变量名第一个字母要小写,如:userName
7.方法名第一个字母要小写:setName
实验截图
-
格式化后的代码
-
以Surround with 为例进行截图
实验三 敏捷开发与XP实践-2
在码云上把自己的学习搭档加入自己的项目中,确认搭档的项目加入自己后,下载搭档实验二的Complex代码,加入不少于三个JUnit单元测试用例,测试成功后git add .; git commit -m "自己学号 添加内容";git push;
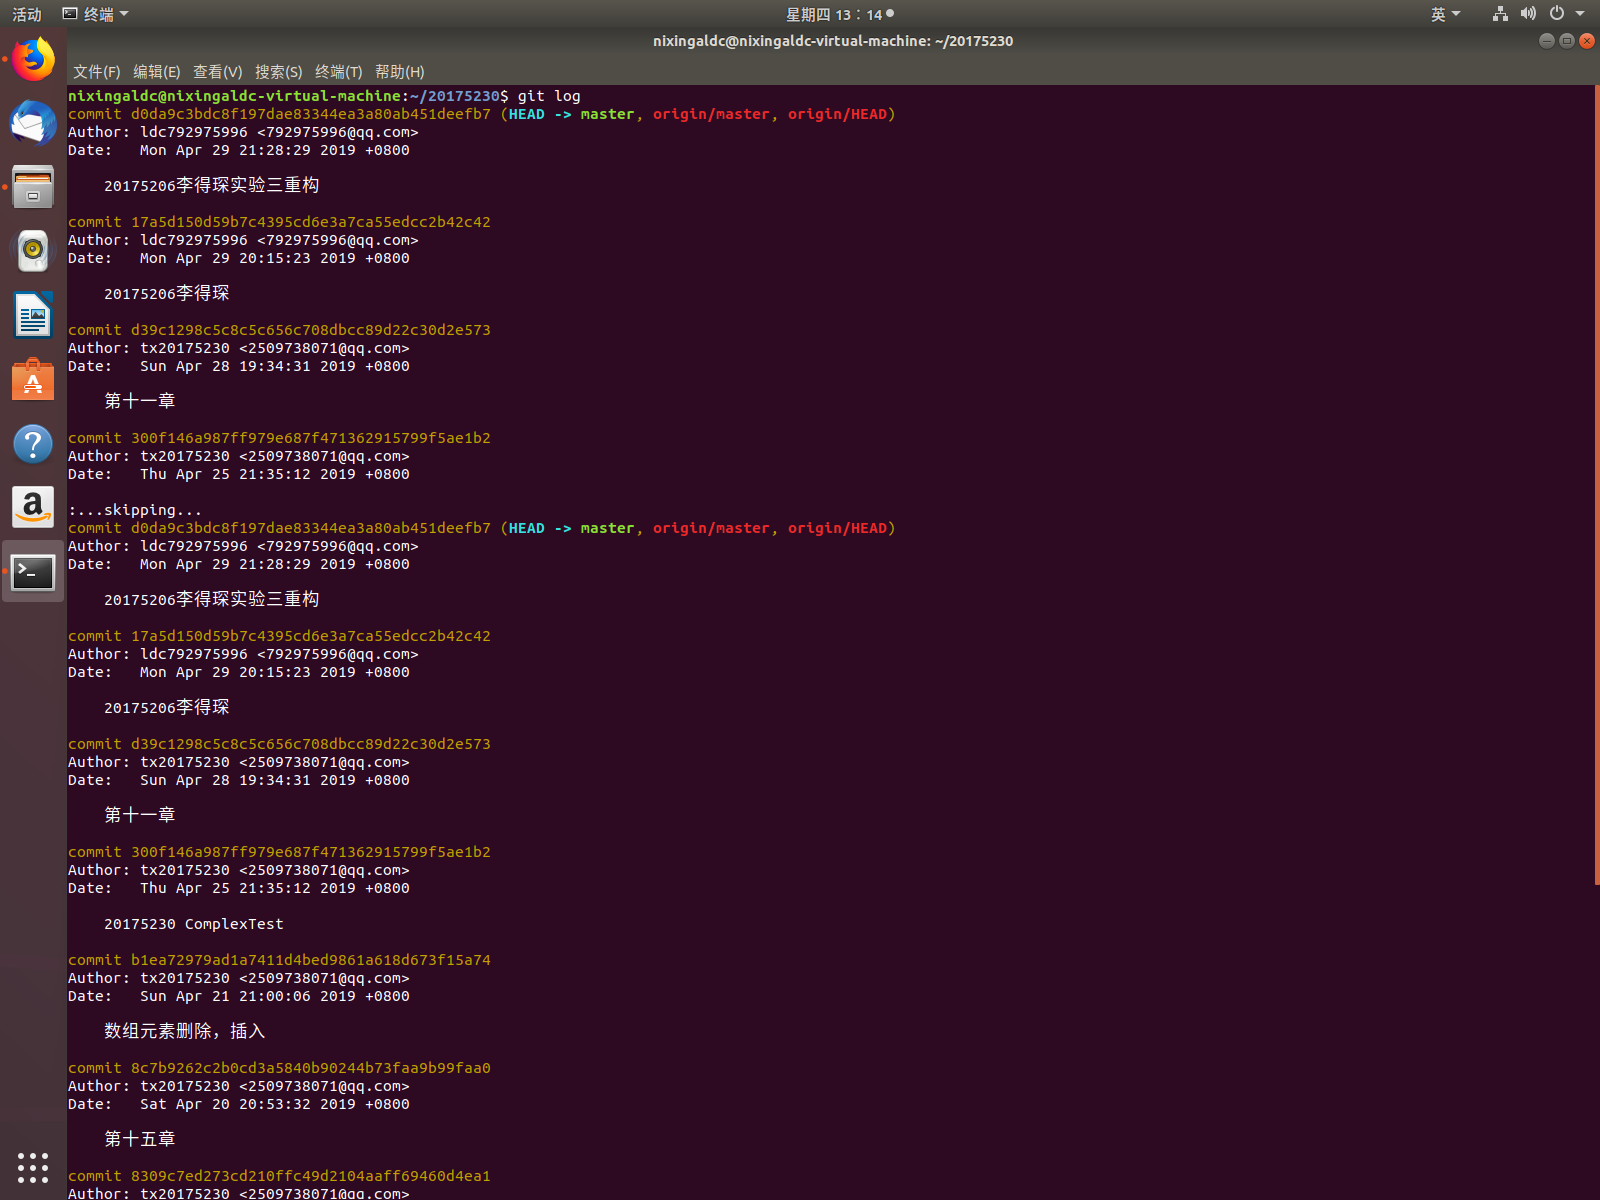
提交搭档项目git log的截图,包含上面git commit的信息,并加上自己的学号水印信息。
实验步骤
1.在码云上仓库中进入管理,点击开发者选项,复制网址并发送到搭档的消息中去,搭档登录码云,同意后即可进行代码的开发与使用,在操作的时候,使用git clone +搭档码云即可将搭档的仓库克隆到本地文件当中
2.复制搭档实验二Complex的代码,加入Junit单元测试用例。
所测试的代码
import org.junit.Test;
import junit.framework.TestCase;
public class ComplexTest extends TestCase {
    Complex c1 = new Complex(1, 3);
    Complex c2 = new Complex(-2, -1);
    Complex c3 = new Complex(2,3);
    @Test
    public void testgetshibu() throws Exception {
        assertEquals(-2.0, Complex.getshibu(-2.0));
        assertEquals(6.0, Complex.getshibu(6.0));
        assertEquals(0.0, Complex.getshibu(0.0));
    }
    @Test
    public void testgetxubu() throws Exception {
        assertEquals(-2.0, Complex.getxubu(-2.0));
        assertEquals(6.0, Complex.getxubu(6.0));
        assertEquals(0.0, Complex.getxubu(0.0));
    }
    @Test
    public void testComplexAdd() throws Exception {
        assertEquals("-1.0+2.0i", c1.ComplexAdd(c2).toString());
        assertEquals("3.0+6.0i", c1.ComplexAdd(c3).toString());
        assertEquals("0.0+2.0i", c2.ComplexAdd(c3).toString());
    }
    @Test
    public void testComplexSub() throws Exception {
        assertEquals("3.0+4.0i", c1.ComplexSub(c2).toString());
        assertEquals("-1.0", c1.ComplexSub(c3).toString());
        assertEquals("-4.0 -4.0i", c2.ComplexSub(c3).toString());
    }
    @Test
    public void testComplexMulti() throws Exception {
        assertEquals("1.0 -7.0i", c1.ComplexMulti(c2).toString());
        assertEquals("-7.0+9.0i", c1.ComplexMulti(c3).toString());
        assertEquals("-1.0 -8.0i", c2.ComplexMulti(c3).toString());
    }
    @Test
    public void testComplexComplexDiv() throws Exception {
        assertEquals("-1.4 -1.0i", c1.ComplexDiv(c2).toString());
        assertEquals("0.6923076923076923+0.8461538461538461i", c1.ComplexDiv(c3).toString());
        assertEquals("-0.6153846153846154 -0.5384615384615384i", c2.ComplexDiv(c3).toString());
    }
    @Test
    public void testComplexComplexFix() throws Exception {
        assertEquals("-7.0 -1.25i", c1.ComplexFix(c2).toString());
        assertEquals("1.0+2.75i", c1.ComplexFix(c3).toString());
        assertEquals("-0.8888888888888888 -1.75i", c2.ComplexFix(c3).toString());
    }
    @Test
    public void testComplexComplexFixsecond() throws Exception {
        assertEquals("-1.6666666666666667+2.0i", c1.ComplexFixsecond(c2).toString());
        assertEquals("-0.6+18.0i", c1.ComplexFixsecond(c3).toString());
        assertEquals("-0.8+12.0i", c2.ComplexFixsecond(c3).toString());
    }
}
所使用的Junit用例ComplexFix ComplexFixsecond ComplexFixthird
实验截图
-
测试后的Junit用例

-
上传到搭档码云

-
git log
代码链接
实验三 敏捷开发与XP实践-3
实验三 敏捷开发与XP实践 http://www.cnblogs.com/rocedu/p/4795776.html, Eclipse的内容替换成IDEA
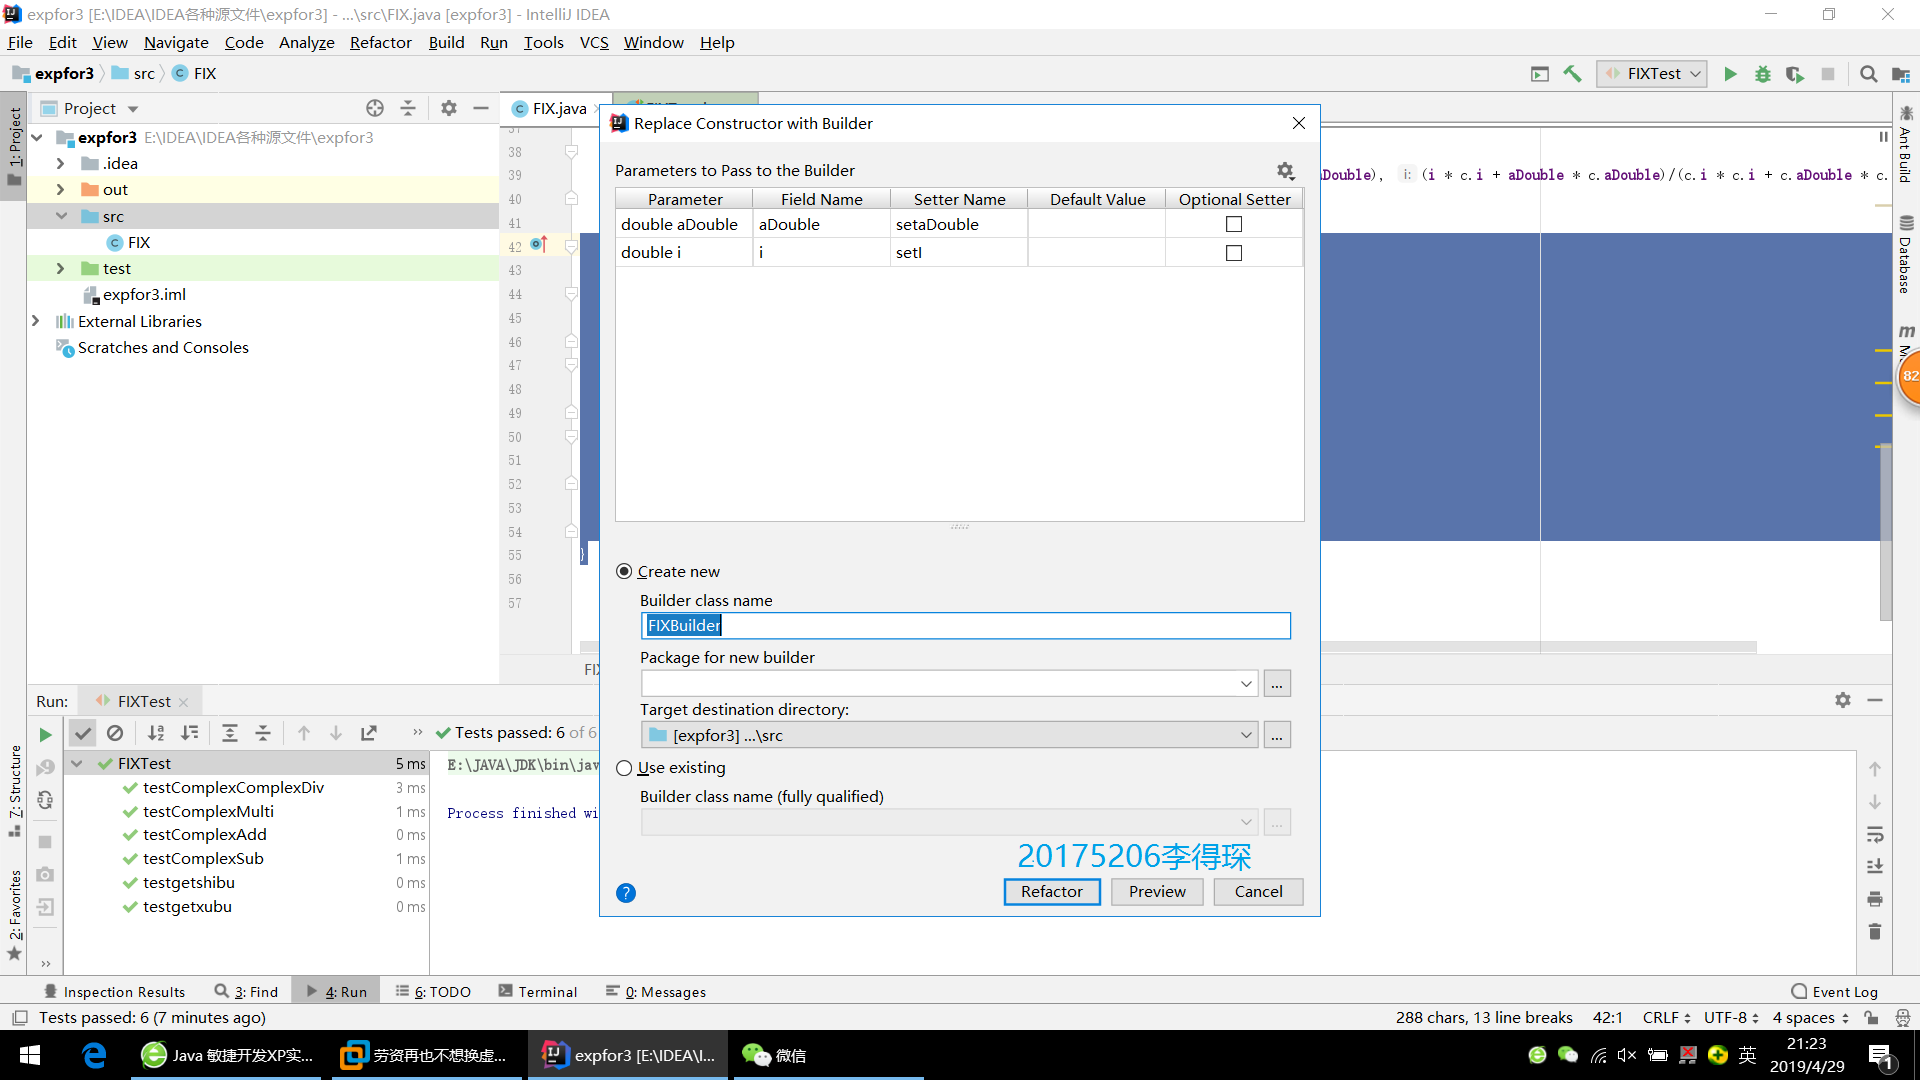
完成重构内容的练习,下载搭档的代码,至少进行三项重构,提交重构后代码的截图,加上自己的学号水印。提交搭档的码云项目链接。
实验步骤
1.重构(Refactor),就是在不改变软件外部行为的基础上,改变软件内部的结构,使其更加易于阅读、易于维护和易于变更 。
2.重构refactor>可以使得代码的到质地般的提高与升华
- 重构的功能
增加新功能;
原有功能有BUG;
改善原有程序的结构;
优化原有系统的性能 。
在试验用例中,这一点可以得到清晰地体现
- 源代码
public class Complex{
    private double r;
    private double i;

    public Complex(double r, double i) {
        this.r = r;
        this.i = i;
    }

    public static double getshibu(double r) {
        return r;
    }

    public static double getxubu(double i) {
        return i;
    }

    public Complex ComplexAdd(Complex c) {
        return new Complex(r + c.r, i + c.i);
    }
    public Complex ComplexSub(Complex c) {
        return new Complex(r - c.r, i - c.i);
    }
    public Complex ComplexMulti(Complex c) {
        return new Complex(r * c.r - i * c.i, r * c.i + i * c.r);
    }
    public Complex ComplexDiv(Complex c) {
        return new Complex((r * c.i + i * c.r)/(c.i * c.i + c.r * c.r), (i * c.i + r * c.r)/(c.i * c.i + c.r * c.r));
    }
    public Complex ComplexFix(Complex c) {
        return new Complex((r * c.i + i * c.r)/(c.i * c.i ), (i * c.i + r * c.r)/(c.r * c.r));
    }
    public Complex ComplexFixsecond(Complex c) {
        return new Complex((r * c.i -i * c.r)/(c.i * c.i - c.r * c.r), (c.i + r * c.r)+(c.i * c.i + c.r * c.r));
    }
    public String toString() {
        String s = " ";
        if (i > 0)
            s =  r + "+" + i + "i";
        if (i == 0)
            s =  r + "";
        if (i < 0)
            s = r + " " + i + "i";
        return s;
    }
}
重构后的代码
/**
 * Demo class
 *
 * @author ldc20175206&&tx20175230
 * @date 2019/4/29
 */
@SuppressWarnings("ALL")
public class FIX {
    private double aDouble;
    private double i;

    public FIX(double aDouble, double i) {
        this.aDouble = aDouble;
        this.i = i;
    }

    public static double getshibu(double r) {
        return r;
    }

    public static double getxubu(double i) {
        return i;
    }

    @SuppressWarnings("AlibabaLowerCamelCaseVariableNaming")
    public FIX ComplexAdd(FIX c) {
        return new FIXBuilder().setaDouble(aDouble + c.aDouble).setI(i + c.i).createFIX();
    }
    @SuppressWarnings("AlibabaLowerCamelCaseVariableNaming")
    public FIX ComplexSub(FIX c) {
        return new FIXBuilder().setaDouble(aDouble - c.aDouble).setI(i - c.i).createFIX();
    }
    @SuppressWarnings("AlibabaLowerCamelCaseVariableNaming")
    public FIX ComplexMulti(FIX c) {
        return new FIXBuilder().setaDouble(aDouble * c.aDouble - i * c.i).setI(aDouble * c.i + i * c.aDouble).createFIX();
    }
    @SuppressWarnings("AlibabaLowerCamelCaseVariableNaming")
    public FIX ComplexDiv(FIX c) {
        return new FIXBuilder().setaDouble((aDouble * c.i + i * c.aDouble) / (c.i * c.i + c.aDouble * c.aDouble)).setI((i * c.i + aDouble * c.aDouble) / (c.i * c.i + c.aDouble * c.aDouble)).createFIX();
    }
    @Override
    public String toString() {
        String s = " ";
        if (i > 0) {
            s =  aDouble + "+" + i + "i";
        }
        if (i == 0) {
            s =  aDouble + "";
        }
        if (i < 0) {
            s = aDouble + " " + i + "i";
        }
        return s;
    }
}


public class FIXBuilder {
    private double aDouble;
    private double i;

    public FIXBuilder setaDouble(double aDouble) {
        this.aDouble = aDouble;
        return this;
    }

    public FIXBuilder setI(double i) {
        this.i = i;
        return this;
    }

    public FIX createFIX() {
        return new FIX(aDouble, i);
    }
}
由此可以得出结论,重构之后,代码功能不变,但代码会显得较为高级且实用。
实验截图
-
Complex的转换,Fix的生成

-
编码规范扫描的重构过程

-
FixBuilder的建立
-
重构上传到搭档码云上的文件

代码链接
实验三 敏捷开发与XP实践-4
参考 http://www.cnblogs.com/rocedu/p/6683948.html,以结对的方式完成Java密码学相关内容的学习,结合重构,git,代码标准。
提交学习成果码云链接和代表性成果截图,要有学号水印。
实验步骤
维吉尼亚算法简介:
第一行代表明文字母,第一列代表密钥字母,它的明码表后有26个密码表,每个表相对前一个发生一次移位。
如果只用其中某一个进行加密,那么只是简单的恺撒移位密码。但用方阵中不同的行加密不同的字母,它就是一种强大的密码了。
加密者可用第7行来加密第一个字母,再用第25行来加密第二个字母,然后根据第8行来加密第三个字母等。
加密算法:ci = E(mi) = (mi+ki) mod 26
解密算法:mi = D(ci) = (ci-ki) mod 26
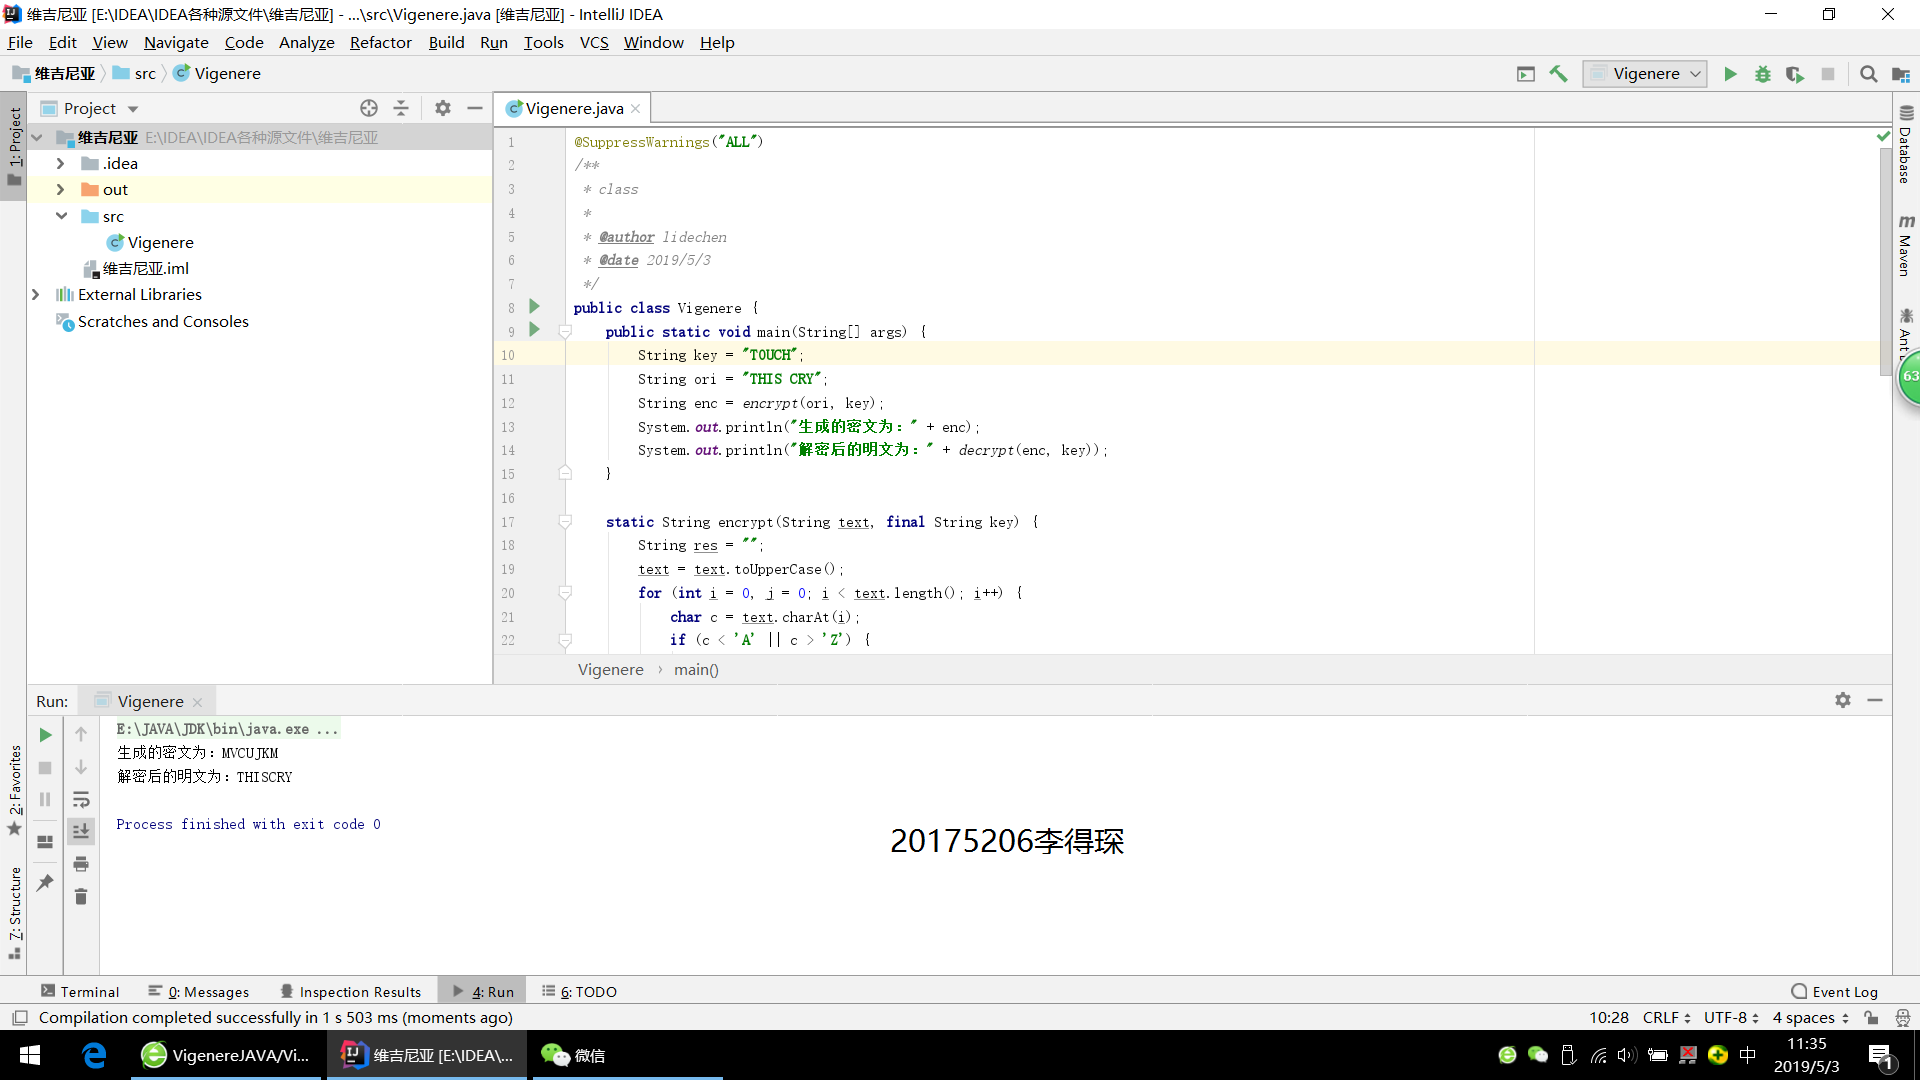
- 处理之后的代码
@SuppressWarnings("ALL")
/**
 * class
 *
 * @author lidechen
 * @date 2019/5/3
 */
public class Vigenere {
    public static void main(String[] args) {
        String key = "TOUCH";
        String ori = "THIS CRY";
        String enc = encrypt(ori, key);
        System.out.println("生成的密文为:" + enc);
        System.out.println("解密后的明文为:" + decrypt(enc, key));
    }

    static String encrypt(String text, final String key) {
        String res = "";
        text = text.toUpperCase();
        for (int i = 0, j = 0; i < text.length(); i++) {
            char c = text.charAt(i);
            if (c < 'A' || c > 'Z') {
                continue;
            }
            res += (char) ((c + key.charAt(j) - 2 * 'A') % 26 + 'A');
            j = ++j % key.length();
        }
        return res;
    }

    static String decrypt(String text, final String key) {
        String res = "";
        text = text.toUpperCase();
        for (int i = 0, j = 0; i < text.length(); i++) {
            char c = text.charAt(i);
            if (c < 'A' || c > 'Z') {
                continue;
            }
            res += (char) ((c - key.charAt(j) + 26) % 26 + 'A');
            j = ++j % key.length();
        }
        return res;
    }
}
实验截图
-
源代码

-
重构以及编码规格扫描中

-
完成后的代码
代码链接
总结分析
| 步骤 | 耗时 | 百分比 |
|---|---|---|
| 需求分析 | 10min | 12.5% |
| 设计 | 5min | 6.25% |
| 代码实现 | 30min | 37.5% |
| 测试 | 15min | 18.75% |
| 分析总结 | 20min | 25% |