一。安装Mysql服务端与Navicat Premium客户端
参见博客:https://blog.csdn.net/wtdask/article/details/79025674
安装mysql服务端:
Step1:使用brew命令安装 ($ brew install mysql)
安装完结果:
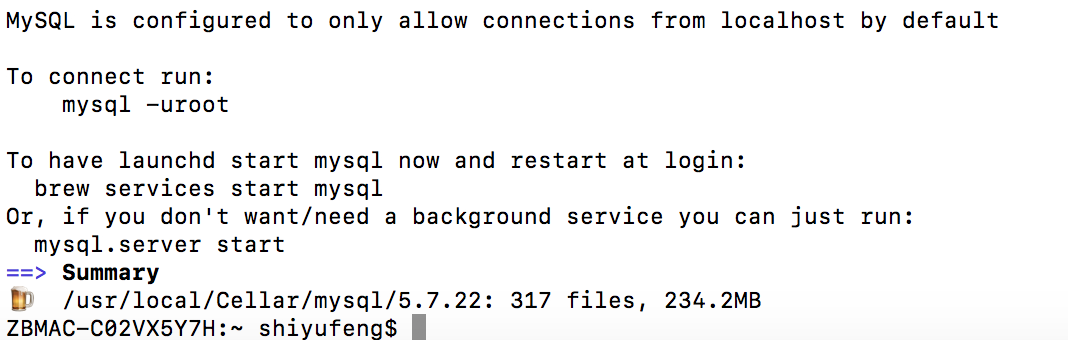
安装完成后:
1。启动mysql数据库
$ bash mysql.server start
$ sudo bash mysql.server start
![]()
注意:此时可能会报错:

此原因为:权限问题导致,可以应用下列命令修改权限。
sudo chmod -R a+rwx /usr/local/var/mysql
再执行
sudo mysql.server start
显示启动成功!

2。连接mysql数据库
mysql应用brew安装成功后,不需要密码,直接使用命令即可登录
$ mysql -uroot
修改,增加密码设置,输入如下命令
$ mysql_secure_installation
说明:
运行mysql_secure_installation会执行几个设置:
【1】。为root用户设置密码
【2】。删除匿名账号
【3】。取消root用户远程登录
【4】。删除test库和对test库的访问权限
【5】。刷新授权表使修改生效
代码如下:


 1 [root@server1 ~]# mysql_secure_installation
 2
 3 NOTE: RUNNING ALL PARTS OF THIS SCRIPT IS RECOMMENDED FOR ALL MySQL
 4
 5 SERVERS IN PRODUCTION USE! PLEASE READ EACH STEP CAREFULLY!
 6
 7 In order to log into MySQL to secure it, we'll need the current
 8
 9 password for the root user. If you've just installed MySQL, and
10
11 you haven't set the root password yet, the password will be blank,
12
13 so you should just press enter here.
14
15 Enter current password for root (enter for none):<–初次运行直接回车
16
17 OK, successfully used password, moving on…
18
19 Setting the root password ensures that nobody can log into the MySQL
20
21 root user without the proper authorisation.
22
23 Set root password? [Y/n]<– 是否设置root用户密码,输入y并回车或直接回车
24
25 New password:<– 设置root用户的密码
26
27 Re-enter new password:<– 再输入一次你设置的密码
28
29 Password updated successfully!
30
31 Reloading privilege tables..
32
33 … Success!
34
35 By default, a MySQL installation has an anonymous user, allowing anyone
36
37 to log into MySQL without having to have a user account created for
38
39 them. This is intended only for testing, and to make the installation
40
41 go a bit smoother. You should remove them before moving into a
42
43 production environment.
44
45 Remove anonymous users? [Y/n]<– 是否删除匿名用户,生产环境建议删除,所以直接回车
46
47 … Success!
48
49 Normally, root should only be allowed to connect from 'localhost'. This
50
51 ensures that someone cannot guess at the root password from the network.
52
53 Disallow root login remotely? [Y/n]<–是否禁止root远程登录,根据自己的需求选择Y/n并回车,建议禁止
54
55 … Success!
56
57 By default, MySQL comes with a database named 'test' that anyone can
58
59 access. This is also intended only for testing, and should be removed
60
61 before moving into a production environment.
62
63 Remove test database and access to it? [Y/n]<– 是否删除test数据库,直接回车
64
65 - Dropping test database…
66
67 … Success!
68
69 - Removing privileges on test database…
70
71 … Success!
72
73 Reloading the privilege tables will ensure that all changes made so far
74
75 will take effect immediately.
76
77 Reload privilege tables now? [Y/n]<– 是否重新加载权限表,直接回车
78
79 … Success!
80
81 Cleaning up…
82
83 All done! If you've completed all of the above steps, your MySQL
84
85 installation should now be secure.
86
87 Thanks for using MySQL!
88
89 [root@server1 ~]#
设置完,可以安装一个 MySQLWorkbench 就可以可视化操作数据库了。
3。关闭mysql数据库
sudo mysql.server stop
4。重启mysql数据库
sudo mysql.server restart
5。关于my.cnf
通过brew安装的mysql似乎默认并没有使用my.cnf,直接使用默认配置启动
my.cnf文件位置
mysql --help | grep 'Default options' -A 1

mysql会按照以上情况顺序加载mysql,所以就按需建立一个吧.
参考博客:
https://segmentfault.com/a/1190000007838188
https://www.jianshu.com/p/3996f6a2fa45
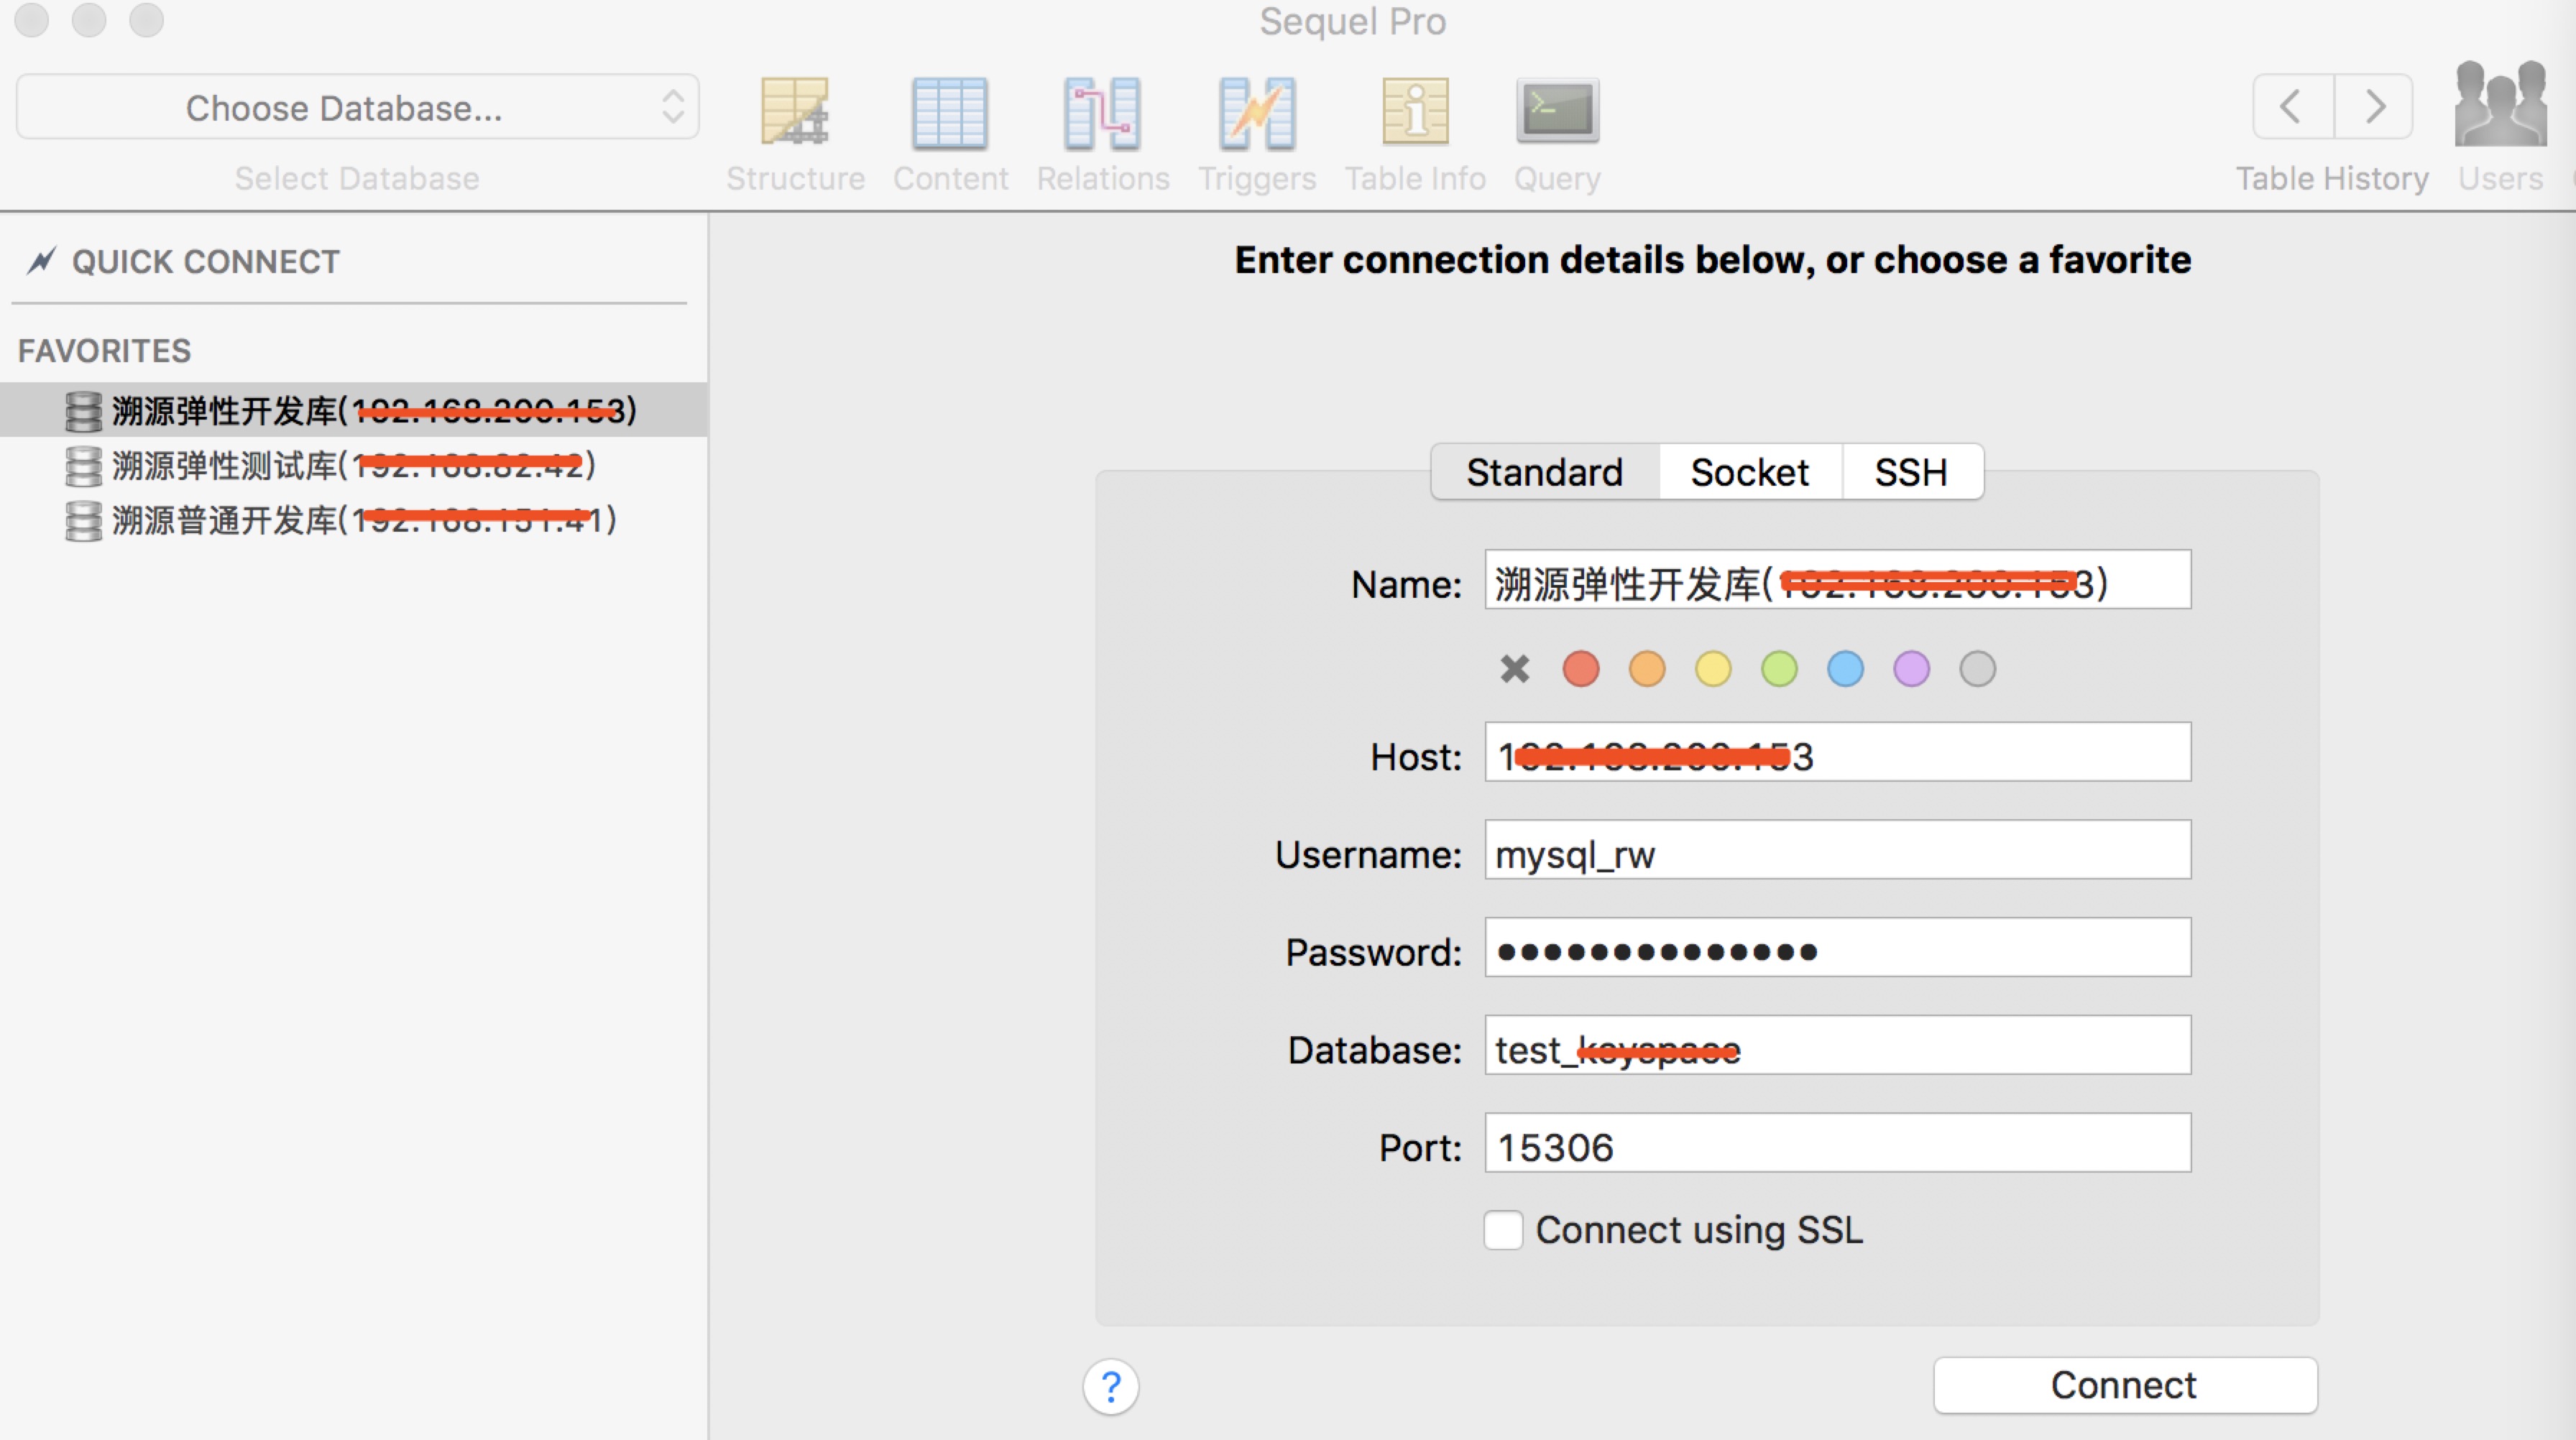
二。使用Sequel Pro连接操作数据库
注意:因数据库为弹性数据库。所以Navicat Premium不支持弹性数据库。所以应用Sequel Pro 。
1.安装Sequel Pro方式一:
下载网址:https://sequelpro.com/download
2.安装Sequel Pro方式二:
可用brew命令安装:brew cask install sequel-pro
图形界面: