随着Qt的版本升级,其自带的controls控件库也不断升级,目前已经到了2.3的版本。本文通过解读Qt自带的gallery例程,说明新版本controls控件库的相关特性。其具体位置于:
因为相关的中文资料比较缺乏,所以这里的内容会详细整理,某种意义上可以当作使用手册来使用。
一、概况
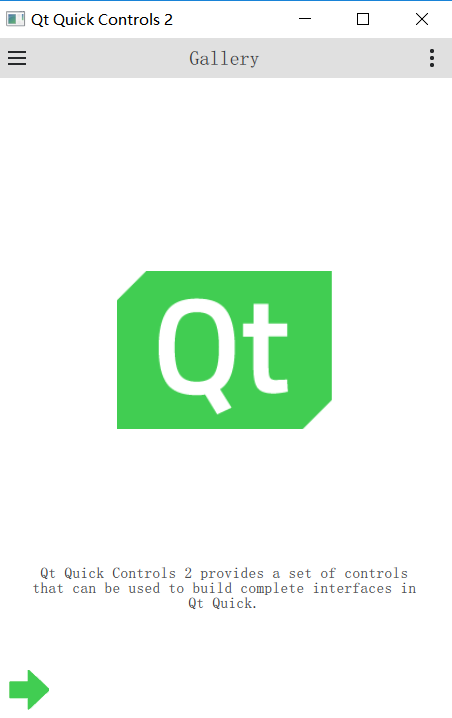
运行界面为,应该说就是一个控件的展示集合
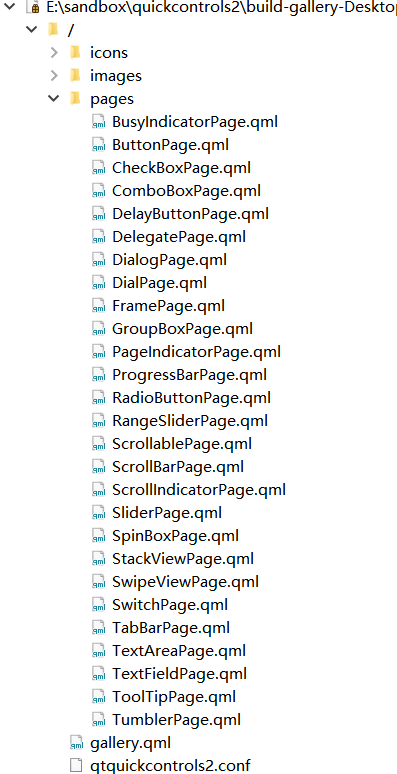
文件结构为:
二、细节
具体内容,按照名称来划分
1、BusyIndicator主要用于忙等显示,一般来说都是覆盖整个界面,通过设置visible来隐藏或者显示;
| 界面 | 代码 |
 |
BusyIndicator{
id:busyindicator
visible:true
anchors.horizontalCenter:parent.horizontalCenter
}
|
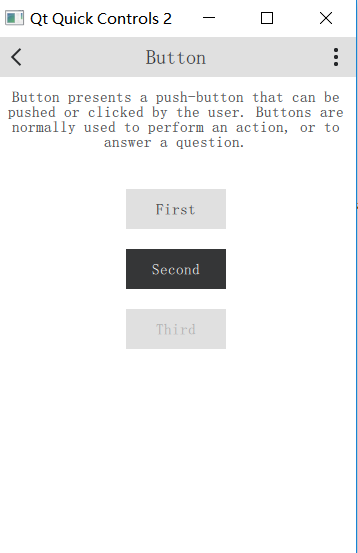
2、Button就是最简单的按钮控件,controls2提供的button带有简单的界面
| 界面 | 代码 |
 |
ColumnLayout{
spacing:20
anchors.horizontalCenter:parent.horizontalCenter
Button{
text:"First"
Layout.fillWidth:true
}
Button{
id:button
text:"Second"
highlighted:true
Layout.fillWidth:true
}
Button{
text:"Third"
enabled:false
Layout.fillWidth:true
}
}
|
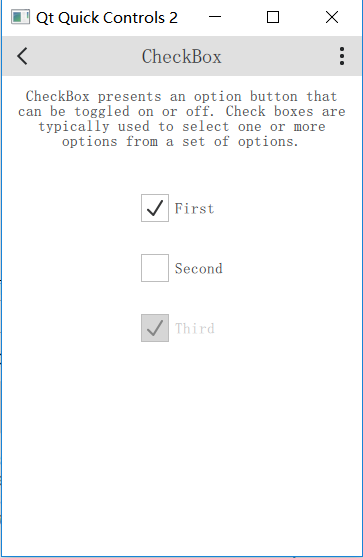
3、CheckBox最简单的选中/不选中控件,controls2提供的CheckBox带有简单的界面
| 界面 | 代码 |
 |
Column{
spacing:20
anchors.horizontalCenter:parent.horizontalCenter
CheckBox{
text:"First"
checked:true
}
CheckBox{
text:"Second"
}
CheckBox{
text:"Third"
checked:true
enabled:false
}
}
|
4、ComboBox是最简单的下拉框控件,controls2提供的ComboBox包含可以修改正文内容和不可以修改内容2个
| 界面 | 代码 |
 |
ComboBox{
model:["First","Second","Third"]
anchors.horizontalCenter:parent.horizontalCenter
}
////////////////////////////////////////////////////////////////////////////////////////////////////
ComboBox{
editable:true
model:ListModel{
id:model
ListElement{text:"Banana"}
ListElement{text:"Apple"}
ListElement{text:"Coconut"}
}
onAccepted:{
if(find(editText)===-1)
model.append({text:editText})
}
anchors.horizontalCenter:parent.horizontalCenter
}
|
5、DelayButton就是很有意思的按钮控件,需要按下一段时间后才会触发
| 界面 | 代码 |
 |
DelayButton{
text:"DelayButton"
anchors.horizontalCenter:parent.horizontalCenter
}
|
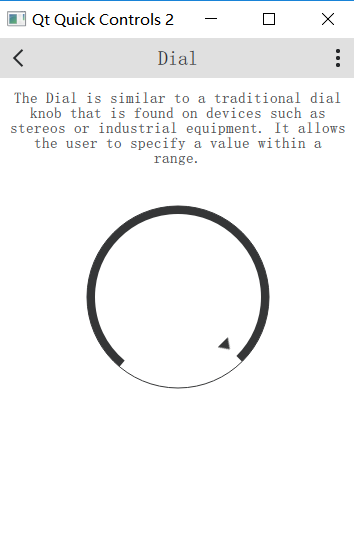
6、Dial就是类似转盘的控件,提供的是输入的结果
| 界面 | 代码 |
 |
Dial{
value:0.5
anchors.horizontalCenter:parent.horizontalCenter
}
|
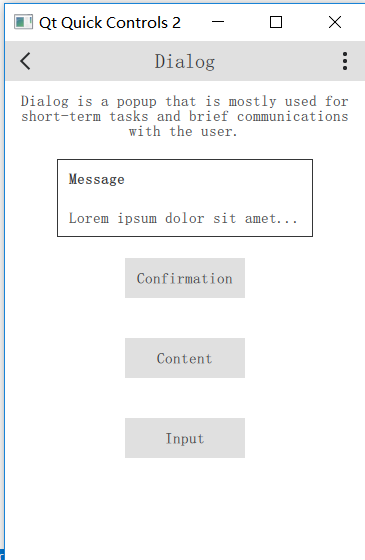
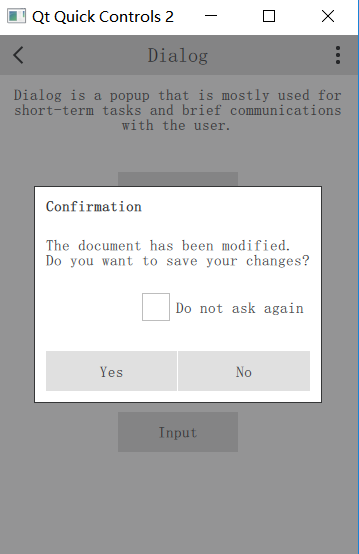
7、Dialog就是窗体控件,controls2提供了集成的显示,基本上还是提供了一个Dialog的基础空间,然后在其上面画各种样式。注意dialog的model设置,就是是否模态显示的意思;standardButtons: Dialog.Yes | Dialog.No就是标准控件的意思
| 界面 | 代码 |
 |
Button{
text:"Message"
anchors.horizontalCenter:parent.horizontalCenter
width:buttonWidth
onClicked:messageDialog.open()
Dialog{
id:messageDialog
x:(parent.width-width)/2
y:(parent.height-height)/2
title:"Message"
Label{
text:"Loremipsumdolorsitamet..."
}
}
}
|
| 界面 | 代码 |
 |
Button{
id:button
text:"Confirmation"
anchors.horizontalCenter:parent.horizontalCenter
width:buttonWidth
onClicked:confirmationDialog.open()
Dialog{
id:confirmationDialog
x:(parent.width-width)/2
y:(parent.height-height)/2
parent:Overlay.overlay
modal:true
title:"Confirmation"
standardButtons:Dialog.Yes|Dialog.No
Column{
spacing:20
anchors.fill:parent
Label{
text:"Thedocumenthasbeenmodified.
Doyouwanttosaveyourchanges?"
}
CheckBox{
text:"Donotaskagain"
anchors.right:parent.right
}
}
}
}
|
这种模式用来显示“关于”非常适合,使用的是Flickable
| 界面 | 代码 |
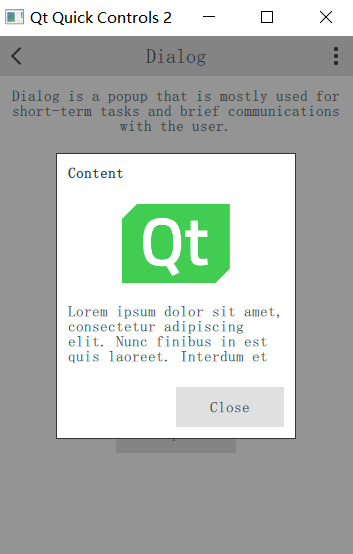 |
Button{
text:"Content"
anchors.horizontalCenter:parent.horizontalCenter
width:buttonWidth
onClicked:contentDialog.open()
Dialog{
id:contentDialog
x:(parent.width-width)/2
y:(parent.height-height)/2
width:Math.min(page.width,page.height)/3*2
contentHeight:logo.height*2
parent:Overlay.overlay
modal:true
title:"Content"
standardButtons:Dialog.Close
Flickable{
id:flickable
clip:true
anchors.fill:parent
contentHeight:column.height
Column{
id:column
spacing:20
width:parent.width
Image{
id:logo
width:parent.width/2
anchors.horizontalCenter:parent.horizontalCenter
fillMode:Image.PreserveAspectFit
source:"../images/qt-logo.png"
}
Label{
width:parent.width
text:"Loremipsumdolorsitamet,consecteturadipiscingelit.Nuncfinibus"
wrapMode:Label.Wrap
}
}
ScrollIndicator.vertical:ScrollIndicator{
parent:contentDialog.contentItem
anchors.top:flickable.top
anchors.bottom:flickable.bottom
anchors.right:parent.right
anchors.rightMargin:-contentDialog.rightPadding+1
}
}
}
}
|
| 界面 | 代码 |
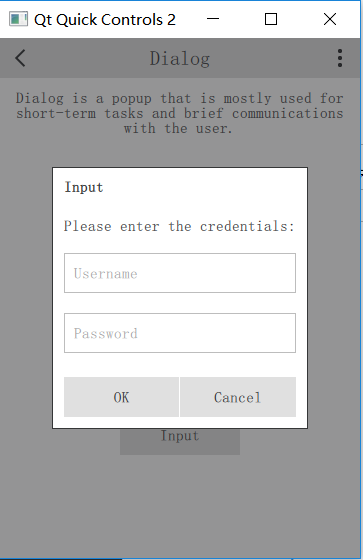 |
Button{
text:"Input"
anchors.horizontalCenter:parent.horizontalCenter
width:buttonWidth
onClicked:inputDialog.open()
Dialog{
id:inputDialog
//直接设置在窗体中间
x:(parent.width-width)/2
y:(parent.height-height)/2
parent:Overlay.overlay
focus:true
modal:true
title:"Input"
standardButtons:Dialog.Ok|Dialog.Cancel
ColumnLayout{
spacing:20
anchors.fill:parent
Label{
elide:Label.ElideRight
text:"Pleaseenterthecredentials:"
Layout.fillWidth:true
}
TextField{
focus:true
placeholderText:"Username"
Layout.fillWidth:true
}
TextField{
placeholderText:"Password"
echoMode:TextField.PasswordEchoOnEdit
Layout.fillWidth:true
}
}
}
}
|
8、Delegates就是委托按钮控件,能够将其他控件集成在一起显示出来。它本身设计到涉及到设计模式,较为复杂,后面专题讨论。
| 界面 | 代码 |
 |
|
9、Frame就是将若干控件继承在一起,有互斥属性
| 界面 | 代码 |
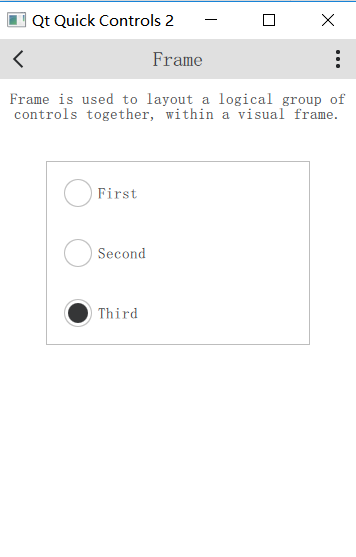 |
Frame{
anchors.horizontalCenter:parent.horizontalCenter
Column{
spacing:20
width:page.itemWidth
RadioButton{
text:"First"
checked:true
width:parent.width
}
RadioButton{
id:button
text:"Second"
width:parent.width
}
RadioButton{
text:"Third"
width:parent.width
}
}
}
|
10、GroupBox和Frame非常类似
| 界面 | 代码 |
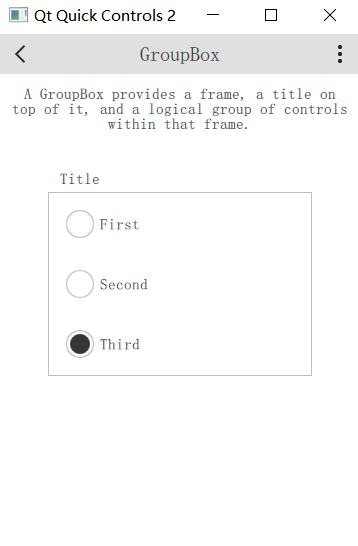 |
GroupBox{
title:"Title"
anchors.horizontalCenter:parent.horizontalCenter
Column{
spacing:20
width:page.itemWidth
RadioButton{
text:"First"
checked:true
width:parent.width
}
RadioButton{
id:button
text:"Second"
width:parent.width
}
RadioButton{
text:"Third"
width:parent.width
}
}
}
|
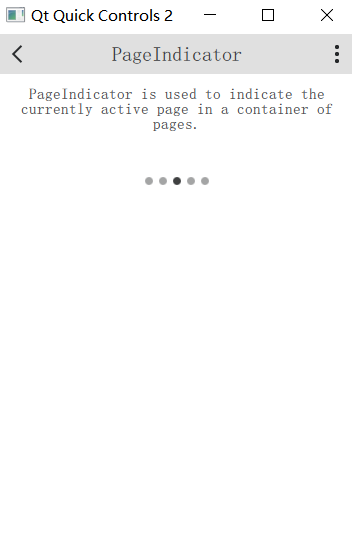
11、PageIndicator能够简单地将多幅界面包含在一起,我看用来做广告是不错。但是需要注意PageIndicator只是显示在最下面的那几个小点点,如果需要显示滑动界面,就必须要和其他控件配合使用
| 界面 | 代码 |
 |
ScrollablePage{
id:page
Column{
spacing:40
width:parent.width
Label{
width:parent.width
wrapMode:Label.Wrap
horizontalAlignment:Qt.AlignHCenter
text:"PageIndicatorisusedtoindicatethecurrentlyactivepageinacontainerofpages."
}
PageIndicator{
count:5
currentIndex:2
anchors.horizontalCenter:parent.horizontalCenter
}
}
}
|
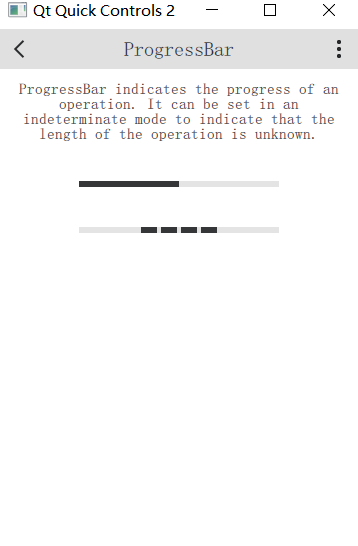
12、ProgressBar就是运行状态显示界面。如果你对完成度能够掌握的话,就可以使用ProgressBar替代busyindicator
| 界面 | 代码 |
 |
ProgressBar{
id:bar
value:0.5
anchors.horizontalCenter:parent.horizontalCenter
}
ProgressBar{
indeterminate:true
anchors.horizontalCenter:parent.horizontalCenter
}
|
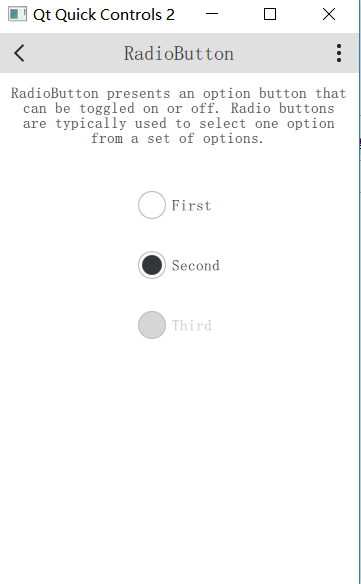
13、RadioButton就是单项选择空间,一般需要包含在互斥的控件中去
| 界面 | 代码 |
 |
Column{
spacing:20
anchors.horizontalCenter:parent.horizontalCenter
RadioButton{
text:"First"
}
RadioButton{
text:"Second"
checked:true
}
RadioButton{
text:"Third"
enabled:false
}
}
|
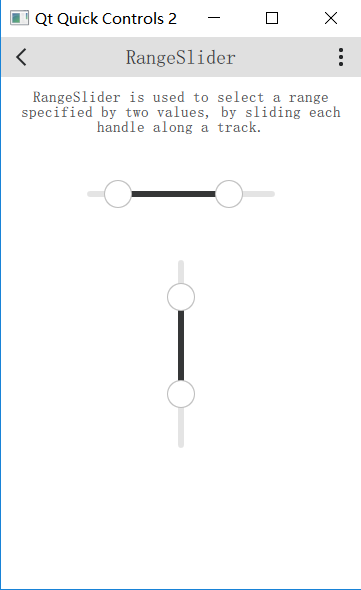
14、RangeSlider不仅可以选择结束,而且可以选择开始
| 界面 | 代码 |
 |
RangeSlider{
id:slider
first.value:0.25
second.value:0.75
anchors.horizontalCenter:parent.horizontalCenter
}
RangeSlider{
orientation:Qt.Vertical
first.value:0.25
second.value:0.75
anchors.horizontalCenter:parent.horizontalCenter
}
|
15、RangeSlider的小兄弟Slider
| 界面 | 代码 |
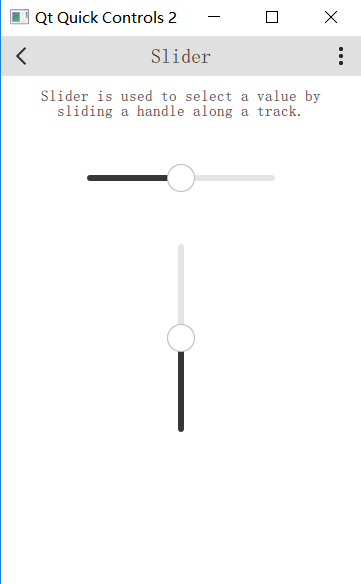 |
Slider{
id:slider
value:0.5
anchors.horizontalCenter:parent.horizontalCenter
}
Slider{
orientation:Qt.Vertical
value:0.5
anchors.horizontalCenter:parent.horizontalCenter
}
|
16、SpinBox显示加加减减的界面
| 界面 | 代码 |
 |
SpinBox{
id:box
value:50
anchors.horizontalCenter:parent.horizontalCenter
editable:true
}
|
17、StackView是重要的,带有生命周期的View界面
| 界面 | 代码 |
 |
StackView{
id:stackView
initialItem:page
Component{
id:page
Pane{
id:pane
width:parent?parent.width:0//TODO:fixnullparentondestruction
Column{
spacing:40
width:parent.width
Label{
width:parent.width
wrapMode:Label.Wrap
horizontalAlignment:Qt.AlignHCenter
text:"StackViewprovidesastack-basednavigationmodelwhichcanbeusedwithasetofinterlinkedpages."
+"Itemsarepushedontothestackastheusernavigatesdeeperintothematerial,andpoppedoffagain"
+"whenhechoosestogoback."
}
Button{
id:button
text:"Push"
anchors.horizontalCenter:parent.horizontalCenter
width:Math.max(button.implicitWidth,Math.min(button.implicitWidth*2,pane.availableWidth/3))
onClicked:stackView.push(page)
}
Button{
text:"Pop"
enabled:stackView.depth>1
width:Math.max(button.implicitWidth,Math.min(button.implicitWidth*2,pane.availableWidth/3))
anchors.horizontalCenter:parent.horizontalCenter
onClicked:stackView.pop()
}
}
}
}
}
|
18、ScrollBar最重要的功能,就是可以通过拖动的方式将界面扩展,注意它的侧边栏
| 界面 | 代码 |
 |
ScrollBar.vertical:ScrollBar{}
|
19、swipeview另一种可以扩展界面的View,注意这是和PageIndicator 结合起来使用的
| 界面 | 代码 |
 |
SwipeView{
id:view
currentIndex:1
anchors.fill:parent
Repeater{
model:3
Pane{
width:view.width
height:view.height
Column{
spacing:40
width:parent.width
Label{
width:parent.width
wrapMode:Label.Wrap
horizontalAlignment:Qt.AlignHCenter
text:"SwipeViewprovidesanavigationmodelthatsimplifieshorizontalpagedscrolling."
+"Thepageindicatoronthebottomshowswhichisthepresentlyactivepage."
}
Image{
source:"../images/arrows.png"
anchors.horizontalCenter:parent.horizontalCenter
}
}
}
}
}
PageIndicator{
count:view.count
currentIndex:view.currentIndex
anchors.bottom:parent.bottom
anchors.horizontalCenter:parent.horizontalCenter
}
|
20、Switch是最简单的开关控件
| 界面 | 代码 |
 |
Switch{
text:"First"
}
Switch{
text:"Second"
checked:true
}
Switch{
text:"Third"
enabled:false
}
|
21、TabBar就是tab构成的bar,和indicator类似,也是必须结合swipeview来使用
| 界面 | 代码 |
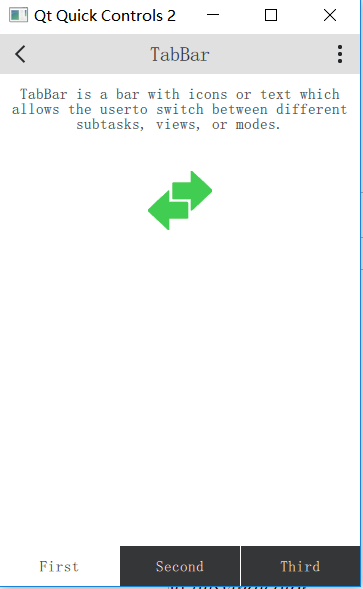 |
SwipeView{
id:swipeView
anchors.fill:parent
currentIndex:tabBar.currentIndex
Repeater{
model:3
Pane{
width:swipeView.width
height:swipeView.height
Column{
spacing:40
width:parent.width
Label{
width:parent.width
wrapMode:Label.Wrap
horizontalAlignment:Qt.AlignHCenter
text:"TabBarisabarwithiconsortextwhichallowstheuser"
+"toswitchbetweendifferentsubtasks,views,ormodes."
}
Image{
source:"../images/arrows.png"
anchors.horizontalCenter:parent.horizontalCenter
}
}
}
}
}
footer:TabBar{
id:tabBar
currentIndex:swipeView.currentIndex
TabButton{
text:"First"
}
TabButton{
text:"Second"
}
TabButton{
text:"Third"
}
}
|
22、TextArea文字输入区域
| 界面 | 代码 |
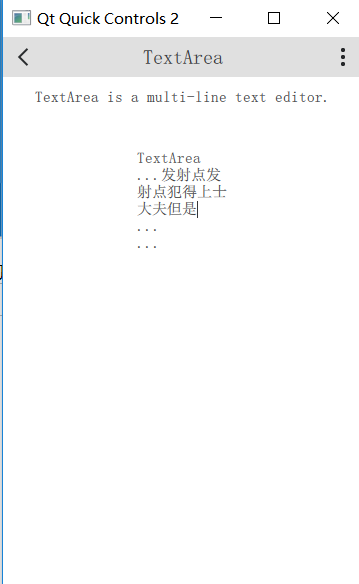 |
TextArea{
width:Math.max(implicitWidth,Math.min(implicitWidth*3,pane.availableWidth/3))
anchors.horizontalCenter:parent.horizontalCenter
wrapMode:TextArea.Wrap
text:"TextArea
...
...
..."
}
|
23、TextField是TextArea的亲弟兄
| 界面 | 代码 |
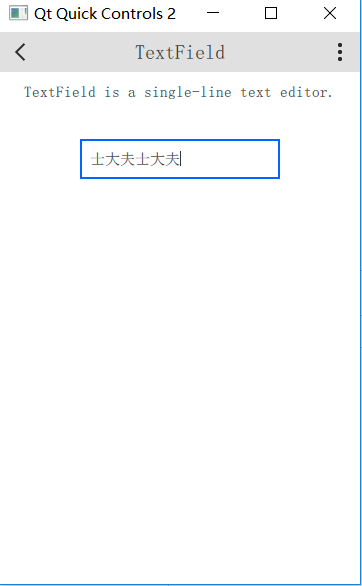 |
TextField{
id:field
placeholderText:"TextField"
anchors.horizontalCenter:parent.horizontalCenter
}
|
24、ToolTip就是显示ToolTip
| 界面 | 代码 |
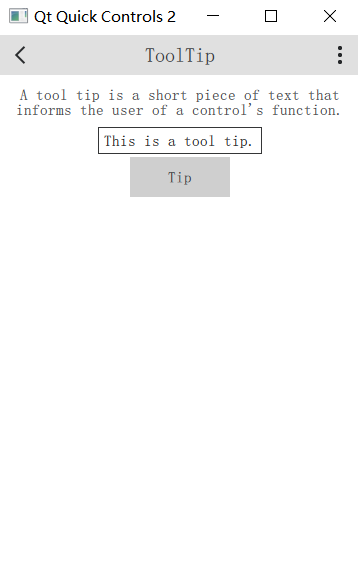 |
Button{
text:"Tip"
anchors.horizontalCenter:parent.horizontalCenter
ToolTip.timeout:5000
ToolTip.visible:pressed
ToolTip.text:"Thisisatooltip."
}
|
25、Tumbler就是从几个简单的数字中选择一个
| 界面 | 代码 |
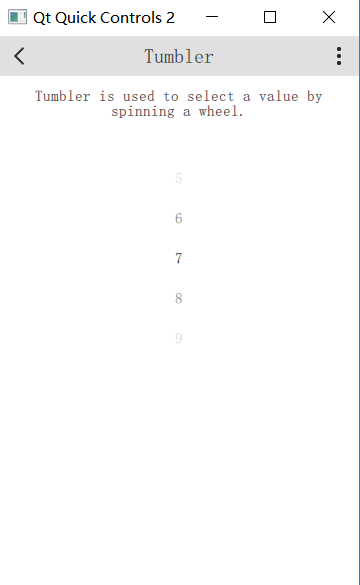 |
Tumbler{
model:10
anchors.horizontalCenter:parent.horizontalCenter
}
|
三、存在问题和下步计划
gallary例子较为全面地展现了controls2的使用,但是存在以下三个问题
一是按照名称分类,略为混乱;二是输入控件没有值的获取,不很完整;三是种类太多,难以把握全局。
下一步机会对整个gallary进行重构,这个一篇博客就太长了,我们放在下一篇(http://www.cnblogs.com/jsxyhelu/p/8452474.html)。
感谢阅读至此,希望有所帮助!