Android 按钮的UI设计,ListView 以及GridView的UI设计
一.按钮的状态
我们一般搞UI设计,按钮通常有三个状态:normal(正常状态);focus(焦点状态),pressed(按下状态)。如下图所示:


我们会在res/drawable目录下定义一个资源文件,比如我们本例中要用到的handle.xml,在里面定义三种状态,每种状态对应一张图片。
代码如下:
 按钮Selector

1
<?xml version="1.0" encoding="utf-8"?>
2
<selector xmlns:android="http://schemas.android.com/apk/res/android">
3
    <item android:state_window_focused="false"  android:drawable="@drawable/handle_normal" />
4
    <item android:state_focused="true" android:drawable="@drawable/handle_focused" />
5
    <item android:state_pressed="true" android:drawable="@drawable/handle_pressed" />
6
</selector>
而我们使用这个资源文件的用法只需要引用drawable里的资源文件(android:background="@drawable/handle")代码如下:
View Code
1 <Button
2     android:id="@+id/handle"
3     android:layout_width="wrap_content"
4     android:layout_height="fill_parent"
5     android:background="@drawable/handle"
6 />
二.android的ListView,GridView UI设计
Android中的层:
看过《盗梦空间》的人都知道,梦境有多少层,而Android中也有层次之分,在Android中第一层"梦境",我们可以认为是壁纸。第二层就是 应用的Activity,第三层就是放在Activity上的容器(ViewGroup以及它的子类FrameLayout,LinearLayout等 布局对象),当然容器中还可以放容器,你也可以放到N层(最多放多少我还没验证过),总之最后一层就是那些继承于View的控件了(诸 如,Button,TextView等.)
而ListView以及GridView中UI是怎么设计的呢,下面我们看一下效果图:

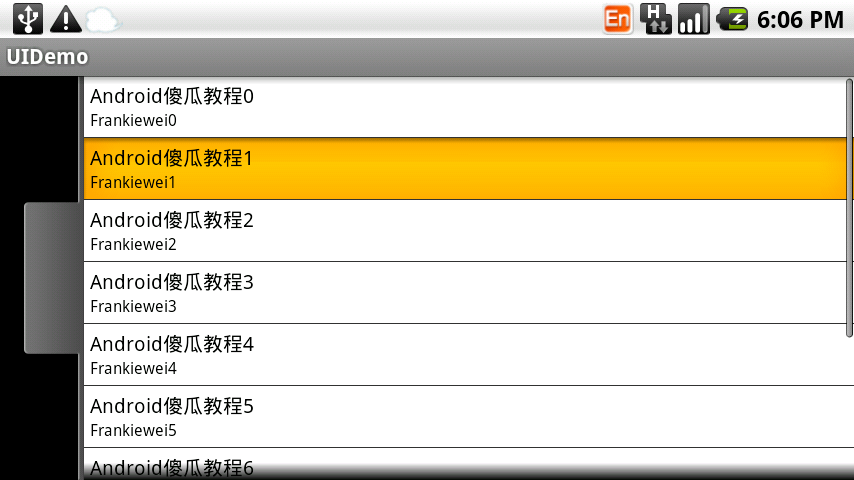
上图是一个ListView的效果图,正常状态下是白色背景黑色字体,当我们点击一列时会出现黄色背景。这一效果是如何做到的呢?
ListView单元格显示的内容其实是我们事先定义在Layout目录下的一个布局文件,从这个效果来看,我们可以看出它一共有三个“层”
第一层容器(LinearLayout) 背景色为白色:
第二层也是容器(LinearLayout)当按下时,背景色为黄色,把第一层挡住(具体做法可以参照按钮):
第三层是控件(TextView)。
实例 :
上面说了一些,有些人肯定会云里雾里,所以我们直接来个实例,实例做完后,再看一下,效果会更好,大家按照步骤跟我来:
第一步:首先准备素材,准备三个按钮,以及ListView的背景图(上面三个按钮已经有了,下面我只贴一个ListView背景图片):

第二步:新建一个Android工程,命名为UIDemo.目录结构如下图所示:

第三步:在res目录下新建一个drawable文件夹,定义两个资源文件一个是handle.xml另一个为listview_selected.xml,其中handle.xml代码已经在上面贴出,listview_selected.xml代码如下:
listview item selector
1 <?xml version="1.0" encoding="utf-8"?>
2 <selector xmlns:android="http://schemas.android.com/apk/res/android">
3     <item android:state_pressed="true" android:drawable="@drawable/list_selector_background_pressed" />
4 </selector>
第四步:修改main.xml布局文件,这里我用到了SliddingDrawer控件,代码如下:
main布局
 1 <?xml version="1.0" encoding="utf-8"?>
 2 <LinearLayout xmlns:android="http://schemas.android.com/apk/res/android"
 3     android:orientation="vertical"
 4     android:layout_width="fill_parent"
 5     android:layout_height="fill_parent"
 6     >
 7  <SlidingDrawer
 8      android:id="@+id/slidingdrawer"
 9      android:layout_width="fill_parent"
10      android:layout_height="fill_parent"
11      android:orientation="horizontal"
12      android:handle="@+id/handle"
13      android:content="@+id/content">
14       <Button
15              android:id="@+id/handle"
16              android:layout_width="wrap_content"
17              android:layout_height="fill_parent"
18              android:background="@drawable/handle"
19         />
20        <ListView
21                 android:id="@+id/content"
22                 android:layout_width="fill_parent"
23              android:layout_height="wrap_content"
24        />
25  </SlidingDrawer>
26 </LinearLayout>
我们这里用到了ListView控件,而我们ListView控件显示的内容我事先在layout目录下定义两个TextView,命名为listview_layout.xml,代码如下(这里有三层哦!)
listview item 布局
 1 <?xml version="1.0" encoding="utf-8"?>
 2 <LinearLayout xmlns:android="http://schemas.android.com/apk/res/android"
 3     android:orientation="vertical"
 4     android:layout_width="fill_parent"
 5     android:layout_height="fill_parent"
 6     android:background="#ffffff"
 7     >
 8     <LinearLayout
 9         android:orientation="vertical"
10         android:layout_width="fill_parent"
11         android:layout_height="fill_parent"
12         android:background="@drawable/listview_selected"
13         android:padding="6px"
14     >
15     <TextView
16         android:id="@+id/bookname"
17         android:layout_width="fill_parent"
18         android:layout_height="wrap_content"
19         android:textSize="20px"
20         android:textColor="#000000"
21         />
22     <TextView
23         android:id="@+id/author"
24         android:layout_width="fill_parent"
25         android:layout_height="wrap_content"
26         android:textSize="16px"
27         android:textColor="#000000"
28         />
29         </LinearLayout>
30 </LinearLayout>
第五步:修改主核心程序UIDemo.java,代码如下:
核心代码
 1 package com.tutor.uidemo;
 2 import android.app.Activity;
 3 import android.os.Bundle;
 4 import android.view.LayoutInflater;
 5 import android.view.View;
 6 import android.view.ViewGroup;
 7 import android.widget.BaseAdapter;
 8 import android.widget.ListView;
 9 import android.widget.TextView;
10 public class UIDemo extends Activity {
11
12     private ListView mListView;
13     @Override
14     public void onCreate(Bundle savedInstanceState) {
15         super.onCreate(savedInstanceState);
16         setContentView(R.layout.main);
17
18         setupViews();
19     }
20
21     private void setupViews(){
22         mListView = (ListView)findViewById(R.id.content);
23         mListView.setAdapter(new ListViewAdapter());
24     }
25
26     private class ListViewAdapter extends BaseAdapter{
27         //这里返回10行,ListView有多少行取决于getCount()方法
28         public int getCount() {
29             return 10;
30         }
31         public Object getItem(int arg0) {
32             return null;
33         }
34         public long getItemId(int arg0) {
35             return 0;
36         }
37         public View getView(int position, View v, ViewGroup parent) {
38
39             final LayoutInflater inflater = LayoutInflater.from(getApplicationContext());
40
41             if(v == null){
42                 v = inflater.inflate(R.layout.listview_layout, null);
43             }
44             TextView mBookName = (TextView)v.findViewById(R.id.bookname);
45             TextView mBookAuthor = (TextView)v.findViewById(R.id.author);
46
47             mBookName.setText("Android傻瓜教程" + position);
48             mBookAuthor.setText("Frankiewei" + position);
49             return v;
50         }
51
52     }
53 }
第六步:运行上述工程,查看效果:
运行效果1:
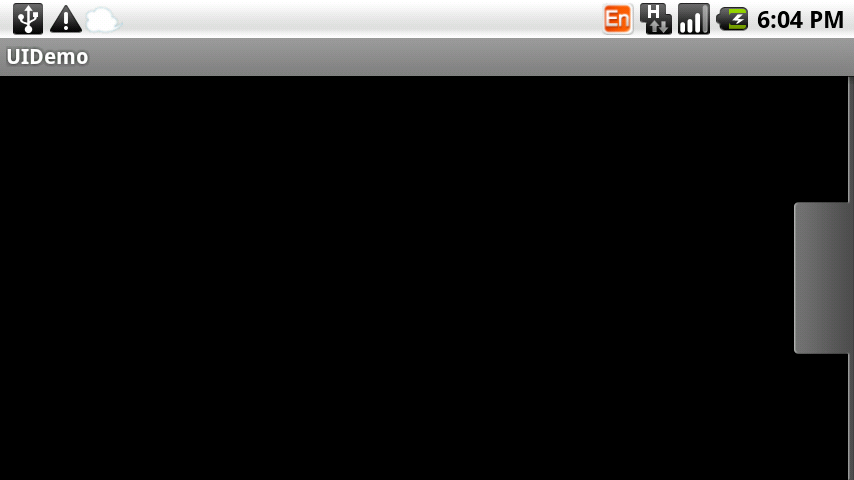
点击按钮效果2:

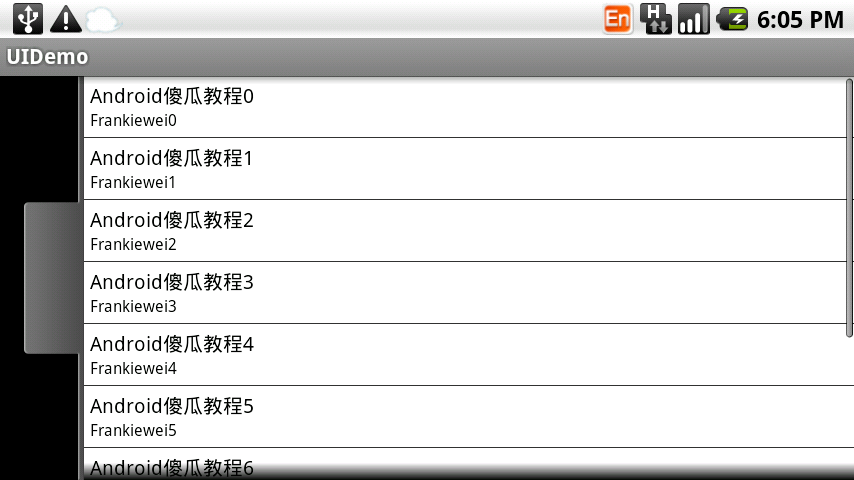
ListView正常效果3:
ListView点击效果4: