基于IP的访问控制 http_access_module(允许哪些IP可以访问,哪些不允许访问)
基于用户的信任登录 http_auth_basic_module(提供登录认证界面,通过登录认证的方式控制访问)
1、http_access_module方式
1)http_access_module 配置语法
可以配置:允许(allow)/拒绝(deny) IP地址,网段,Socket,所有。
Syntax:allow address | CIDR | unix: | all;
Default:-
Context:http,server,location,limit_except
Syntax:deny address | CIDR | unix: | all;
Default:-
Context:http,server,location,limit_except
2)演示限制IP
[root@localhost conf.d]# mv /etc/nginx/conf.d/default.conf /etc/nginx/conf.d/access_mod.conf
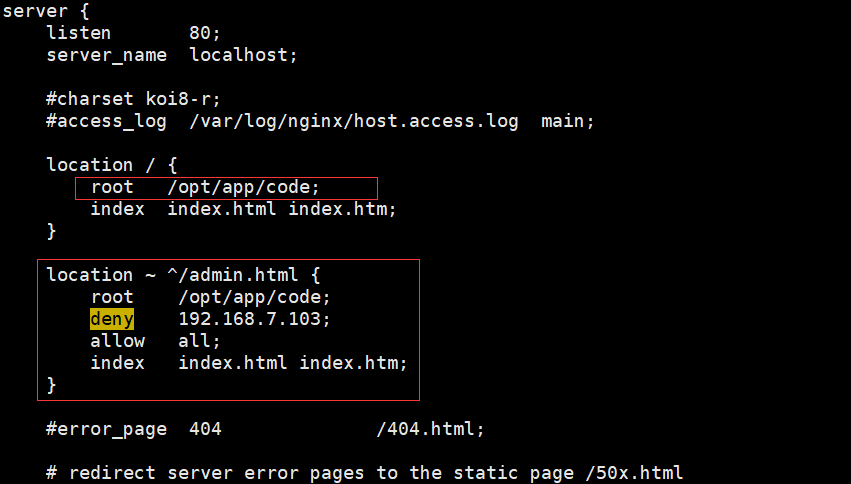
修改access_mod.conf,限制192.168.7.103不能访问admin.html文件。allow all;是配置其他IP可以访问。
location / {
  root   /opt/app/code;
  index  index.html index.htm;
}

location ~ ^/admin.html {
  root  /opt/app/code;
  deny  192.168.7.103;
  allow  all;
  index  index.html index.htm;
}

新建/opt/app/code/admin.html
<html>
<head>
    <meta charset="utf-8">
    <title>imooc1</title>
</head>
<body style="background-color:red;">
</body>
</html>
检查配置文件语法,并重新加载配置,测试 http://192.168.7.151/admin.html 成功:

配置某一段的IP可以访问,如下,需要了解IP段的含义。
location / {
  root   /opt/app/code;
  index  index.html index.htm;
}

location ~ ^/admin.html {
  root    /opt/app/code;
  allow   192.168.7.0/24;
  deny    all;
  index   index.html index.htm;
}
3)http_access_module方式的局限性及其解决方案
如果不是客户端直接访问服务端,而是通过代理再访问服务端,比如通过中间件代理Nginx、7lay LSB、CDN等访问服务端会出现问题。因为Nginx的http_access_module是基于remote_addr变量识别客户端IP的。经过中间一层,客户端的IP地址会改变,识别的Ip实际是代理层的IP。
解决方式:
方法一:采用别的HTTP头信息控制访问,如:HTTP_X_FORWARD_FOR。HTTP_X_FORWARD_FOR是HTTP头信息,HTTP协议规定携带的,客户端IP1访问到代理上,代理上的HTTP_X_FORWARD_FOR是IP1,代理的IP地址IP2访问到Nginx服务端,服务端上的HTTP_X_FORWARD_FOR是IP1,IP2(两个IP逗号分隔)。使用HTTP_X_FORWARD_FOR会包含客户端浏览器的IP。
使用HTTP_X_FORWARD_FOR也有问题:HTTP_X_FORWARD_FOR是协议要求的,不一定所有的CDN厂商或者代理厂商按照要求来做。并且由于它只是一个头信息,可能会被客户端修改。
方法二:结合geo模块做。
方法三:通过HTTP自定义变量传递。
2、http_auth_basic_module方式
1)http_auth_basic_module是Nginx的认证模块,语法如下:
Syntax:auth_basic_string | off;
Default:auth_basic off;
Context:server,location,limit_except
Syntax:auth_basic_user_file file;
Default:-
Context:http,server,location,limit_except
file是存储用户名和密码信息的文件。生成密码文件可参考官网:http://nginx.org/en/docs/http/ngx_http_auth_basic_module.html
2)演示
进入到/etc/nginx,在该目录生成密码文件,文件名:auth_conf,并添加用户名sl,密码123456
htpasswd -c ./auth_conf sl


修改配置文件/etc/nginx/conf.d/auth_mod.conf
location / {
  root   /opt/app/code;
  index  index.html index.htm;
}

location ~ ^/admin.html {
  root    /opt/app/code;
  auth_basic "Auth access test! input your password!";
  auth_basic_user_file /etc/nginx/auth_conf;
  index   index.html index.htm;
}

检查配置文件语法,并重新加载配置,测试:http://192.168.7.151/admin.html,弹出输入密码框,测试成功!

3)该方式的局限性
用户信息依赖文件方式;操作管理机械,效率低下。
4)解决方案
Nginx结合LUA实现高效验证
Nginx和LDAP打通,利用nginx-auth-ldap模块