参考PHP Manual.
Windows环境
1. Apache
下载地址:www.apachelounge.com
64位版本的加压后直接使用;
查看根目录下的install文件,查看manual/platform/windows.html
修改http.cnf文件:
修改程序路径c:/apache24为当前安装路径;
修改DocumentRoot 路径为自定义站点路径,如:D:/www;
修改DirectoryIndex,添加index.php;
命令行输入:httpd.exe -k install 安装为服务,或者直接输入http.exe运行
2. PHP
下载地址:windows.php.net;
从Microsoft下载vcredist_x64.exe -- “Visual C++ Redistributable for Visual Studio 2012”;
安装vcredist_x64.exe;
解压PHP到自定义安装目录;
修改php.ini :
修改extension_dir;
修改"extension=",配置需要加载的模块;
修改"error_log=",配置错误日志文件的路径;
修改http.conf, 添加:
#
#PHP
#handler mode
LoadModule php5_module "c:/php/php5apache2.dll"
PHPIniDir "C:/php"
<FilesMatch .php$>
SetHandler application/x-httpd-php
</FilesMatch>
3. Mysql
下载后添加为service
4. xdebug
(1). 下载对应PHP版本dll
(2). 修改php.ini, 添加
[xdebug]
zend_extension = "D:/Program Files/php/ext/php_xdebug-2.2.3-5.5-vc11-x86_64.dll"
;开启自动跟踪
xdebug.auto_trace = On
;开启异常跟踪
xdebug.show_exception_trace = On
;开启远程调试自动启动
xdebug.remote_autostart = On
;开启远程调试
xdebug.remote_enable = On
;收集变量
xdebug.collect_vars = On
;收集返回值
xdebug.collect_return = On
;收集参数
xdebug.collect_params = On
xdebug.trace_output_dir="D:/Program Files/php/xdebuginfo"
xdebug.profiler_enable=On
xdebug.profiler_output_dir="D:/Program Files/php/xdebuginfo"

xdebug.remote_host=localhost
xdebug.remote_port=9000
xdebug.remote_handler=dbgp
(3). 重启服务器
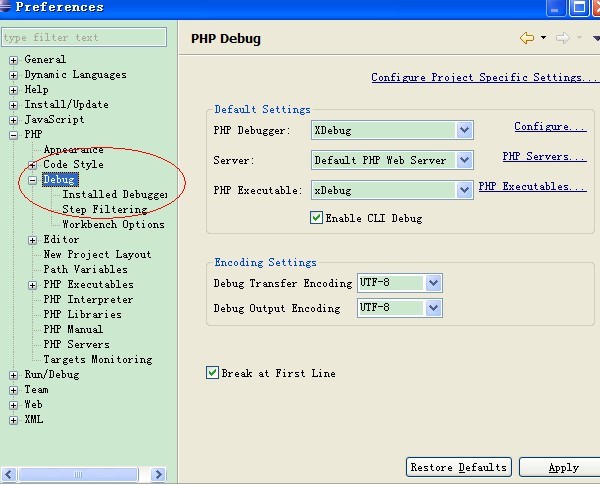
(4). 在eclipse中配置两个地方:

(5). debug 项目构建debug configuration进行调试
5. xdebug 浏览器端调试
(1). 查看官网:http://xdebug.org/docs/remote | Firefox下用“The easiest Xdebug”, chrome下用“Xdebug Helper”
(2). 在eclipse中需要进行特别的设置: 进入window->Preferences->PHP->Debug, 找到配置xdebug中的Accept remote session(JIT),选择为localhost,并保存。
(3). 在PHP的配置文件中对xdebug的设置需要特别注意,将xdebug.remote_autostart设置为off,如果设置为on,则会忽略在浏览器中是选择Debug还是Disable,都会通知eclipse进行调试
xdebug.remote_autostart = Off