环境说明:
系统:centos7.6
php版本:php7.1
数据库:mariadb
nginx:1.16.1
一 安装nginx
yum install nginx
二 安装数据库
yum install mariadb-server
三 安装php
3.1 安装依赖包
yum install libxml2 libxml2-devel openssl openssl-devel bzip2 bzip2-devel libcurl libcurl-devel libjpeg libjpeg-devel libpng libpng-devel freetype freetype-devel gmp gmp-devel libmcrypt libmcrypt-devel readline readline-devel libxslt libxslt-devel zlib zlib-devel glibc glibc-devel glib2 glib2-devel ncurses curl gdbm-devel db4-devel libXpm-devel libX11-devel gd-devel gmp-devel expat-devel xmlrpc-c xmlrpc-c-devel libicu-devel libmcrypt-devel libmemcached-devel
3.2 安装php
wget http://php.net/distributions/php-7.1.0.tar.gz
解压,然后
configure
--prefix=/home/yx/server/php72  #安装路径,需要提前创建

./configure --prefix=/home/yx/server/php72 --enable-cli --with-libxml-dir=/usr/include/libxml2/libxml/ --with-kerberos=/usr/include/krb5/ --enable-bcmath --enable-calendar --enable-fpm  --enable-soap --enable-exif --enable-mbstring --enable-pdo --with-pdo-mysql=mysqlnd --with-mysql-sock --with-curl=/usr/include/curl/ --enable-ftp --enable-mbstring --with-png-dir --with-gd  --with-freetype-dir=/usr/include/freetype2/freetype/ --disable-debug --disable-rpath --enable-inline-optimization --with-bz2 --with-zlib=/usr --enable-sockets --enable-sysvsem --enable-sysvshm --enable-pcntl --enable-mbregex --with-mhash --enable-zip --with-pcre-regex --with-pdo-mysql=mysqlnd --with-mysqli=mysqlnd --with-gd --with-jpeg-dir --with-openssl --with-gettext --with-ldap --enable-opcache
在configure中可能存在多个错误,按照提示解决即可
3.3 安装 make && make install
在make的时候会遇到一个错误:
/bin/ld: ext/ldap/.libs/ldap.o: undefined reference to symbol 'ber_scanf'
//usr/lib64/liblber-2.4.so.2: error adding symbols: DSO missing from command line
collect2: error: ld returned 1 exit status
解决办法
编辑MakeFile

找到 开头是 'EXTRA_LIBS' 这一行 在结尾加上 '-llber,在113行
四 配置php-fpm
4.1 拷贝php.fpm.conf
cp -r /home/yx/server/php72/etc/php-fpm.d/www.conf.default /home/yx/server/php72/etc/php-fpm.conf
php-fpm.conf配置文件内容如下:
grep -v "^;" /home/yx/server/php72/etc/php-fpm.conf|grep -v "^$"

[www]
user = nobody
group = nobody
listen = 127.0.0.1:9000 #端口9000
pm = dynamic
pm.max_children = 5
pm.start_servers = 2
pm.min_spare_servers = 1
pm.max_spare_servers = 3
4.2拷贝启动脚本
cp -r /soft/php-7.1.0/sapi/fpm/init.d.php-fpm /etc/init.d/php-fpm

chmod +x /etc/init.d/php-fpm

启动php-fpm

/etc/init.d/php-fpm start
五 配置nginx
[root@k8s-master01 php-7.1.0]# cat /etc/nginx/conf.d/php.conf
server{
        server_name www.aa.com;
        listen 80;

        root /usr/share/nginx/html;
        index index.php index.html;

        location ~ .php?$
        {

                fastcgi_index index.php;
                fastcgi_pass 127.0.0.1:9000; # 这个地方要跟php-fpm.conf里面的一致
                fastcgi_param SCRIPT_FILENAME $document_root$fastcgi_script_name;
                include fastcgi_params;
        }
}
然后重启nginx服务
5.1 解析php
[root@k8s-master01 php-7.1.0]# cat /usr/share/nginx/html/index.php
<?php
    phpinfo();
?>
去浏览器访问 www.aa.com
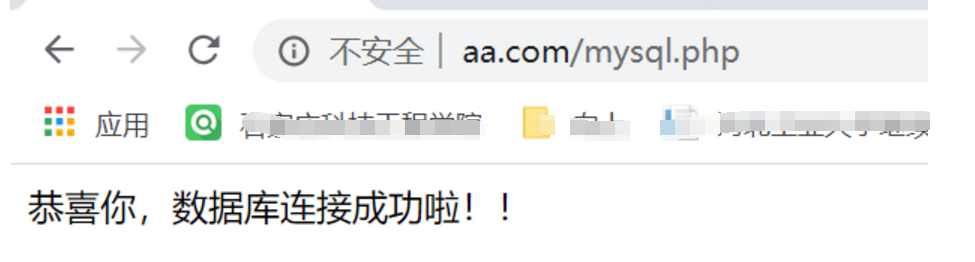
5.2测试连接数据库
[root@k8s-master01 php-7.1.0]# cat /usr/share/nginx/html/mysql.php
<?php
$link=mysqli_connect('127.0.0.1','root','');
if($link) echo "恭喜你,数据库连接成功啦!!";
mysqli_close($link);
?>
同样访问www.aa.com/mysql.php