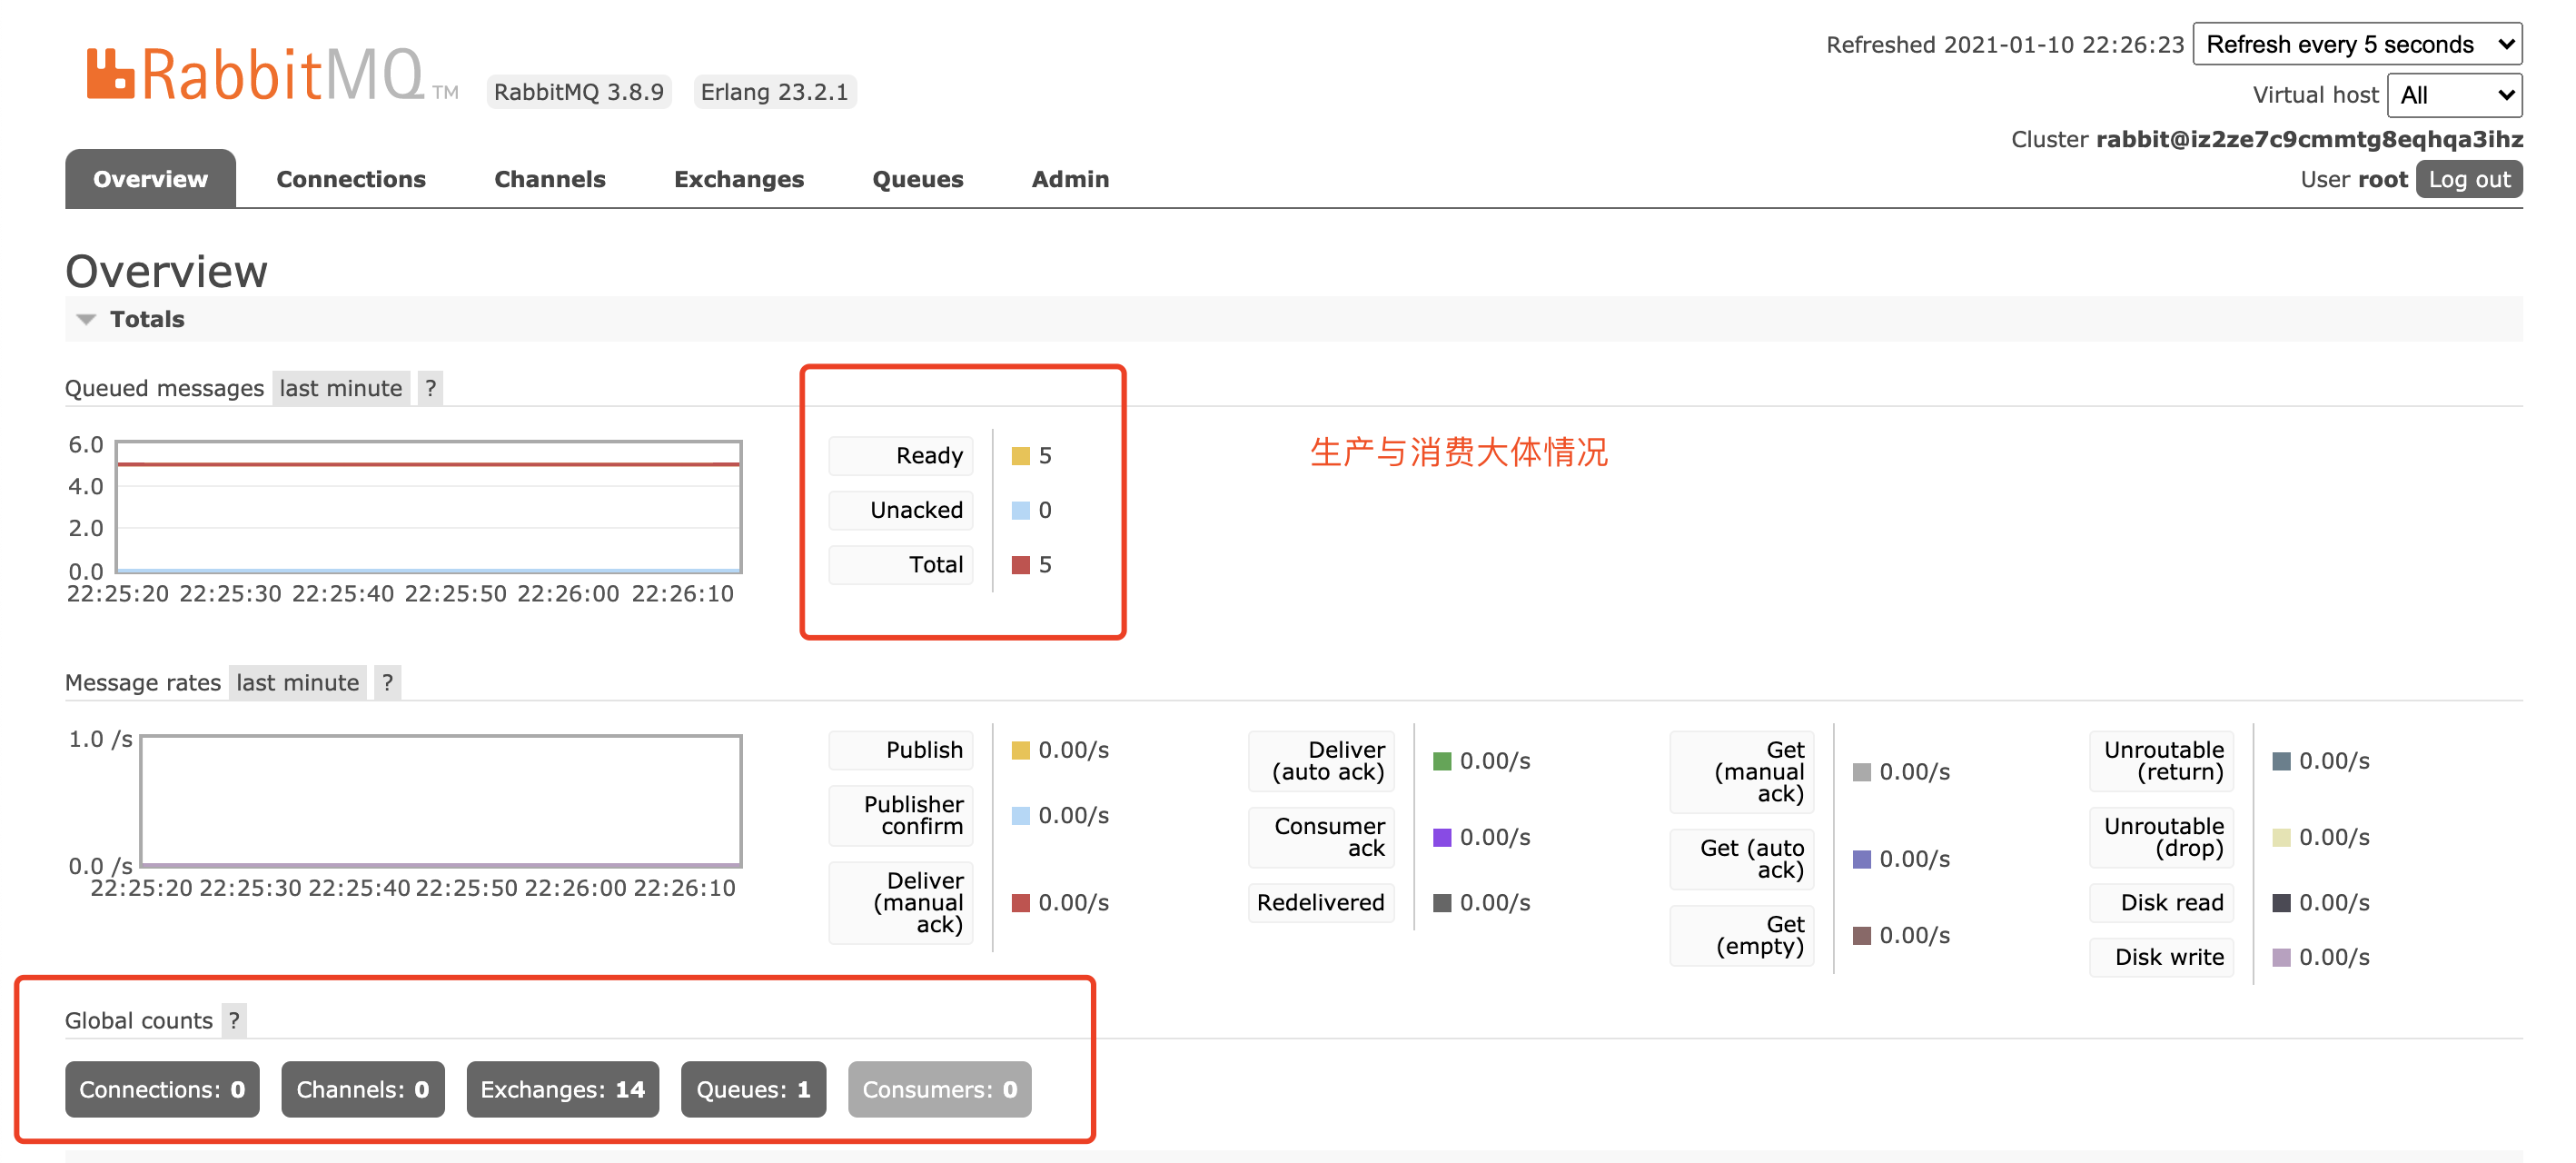
消息生产与消费
- ConnectionFactory: 获取连接工厂
- Connection:一个连接
- Channel:数据通信信道,可发送和接收消息
- Queue:具体的消息存储队列
- Producer & Consumer 生产和消费者
代码演示
引入maven依赖
<dependency>
    <groupId>com.rabbitmq</groupId>
    <artifactId>amqp-client</artifactId>
    <version>5.7.3</version>
</dependency>
新建三个类
Procuder类:生产者
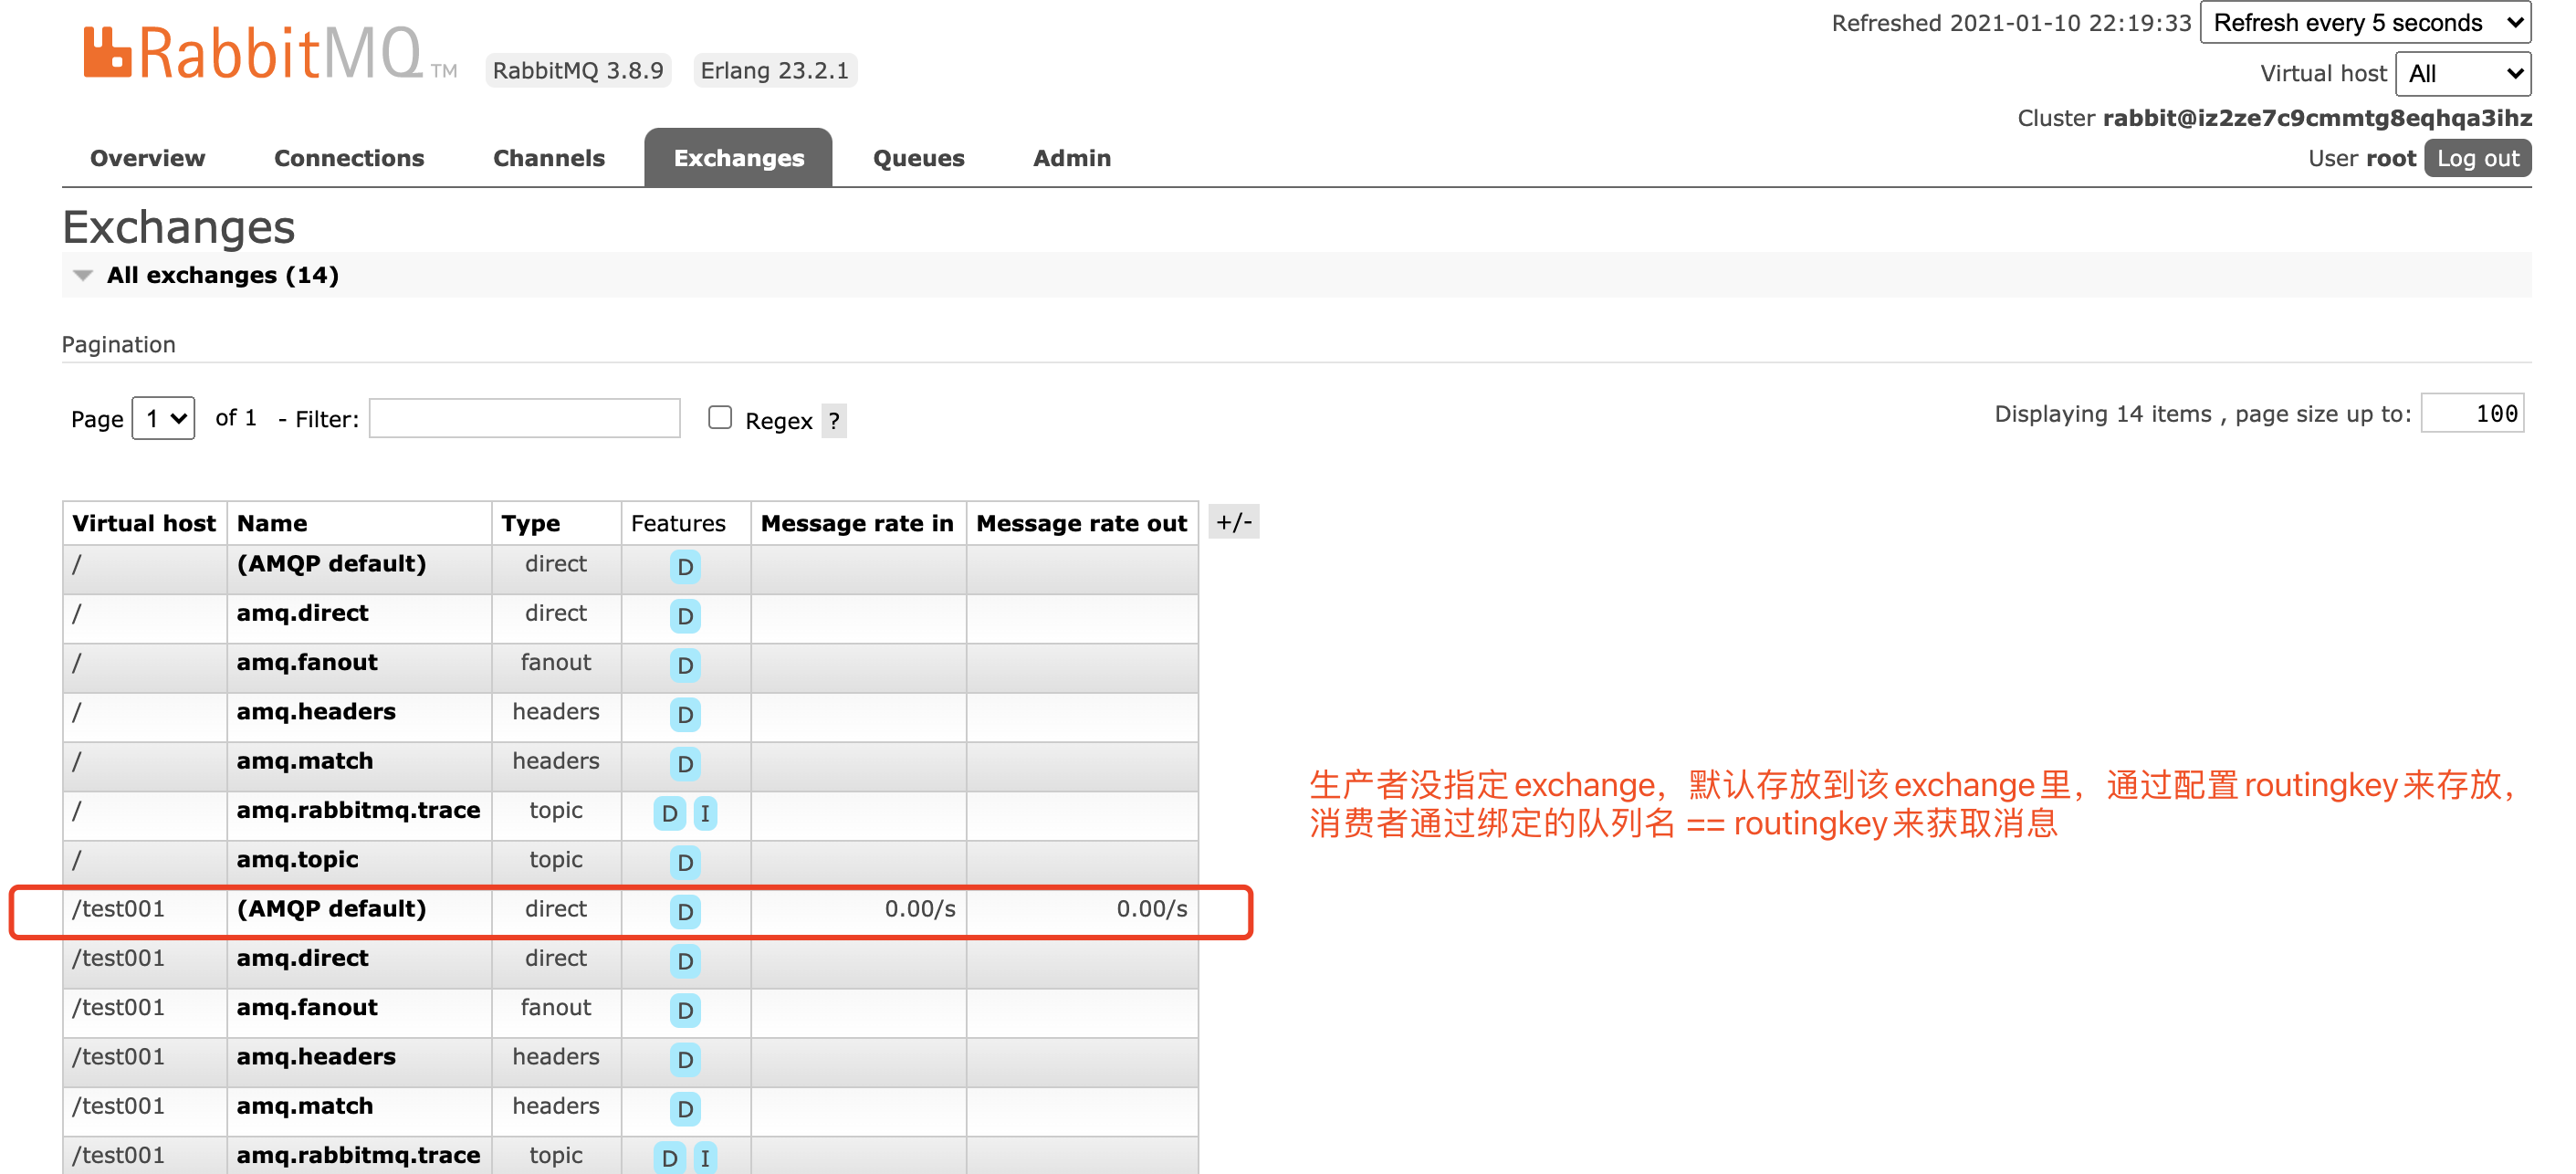
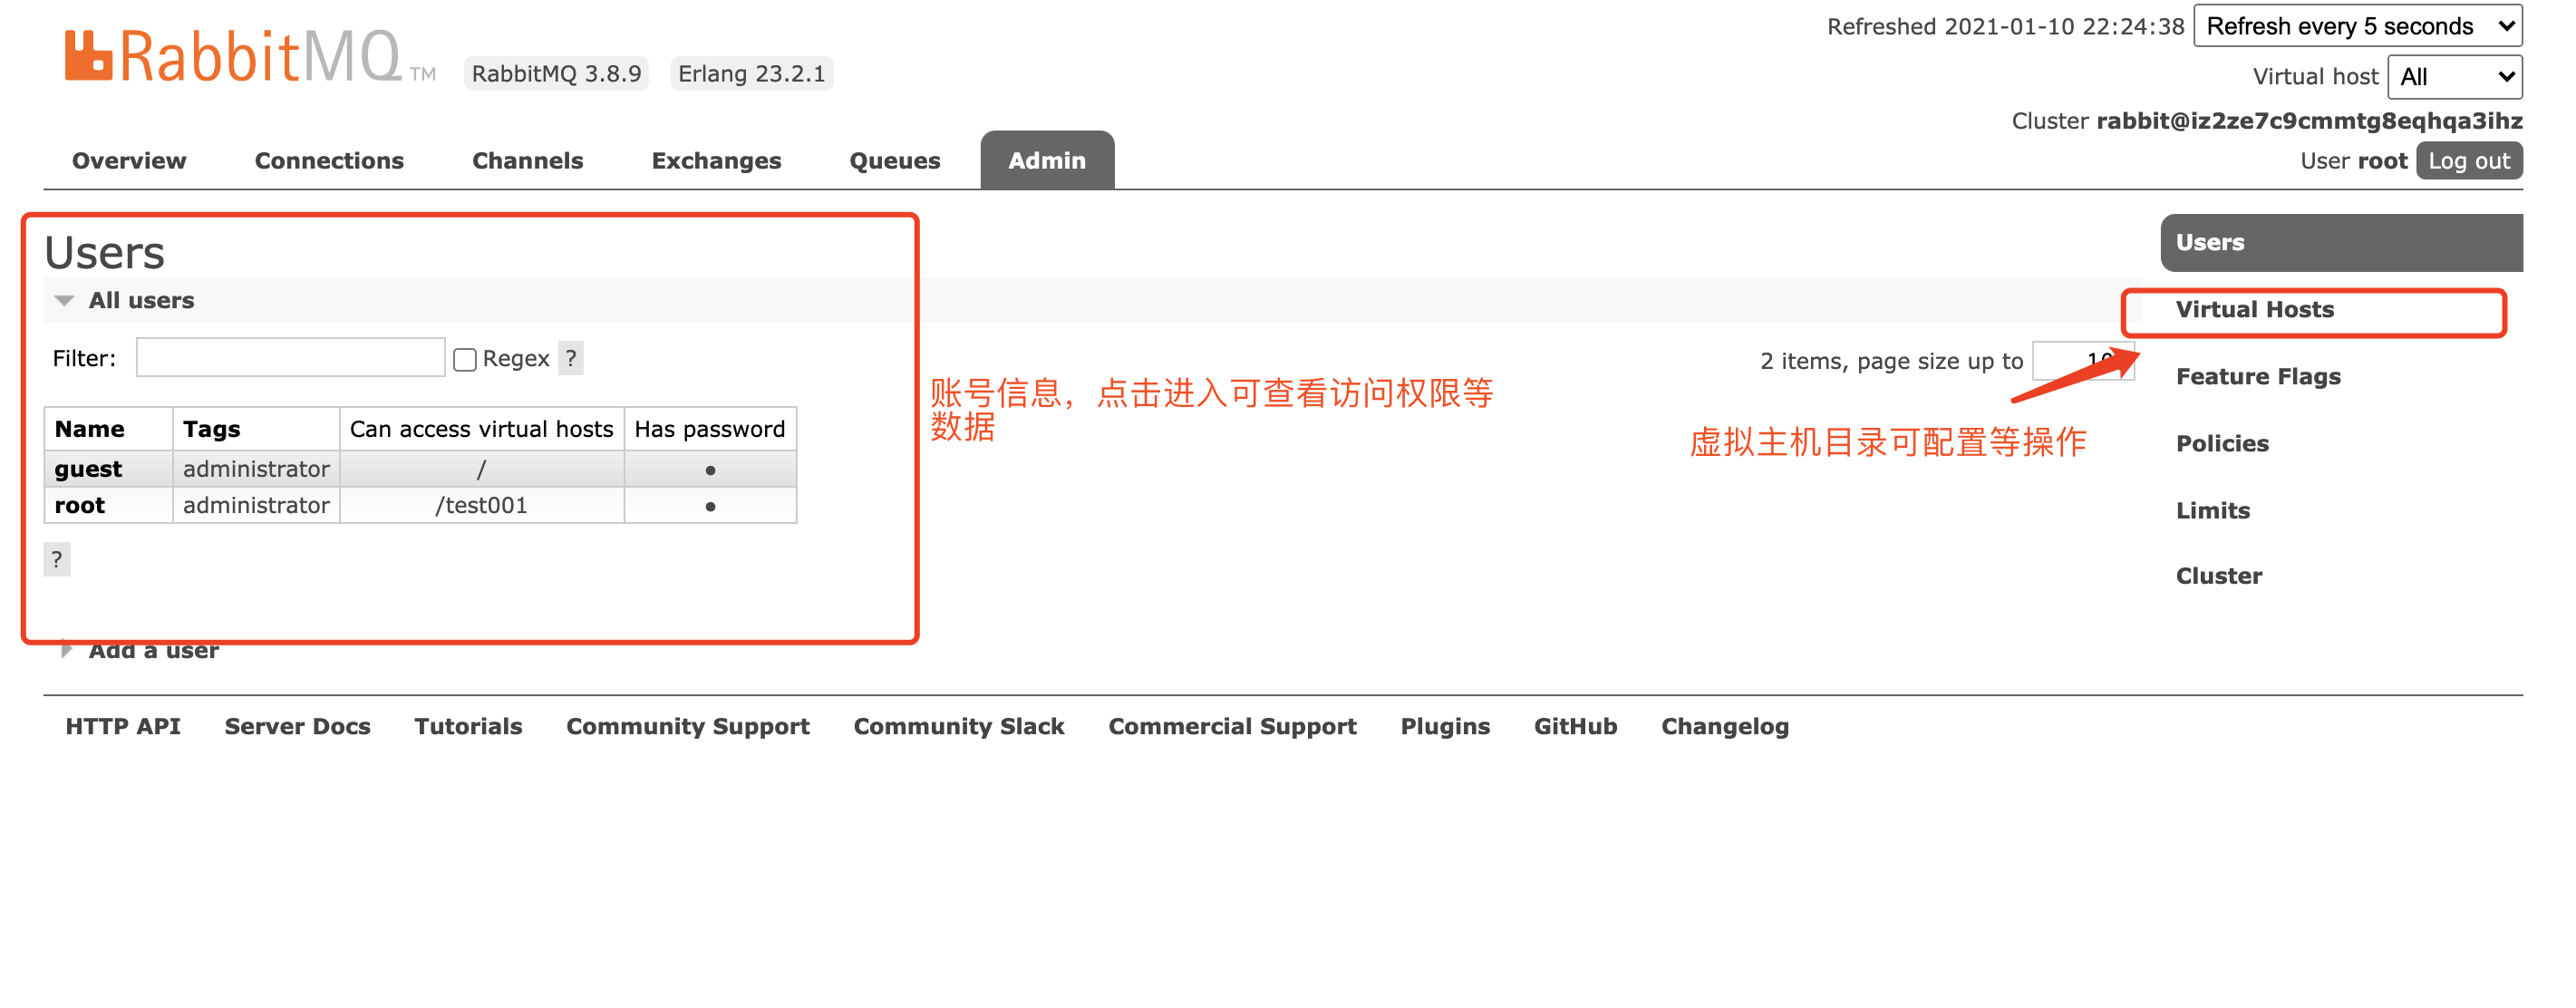
package com.cx.temp.common.rabbitmq.quickstart;


import com.rabbitmq.client.Channel;
import com.rabbitmq.client.Connection;
import com.rabbitmq.client.ConnectionFactory;

/**
 * 生产端
 */
public class Procuder {

    public static void main(String[] args) throws Exception{
        try {
            //1 创建一个ConectionFacory
            ConnectionFactory connectionFactory = new ConnectionFactory();
            connectionFactory.setHost("127.0.0.1");
            connectionFactory.setPort(5672);
            connectionFactory.setVirtualHost("/test001");
            connectionFactory.setUsername("root");
            connectionFactory.setPassword("123456");

            //2 通过连接工厂创建连接
            Connection connection = connectionFactory.newConnection();

            //3 通过connection创建一个Channel
            Channel channel = connection.createChannel();

            //4 通过channel发送数据
            //以下参数对应:exchange routingKey(队列名称)  props  body
            //假如exchange传空,rabbitMq默认机制走的是exchange里的【AMQP defalut】,此时routingKey = 消费者的队列名就会被消费
            for (int i = 0; i < 5; i++) {
                String msg = "Hello RabbitMQ!";
                channel.basicPublish("", "test01", null, msg.getBytes());
            }

            //5 记得关闭相关的连接
            channel.close();
            connection.close();
        } catch (Exception e) {
            e.printStackTrace();
        }
    }

}
QueueingConsumer类:重写消费者队列工具
package com.cx.temp.common.rabbitmq.quickstart;

import com.rabbitmq.client.*;
import org.slf4j.Logger;
import org.slf4j.LoggerFactory;

import java.io.IOException;
import java.util.concurrent.LinkedBlockingQueue;
import java.util.concurrent.TimeUnit;

public class QueueingConsumer extends DefaultConsumer {

    private Logger logger = LoggerFactory.getLogger(QueueingConsumer.class);

    private LinkedBlockingQueue<Delivery> queue;

    public QueueingConsumer(Channel channel) {
        super(channel);
        queue = new LinkedBlockingQueue<QueueingConsumer.Delivery>();
    }

    public QueueingConsumer(Channel channel, int size) {
        super(channel);
        queue = new LinkedBlockingQueue<QueueingConsumer.Delivery>(size);
    }

    @Override
    public void handleDelivery(String consumerTag, Envelope envelope, AMQP.BasicProperties properties, byte[] body) throws IOException {
        Delivery delivery = new Delivery();
        delivery.setBody(body);
        delivery.setProperties(properties);
        delivery.setEnvelope(envelope);
        try {
            queue.put(delivery);
        } catch (InterruptedException e) {
            logger.error(e.getMessage());
        }
    }


    public Delivery nextDelivery() throws InterruptedException, ShutdownSignalException, ConsumerCancelledException {
        return queue.take();
    }

    public Delivery nextDelivery(long timeout) throws InterruptedException, ShutdownSignalException, ConsumerCancelledException {
        return queue.poll(timeout, TimeUnit.MILLISECONDS);
    }

    public class Delivery {
        private BasicProperties properties;
        private byte[] body;
        private Envelope envelope;

        public BasicProperties getProperties() {
            return properties;
        }

        public void setProperties(BasicProperties properties) {
            this.properties = properties;
        }

        public byte[] getBody() {
            return body;
        }

        public void setBody(byte[] body) {
            this.body = body;
        }

        public Envelope getEnvelope() {
            return envelope;
        }

        public void setEnvelope(Envelope envelope) {
            this.envelope = envelope;
        }
    }

}
Consumer:消费者
package com.cx.temp.common.rabbitmq.quickstart;

import com.rabbitmq.client.*;

/**
 * 消费端
 */
public class Consumer {

    public static void main(String[] args) throws Exception {

        //1 创建一个ConectionFacory
        ConnectionFactory connectionFactory = new ConnectionFactory();
        connectionFactory.setHost("127.0.0.1");
        connectionFactory.setPort(5672);
        connectionFactory.setVirtualHost("/test001");
        connectionFactory.setUsername("root");
        connectionFactory.setPassword("123456");

        //2 通过连接工厂创建连接
        Connection connection = connectionFactory.newConnection();

        //3 通过connection创建一个Channel
        Channel channel = connection.createChannel();

        //4 声明(创建)一个队列
        //以下参数:
        // queue队列名称
        // durable是否持久化,持久化后服务重启队列还在
        // exclusive 独占,该队列只有我能监听,相当于加了把锁,保证消息顺序消费
        // authDelete 如果脱离了exchange,队列会自动被删除
        // arguments 扩展参数
        String queueName = "test01";
        channel.queueDeclare(queueName, true, false, false, null);

        //5 创建消费者
        //QueueingConsumenr这个应该是5.x之前的经典写法。但是在4.x的版本QueueingConsumer被标记废止5.x被移除。移除的原因是什么呢?
        //原来QueueingConsumer内部用LinkedBlockingQueue来存放消息的内容,而LinkedBlockingQueue:一个由链表结构组成的有界队列,
        // 照先进先出的顺序进行排序 ,未指定长度的话,默认 此队列的长度为Integer.MAX_VALUE,那么问题来了,如果生产者的速度远远
        // 大于消费者的速度,也许没等到队列阻塞的条件产生(长度达到Integer.MAX_VALUE)内存就完蛋了,在老的版本你可以通过
        // 设置 rabbitmq的prefetch属性channel.basicQos(prefetch)来处理这个问题如果不设置可能出现内存问题
        // (比如因为网络问题只能向rabbitmq生产不能消费,消费者恢复网络之后就会有大量的数据涌入,出现内存问题,oom fgc等)。
        QueueingConsumer queueingConsumer = new QueueingConsumer(channel);

        //6 设置Channel
        // 队列名
        // autoAck 是否自动签收
        // callback 具体消费者对象
        channel.basicQos(1);
        channel.basicConsume(queueName, true, queueingConsumer);

        while(true) {
            // 7 获取消息
            QueueingConsumer.Delivery delivery = queueingConsumer.nextDelivery();
            String msg = new String(delivery.getBody());
            System.out.println("消费端:" + msg);
            //Envelope envelope = delivery.getEnvelope();
        }
    }

}