Android 异步消息处理机制 让你深入理解 Looper、Handler、Message三者关系
android的消息处理机制(图+源码分析)——Looper,Handler,Message
android的消息处理机制其实就是异步消息处理机制。那么什么叫异步消息处理线程呢?
异步消息处理线程启动后会进入一个无限的循环体之中,每循环一次,从其内部的消息队列中取出一个消息,然后回调相应的消息处理函数,执行完成一个消息后则继续循环。若消息队列为空,线程则会阻塞等待。说了这一堆,那么和Handler 、 Looper 、Message有啥关系?其实Looper负责的就是创建一个MessageQueue,然后进入一个无限循环体不断从该MessageQueue中读取消息,而消息的创建者就是一个或多个Handler 。
android的消息处理有三个核心类:Looper,Handler和Message。其实还有一个Message Queue(消息队列),但是MQ被封装到Looper里面了,我们不会直接与MQ打交道,因此我没将其作为核心类。
下面一一介绍:
Class Handler
-
public class Handler
extends Object
A Handler allows you to send and processMessageand Runnable objects associated with a thread'sMessageQueue. Each Handler instance is associated with a single thread and that thread's message queue. When you create a new Handler, it is bound to the thread / message queue of the thread that is creating it -- from that point on, it will deliver messages and runnables to that message queue and execute them as they come out of the message queue.There are two main uses for a Handler: (1) to schedule messages and runnables to be executed as some point in the future; and (2) to enqueue an action to be performed on a different thread than your own.
Class Looper
-
public class Looper
extends Object
Class used to run a message loop for a thread. Threads by default do not have a message loop associated with them; to create one, callprepare()in the thread that is to run the loop, and thenloop()to have it process messages until the loop is stopped.Most interaction with a message loop is through the
Handlerclass.This is a typical example of the implementation of a Looper thread, using the separation of
prepare()andloop()to create an initial Handler to communicate with the Looper.
 class LooperThread extends Thread {
      public Handler mHandler;

      public void run() {
          Looper.prepare();

          mHandler = new Handler() {
              public void handleMessage(Message msg) {
                  // process incoming messages here
              }
          };

          Looper.loop();
      }
  }
Class Message
-
public final class Message
extends Object
implements Parcelable
Defines a message containing a description and arbitrary data object that can be sent to aHandler. This object contains two extra int fields and an extra object field that allow you to not do allocations in many cases.While the constructor of Message is public, the best way to get one of these is to call
Message.obtain()or one of theHandler.obtainMessage()methods, which will pull them from a pool of recycled objects.
还有个相联系的类:
Class HandlerThread
Handy class for starting a new thread that has a looper. The looper can then be used to create handler classes. Note that start() must still be called.
ps:Threads by default do not have a message loop associated with them
先以一个例子说明HandlerThread的使用:
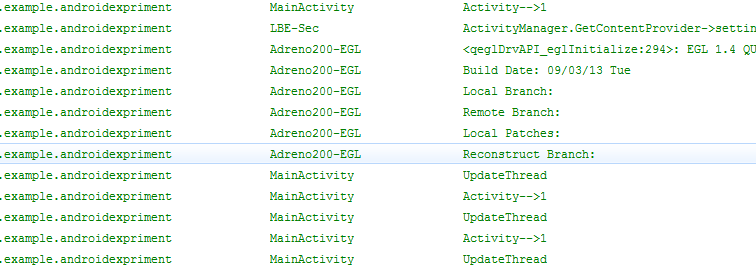
  1 package com.example.androidexpriment;
  2
  3 import android.app.Activity;
  4 import android.os.*;
  5 import android.util.Log;
  6 import android.view.View;
  7 import android.view.View.OnClickListener;
  8 import android.widget.Button;
  9
 10
 11 /**
 12  * handler UIThread
 13  * myHandler  handlerThread
 14  * handler1 handler2  looperThread
 15  */
 16 public class MainActivity extends Activity {
 17
 18     private String TAG = "MainActivity";
 19       //声明两个按钮控件
 20       private Button startButton = null;
 21       private Button endButton = null;
 22
 23       @Override
 24       public void onCreate(Bundle savedInstanceState) {
 25          super.onCreate(savedInstanceState);
 26           setContentView(R.layout.activity_main);
 27         //根据控件的ID得到代表控件的对象,并为这两个按钮设置相应的监听器
 28         startButton = (Button)findViewById(R.id.startButton);
 29         startButton.setOnClickListener(new StartButtonListener());
 30         endButton = (Button)findViewById(R.id.endButton);
 31         endButton.setOnClickListener(new EndButtonListener());
 32         Log.i(TAG,"Activity-->" + Thread.currentThread().getId());
 33         //打印主线程消息队列
 34         Log.i(TAG," UIThread--->" + Looper.getMainLooper().toString());
 35
 36
 37
 38         //创建HandlerThread
 39         HandlerThread handlerThread = new HandlerThread("handler_thread");
 40         handlerThread.start();
 41         Log.i(TAG," HandlerThread--->" + handlerThread.getLooper().toString());
 42
 43         MyHandler myHandler = new MyHandler(handlerThread.getLooper());  //myHandler与新线程的消息队列绑定
 44        // When you create a new Handler, it is bound to the thread / message queue of the thread that is creating it
 45         Message msg = myHandler.obtainMessage();
 46         //将msg发送到目标对象,所谓的目标对象,就是生成该msg对象的handler对象
 47         Bundle b = new Bundle();
 48         b.putInt("age", 20);
 49         b.putString("name", "Jhon");
 50         msg.setData(b);
 51         msg.sendToTarget();  //将msg发送到myHandler
 52
 53
 54         //创建LooperThread
 55         LooperThread looperThread = new LooperThread();
 56         looperThread.start();
 57         /*
 58          * 04-11 16:32:53.551: E/AndroidRuntime(8618): Caused by: java.lang.NullPointerException
 59          *
 60         Message msg1 = looperThread.mHandler.obtainMessage();
 61                                msg1.arg1 = 1;
 62                             msg1.sendToTarget(); */
 63
 64      }
 65
 66       Handler handler  = new Handler();
 67       //将要执行的操作写在线程对象的run方法当中
 68       Runnable updateThread =  new Runnable(){
 69            @Override
 70           public void run() {
 71               Log.i(TAG,"UpdateThread");
 72               Log.i(TAG,"Activity-->" + Thread.currentThread().getId());
 73                //在run方法内部,执行postDelayed或者是post方法
 74               handler.postDelayed(updateThread, 3000);
 75           }
 76
 77       };
 78
 79      class StartButtonListener implements OnClickListener{
 80
 81          @Override
 82          public void onClick(View v) {
 83              //调用Handler的post方法,将要执行的线程对象添加到队列当中
 84             handler.post(updateThread);
 85          }
 86
 87      }
 88
 89      class EndButtonListener implements OnClickListener{
 90
 91          @Override
 92          public void onClick(View v) {
 93             handler.removeCallbacks(updateThread);
 94          }
 95
 96     }
 97
 98      class MyHandler extends Handler{
 99          public MyHandler(){
100
101           }
102
103           public MyHandler(Looper looper){
104               super(looper);
105           }
106           @Override
107           public void handleMessage(Message msg) {
108               Bundle b = msg.getData();
109               int age = b.getInt("age");
110               String name = b.getString("name");
111               Log.i(TAG," myHandler--->" + Thread.currentThread().getId());
112               Log.i(TAG," HandlerThread--->" + Looper.myLooper().toString());
113               Log.i(TAG,"age is " + age + ", name is" + name);
114           }
115       }
116
117      //如何为一个线程创建Handler
118      class LooperThread extends Thread implements Handler.Callback{
119         private Handler handler1;
120         private Handler handler2;
121         private Handler handler3;
122
123         public void run() {
124              Looper.prepare();
125           // 实例化三个handler
126              handler1 = new Handler(this);
127              handler2 = new Handler();
128              handler3 = new Handler() {
129                  @Override
130                  public void handleMessage(Message msg) {
131                      super.handleMessage(msg);
132                      switch(msg.arg1) {
133                       case 3:
134                           Log.i(TAG,"handler33 message" + Thread.currentThread().getId());
135                           break;
136                      }
137                  }
138
139              };
140              /*Message msg1 = handler1.obtainMessage();
141              msg1.arg1 = 1;
142              msg1.sendToTarget();
143              Message msg2 = handler2.obtainMessage();
144              msg2.arg1 = 2;
145              msg2.sendToTarget();*/
146
147              Message msg1=new Message();
148              msg1.arg1=1;
149              handler1.sendMessage(msg1);
150
151              Message msg2=new Message();
152              msg2.arg1=2;
153              handler2.sendMessage(msg2);
154
155              Message msg3=new Message();
156              msg3.arg1=3;
157              handler3.sendMessage(msg3);
158
159              Log.i(TAG," mHandler--->" + Thread.currentThread().getId());
160              Log.i(TAG," LooperThread--->" + Looper.myLooper().toString());
161              Looper.loop();
162
163          }
164         @Override
165         public boolean handleMessage(Message msg) {
166             switch(msg.arg1) {
167                 case 1:
168                     Log.i(TAG,"handler1 message" + Thread.currentThread().getId()); break;
169                 case 2:
170                     Log.i(TAG,"handler2 message" + Thread.currentThread().getId()); break;
171                 case 3:
172                     Log.i(TAG,"handler3 message" + Thread.currentThread().getId()); break;
173             }
174
175             return false;
176         }
177      }
178
179 }
180

对照程序和输出结果做一下解释,这个demo一共创建了三个thread
/**
* handler UIThread
* myHandler handlerThread
* handler1,handler2,handler3 looperThread
*/
handlerThread是一个具有消息队列的线程,android已经给我们封装好啦,looperThread是我们自己创建的一个线程类,程序要实现模拟在子线程里发送和接受消息,我们需要为这个looperThread创建一个消息队列,因为Threads by default do not have a message loop associated with them,为了让handler能接受和处理消息,子线程的handler需要实现handlerMessage()方法,程序中展示了两种方法:继承Handler.Callback接口,参见handler1;创建handler的时候直接重写handlerMessage(),参见handler3。结果中并没有handler2的输出消息,虽然handler2也向消息队列中发过消息,这是为什么呢,带着这个疑问我们去寻找源码?
handler2 = new Handler(); 采用默认构造函数创建
/**
     * Default constructor associates this handler with the {@link Looper} for the
     * current thread.
     *
     * If this thread does not have a looper, this handler won't be able to receive messages
     * so an exception is thrown.
     */
    public Handler() {
        this(null, false);
    }
实际上是调用:
 *
     * @param callback The callback interface in which to handle messages, or null.
     * @param async If true, the handler calls {@link Message#setAsynchronous(boolean)} for
     * each {@link Message} that is sent to it or {@link Runnable} that is posted to it.
     *
     * @hide
     */
    public Handler(Callback callback, boolean async) {
        if (FIND_POTENTIAL_LEAKS) {
            final Class<? extends Handler> klass = getClass();
            if ((klass.isAnonymousClass() || klass.isMemberClass() || klass.isLocalClass()) &&
                    (klass.getModifiers() & Modifier.STATIC) == 0) {
                Log.w(TAG, "The following Handler class should be static or leaks might occur: " +
                    klass.getCanonicalName());
            }
        }

        mLooper = Looper.myLooper();
        if (mLooper == null) {
            throw new RuntimeException(
                "Can't create handler inside thread that has not called Looper.prepare()");
        }
        mQueue = mLooper.mQueue;
        mCallback = callback;
        mAsynchronous = async;
    }

    /**
执行到这里mCallback = null; mCallback是什么呢,继续查找源码:
public class Handler {
     /**
     * Callback interface you can use when instantiating a Handler to avoid
     * having to implement your own subclass of Handler.
     *
     * @param msg A {@link android.os.Message Message} object
     * @return True if no further handling is desired
     */
    public interface Callback {
        public boolean handleMessage(Message msg);
    }

    /**
     * Subclasses must implement this to receive messages.
     */
    public void handleMessage(Message msg) {
    }

    /**
     * Handle system messages here.
     */
    public void dispatchMessage(Message msg) {
        if (msg.callback != null) {
            handleCallback(msg);
        } else {
            if (mCallback != null) {
                if (mCallback.handleMessage(msg)) {
                    return;
                }
            }
            handleMessage(msg);
        }
    }


    /*
    */
    final MessageQueue mQueue;
    final Looper mLooper;
    final Callback mCallback;
    final boolean mAsynchronous;
    IMessenger mMessenger;
    /*
    */

}
找了一通反而更加疑惑啦,因为都不知道系统什么时候调用的handleMessage(msg),那么有没有可能是在handler.sendMessage()的时候给了一个回调方法,那么就来看看sendMessage()是什么情况
 /**
     * Pushes a message onto the end of the message queue after all pending messages
     * before the current time. It will be received in {@link #handleMessage},
     * in the thread attached to this handler.
     *
     * @return Returns true if the message was successfully placed in to the
     *         message queue.  Returns false on failure, usually because the
     *         looper processing the message queue is exiting.
     */
    public final boolean sendMessage(Message msg)
    {
        return sendMessageDelayed(msg, 0);
    }
/**
     * Enqueue a message into the message queue after all pending messages
     * before (current time + delayMillis). You will receive it in
     * {@link #handleMessage}, in the thread attached to this handler.
     *
     * @return Returns true if the message was successfully placed in to the
     *         message queue.  Returns false on failure, usually because the
     *         looper processing the message queue is exiting.  Note that a
     *         result of true does not mean the message will be processed -- if
     *         the looper is quit before the delivery time of the message
     *         occurs then the message will be dropped.
     */
    public final boolean sendMessageDelayed(Message msg, long delayMillis)
    {
        if (delayMillis < 0) {
            delayMillis = 0;
        }
        return sendMessageAtTime(msg, SystemClock.uptimeMillis() + delayMillis);
    }
   /**
     * Enqueue a message into the message queue after all pending messages
     * before the absolute time (in milliseconds) <var>uptimeMillis</var>.
     * <b>The time-base is {@link android.os.SystemClock#uptimeMillis}.</b>
     * You will receive it in {@link #handleMessage}, in the thread attached
     * to this handler.
     *
     * @param uptimeMillis The absolute time at which the message should be
     *         delivered, using the
     *         {@link android.os.SystemClock#uptimeMillis} time-base.
     *
     * @return Returns true if the message was successfully placed in to the
     *         message queue.  Returns false on failure, usually because the
     *         looper processing the message queue is exiting.  Note that a
     *         result of true does not mean the message will be processed -- if
     *         the looper is quit before the delivery time of the message
     *         occurs then the message will be dropped.
     */
    public boolean sendMessageAtTime(Message msg, long uptimeMillis) {
        MessageQueue queue = mQueue;
        if (queue == null) {
            RuntimeException e = new RuntimeException(
                    this + " sendMessageAtTime() called with no mQueue");
            Log.w("Looper", e.getMessage(), e);
            return false;
        }
        return enqueueMessage(queue, msg, uptimeMillis);
    }
MessageQueue queue = mQueue;这个quene肯定不会为空,因为前面调用过Looper的prepare()方法。看prepare()方法
 private static void prepare(boolean quitAllowed) {
        if (sThreadLocal.get() != null) {
            throw new RuntimeException("Only one Looper may be created per thread");
        }
        sThreadLocal.set(new Looper(quitAllowed));
    }
sThreadLocal是一个ThreadLocal对象,可以在一个线程中存储变量。可以看到,在第5行,将一个Looper的实例放入了ThreadLocal,并且2-4行判断了sThreadLocal是否为null,否则抛出异常。这也就说明了Looper.prepare()方法不能被调用两次,同时也保证了一个线程中只有一个Looper实例~相信有些哥们一定遇到这个错误。
下面看Looper的构造方法:
private Looper(boolean quitAllowed) {
        mQueue = new MessageQueue(quitAllowed);
        mRun = true;
        mThread = Thread.currentThread();
    }
原来在构造方法中,创建了一个MessageQueue(消息队列)。接着前面的继续刨根
private boolean enqueueMessage(MessageQueue queue, Message msg, long uptimeMillis) {
        msg.target = this;
        if (mAsynchronous) {
            msg.setAsynchronous(true);
        }
        return queue.enqueueMessage(msg, uptimeMillis);
    }
这里this就是相应的handler对象,记住
msg.target = this;后面还会用到
到了这里发现信息似乎断啦,现在转到MessageQueen.java
  boolean enqueueMessage(Message msg, long when) {
        if (msg.isInUse()) {
            throw new AndroidRuntimeException(msg + " This message is already in use.");
        }
        if (msg.target == null) {
            throw new AndroidRuntimeException("Message must have a target.");
        }

        synchronized (this) {
            if (mQuitting) {
                RuntimeException e = new RuntimeException(
                        msg.target + " sending message to a Handler on a dead thread");
                Log.w("MessageQueue", e.getMessage(), e);
                return false;
            }

            msg.when = when;
            Message p = mMessages;
            boolean needWake;
            if (p == null || when == 0 || when < p.when) {
                // New head, wake up the event queue if blocked.
                msg.next = p;
                mMessages = msg;
                needWake = mBlocked;
            } else {
                // Inserted within the middle of the queue.  Usually we don't have to wake
                // up the event queue unless there is a barrier at the head of the queue
                // and the message is the earliest asynchronous message in the queue.
                needWake = mBlocked && p.target == null && msg.isAsynchronous();
                Message prev;
                for (;;) {
                    prev = p;
                    p = p.next;
                    if (p == null || when < p.when) {
                        break;
                    }
                    if (needWake && p.isAsynchronous()) {
                        needWake = false;
                    }
                }
                msg.next = p; // invariant: p == prev.next
                prev.next = msg;
            }

            // We can assume mPtr != 0 because mQuitting is false.
            if (needWake) {
                nativeWake(mPtr);
            }
        }
        return true;
    }
看完这个函数,也没找到线索。不是在创建Handler的时候,也不是在发送消息的时候,那么这个神奇的handleMessage(Message msg)究竟是怎么回事,能够做到不需要让我们去调用,消息来了就能处理呢。现在唯一的可能也就在 Looper.loop();
然后我们看loop()方法:
 1  public static void loop() {
 2         final Looper me = myLooper();
 3         if (me == null) {
 4             throw new RuntimeException("No Looper; Looper.prepare() wasn't called on this thread.");
 5         }
 6         final MessageQueue queue = me.mQueue;
 7
 8         // Make sure the identity of this thread is that of the local process,
 9         // and keep track of what that identity token actually is.
10         Binder.clearCallingIdentity();
11         final long ident = Binder.clearCallingIdentity();
12
13         for (;;) {
14             Message msg = queue.next(); // might block
15             if (msg == null) {
16                 // No message indicates that the message queue is quitting.
17                 return;
18             }
19
20             // This must be in a local variable, in case a UI event sets the logger
21             Printer logging = me.mLogging;
22             if (logging != null) {
23                 logging.println(">>>>> Dispatching to " + msg.target + " " +
24                         msg.callback + ": " + msg.what);
25             }
26
27             msg.target.dispatchMessage(msg);
28
29             if (logging != null) {
30                 logging.println("<<<<< Finished to " + msg.target + " " + msg.callback);
31             }
32
33             // Make sure that during the course of dispatching the
34             // identity of the thread wasn't corrupted.
35             final long newIdent = Binder.clearCallingIdentity();
36             if (ident != newIdent) {
37                 Log.wtf(TAG, "Thread identity changed from 0x"
38                         + Long.toHexString(ident) + " to 0x"
39                         + Long.toHexString(newIdent) + " while dispatching to "
40                         + msg.target.getClass().getName() + " "
41                         + msg.callback + " what=" + msg.what);
42             }
43
44             msg.recycle();
45         }
46     }
第2行:
public static Looper myLooper() {
return sThreadLocal.get();
}
方法直接返回了sThreadLocal存储的Looper实例,如果me为null则抛出异常,也就是说looper方法必须在prepare方法之后运行。
第6行:拿到该looper实例中的mQueue(消息队列)
13到45行:就进入了我们所说的无限循环。
14行:取出一条消息,如果没有消息则阻塞。
27行:使用调用 msg.target.dispatchMessage(msg);把消息交给msg的target的dispatchMessage方法去处理。Msg的target是什么呢?其实就是handler对象,前面提到过,下面会进行分析。
44行:释放消息占据的资源。
Looper主要作用:
1、 与当前线程绑定,保证一个线程只会有一个Looper实例,同时一个Looper实例也只有一个MessageQueue。
2、 loop()方法,不断从MessageQueue中去取消息,交给消息的target属性的dispatchMessage去处理。
到了这里,前面的一部分疑惑就解决啦,因为发送消息时,msg绑定了handler,所以looper执行到该message时也就能找到对应处理它的handler
好了,我们再去看一下dispatchMessage
    /**
     * Handle system messages here.
     */
    public void dispatchMessage(Message msg) {
        if (msg.callback != null) {
            handleCallback(msg);
        } else {
            if (mCallback != null) {
                if (mCallback.handleMessage(msg)) {
                    return;
                }
            }
            handleMessage(msg);
        }
    }
msg.callback是什么, 这里就不展开啦,handler能发两种消息,一种是Runnable对象,一种是message对象,这是直观的理解,但其实post发出的Runnable对象最后都被封装成message对象的成员了,就是这里的callback。见源码:
 public final boolean post(Runnable r)
    {
       return  sendMessageDelayed(getPostMessage(r), 0);
    }

 private static Message getPostMessage(Runnable r) {
        Message m = Message.obtain();
        m.callback = r;
        return m;
    }
 private static void handleCallback(Message message) {
        message.callback.run();
    }
所以如果message设置了callback,即runnable消息,处理callback,也就是执行Runnable的run()方法!这里的if esle其实就是分情况处理hander的两种消息,对应handler的两种用法。
            if (mCallback != null) {
                if (mCallback.handleMessage(msg)) {
                    return;
                }
            }
显然handler2 = new Handler()对应的mCallback=null,就无法享受mCallback.handleMessage()啦,只能直接执行
handleMessage(msg);
而这个方法在源码中是一个空方法,所以handler2的消息没有对应的打印信息。
 public interface Callback {
        public boolean handleMessage(Message msg);
    }

    /**
     * Subclasses must implement this to receive messages.
     */
    public void handleMessage(Message msg) {
    }

    /**
     * Handle system messages here.
     */
    public void dispatchMessage(Message msg) {
        if (msg.callback != null) {
            handleCallback(msg);
        } else {
            if (mCallback != null) {
                if (mCallback.handleMessage(msg)) {
                    return;
                }
            }
            handleMessage(msg);
        }
    }
到此可以做出总结:一个线程可以有多个Handler,但是只能有一个Looper!各个handler发送的消息在同一个消息队列中,不同的handler只能负责处理自己发的消息,哪怕两个消息是一样的,也无法处理
             Message msg1=new Message();
             msg1.arg1=1;
             handler1.sendMessage(msg1);

             Message msg2=new Message();
             msg2.arg1=1;
             handler2.sendMessage(msg2);
将上面的代码修改一下,发现
case 1:
Log.i(TAG,"handler1 message" + Thread.currentThread().getId()); break;
logcat中也只打印了一次。
Handler与多线程:安卓的UI线程(即OnCreate函数创建的线程)是线程非安全的。也就是说,在UI线程中,使用sleep这样的函数会导致整个线程延迟,但是我们在安卓开发中,往往会经常遇到一些延迟比较厉害的操作,(例如通过HTTP获取数据信息)如果放在主线程中,则会影响UI界面的渲染。但是如果另外新开一个线程,则由于UI线程只能在主线程中修改,而导致无法修改主线程的UI界面。这个时候Handler就出来解决这个问题。
handler可以分发Message对象和Runnable对象到主线程中, 每个Handler实例,都会绑定到创建他的线程中(一般是位于主线程), 也就是说Handler对象初始化后,就默认与对它初始化的进程的消息队列绑定,因此可以利用Handler所包含的消息队列,制定一些操作的顺序。
Handler主要两大作用:
1. 提供post操作。post操作主要将Runnable对象放进主线程(UI)线程中的队列中操作。post还支持延迟操作。使用post后,Runnable是按照队列的形式逐个执行的。
2. handlerMessage操作。主要用于新开一个线程与主线程中的通信。新开的线程执行完毕后,可以通过sendMessage给主线程发送消息,并且传递一些参数,然后主线程就可以修改UI界面了。
Handler提供的函数:
post类方法允许你排列一个Runnable对象到主线程队列中:
post(Runnable)
postAtTime(Runnable,long)
postDelayed(Runnable long)
sendMessage类方法, 允许你安排一个带数据的Message对象到队列中:
sendEmptyMessage(int)
sendMessage(Message)
sendMessageAtTime(Message,long)
sendMessageDelayed(Message,long)
应用实例:
1,传递Message。用于接受子线程发送的数据, 并用此数据配合主线程更新UI。
在Android中,对于UI的操作通常需要放在主线程中进行操作。如果在子线程中有关于UI的操作,那么就需要把数据消息作为一个Message对象发送到消息队列中,然后,用Handler中的handlerMessge方法处理传过来的数据信息,并操作UI。类sendMessage(Message msg)方法实现发送消息的操作。 在初始化Handler对象时重写的handleMessage方法来接收Messgae并进行相关操作。
2,传递Runnable对象。用于通过Handler绑定的消息队列,安排不同操作的执行顺序。
Handler对象在进行初始化的时候,会默认的自动绑定消息队列。利用类post方法,可以将Runnable对象发送到消息队列中,按照队列的机制按顺序执行不同的Runnable对象中的run方法。
另外,Android的CPU分配的最小单元是线程,Handler一般是在某个线程里创建的,因而Handler和Thread就是相互绑定的,一一对应。而Runnable是一个接口,Thread是Runnable的子类。所以说,他俩都算一个进程.xml文件:


<RelativeLayout xmlns:android="http://schemas.android.com/apk/res/android"
    xmlns:tools="http://schemas.android.com/tools"
    android:layout_width="match_parent"
    android:layout_height="match_parent" >

    <Button
        android:id="@+id/startButton"
        android:layout_width="wrap_content"
        android:layout_height="wrap_content"
        android:text="start"
        android:layout_centerInParent="true"
        />
    <Button
        android:id="@+id/endButton"
        android:layout_width="wrap_content"
        android:layout_height="wrap_content"
        android:text="end"
        android:layout_below="@id/startButton"
        />

</RelativeLayout>
package com.example.androidexpriment;

import android.app.Activity;
import android.os.Bundle;
import android.os.Handler;
import android.util.Log;
import android.view.View;
import android.view.View.OnClickListener;
import android.widget.Button;


public class MainActivity extends Activity {

    private String TAG = "MainActivity";
      //声明两个按钮控件
     private Button startButton = null;
      private Button endButton = null;
      @Override
      public void onCreate(Bundle savedInstanceState) {
         super.onCreate(savedInstanceState);
          setContentView(R.layout.activity_main);
        //根据控件的ID得到代表控件的对象,并为这两个按钮设置相应的监听器
        startButton = (Button)findViewById(R.id.startButton);
        startButton.setOnClickListener(new StartButtonListener());
        endButton = (Button)findViewById(R.id.endButton);
        endButton.setOnClickListener(new EndButtonListener());
        Log.i(TAG,"Activity-->" + Thread.currentThread().getId());

     }
     class StartButtonListener implements OnClickListener{

         @Override
         public void onClick(View v) {
             //调用Handler的post方法,将要执行的线程对象添加到队列当中
            handler.post(updateThread);
         }

     }

     class EndButtonListener implements OnClickListener{

         @Override
         public void onClick(View v) {
            handler.removeCallbacks(updateThread);
         }

   }
    //创建一个Handler对象
    Handler handler  = new Handler();
    //将要执行的操作写在线程对象的run方法当中
    Runnable updateThread =  new Runnable(){

         @Override
        public void run() {
            Log.i(TAG,"UpdateThread");
            Log.i(TAG,"Activity-->" + Thread.currentThread().getId());
             //在run方法内部,执行postDelayed或者是post方法
            handler.postDelayed(updateThread, 3000);
        }

    };
 }
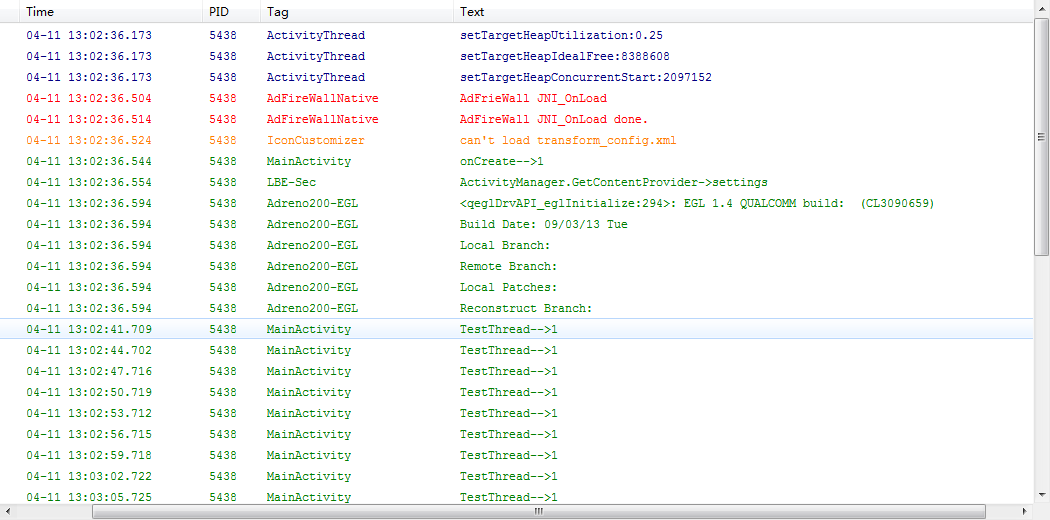
点击start后,程序的运行结果就是每隔3秒钟,就会在控制台打印一行UpdateTread。这是因为实现了Runnable接口的updateThread对象进入了空的消息队列即被立即执行run方法,而在run方法的内部,又在3000ms之后将其再次发送进入消息队列中。
注意这种方法创建Handler对象并不需要重写handlerMessage方法。
从输出结果能看出来:
post方法虽然发送的是一个实现了Runnable接口的类对象,但是它并非创建了一个新线程,而是执行了该对象中的run方法。也就是说,整个run中的操作和主线程处于同一个线程。这样对于那些简单的操作,似乎并不会影响。但是对于耗时较长的操作,就会出现“假死”。为了解决这个问题,就需要使得handler绑定到一个新开启线程的消息队列上,在这个处于另外线程的上的消息队列中处理传过来的Runnable对象和消息。Runnable对象只是作为一个封装了操作的对象被传递,并未产生新线程。
下面这种写法也是可以的:
package com.example.androidexpriment;

import android.app.Activity;
import android.os.Bundle;
import android.os.Handler;
import android.util.Log;
import android.view.View;
import android.view.View.OnClickListener;
import android.widget.Button;

public class MainActivity extends Activity {

     TestThread t = null;
     private String TAG = "MainActivity";
      //声明两个按钮控件
     private Button startButton = null;
      private Button endButton = null;
      @Override
      public void onCreate(Bundle savedInstanceState) {
         super.onCreate(savedInstanceState);
         setContentView(R.layout.activity_main);
        //根据控件的ID得到代表控件的对象,并为这两个按钮设置相应的监听器
        startButton = (Button)findViewById(R.id.startButton);
        startButton.setOnClickListener(new StartButtonListener());
        endButton = (Button)findViewById(R.id.endButton);
        endButton.setOnClickListener(new EndButtonListener());
        Log.i(TAG,"onCreate-->" + Thread.currentThread().getId());
        t= new TestThread(1);

     }
     class StartButtonListener implements OnClickListener{

         @Override
         public void onClick(View v) {
             //调用Handler的post方法,将要执行的线程对象添加到队列当中
            handler.post(t);
         }

     }

     class EndButtonListener implements OnClickListener{

         @Override
         public void onClick(View v) {
            handler.removeCallbacks(t);
         }

   }
    //创建一个Handler对象
    Handler handler  = new Handler();

    class TestThread extends Thread{
            int prime;
            TestThread(int prime) {
                this.prime = prime;
            }
        @Override
        public void run() {
                 //在run方法内部,执行postDelayed或者是post方法
                   handler.postDelayed(t, 3000);
                   Log.i(TAG,"TestThread-->" + Thread.currentThread().getId());
            }
        }
 }
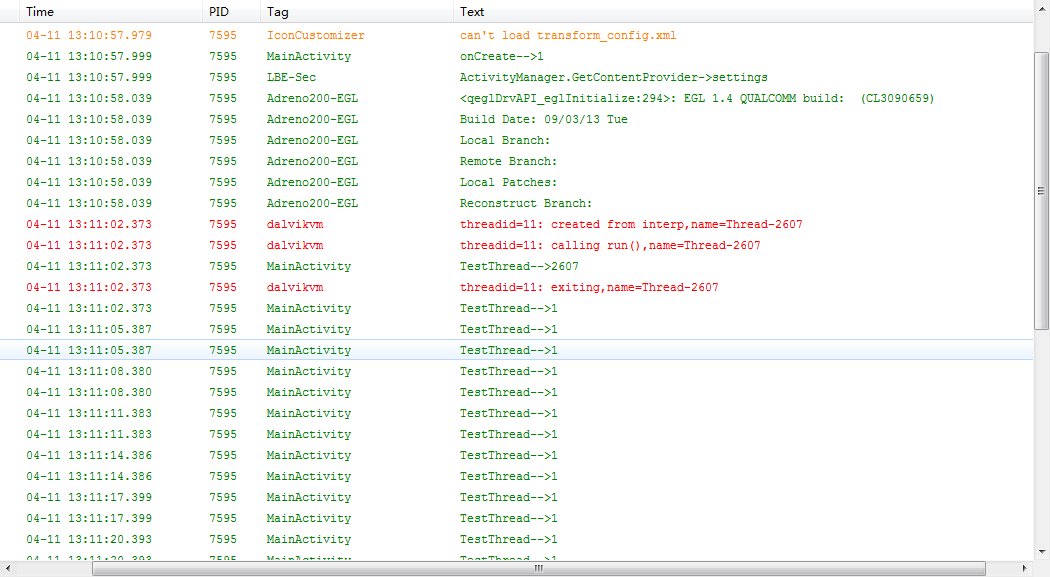
虽然创建了一个Thread,但是并没有执行Thread的start()方法。考虑到Thread和Runnable之间的关系,上面的两种代码并无实质差别,所以logcat中甚至都没出现启动新线程的日志。
然而,如果稍加修改:加上启动方法
class StartButtonListener implements OnClickListener{
@Override
public void onClick(View v) {
//调用Handler的post方法,将要执行的线程对象添加到队列当中
handler.post(t);
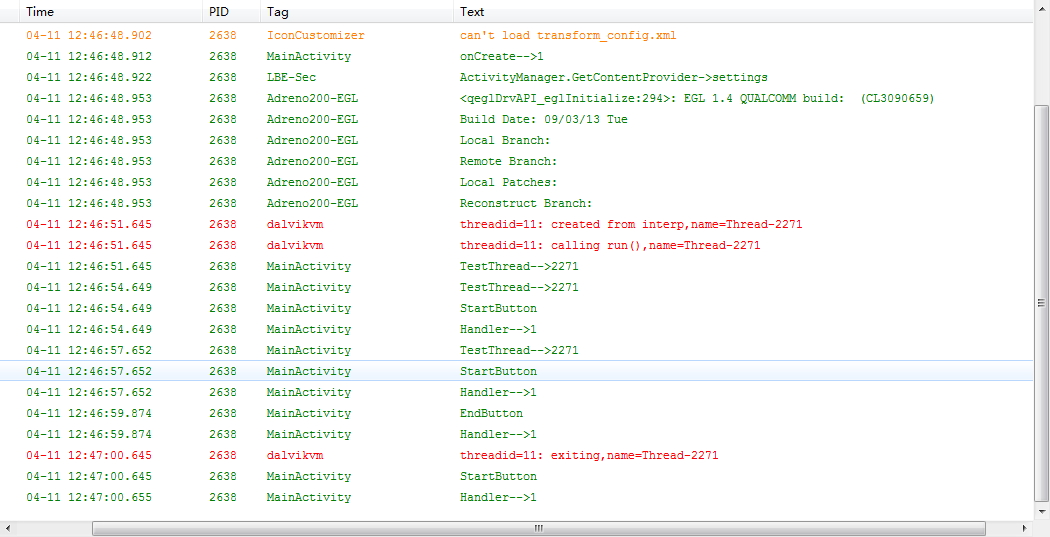
t.start();
}
}
可以明显看到,虽然启动了新线程,但post仍然可以把这个线程推到主线程里面去,线程由虚拟机自动结束。
所以,在UI线程(主线程)中:
mHandler=new Handler();
mHandler.post(new Runnable(){
void run(){
//执行代码..
}
});
这个线程其实是在UI线程之内运行的,并没有新建线程。
常见的新建线程的方法是:参考J2SE文档的
1、
 class PrimeThread extends Thread {
         long minPrime;
         PrimeThread(long minPrime) {
             this.minPrime = minPrime;
         }

         public void run() {
             // compute primes larger than minPrime
              . . .
         }
  }
-
The following code would then create a thread and start it running:
     PrimeThread p = new PrimeThread(143);
     p.start();
2、
   class PrimeRun implements Runnable {
         long minPrime;
         PrimeRun(long minPrime) {
             this.minPrime = minPrime;
         }

         public void run() {
             // compute primes larger than minPrime
              . . .
         }
     }
-
The following code would then create a thread and start it running:
     PrimeRun p = new PrimeRun(143);
     new Thread(p).start();
尽量按照上面给出的两种方式做,不要受网上影响简单的从Threa创建,那样不能做到传递参数。
static void |
sleep(long millis)
Causes the currently executing thread to sleep (temporarily cease execution) for the specified number of milliseconds, subject to the precision and accuracy of system timers and schedulers.
|
代码验证:
package com.example.androidexpriment;

import android.app.Activity;
import android.os.Bundle;
import android.os.Handler;
import android.os.Message;
import android.util.Log;
import android.view.View;
import android.view.View.OnClickListener;
import android.widget.Button;


public class MainActivity extends Activity {

    private String TAG = "MainActivity";
      //声明两个按钮控件
    private Button startButton = null;
    private Button endButton = null;
    TestThread t = null;
    int flag = 0;
      @Override
      public void onCreate(Bundle savedInstanceState) {
         super.onCreate(savedInstanceState);
          setContentView(R.layout.activity_main);
        //根据控件的ID得到代表控件的对象,并为这两个按钮设置相应的监听器
        startButton = (Button)findViewById(R.id.startButton);
        startButton.setOnClickListener(new StartButtonListener());
        endButton = (Button)findViewById(R.id.endButton);
        endButton.setOnClickListener(new EndButtonListener());
        Log.i(TAG,"onCreate-->" + Thread.currentThread().getId());

        t= new TestThread(1);

     }
     class StartButtonListener implements OnClickListener{

         @Override
         public void onClick(View v) {
             //调用Handler的post方法,将要执行的线程对象添加到队列当中
             t.start();
         }

     }

     class EndButtonListener implements OnClickListener{

         @Override
         public void onClick(View v) {
             handler.sendEmptyMessage(33);
             flag = 5;
         }

   }


     class TestThread extends Thread{
         int prime;
         TestThread(int prime) {
             this.prime = prime;
         }
        @Override
        public void run() {
             //在run方法内部,执行postDelayed或者是post方法
            try {
                while(true) {
                    Log.i(TAG,"TestThread-->" + Thread.currentThread().getId());
                    //handler.sendEmptyMessageDelayed(22,3000);
                    Thread.sleep(3000);
                    handler.sendEmptyMessage(22);
                    if(flag  == 5)  //线程最佳的退出方法,就是自杀,也就是在线程的函数里面自然的return 出来
                        return;
                }
            } catch (InterruptedException e) {
                // TODO Auto-generated catch block
                e.printStackTrace();
            }
        }

     }
    //创建一个Handler对象
    Handler handler  = new Handler(){
        @Override
        public void handleMessage(Message msg) {
            // TODO Auto-generated method stub
            super.handleMessage(msg);
            switch(msg.what) {
                case 22:
                    Log.i(TAG,"StartButton");
                    Log.i(TAG,"Handler-->" + Thread.currentThread().getId());
                    break;
                case 33:
                    Log.i(TAG,"EndButton");
                    Log.i(TAG,"Handler-->" + Thread.currentThread().getId());
                    break;
            }

        }

    };

 }
能够看到,sendMessage()才真正做到多线程啦。
最近更新:
Android 异步消息处理机制 让你深入理解 Looper、Handler、Message三者关系这篇博客在最后提到
“其实Handler不仅可以更新UI,你完全可以在一个子线程中去创建一个Handler,然后使用这个handler实例在任何其他线程中发送消息,最终处理消息的代码都会在你创建Handler实例的线程中运行”
其实一开始我也是想实现这个过程,即主线发消息给子线程,在子线程中处理消息,相当于传统handler的相反用法。
在博客开头的代码中注释掉了这么一段:
/*
* 04-11 16:32:53.551: E/AndroidRuntime(8618): Caused by: java.lang.NullPointerException
*
Message msg1 = looperThread.mHandler.obtainMessage();
msg1.arg1 = 1;
msg1.sendToTarget(); */
现在想来这段代码报错显而易见,mHandler是在创建looperThead对象的过程中创建的,两个线程同时运行,什么时候mHandler有值了你并不知道。改成下面这样就可以啦
while(looperThread.handler3 == null);
Message msg3 = looperThread.handler3.obtainMessage();
msg3.arg1 = 3;
msg3.sendToTarget();
当然也可以在子线程中将handler3的引用传出来像下面这样:
 1 public class MainActivity extends Activity {
 2
 3       private Handler handler3_reference;
 4
 5       @Override
 6       public void onCreate(Bundle savedInstanceState) {
 7          /*
 8
 9         */
10         //创建LooperThread
11         LooperThread looperThread = new LooperThread();
12         looperThread.start();
13
14
15         Message msg3=new Message();
16         msg3.arg1=3;
17         while(handler3_reference == null);
18         handler3_reference.sendMessage(msg3);
19       }
20
21
22       void sendMessage(Handler handler) {
23          handler3_reference = handler;
24      }
25         /*
26
27         */
28
29       //如何为一个线程创建Handler
30      class LooperThread extends Thread implements Handler.Callback{
31         /*
32
33         */
34         private Handler handler3;
35
36         public void run() {
37              Looper.prepare();
38              handler3 = new Handler() {
39                  @Override
40                  public void handleMessage(Message msg) {
41                      super.handleMessage(msg);
42                      switch(msg.arg1) {
43                       case 3:
44                           Log.i(TAG,"handler33 message" + Thread.currentThread().getId());
45                           break;
46                      }
47                  }
48
49              };
50
51              sendMessage(handler3);
52
53              Log.i(TAG," mHandler--->" + Thread.currentThread().getId());
54              Log.i(TAG," LooperThread--->" + Looper.myLooper().toString());
55              Looper.loop();
56
57          }
58
59
60      }
61 }